Add Social and Navigation Blocks
Use the Social and Navbar content blocks to add linked social icons and simple navigation menus to your email design. These blocks help recipients move to your website, social media pages, or other important destinations directly from the email.
Before You Start
Create an Email Template and open the Email Editor.
Decide whether you want to add linked social media icons with the Social block or a simple text-based menu with the Navbar block.
Add Social Media Icons
Drag and drop the Social content block into the email canvas.
Click the block in the canvas to open its settings in the left panel.
In Mode, choose how the icons should be arranged.
In Theme, choose the icon style you want to use.
Click Add Social Element to add another icon to the block.
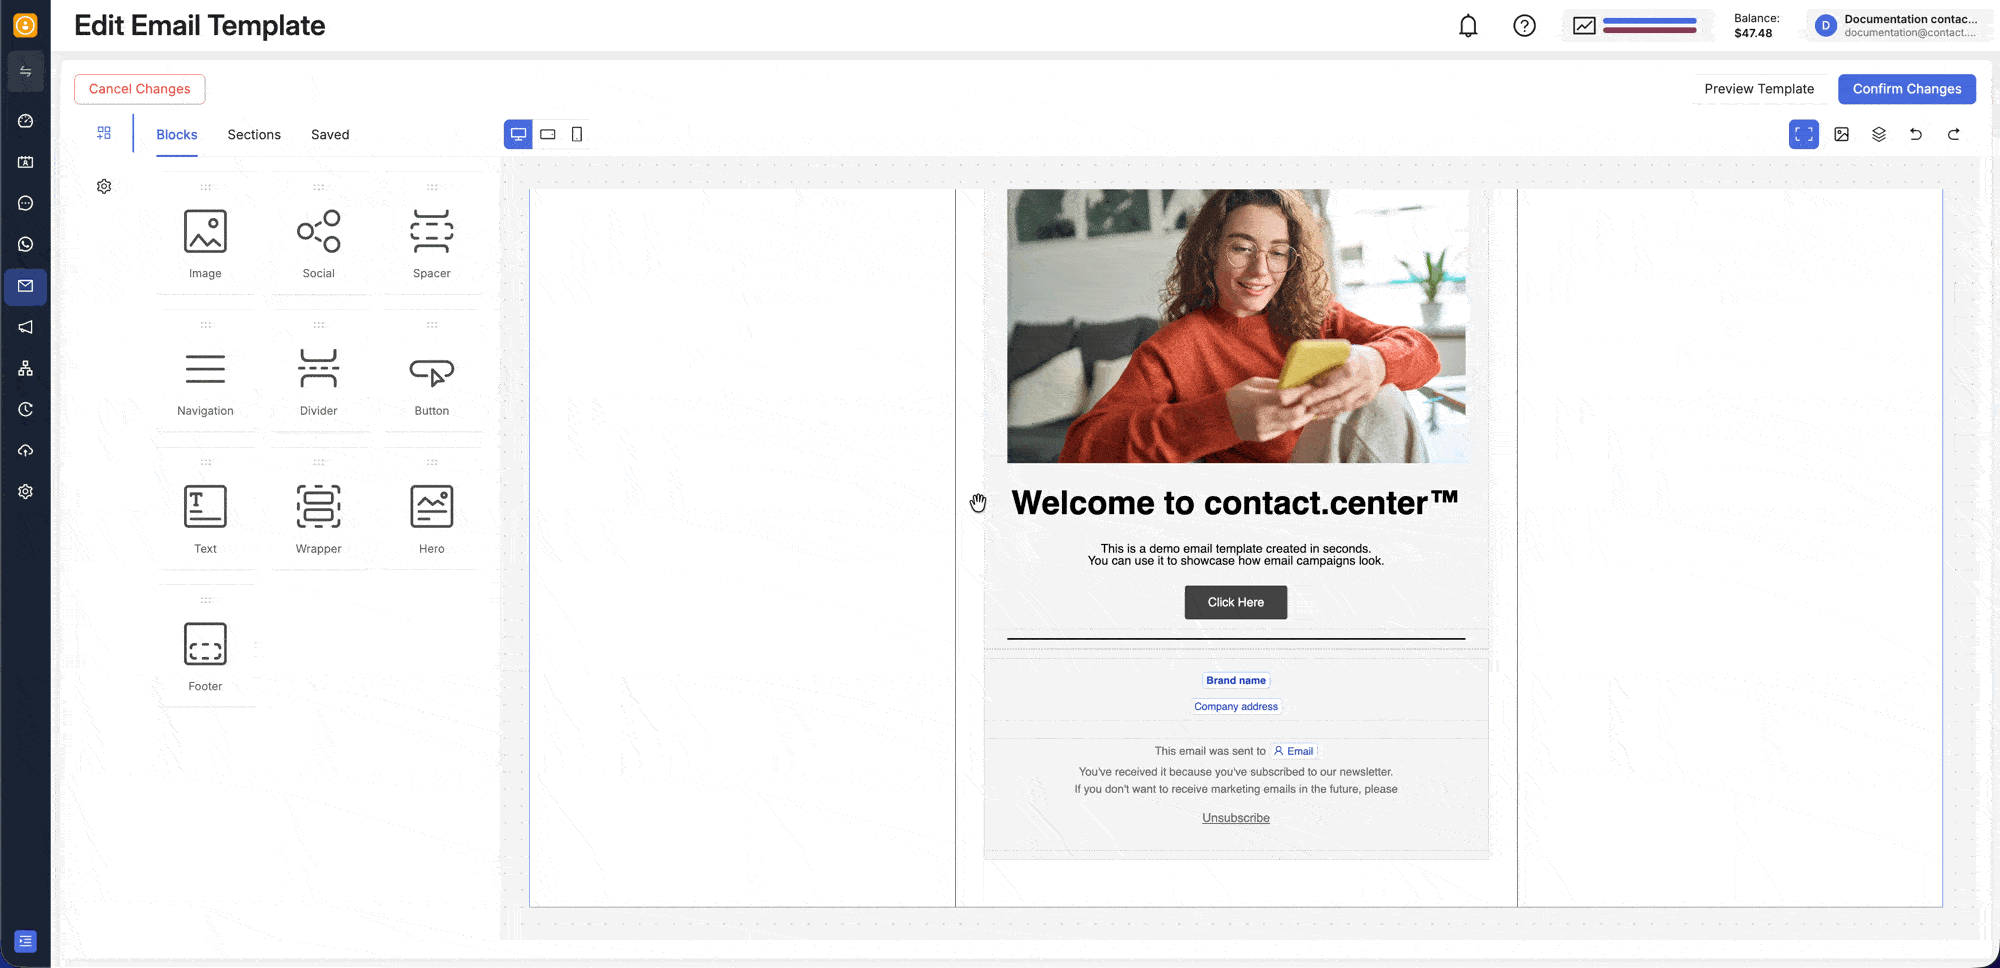
Fig. 1. Insert and configure the Social block.
Configure a Social Media Item
After you add a social icon, click the individual icon in the canvas to open its Social Item settings in the left panel.
In Select icon, choose the platform or icon you want to use. Then open Link Settings and choose the tab that matches the type of link you want to add:
Use this option to send recipients to a social media page or any other direct URL.
In Link Type, select Absolute (URL).
In Link target, enter the destination URL.
In Link title, enter the label or helper text you want to associate with the icon.
Enable link tracking if you want to measure clicks on the icon.
Use this option when the social icon should start a phone call on supported devices.
In Link Type, select Click-to-call phone number (tel).
In Telephone number, enter the phone number you want to use.
In Link title, enter the label or helper text you want to associate with the icon.
Use this option when the social icon should open a new email message.
In Link Type, select Email link (mail-to).
In Email address, enter the destination email address.
Fill in Email subject and Email body.
In Link title, enter the label or helper text you want to associate with the icon.
Use this option when the social icon should act as an unsubscribe action in the email.
In Link Type, select Unsubscribe link.
In Link title, enter the label or helper text you want to associate with the icon.
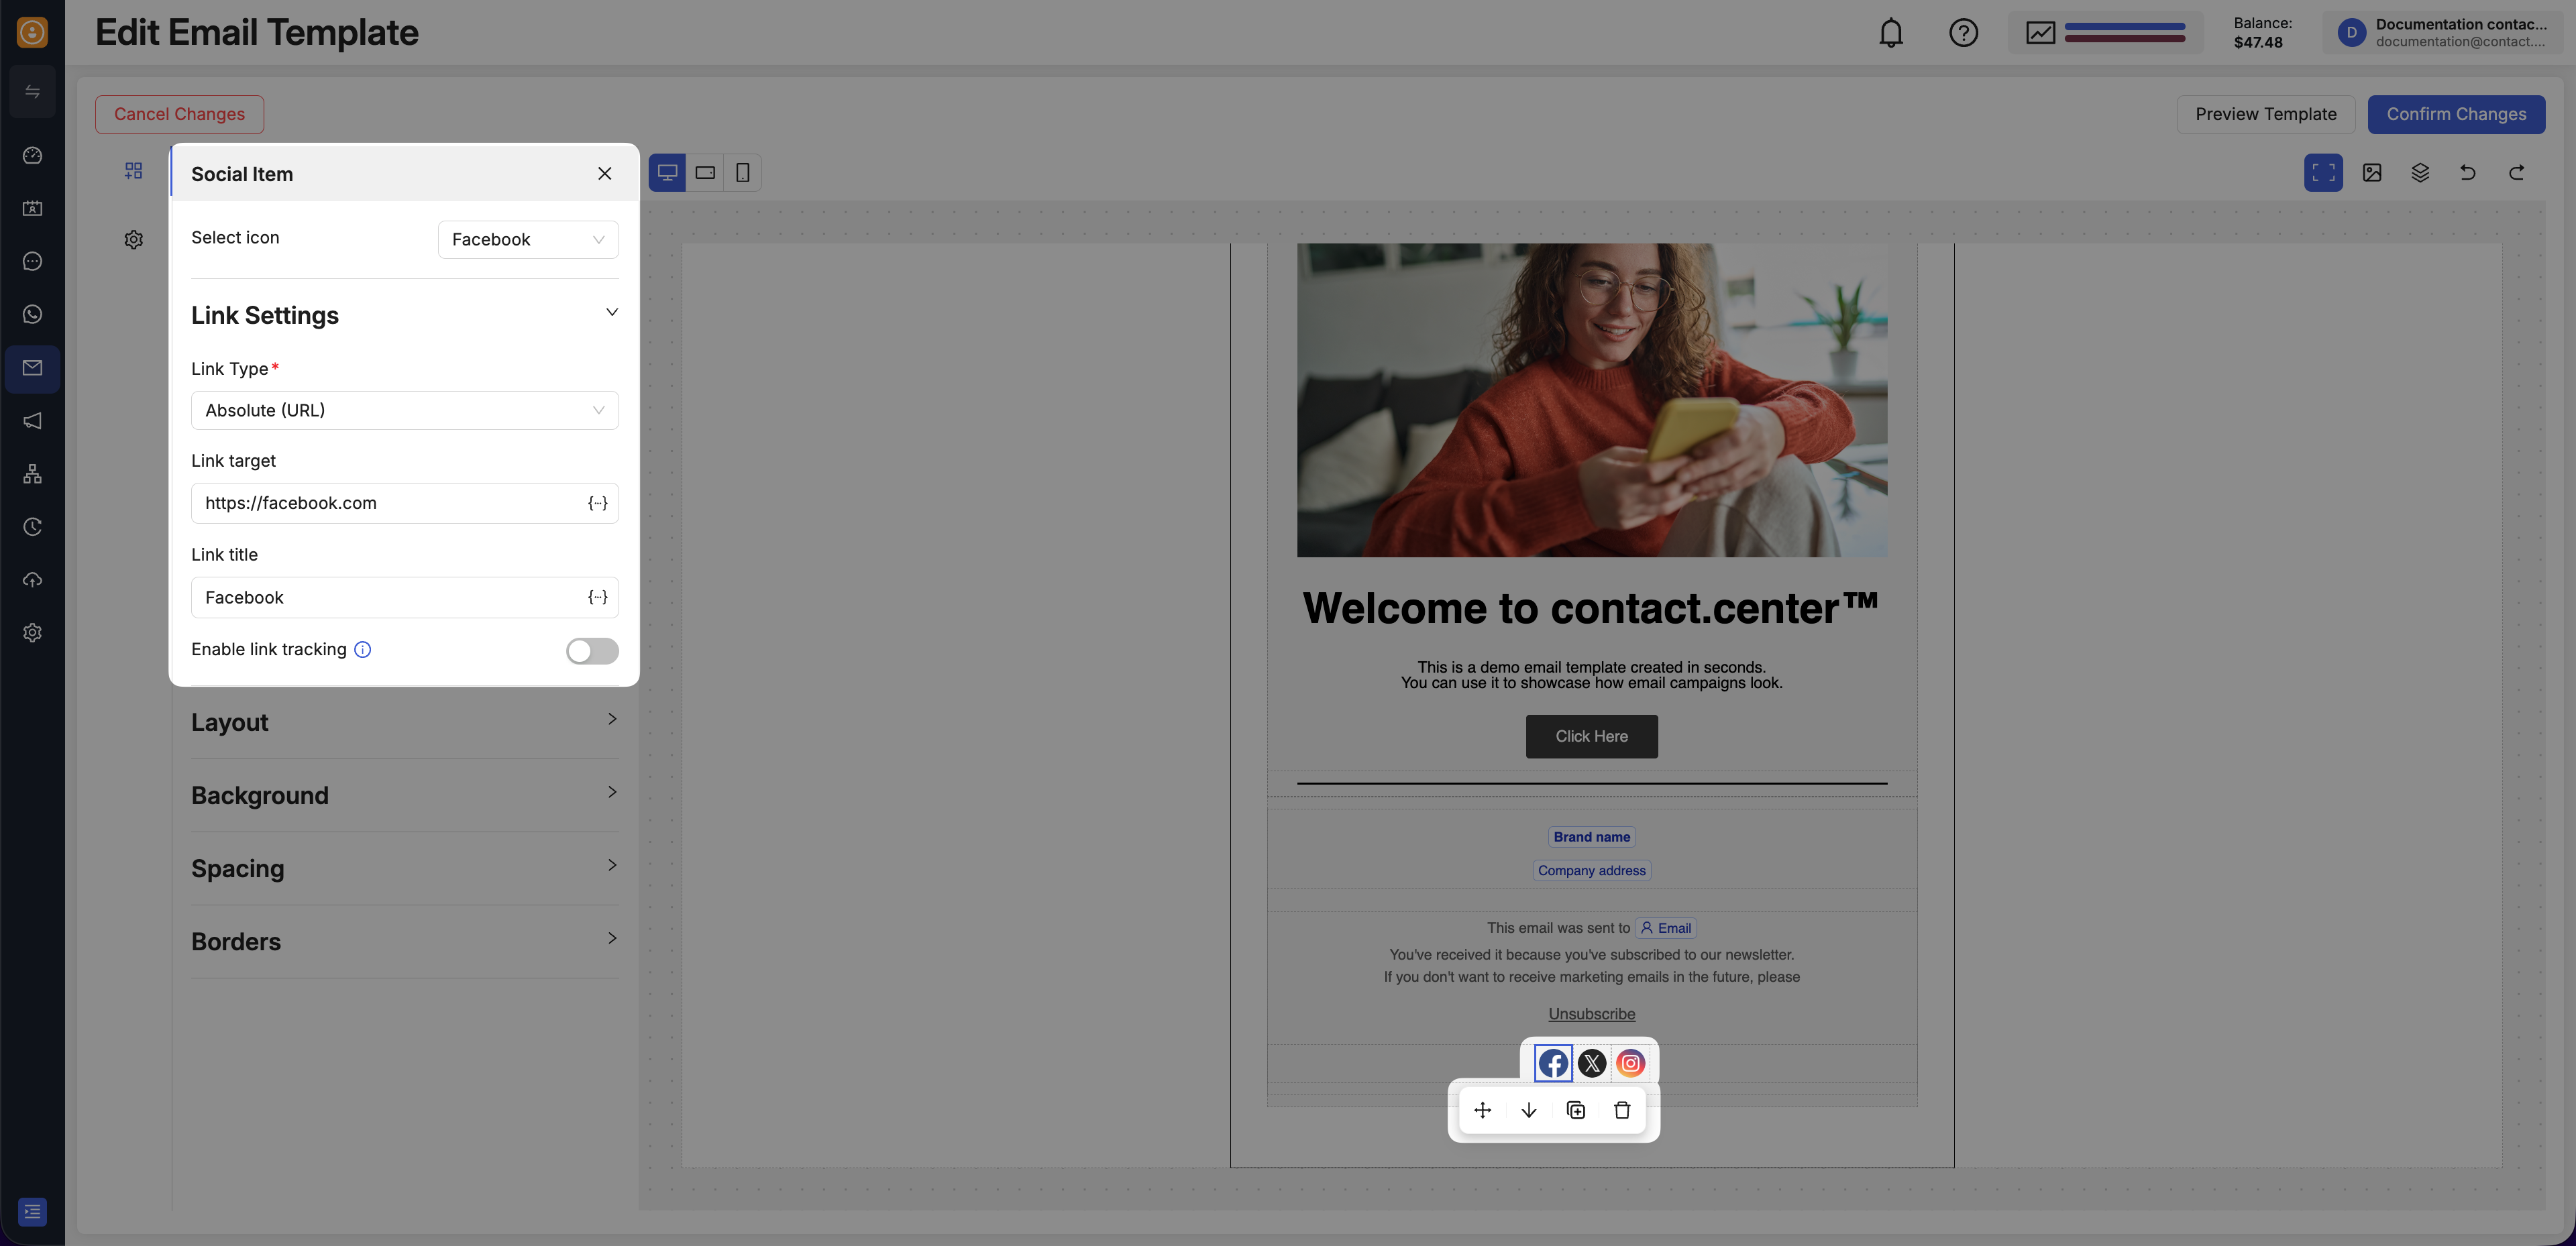
Fig. 2. Configure an individual social media item.
Customize Social Media Icons
Click the Social block in the canvas and choose the tab that matches what you want to adjust:
Click the Social block in the canvas.
In Mode, choose how the icons should be arranged.
In Theme, choose the icon style and appearance.
Click the Social block in the canvas.
Open Layout in the left panel.
Adjust the block alignment.
Adjust Icon size to control how large the icons appear.
Open Background if you want to apply a background color to the block.
Click the Social block in the canvas.
Open Spacing in the left panel.
Adjust Padding to add space around the block.
Adjust Social item padding to control the spacing around each icon.
Open Borders if you want to add visual separation around the block.
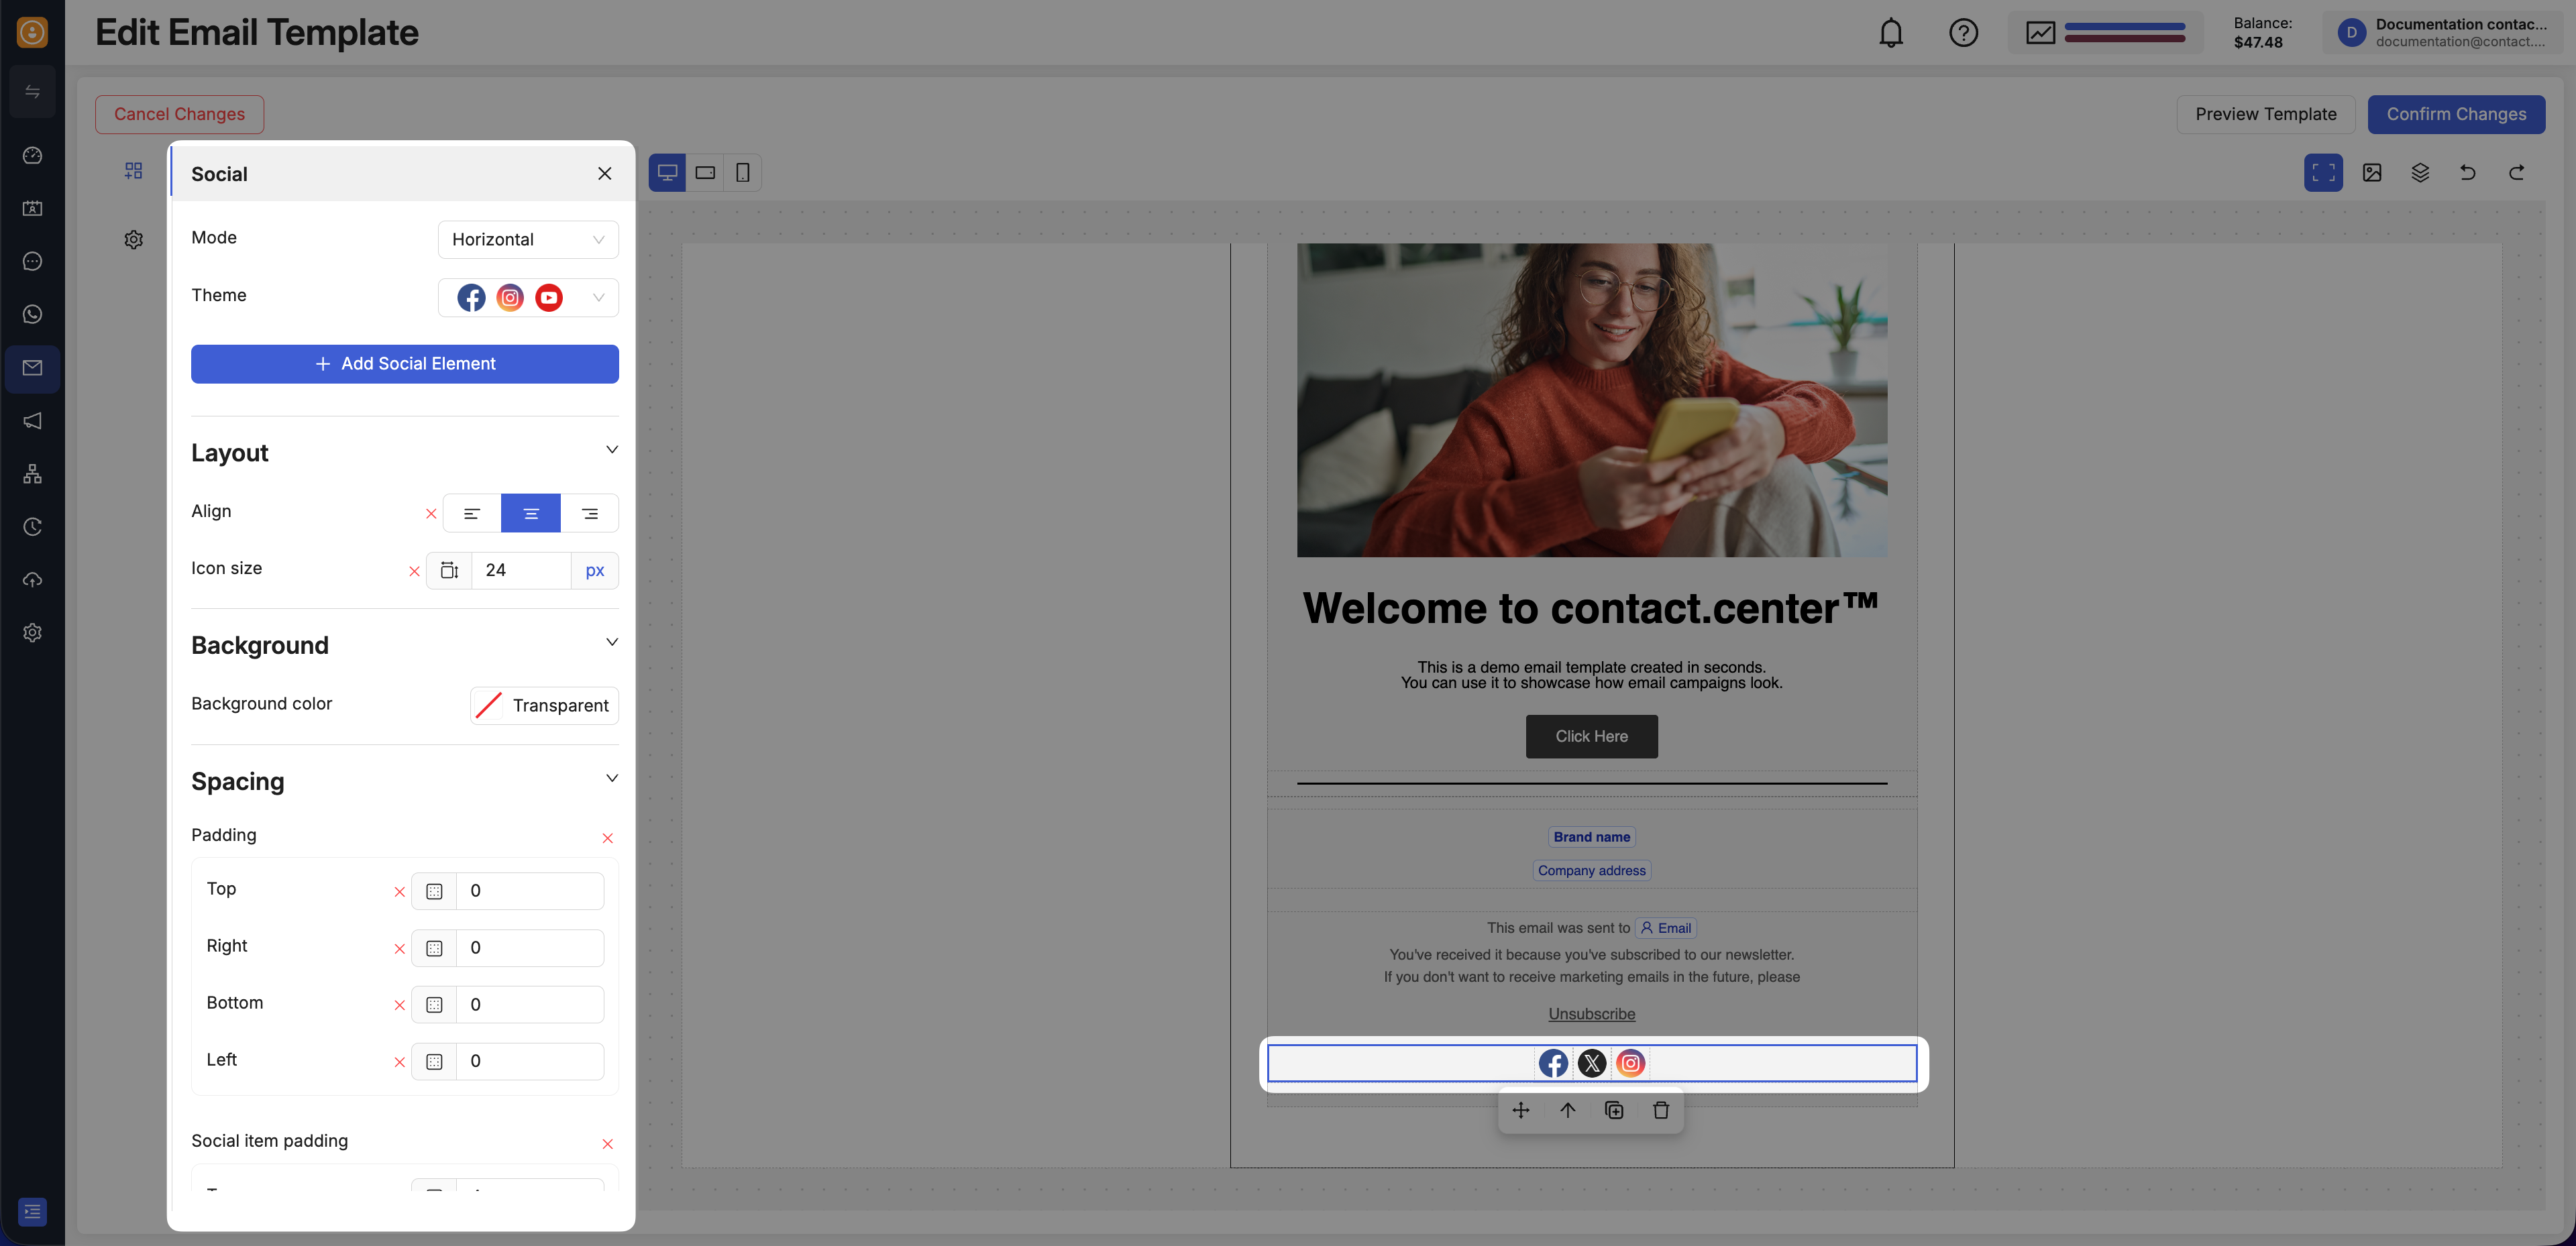
Fig. 3. Customize the social block layout and icon styling.
Add Navigation Links
Drag and drop the Navbar content block into the email canvas.
Click the block in the canvas to open its settings in the left panel.
Click Add Navbar Link to add a new navigation item.
Edit the link label directly in the canvas if needed.
Click an individual navigation item to open its Navbar Link settings.

Fig. 4. Insert and configure the Navbar block.
Configure a Navigation Link
When a navigation item is selected, open Link Settings and choose the tab that matches the type of link you want to add:
Use this option to send recipients to a webpage or any other direct URL.
In Link Type, select Absolute (URL).
In Link target, enter the destination URL.
In Link title, enter the label or helper text you want to associate with the link.
Enable link tracking if you want to measure clicks on the navigation item.
Use this option when the navigation item should start a phone call on supported devices.
In Link Type, select Click-to-call phone number (tel).
In Telephone number, enter the phone number you want to use.
In Link title, enter the label or helper text you want to associate with the link.
Use this option when the navigation item should open a new email message.
In Link Type, select Email link (mail-to).
In Email address, enter the destination email address.
Fill in Email subject and Email body.
In Link title, enter the label or helper text you want to associate with the link.
Use this option when the navigation item should act as an unsubscribe action in the email.
In Link Type, select Unsubscribe link.
In Link title, enter the label or helper text you want to associate with the link.
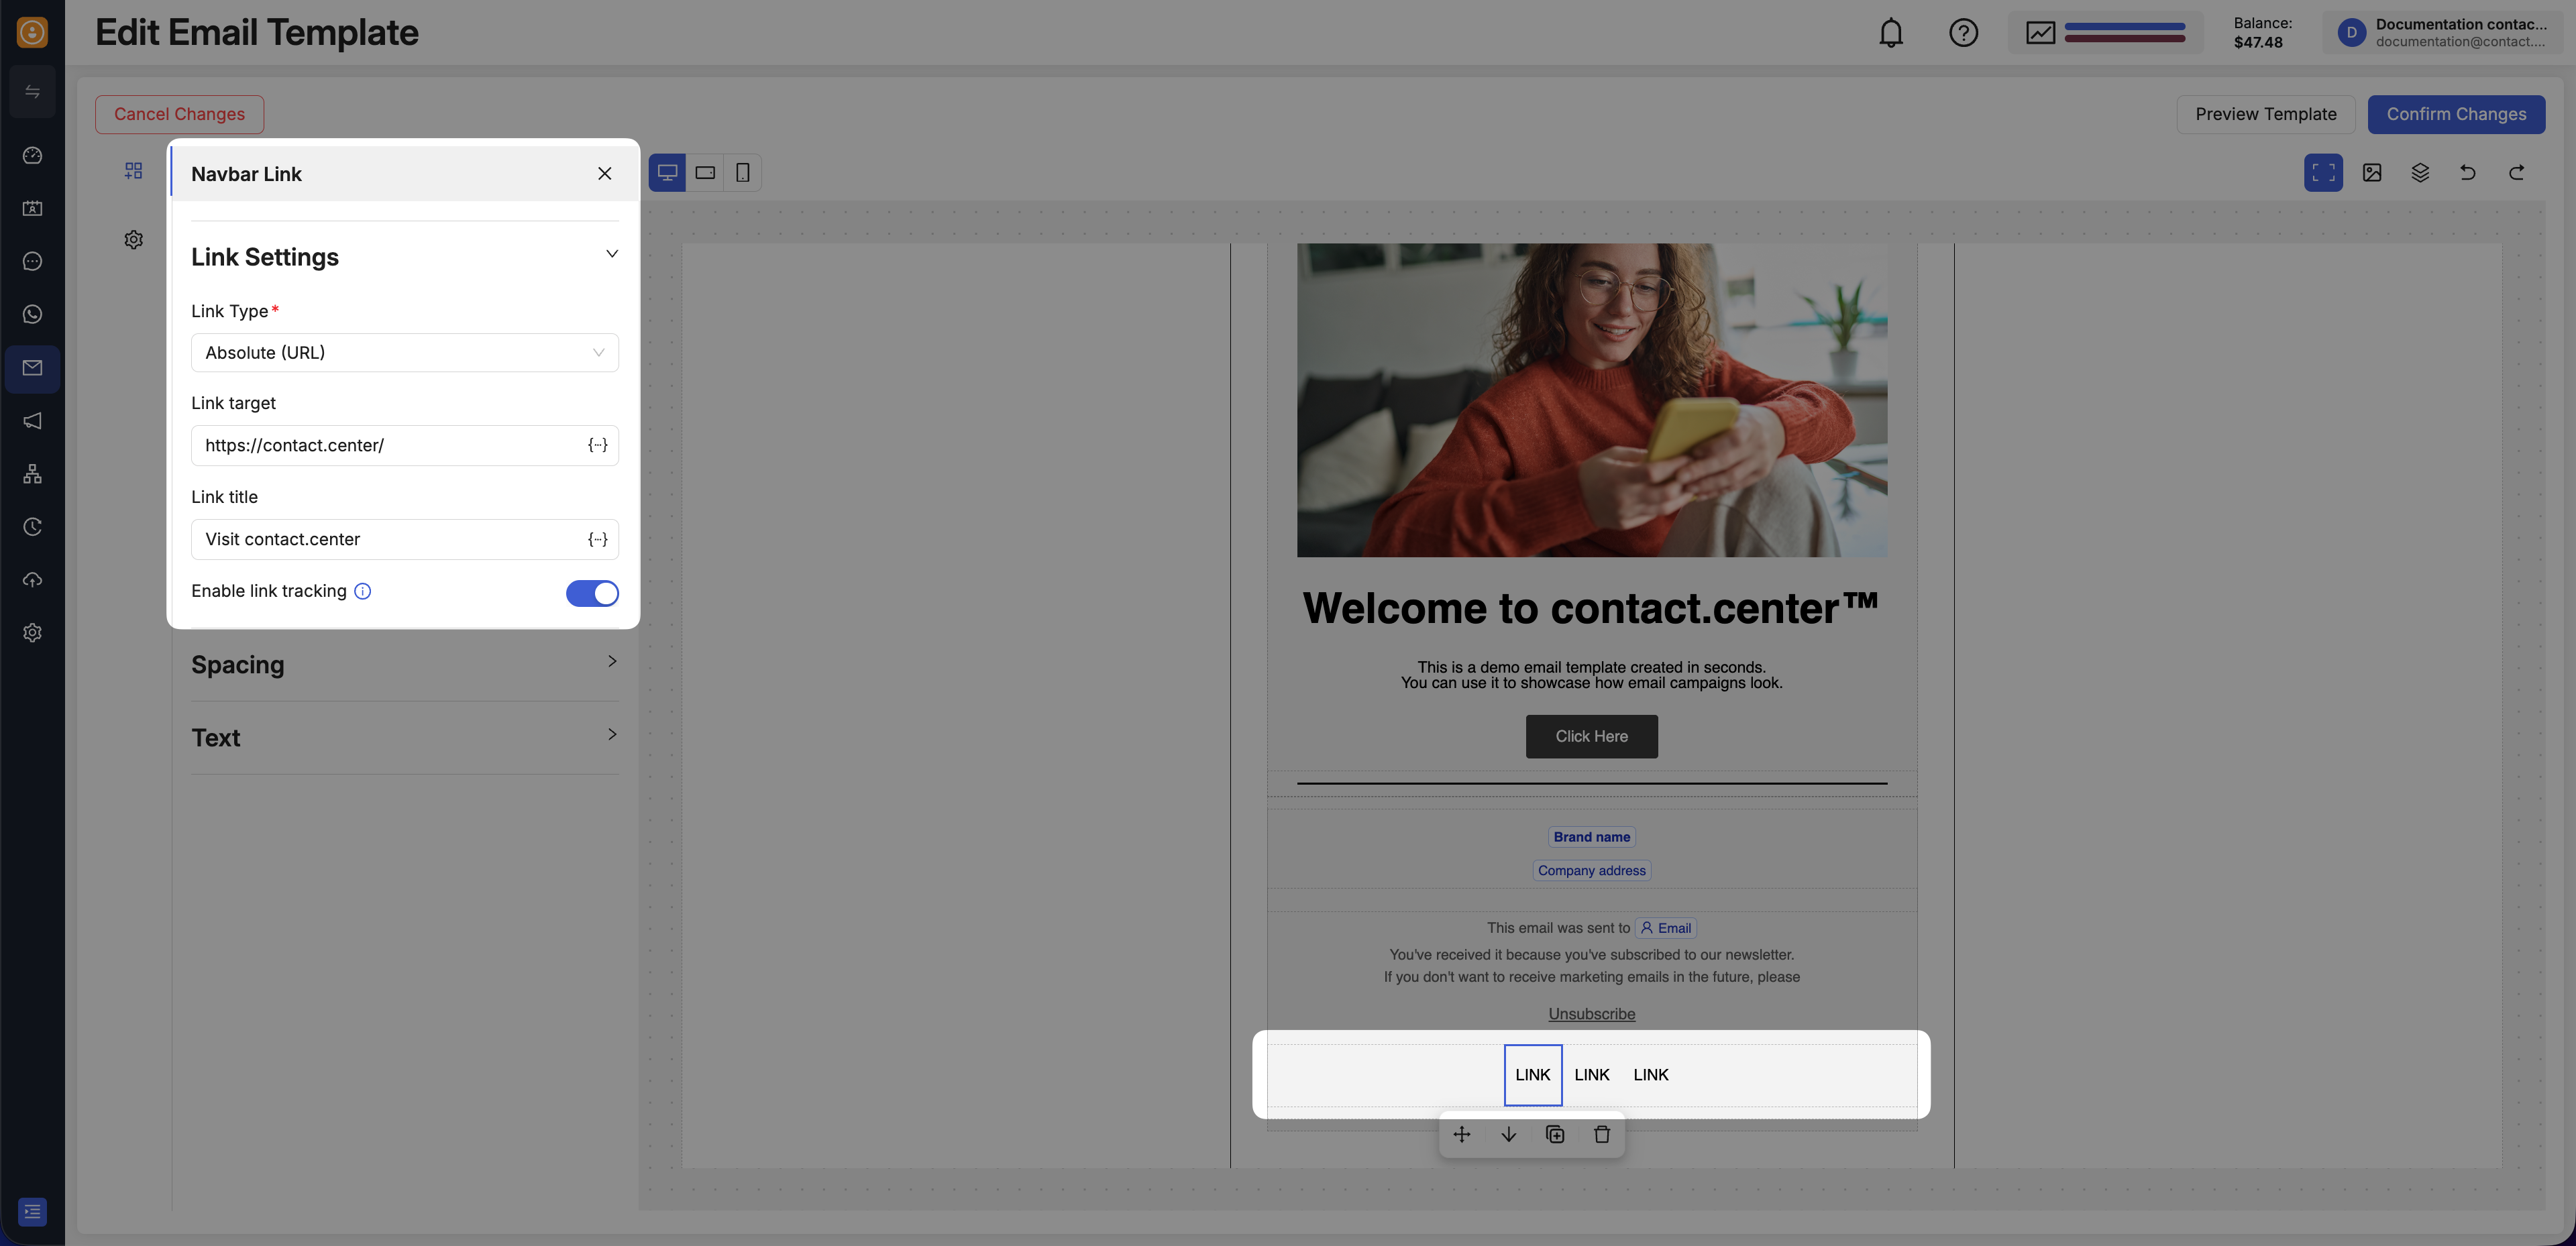
Fig. 5. Configure an individual navigation link.