Account Settings
Manage workspaces and team members for your contact.center™ account.
The Account tab contains settings that apply to the entire account. Use this page to create and manage workspaces, control who can access the account, and assign workspace access to team members.
Create, switch, and remove workspaces used to organize contacts, campaigns, templates, and automation settings.
Review team members who have access to the account and manage their roles.
Workspaces
Workspaces allow you to organize contacts, campaigns, templates, and automation workflows. Each workspace operates independently, but all workspaces under the same account share the same billing subscription.
Note
Creating additional workspaces requires a paid plan.
Up to 10 workspaces can be created per account.
The Workspaces section displays the following information:
Column |
Description |
|---|---|
Workspace Name |
The name of the workspace. The currently active workspace is marked with a Current label. |
Created |
The date when the workspace was created. |
Actions |
Available operations for the workspace, such as Switch or Delete. |

Fig. 1. Workspaces list.
Create a Workspace
Go to Settings → Account Settings.
Open the Workspaces sub-menu.
Click Create Workspace.
Enter the workspace name.
Click Create Workspace.
After the workspace is created, it appears in the workspaces list.
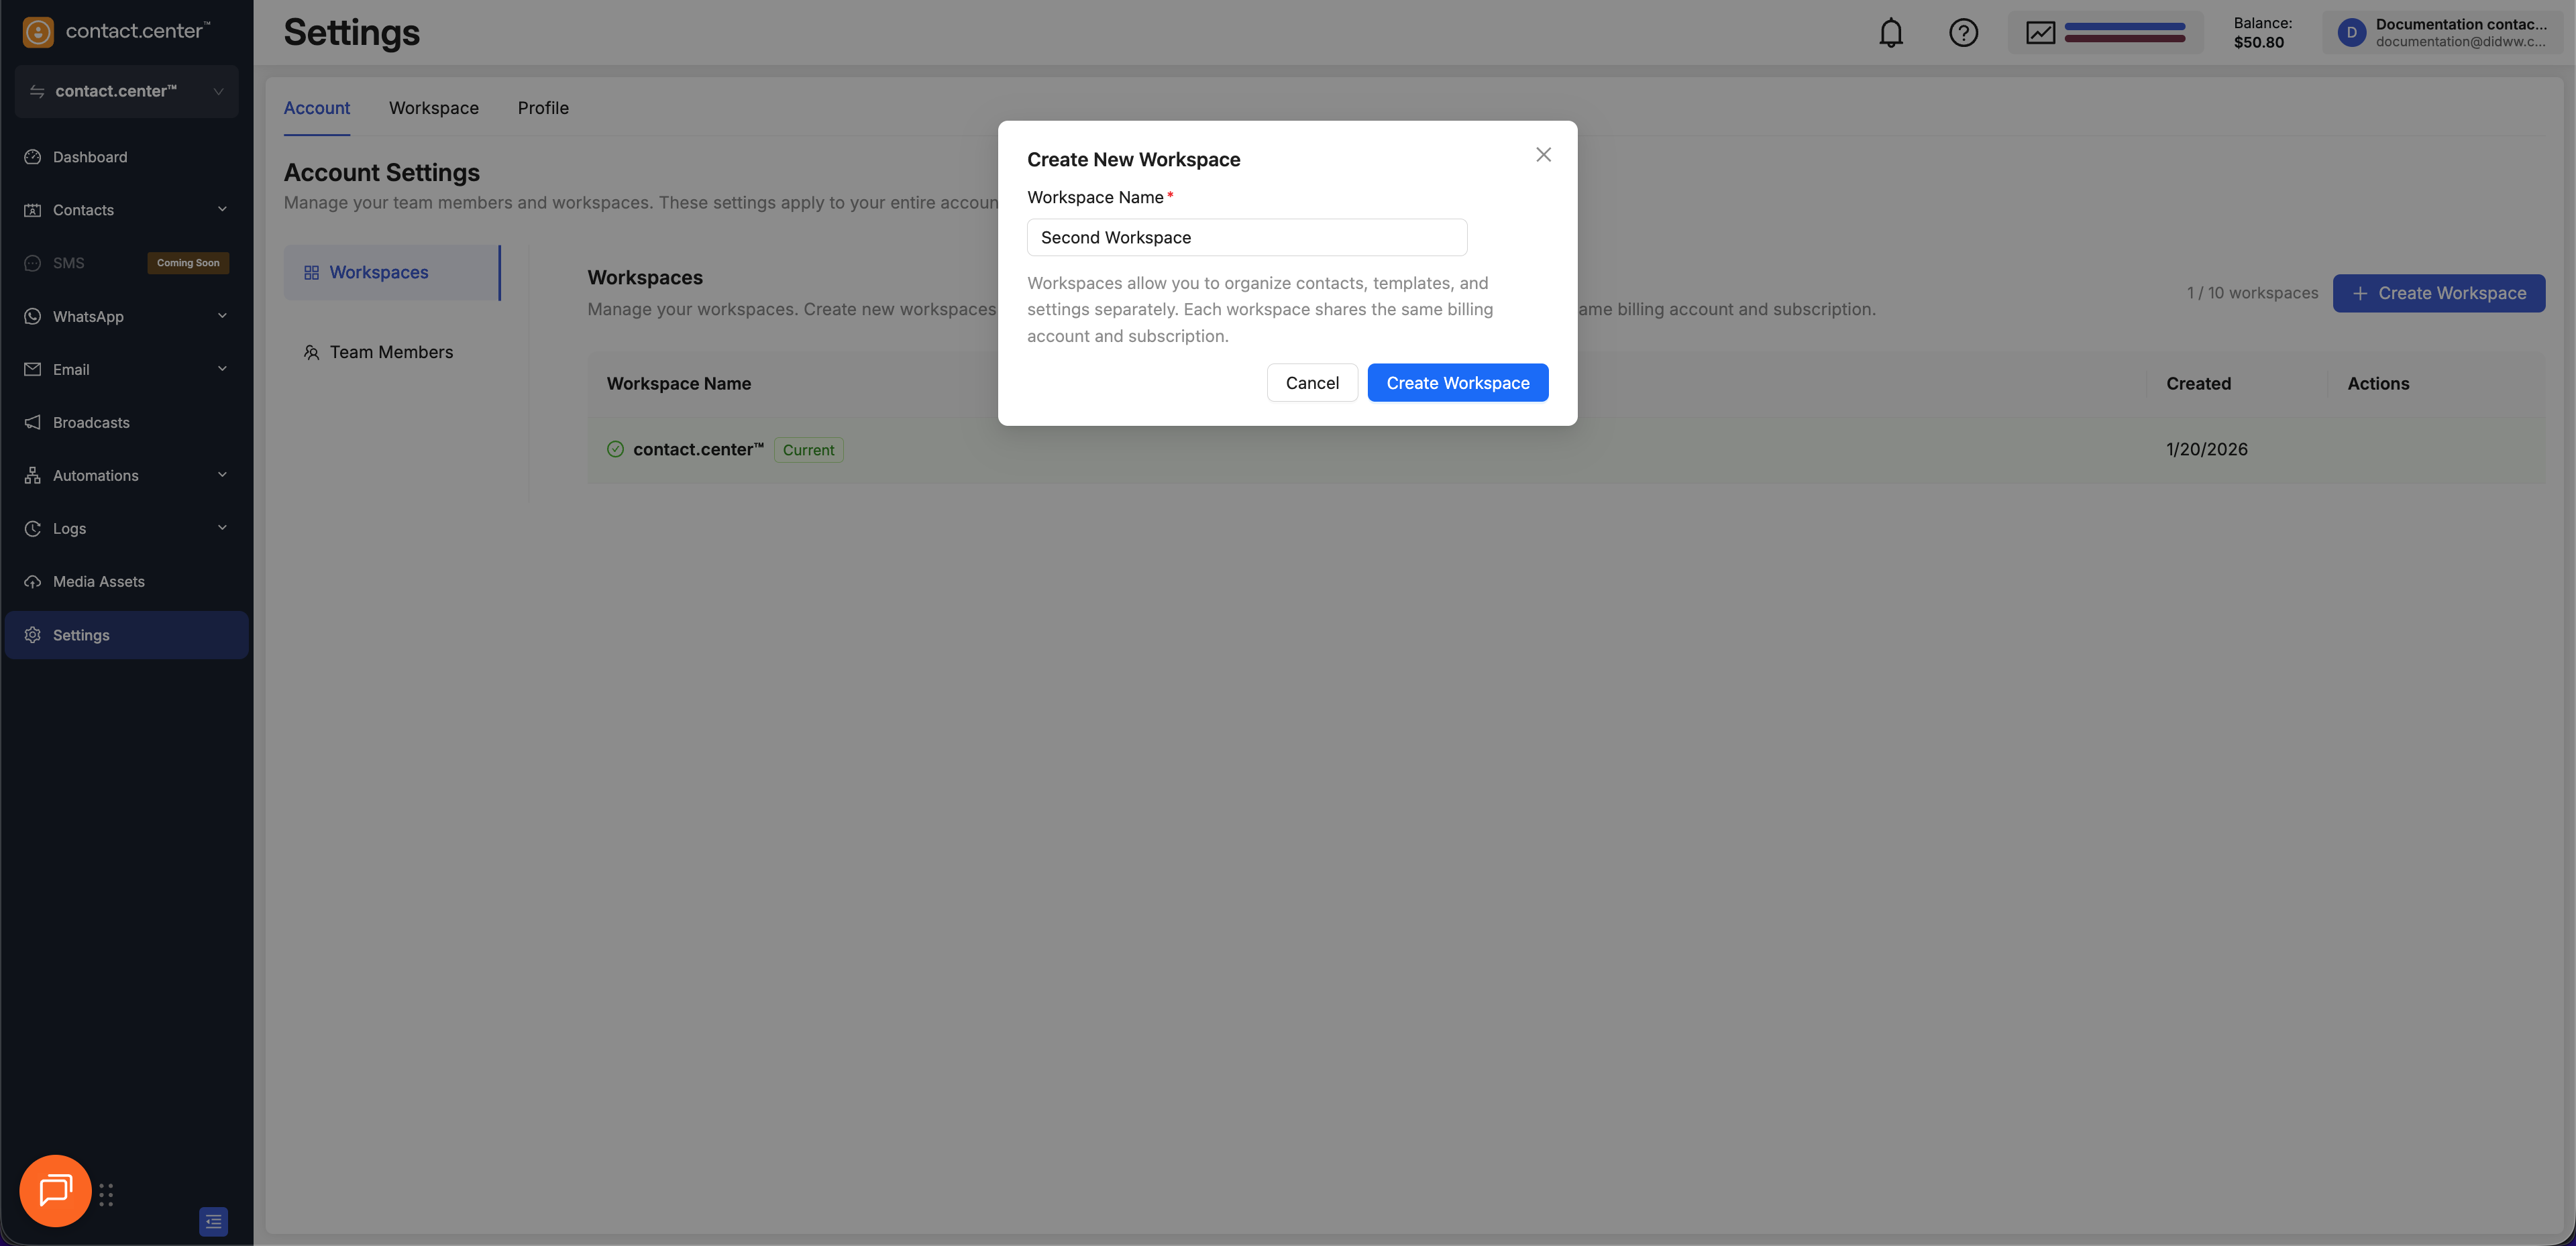
Fig. 2. Create New Workspace dialog.
Switch Between Workspaces
You can switch between workspaces in two ways.
Use the workspace selector in the main menu to switch workspaces quickly.
In the main menu, select the current workspace.
Select the workspace you want to open.
The selected workspace becomes active immediately.
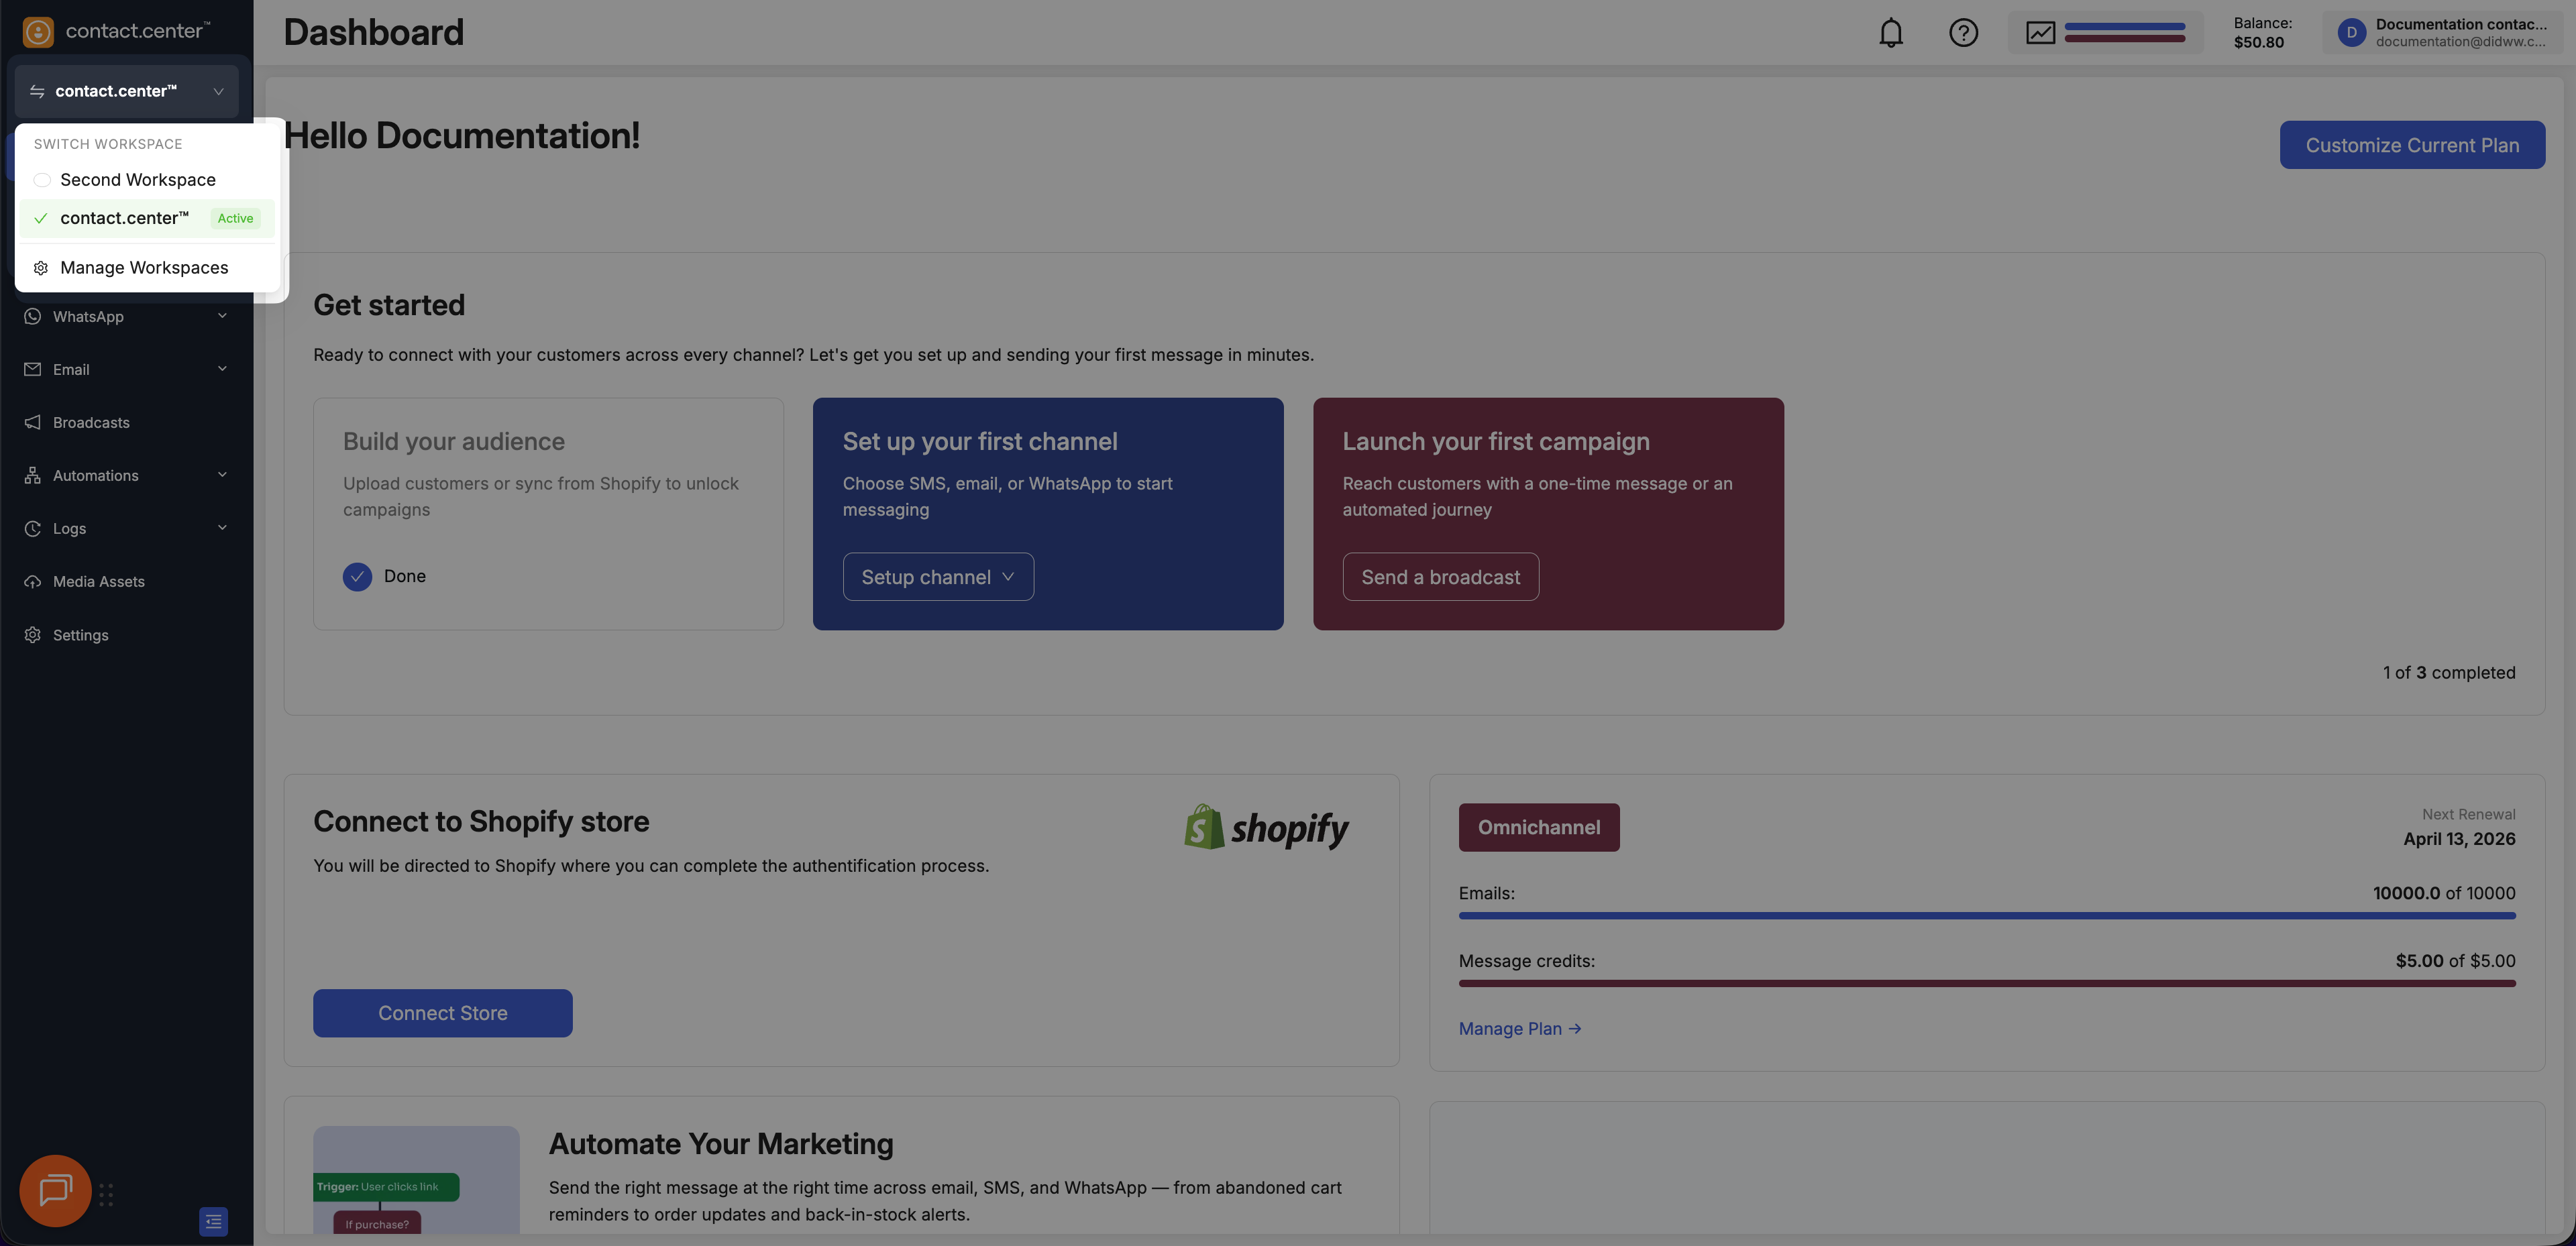
Switch workspaces from the main menu.
Use the workspace list in Account settings to switch to another workspace.
Go to Settings > Account settings.
Open the Workspaces submenu.
In the Actions column, select Switch for the workspace you want to open.
The selected workspace becomes active immediately.
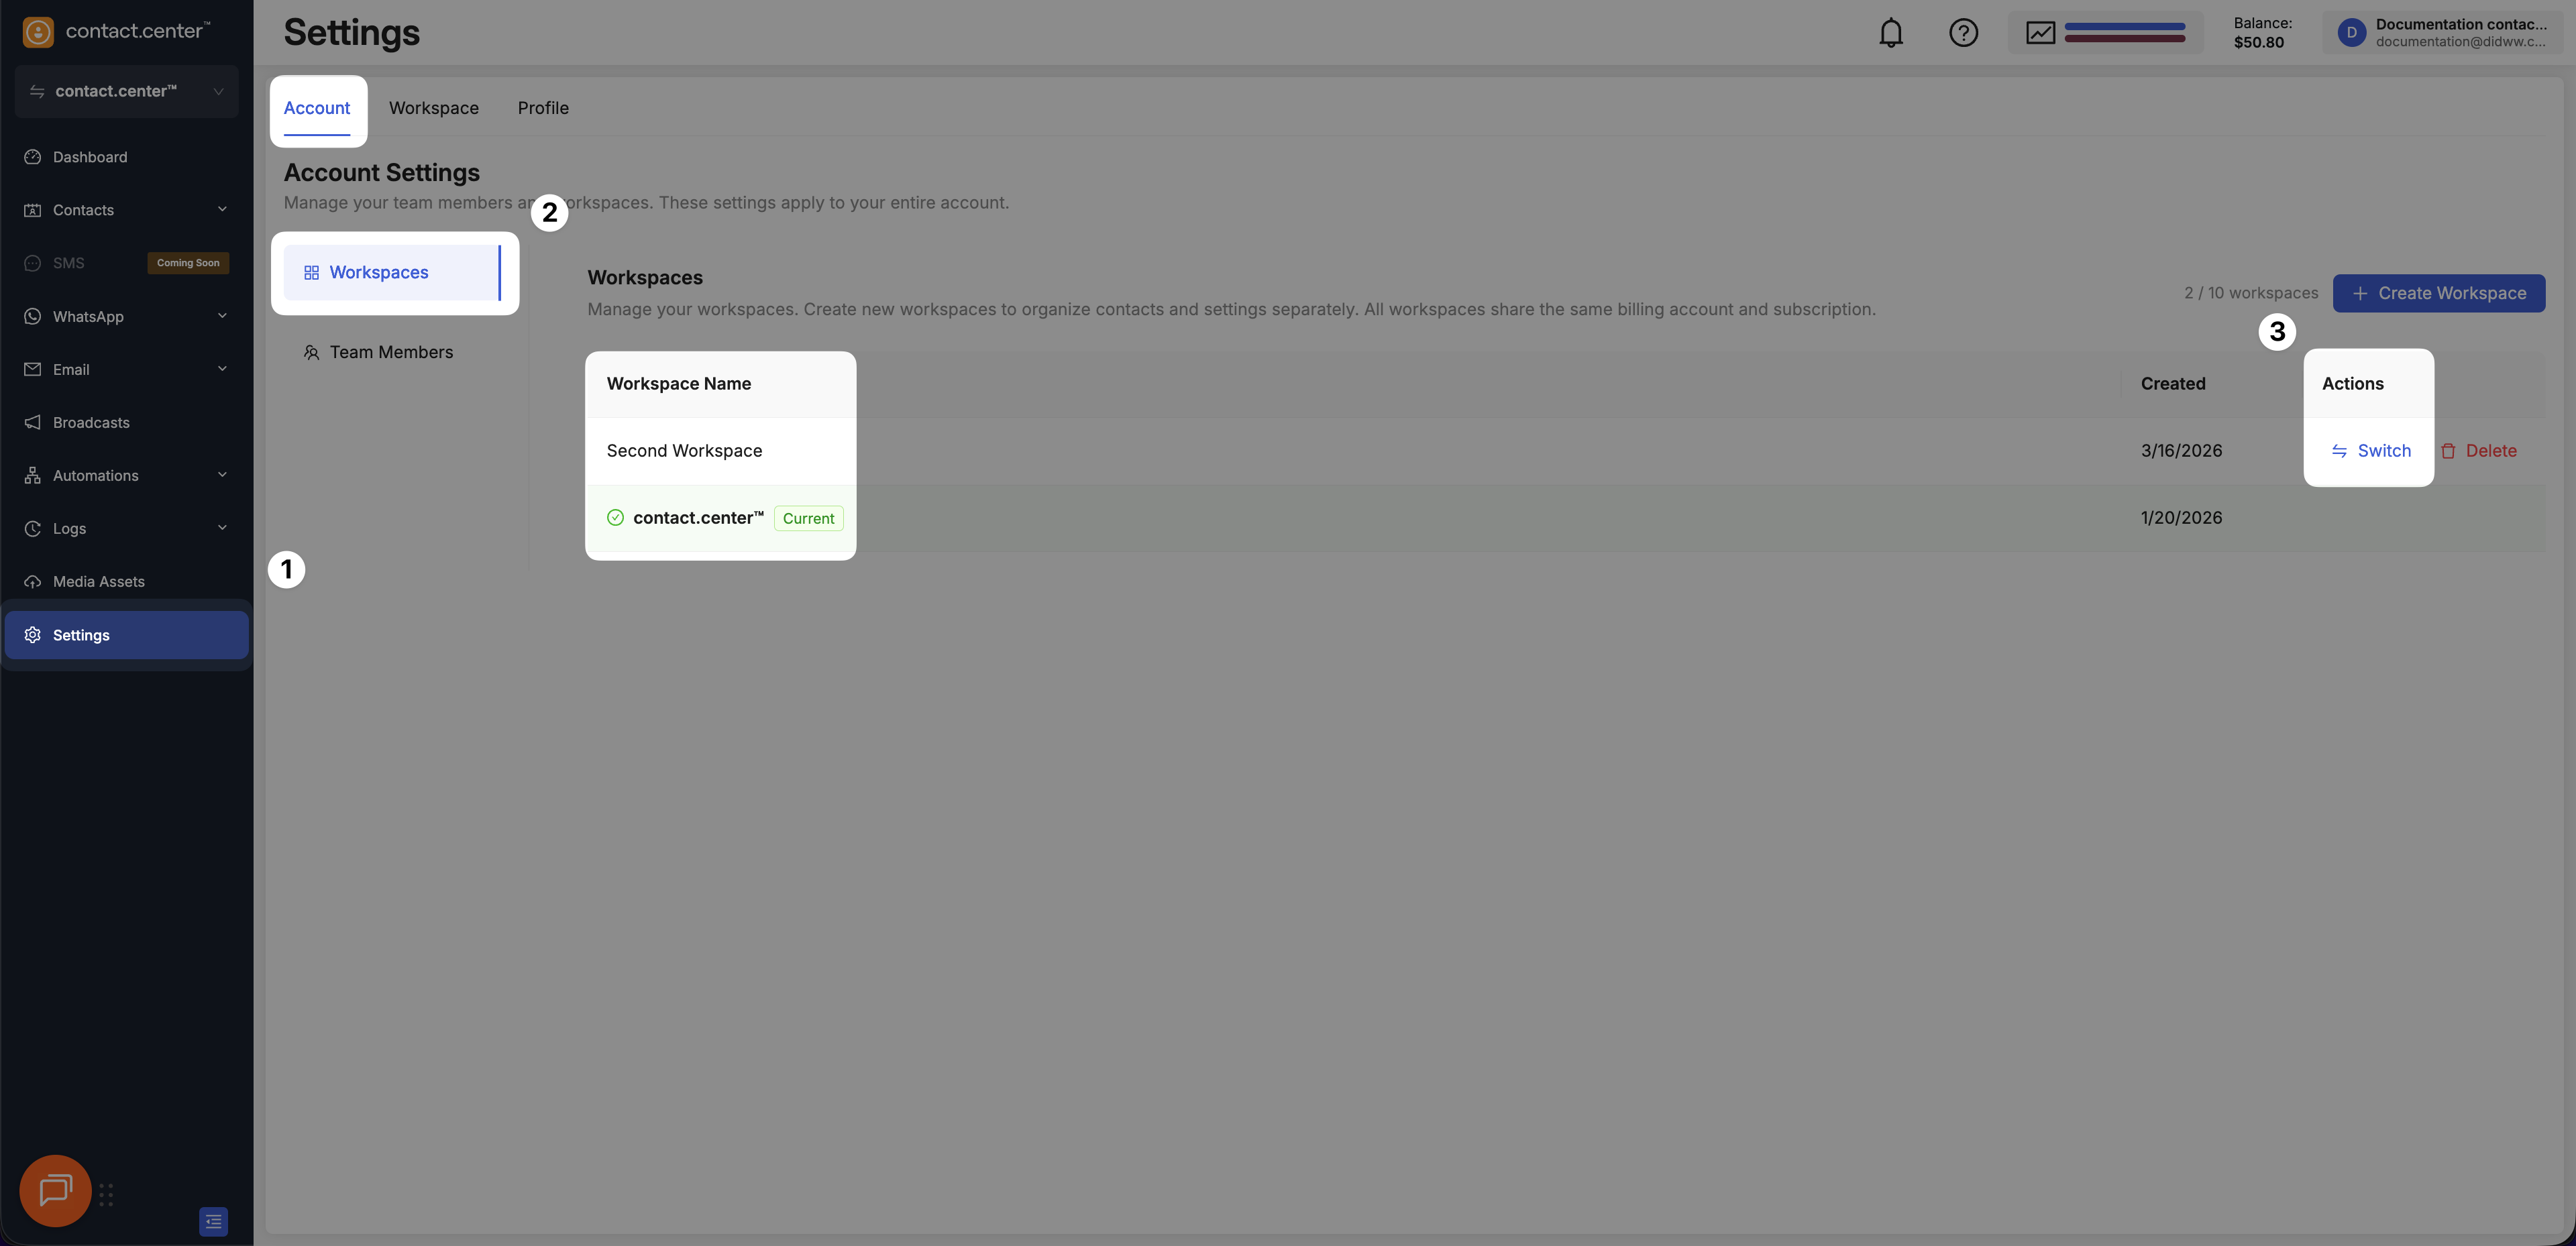
Switch workspaces from the Workspaces list.
Delete a Workspace
You can delete a workspace if it is no longer needed.
Go to Settings → Account Settings.
Open the Workspaces sub-menu.
Locate the workspace you want to remove.
Click Delete in the Actions column.
Confirm the workspace deletion.
Warning
Deleting a workspace permanently removes its configuration and associated data.
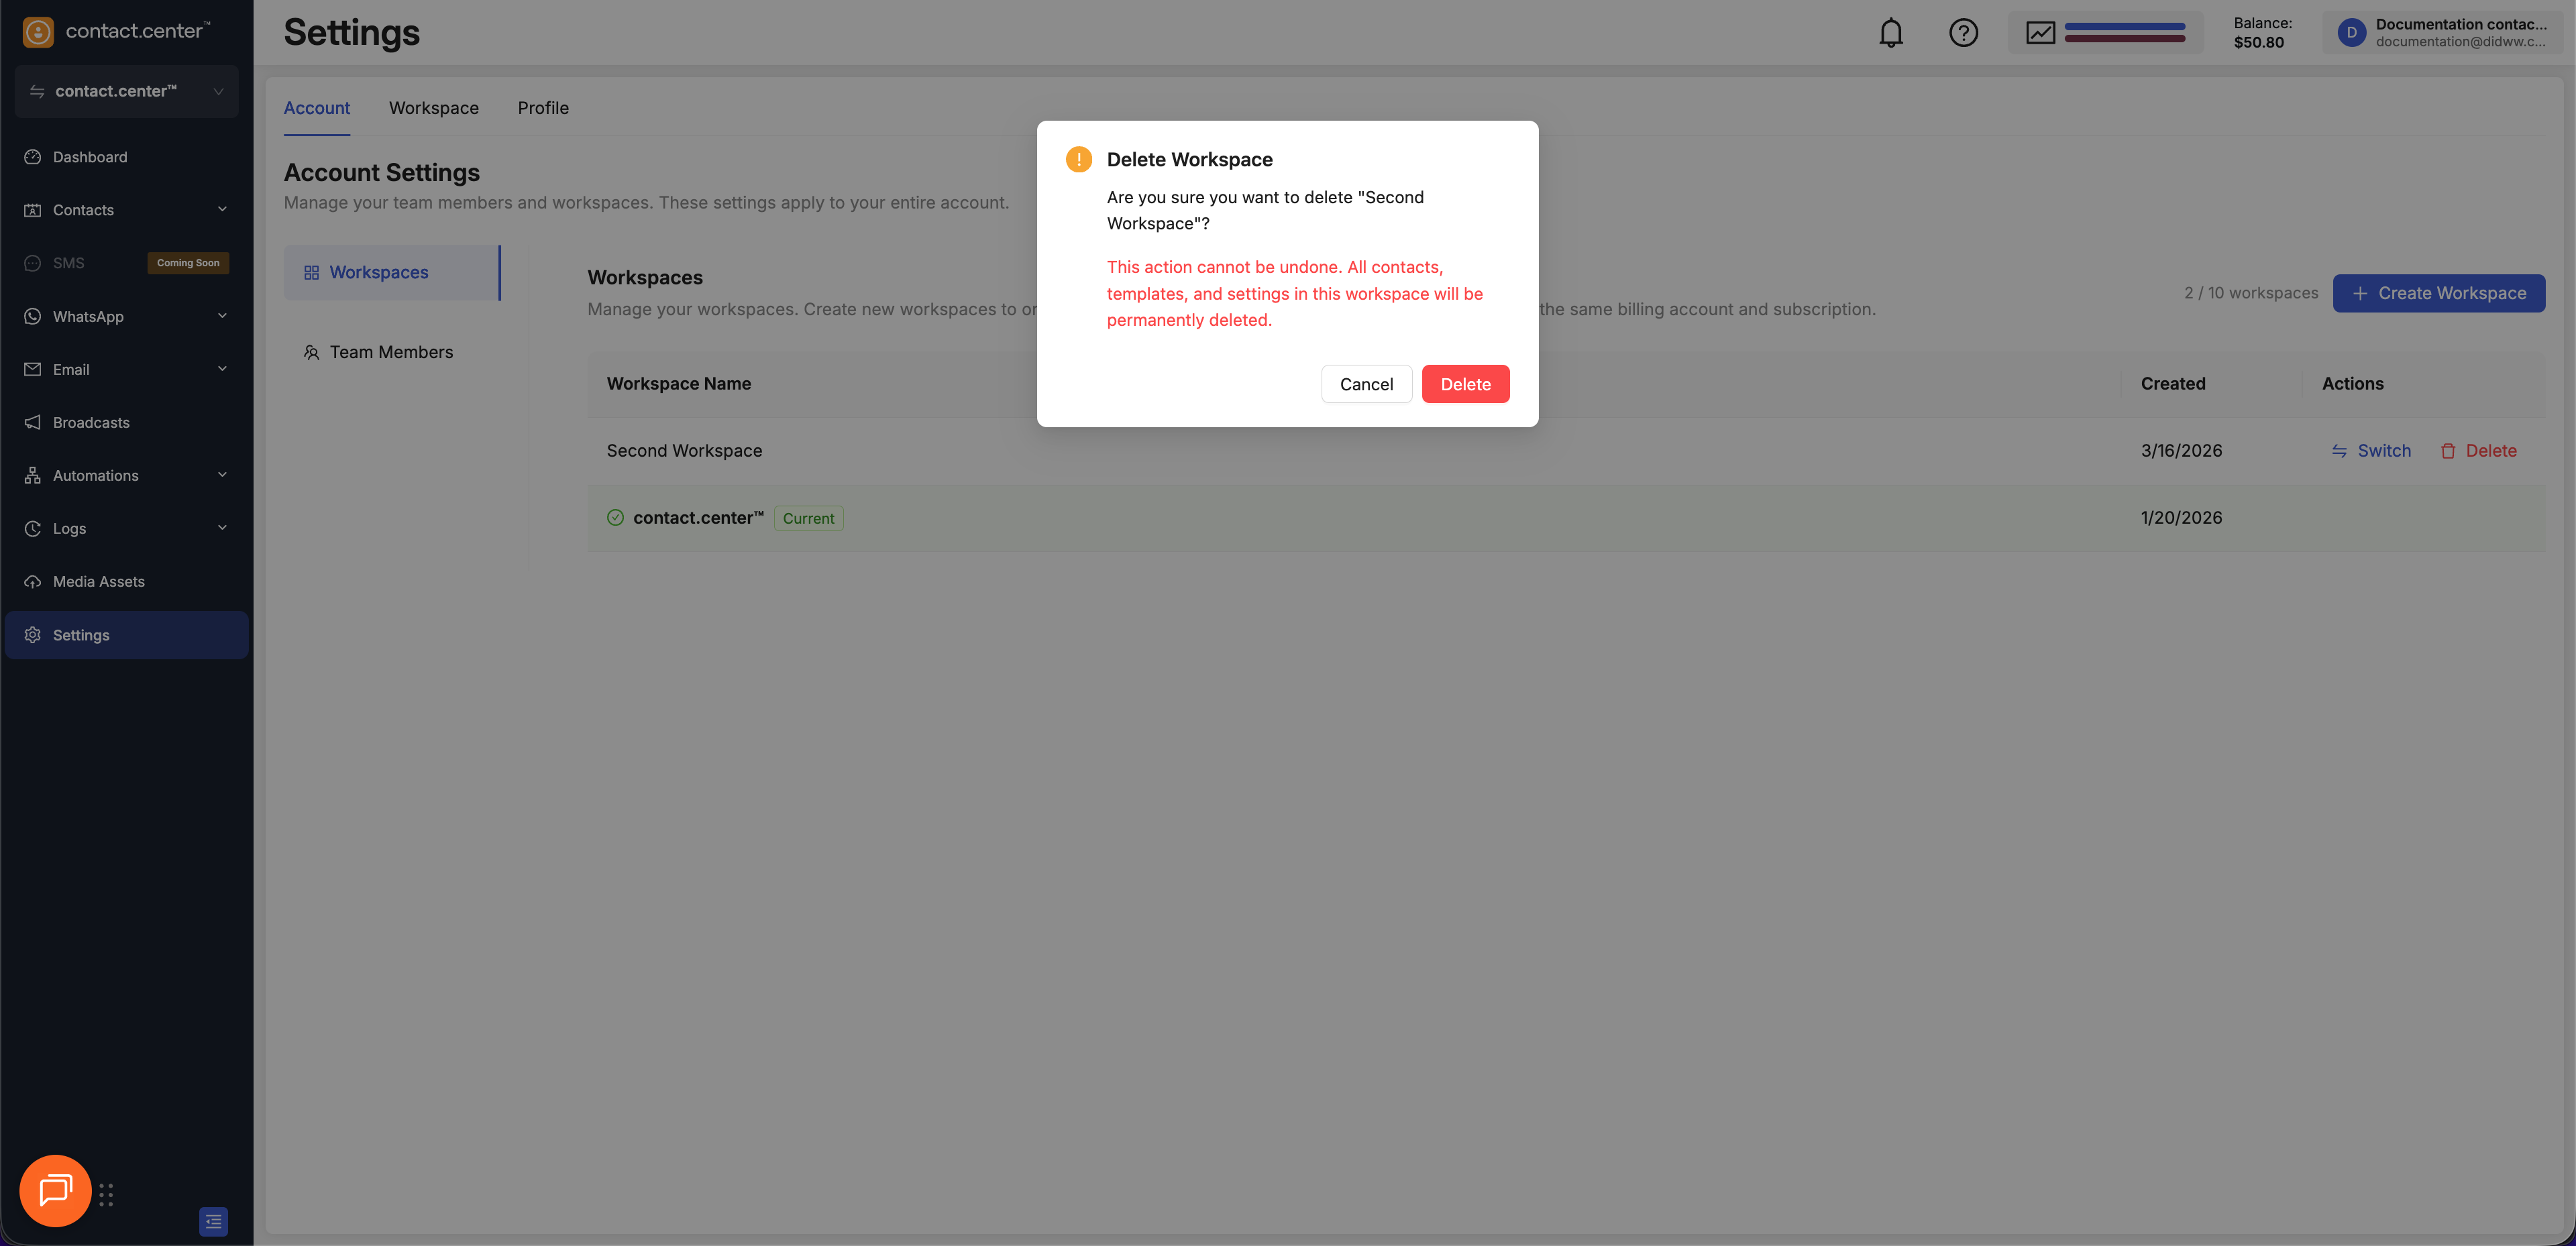
Fig. 5. Delete a workspace.
Team Members
The Team Members section lists all team members who have access to your contact.center™ account.
From this page, you can invite team members, review their access, and remove access when it is no longer required.
Note
Inviting additional team members requires a paid plan.
Up to 10 team members can be added per account.
The Team Members table displays the following information:
Column |
Description |
|---|---|
Name |
The full name of the team member. |
The email address associated with the team member account. |
|
Role |
The assigned team member role. Roles define what actions a team member can perform in the workspace. |
Workspaces |
The workspace or workspaces the team member has access to. |
Status |
Indicates whether the team member is active or has a pending invitation. |
Added |
The date when the team member was added to the account. |
Last Login |
The last time the team member signed in to the platform. |
Actions |
Available operations for the team member, such as Remove. |
Invite a Team Member
Follow these steps to invite a team member.
Step 1: Initiate the Invitation
Go to Settings → Account Settings.
Open the Team Members sub-menu.
Click Invite Team Member.
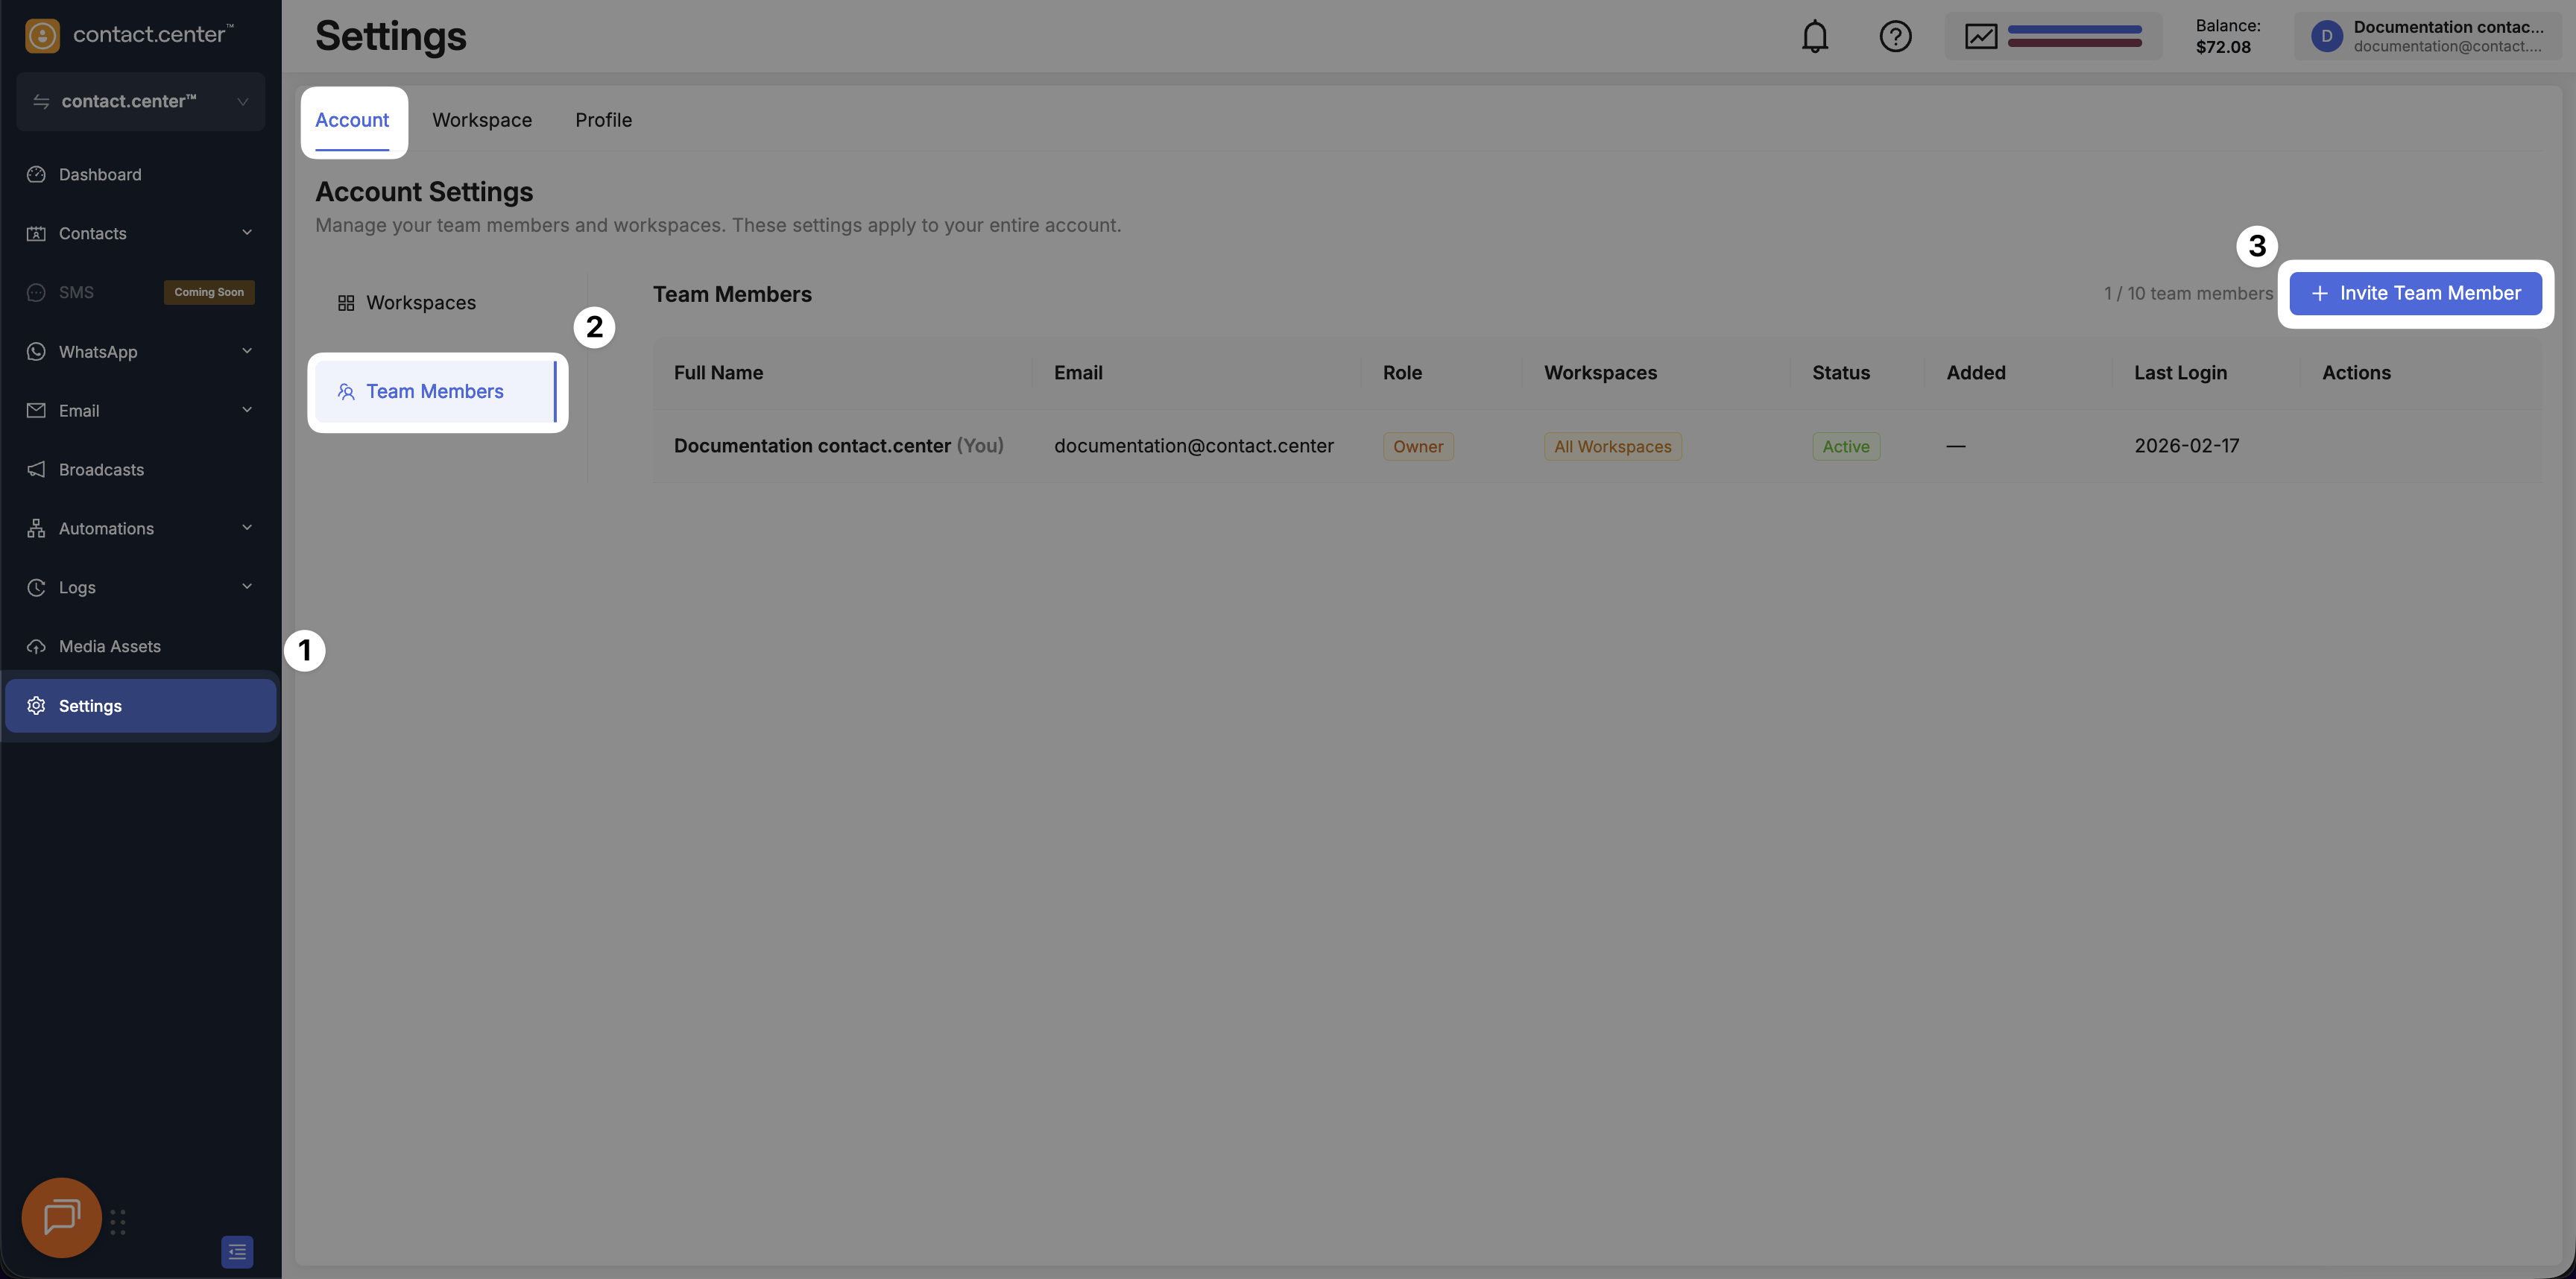
Fig. 7. Invite Team Member button.
Step 2: Enter Team Member Details and Send the Invitation
In the Invite Team Member window, enter the team member’s email address.
In Workspace Access, select one or more workspaces.
Click Send Invitation.
The invited team member receives an email with instructions to create an account and access the selected workspace or workspaces.
Note
Invited team members are assigned the Super Admin role by default and have full access to the workspace.
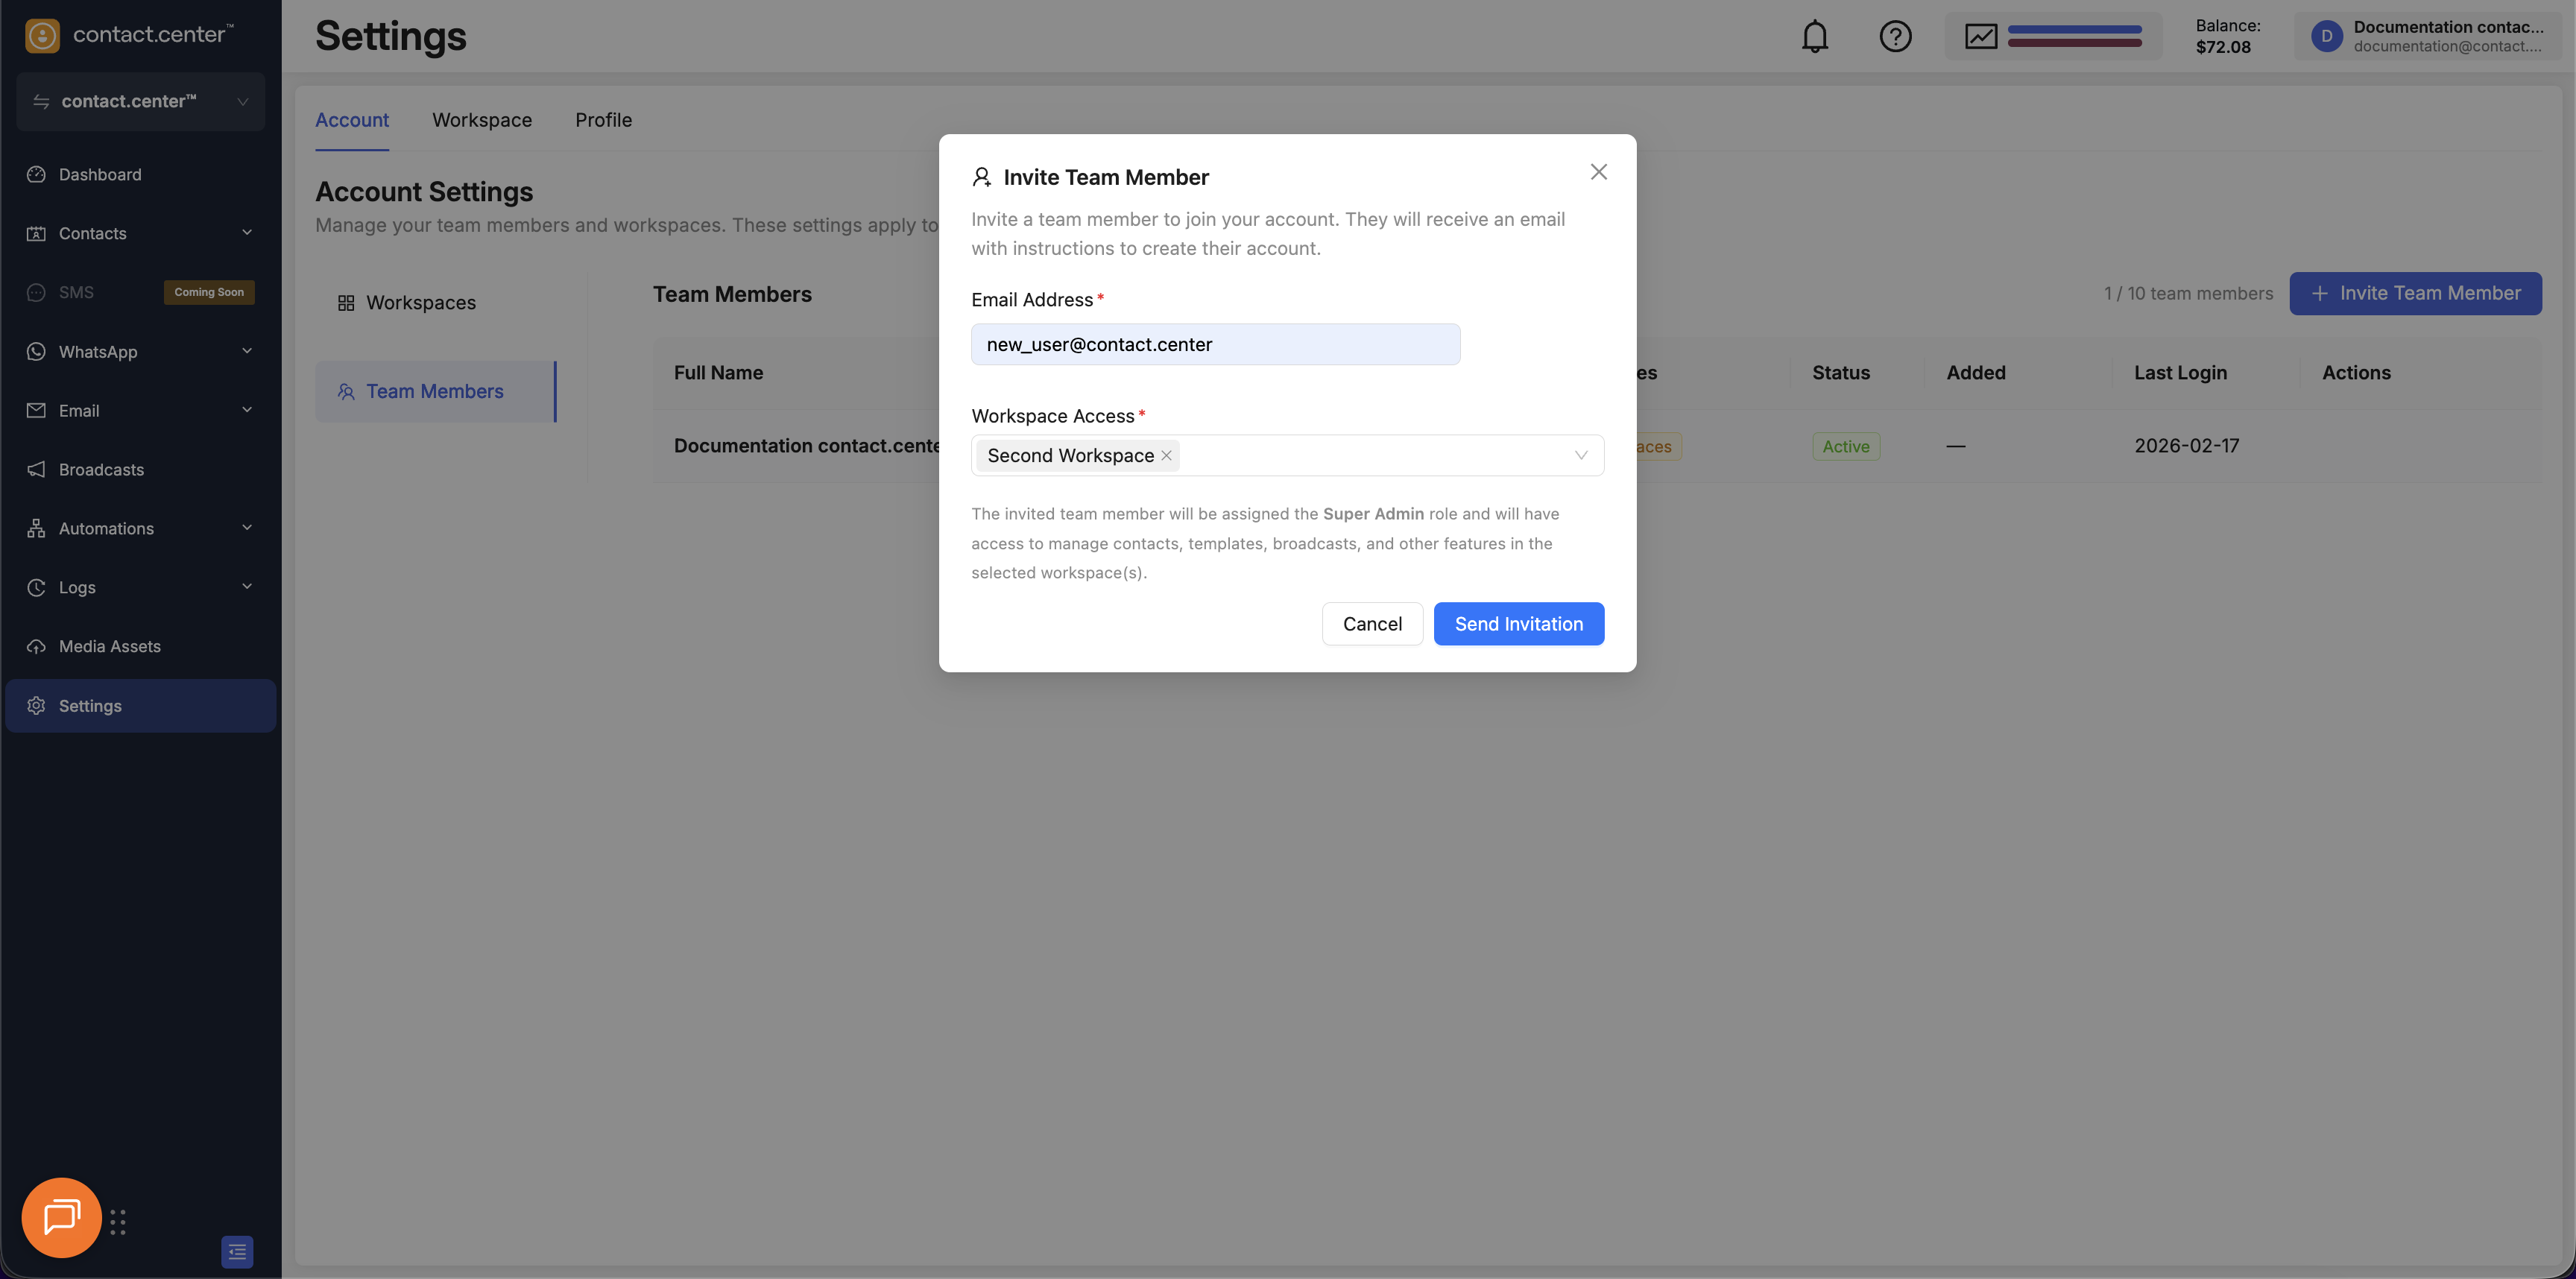
Fig. 8. Invite Team Member dialog.
Remove a Team Member
Follow these steps to remove a team member from your account.
Warning
Removing a team member revokes their access to the account immediately.
Step 1: Locate the Team Member
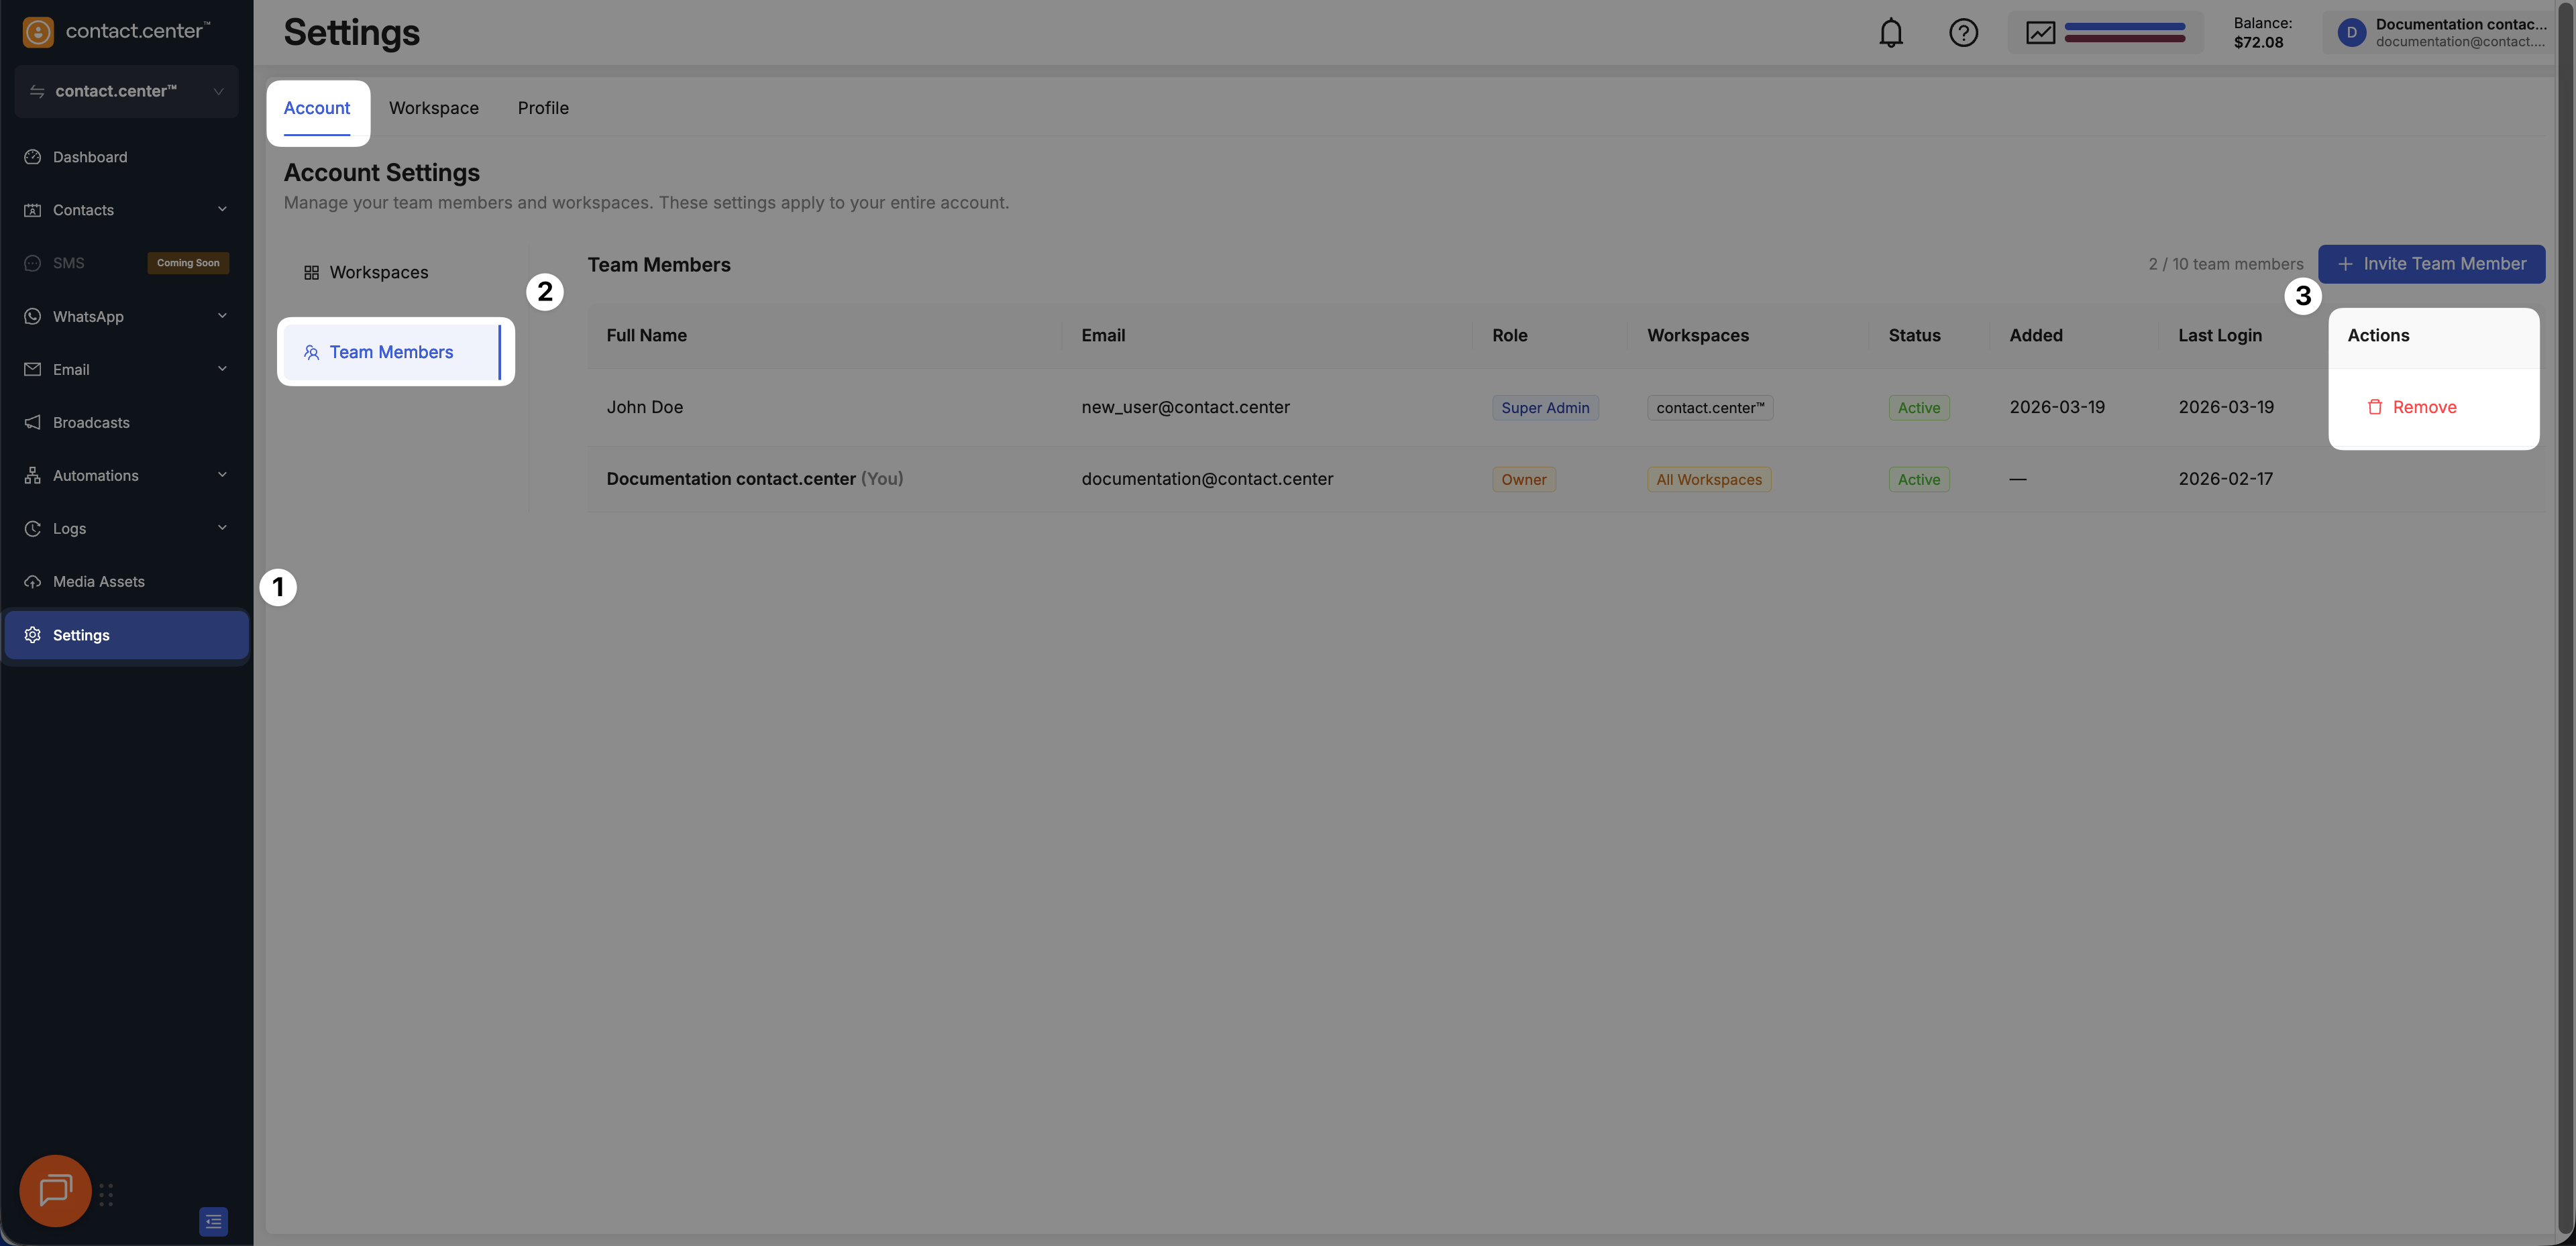
Go to Settings → Account Settings.
Open the Team Members sub-menu.
Locate the team member in the list and click Remove in the Actions column.
Step 2: Delete the Team Member
In the confirmation dialog, click Yes, Remove.
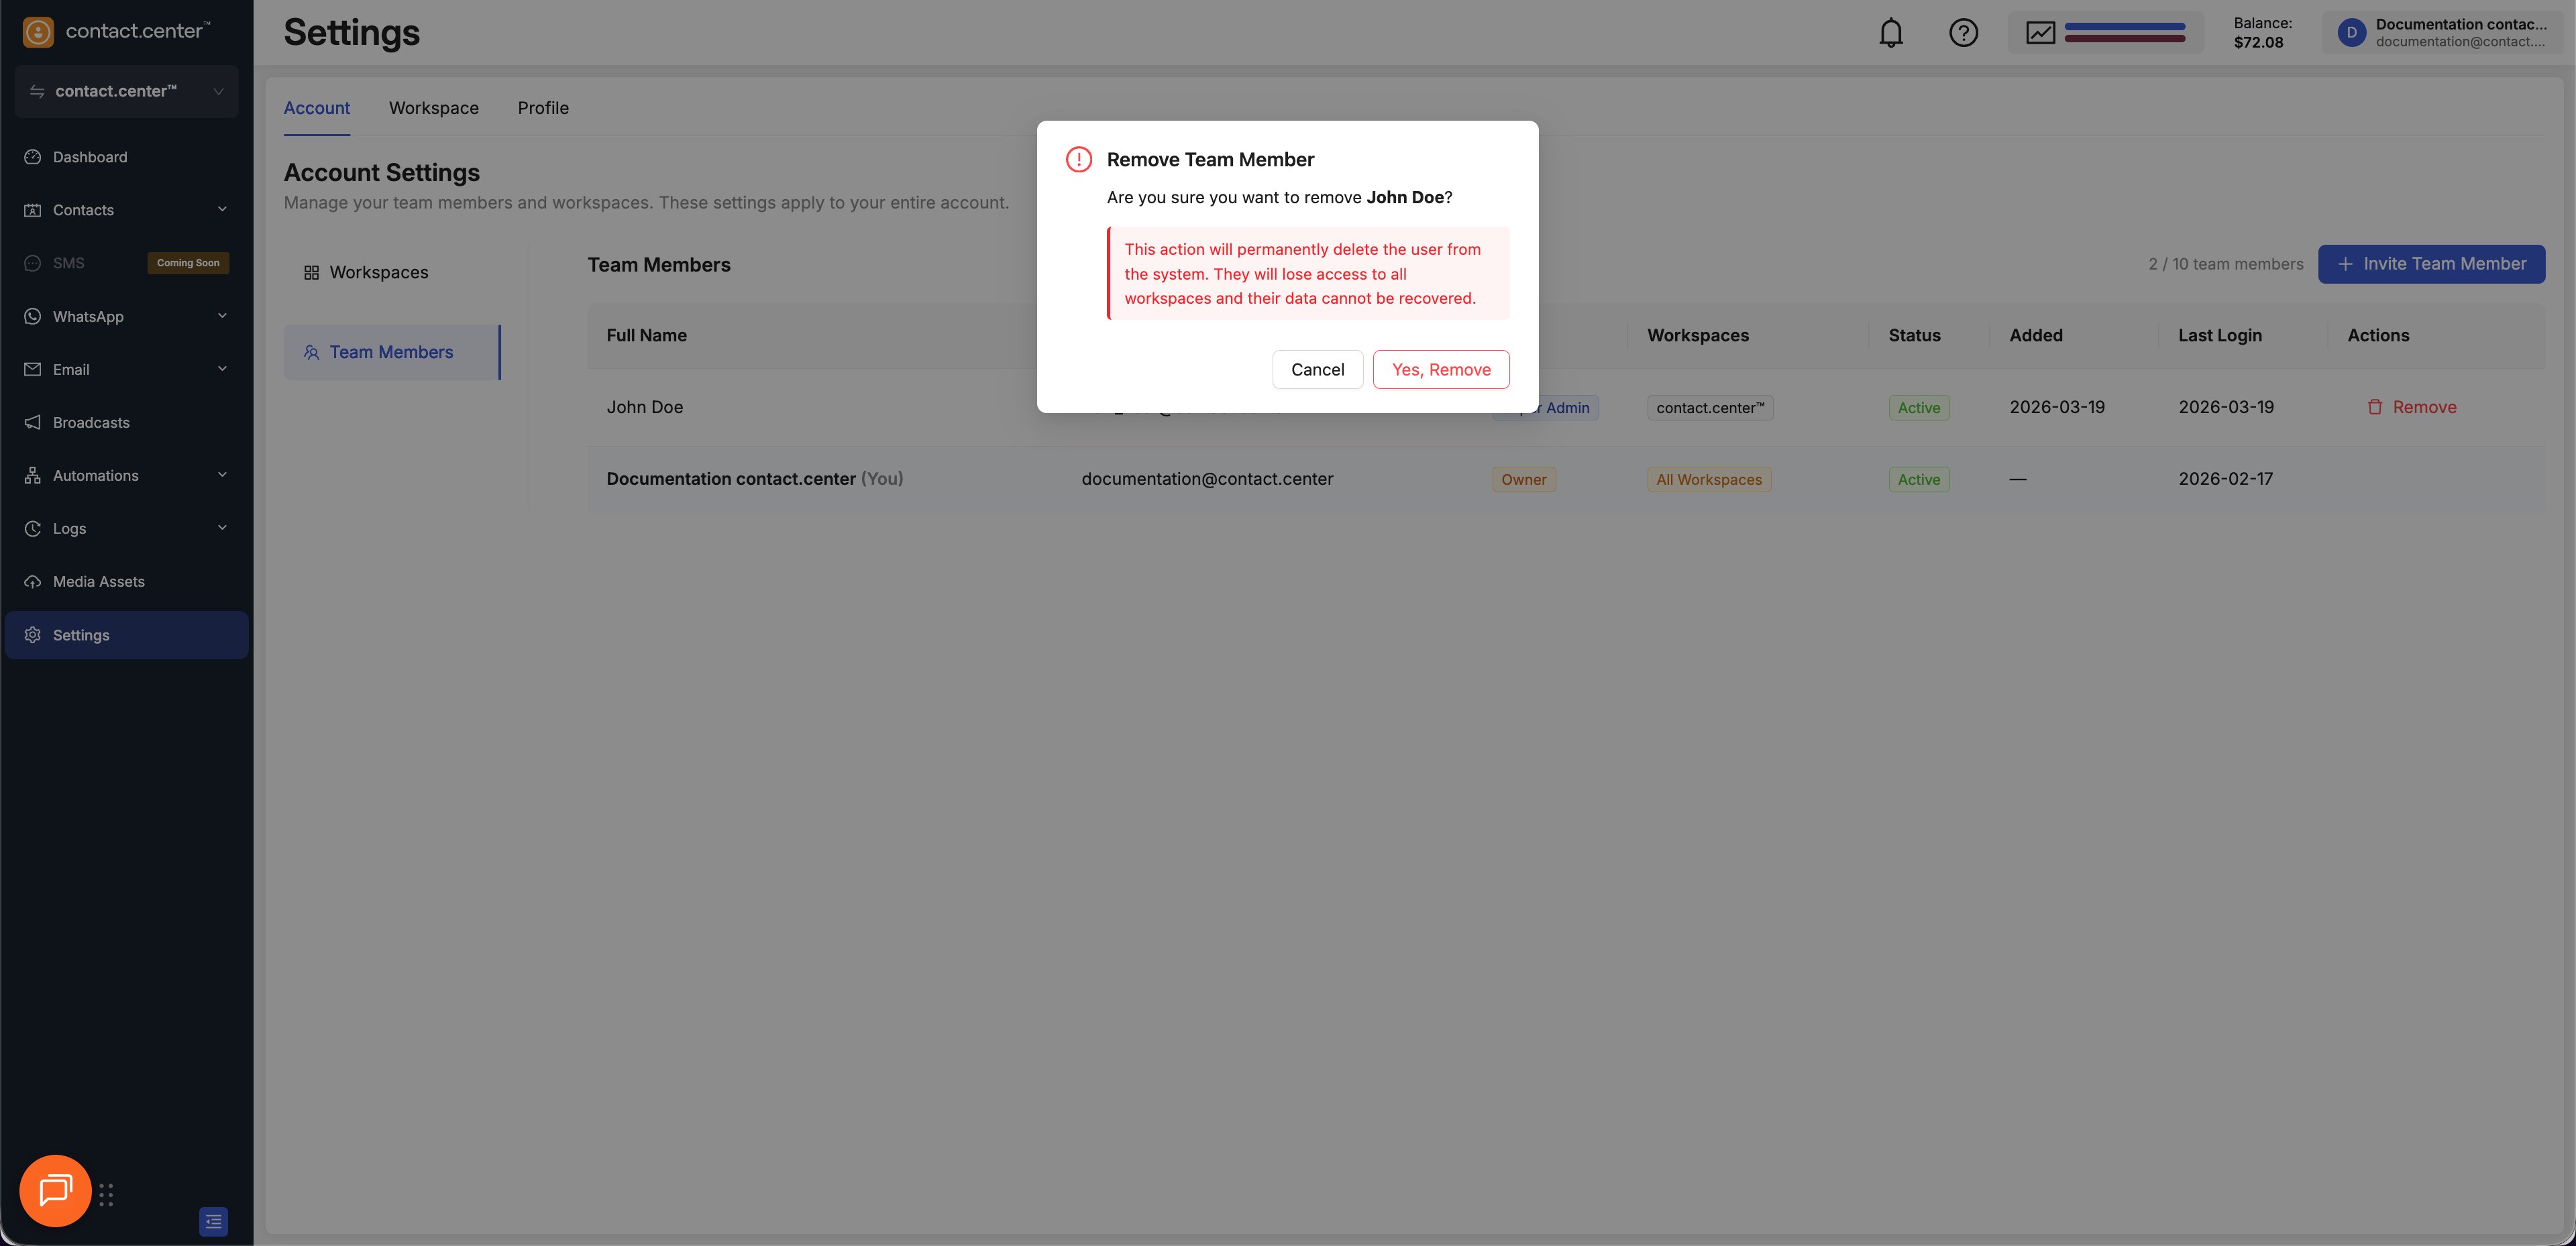
Fig. 9. Confirm removing a team member.
Accept a Team Member Invitation
If you receive a team member invitation, follow these steps to complete registration and access the workspace.
Note
If you do not see the invitation in your main inbox, check your other email folders, such as Spam, Junk or Promotions.
Step 1: Open the Invitation Email
Open the team member invitation from contact.center™.
Click Accept Invite.
Step 2: Complete Registration
Enter your first name and last name.
Choose whether to receive updates and promotions.
Click Accept Invitation.
Step 3: Access the Workspace
After completing registration, the team member is automatically signed in and gains access to the assigned workspace.