WhatsApp Templates
Use WhatsApp templates to create pre-approved messages for customer communication in WhatsApp. Templates let you send structured messages with text, media, buttons, and variables so you can reach contacts consistently and use them in broadcasts, automations, or other messaging workflows.
Create WhatsApp Template
Use the New WhatsApp Template page to create a WhatsApp message template with text, media, buttons, and variables. Follow the steps below to configure the template, preview how it will appear in WhatsApp, and then save it as a draft or submit it for review.
Before You Begin
A verified WhatsApp Business Account is required to use WhatsApp templates. See WhatsApp integration.
A positive account balance is required to send WhatsApp messages. If needed, top up your balance.
Step 1: Open the New WhatsApp Template Page
To start creating a new WhatsApp template, navigate to the Templates list and open the template creation page.
In the left navigation menu, go to WhatsApp → Templates.
In the top-right corner of the page, click + Create WhatsApp Template.
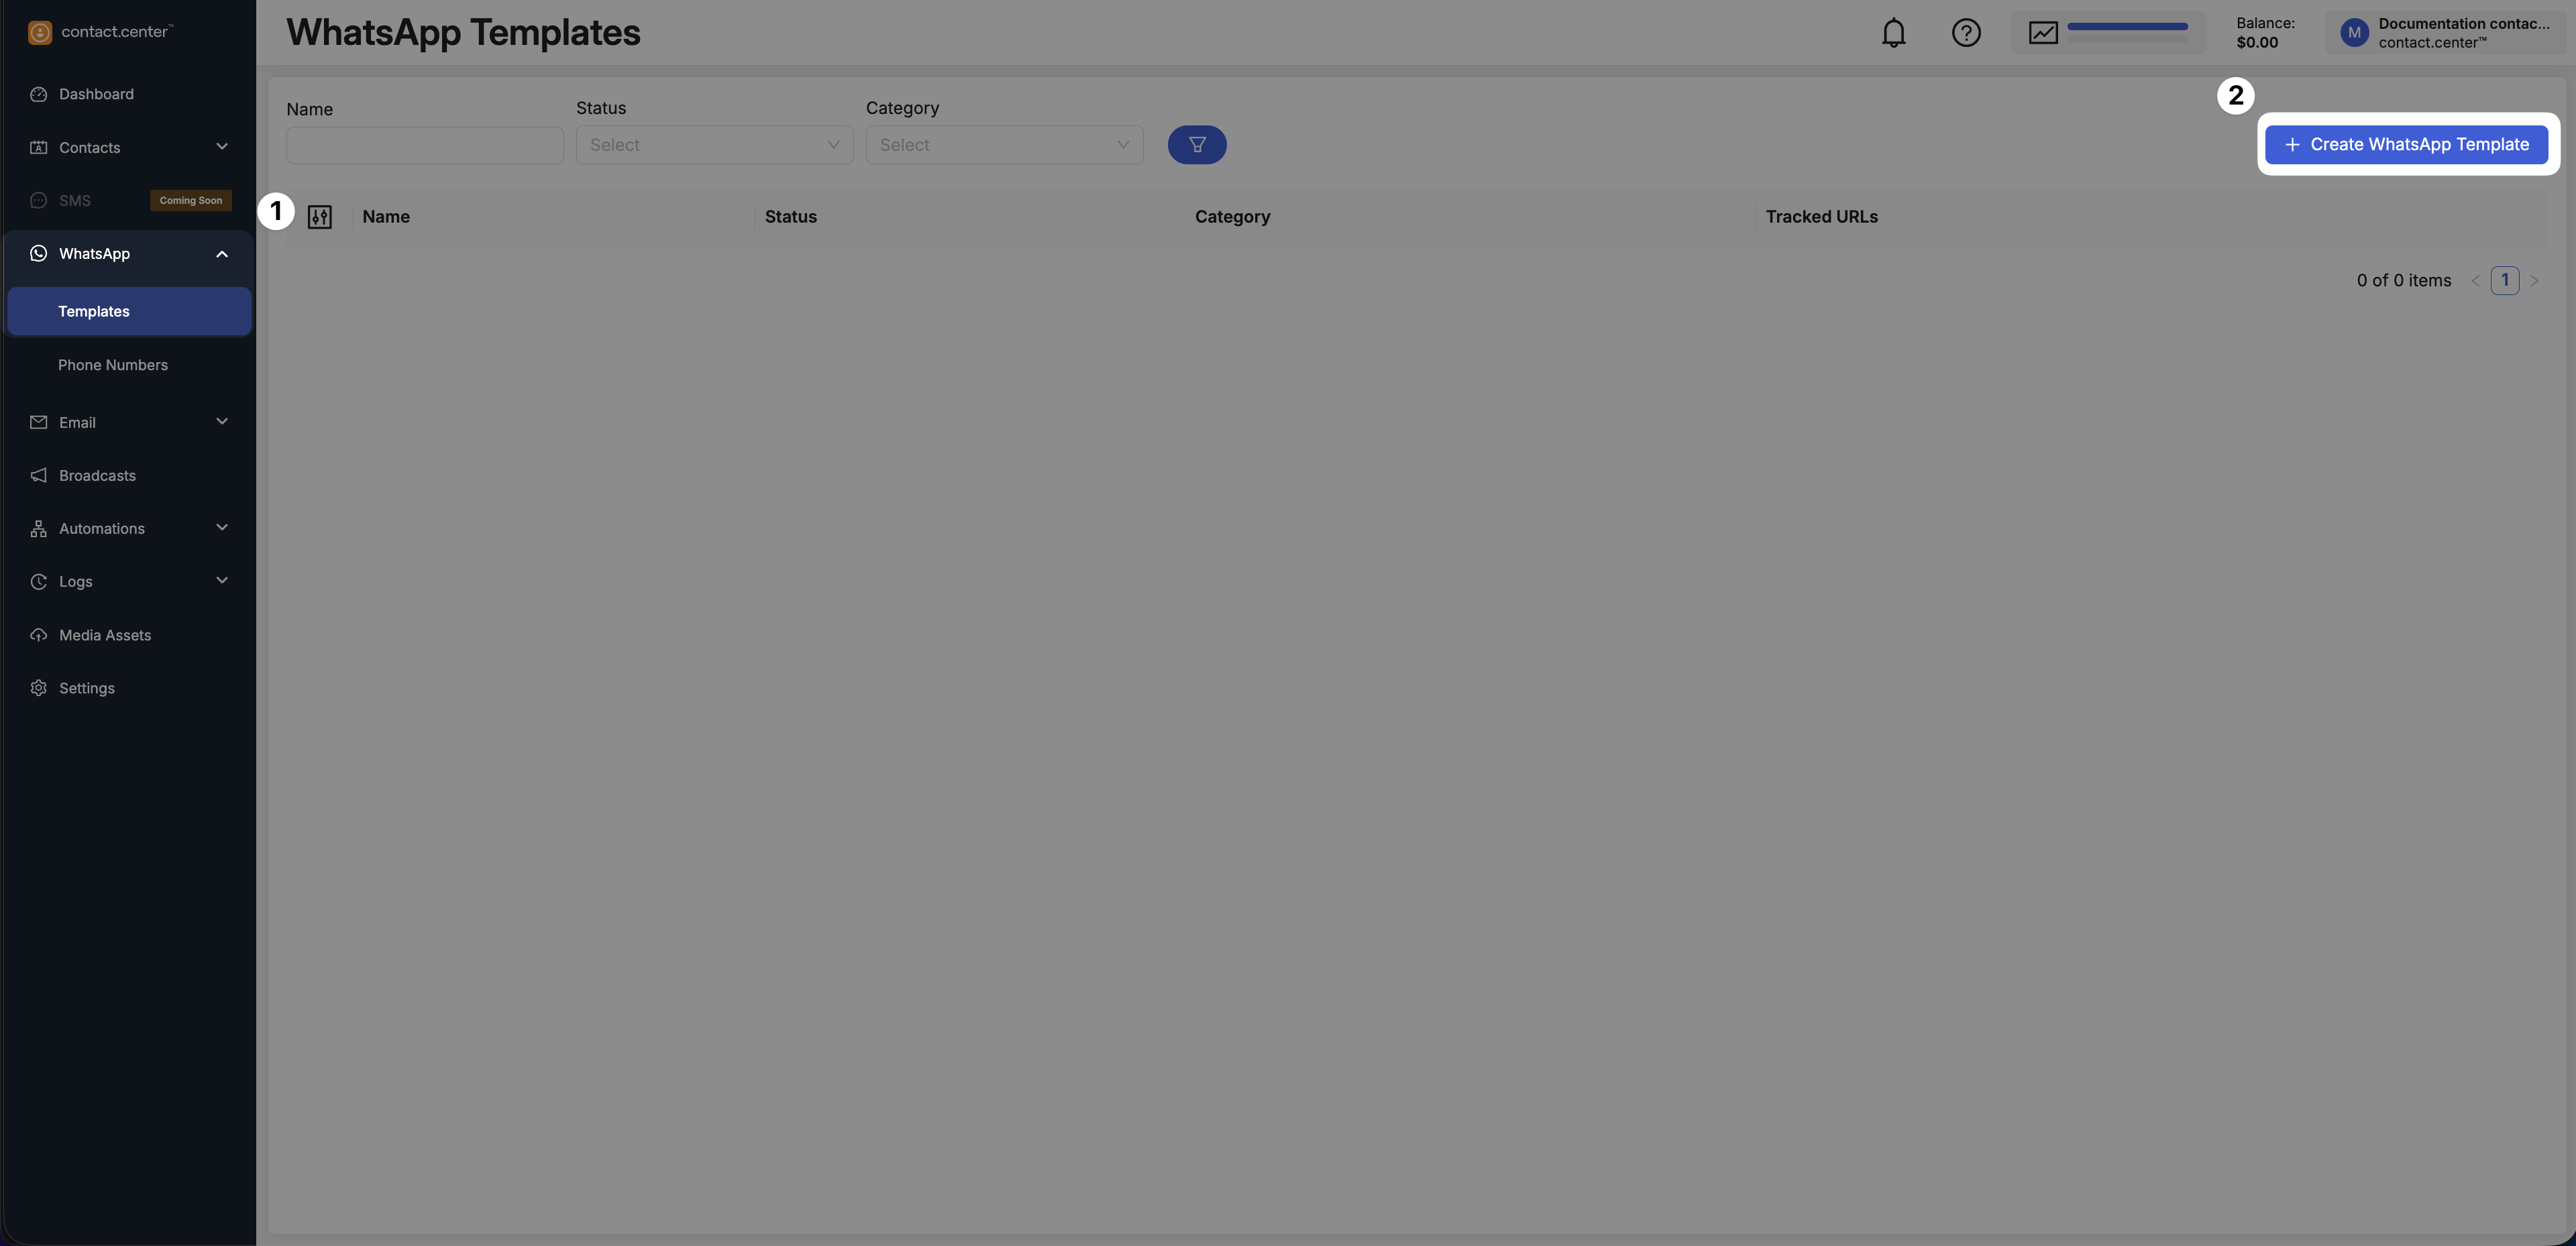
Fig. 1. WhatsApp Templates page with the Create WhatsApp Template action
Step 2: Configure Basic Template Information
Fill in the following fields:
Name: Enter a name for your WhatsApp template.
Category: Select a category such as Marketing or Utility.
Language: Choose the language used in the message content.
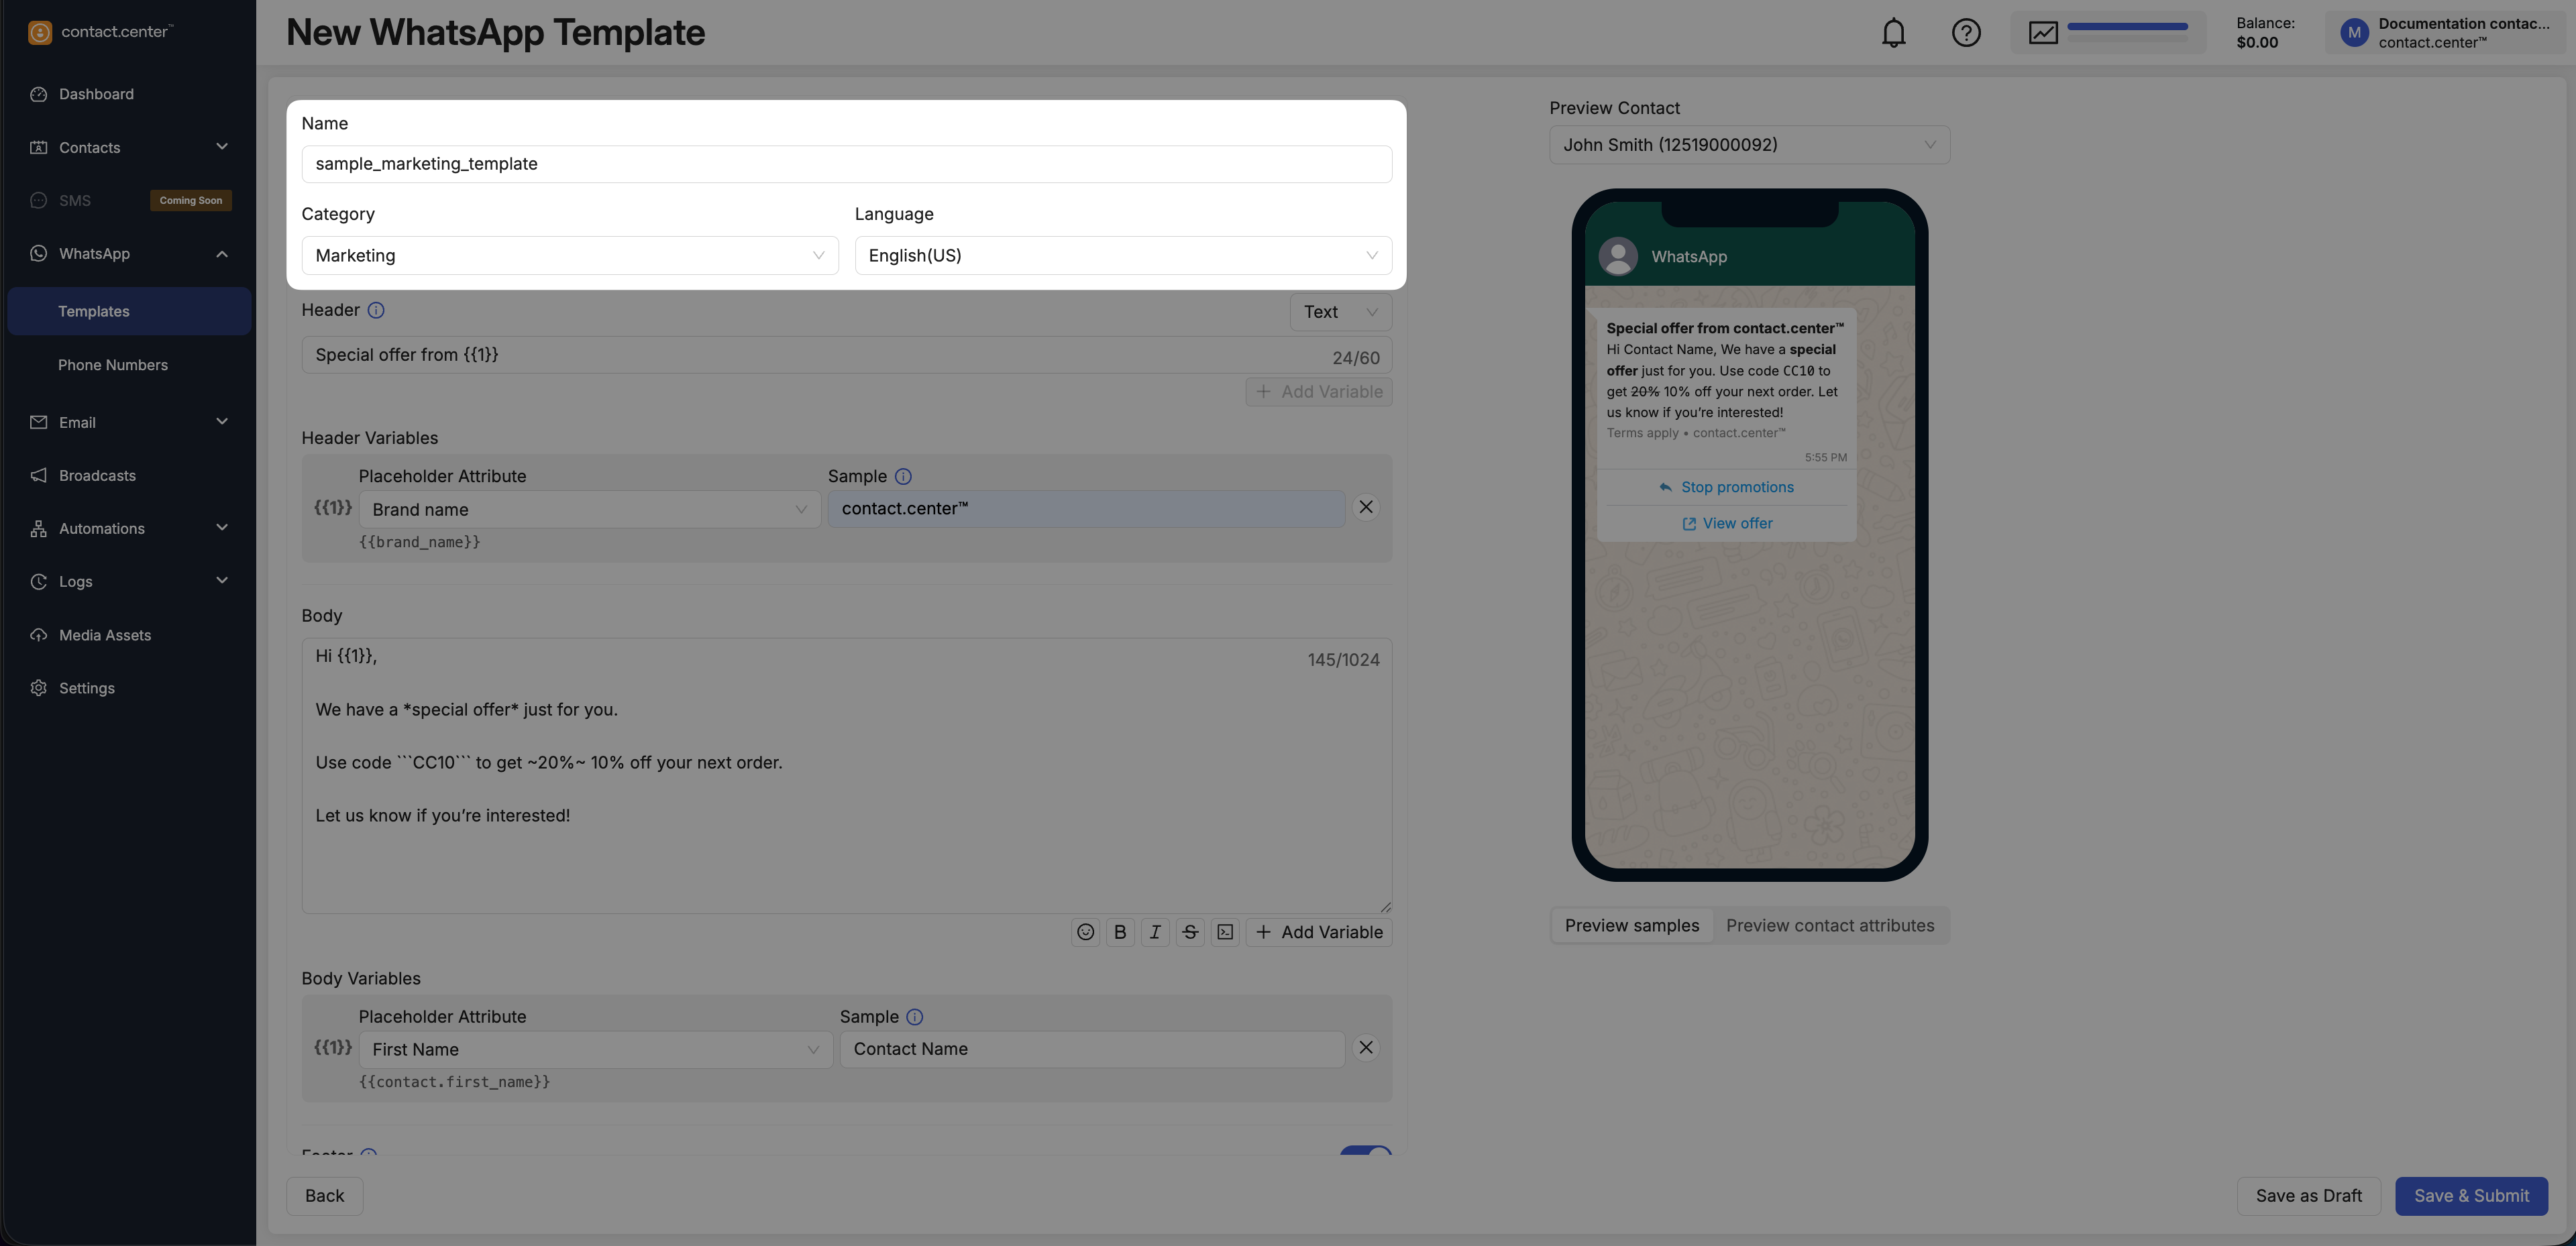
Fig. 2. Basic information fields
Step 3: Build message content
Define the content of the WhatsApp message so recipients can clearly understand it when they receive it.
Note
Use the editor on the left to configure the Header, Body, and Footer sections. The WhatsApp message preview on the right updates as you make changes.
1. Header
The Header appears above the body text. Use it to add a short title or media before the main message.
Choose one of the following header types:
Select None if you do not want to include a header.
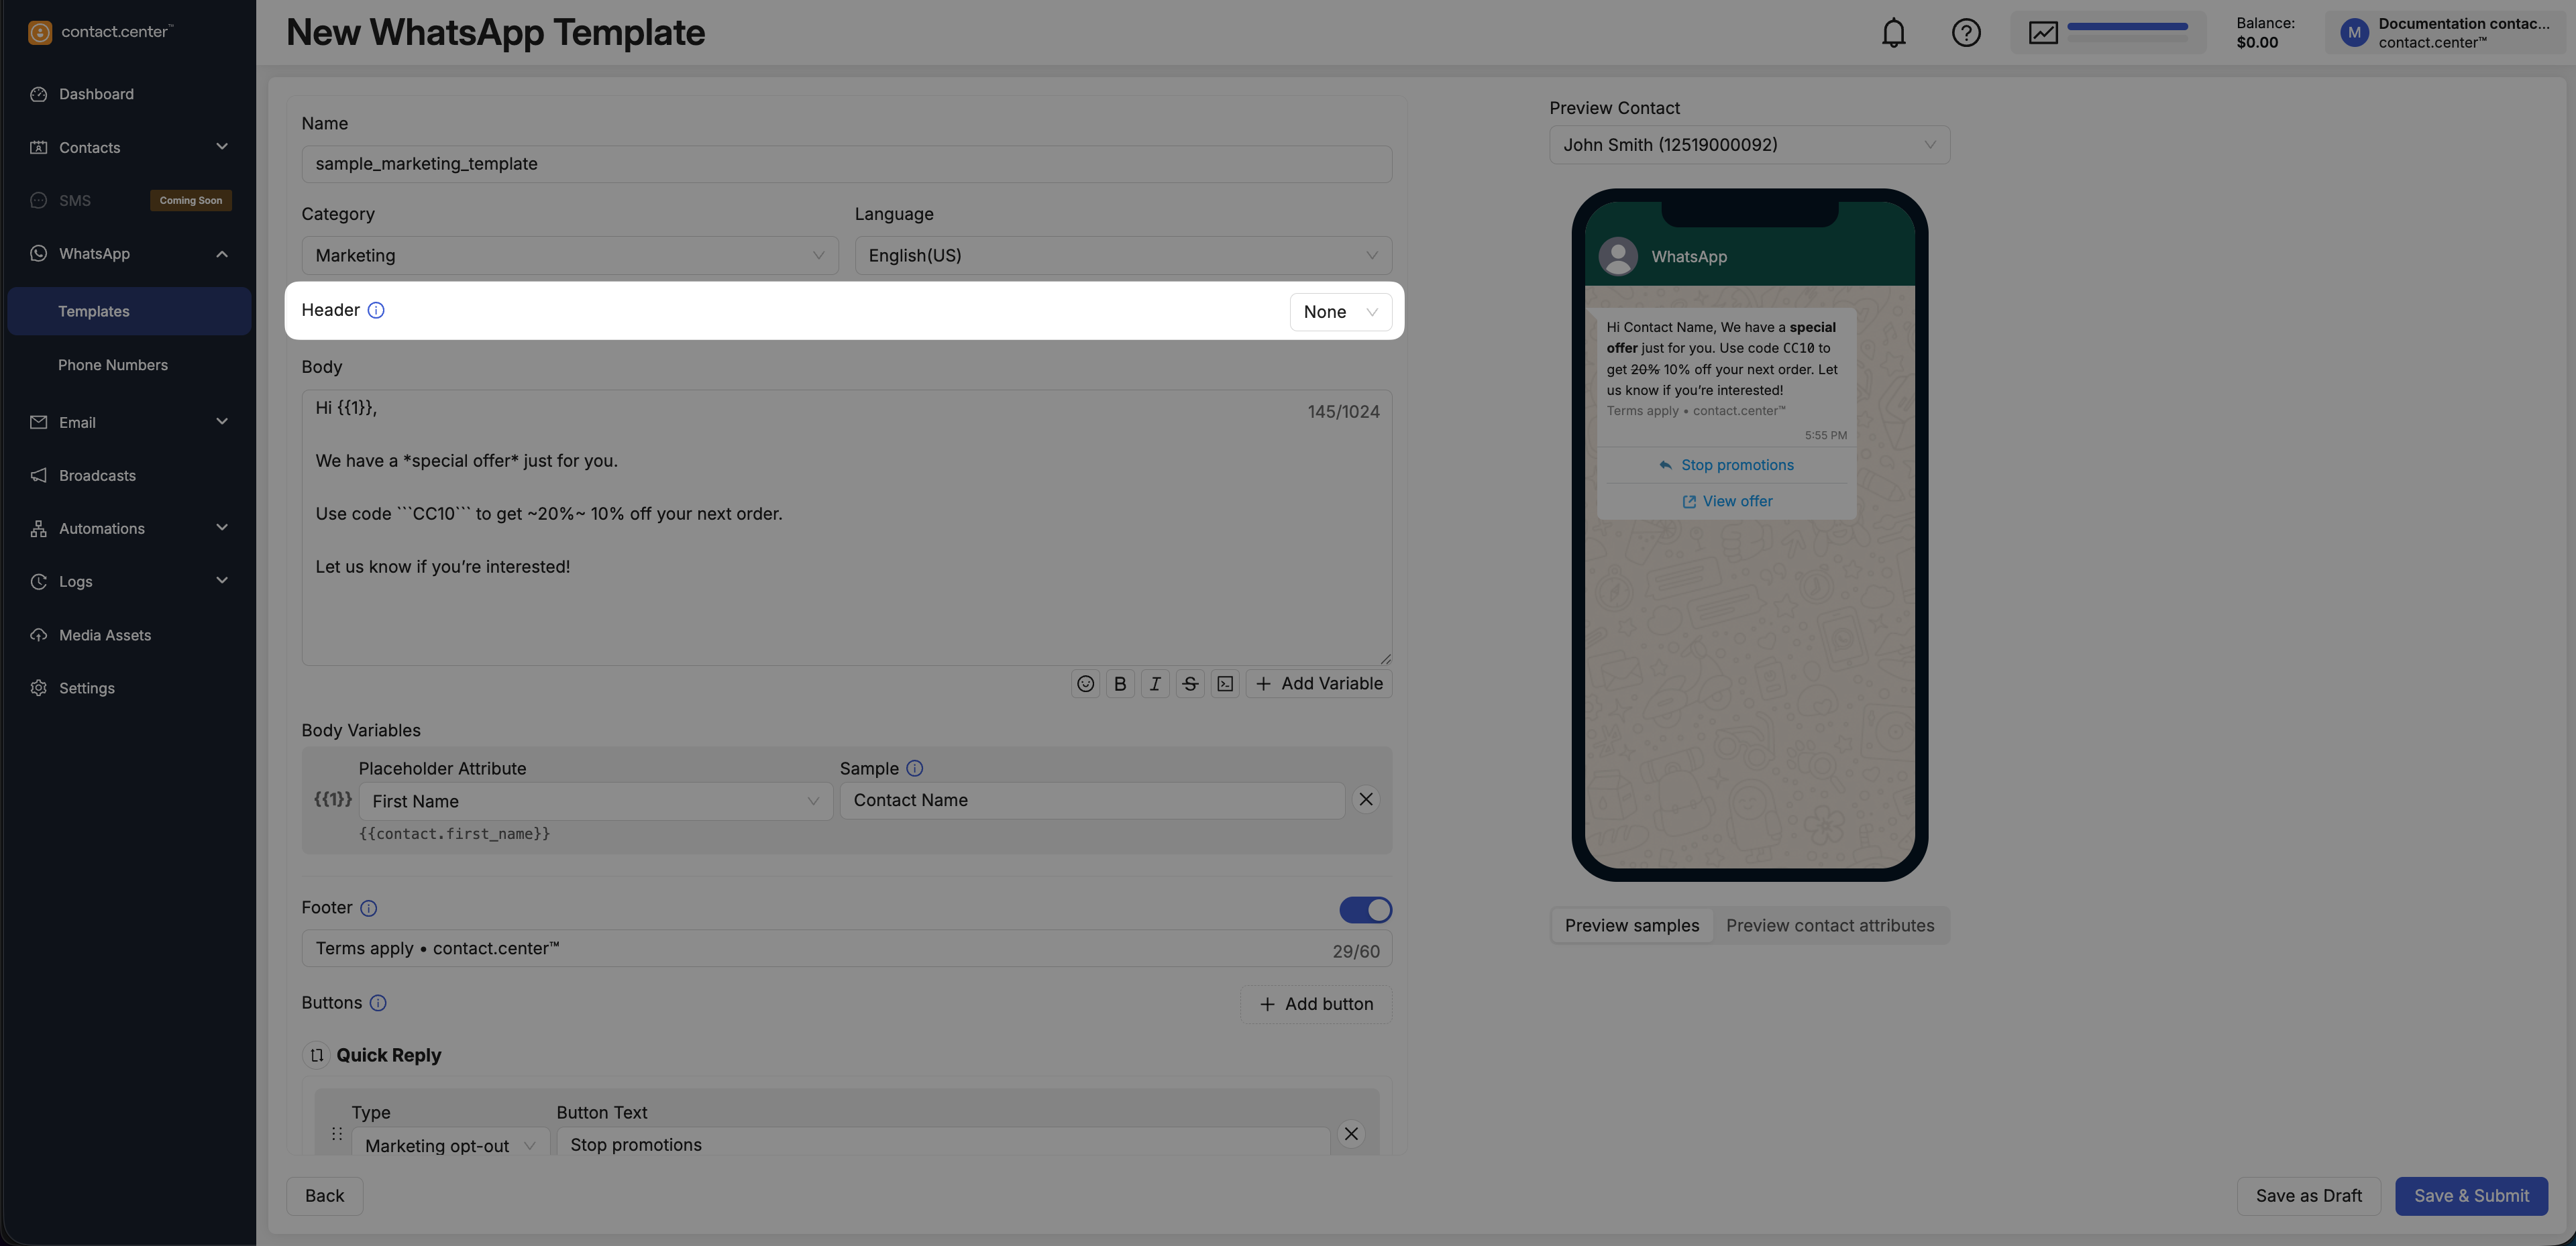
Fig. 3. Header type set to None
Select Text to display a short header above the message body, such as a title, label, or short context.
In the Header section, select Text.
Enter the header text.
Optional: click Add Variable to insert one header variable.
In Placeholder Attribute, select a contact attribute.
In Sample, enter a fictional value for preview purposes.
Note
The header text can be up to 60 characters long.
A header can contain only one variable.
Sample values are used only in the preview.
Do not enter real customer data in sample fields.
The available Placeholder Attributes come from your contact attributes, including system and custom attributes. For more information, see Contact Attributes.
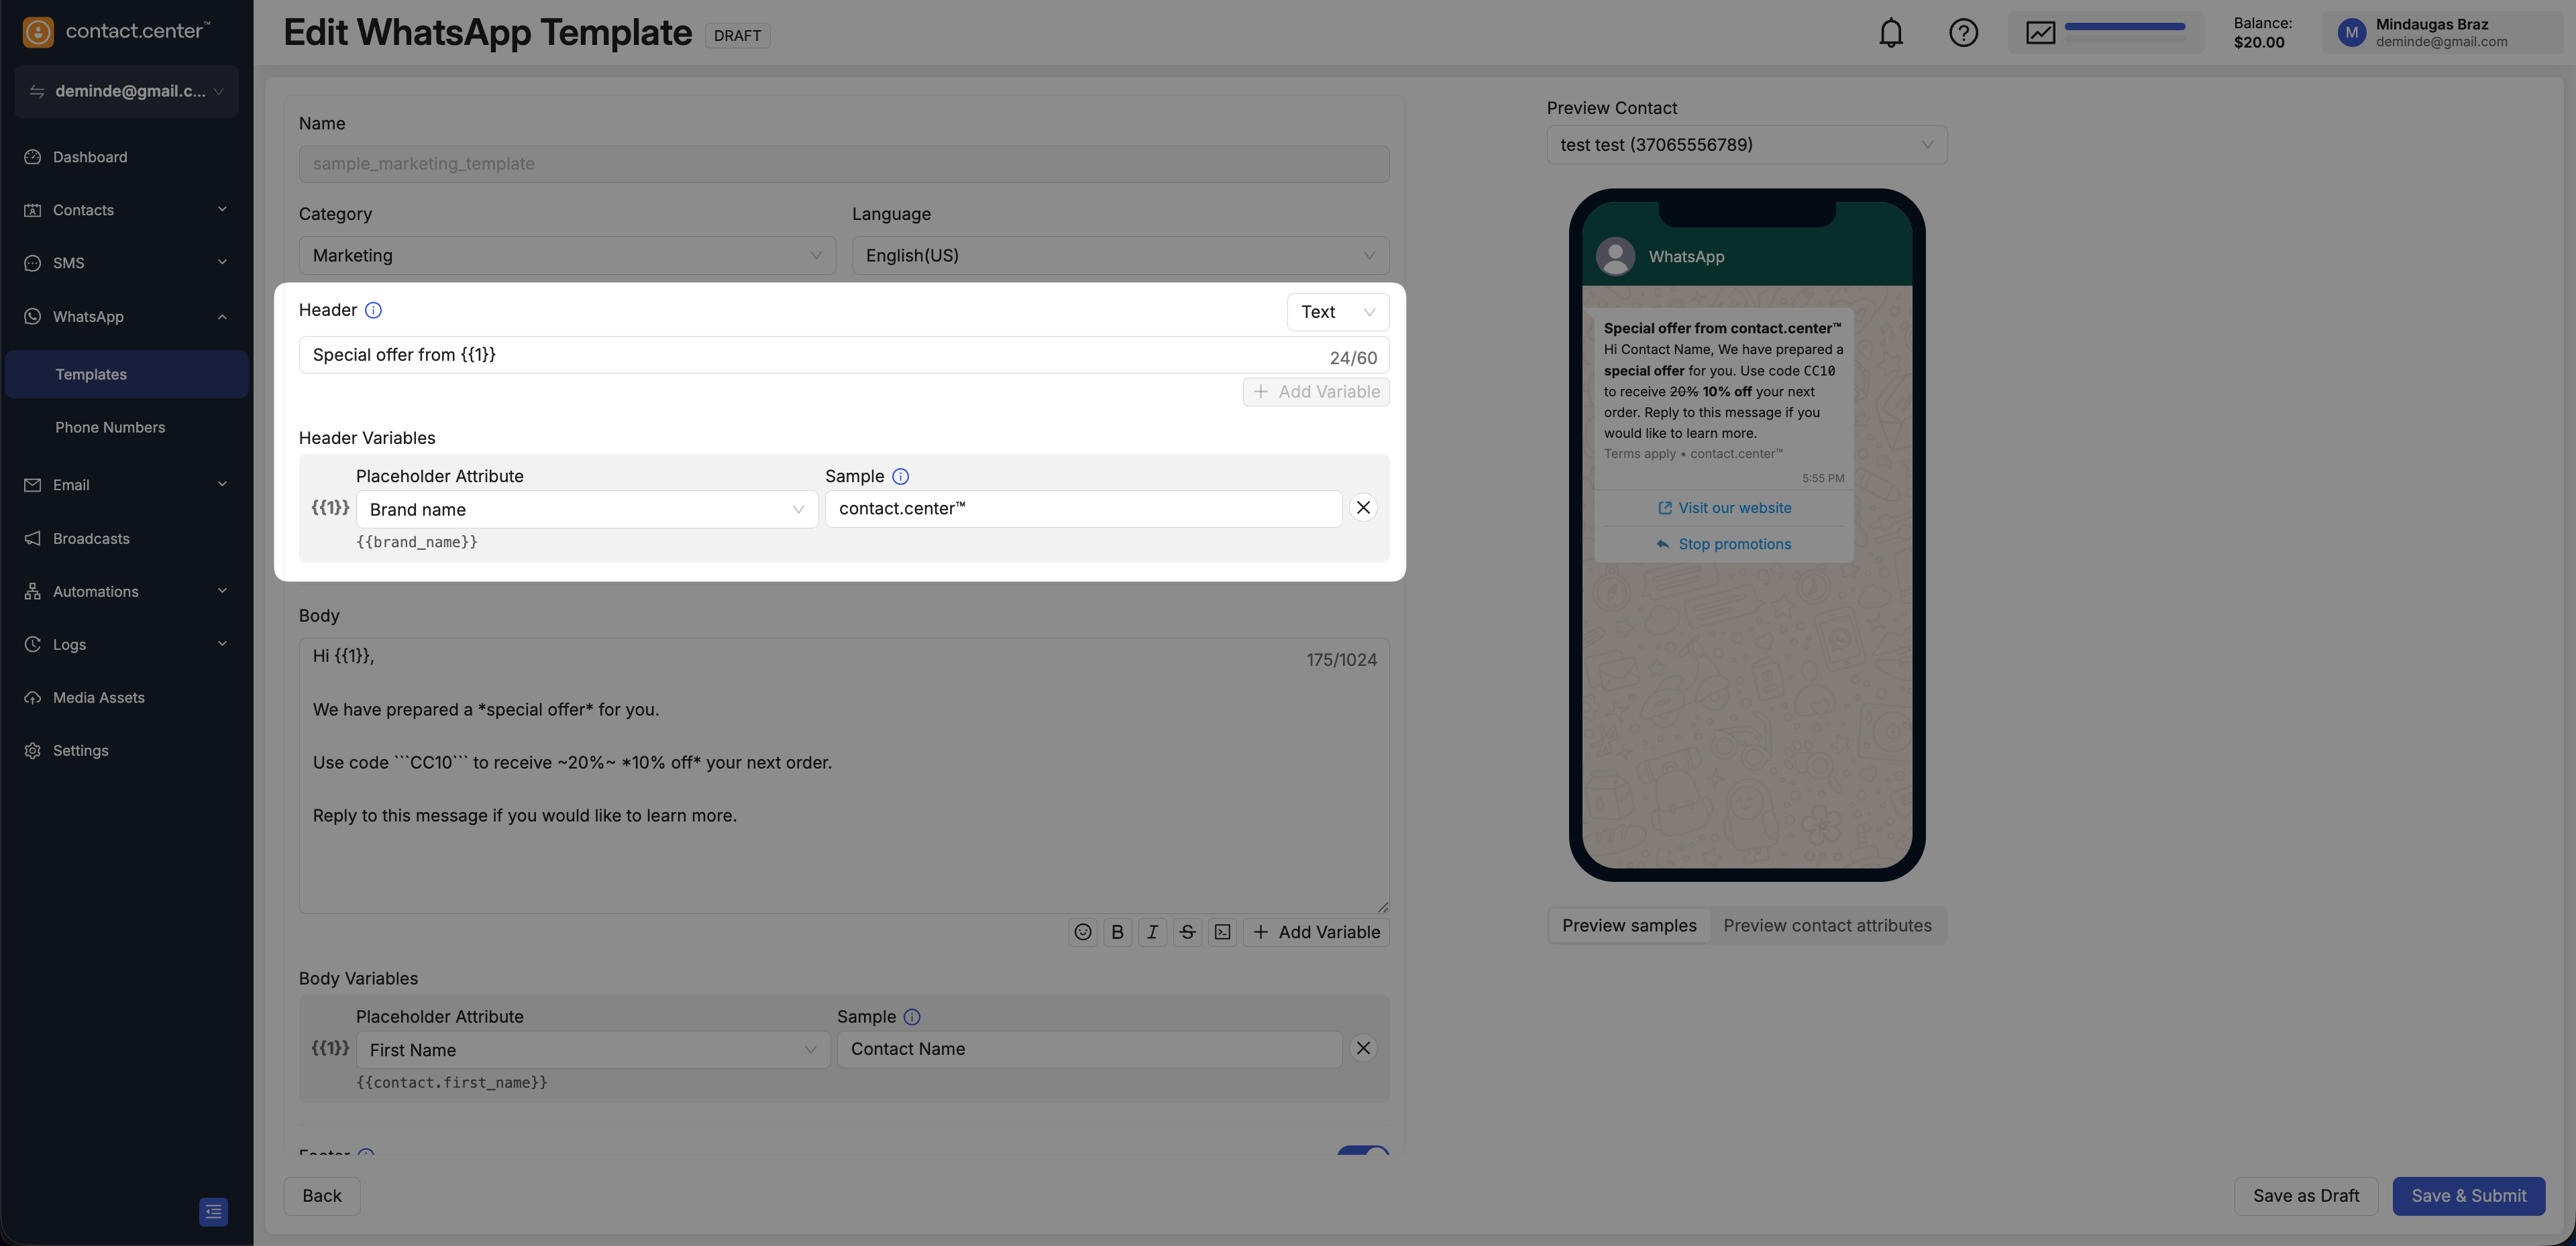
Fig. 4. Text header and variable configuration
Select Media to display an image, video, or document above the message body.
In the Header section, select Media.
In Media Type, choose Image, Video, or Document.
Click Choose File.
In the Content library, upload a file or select an existing one.
Click Insert.
Note
Media files can be uploaded while creating the template or selected from files already available in Media Assets. For more information, see Media Assets.
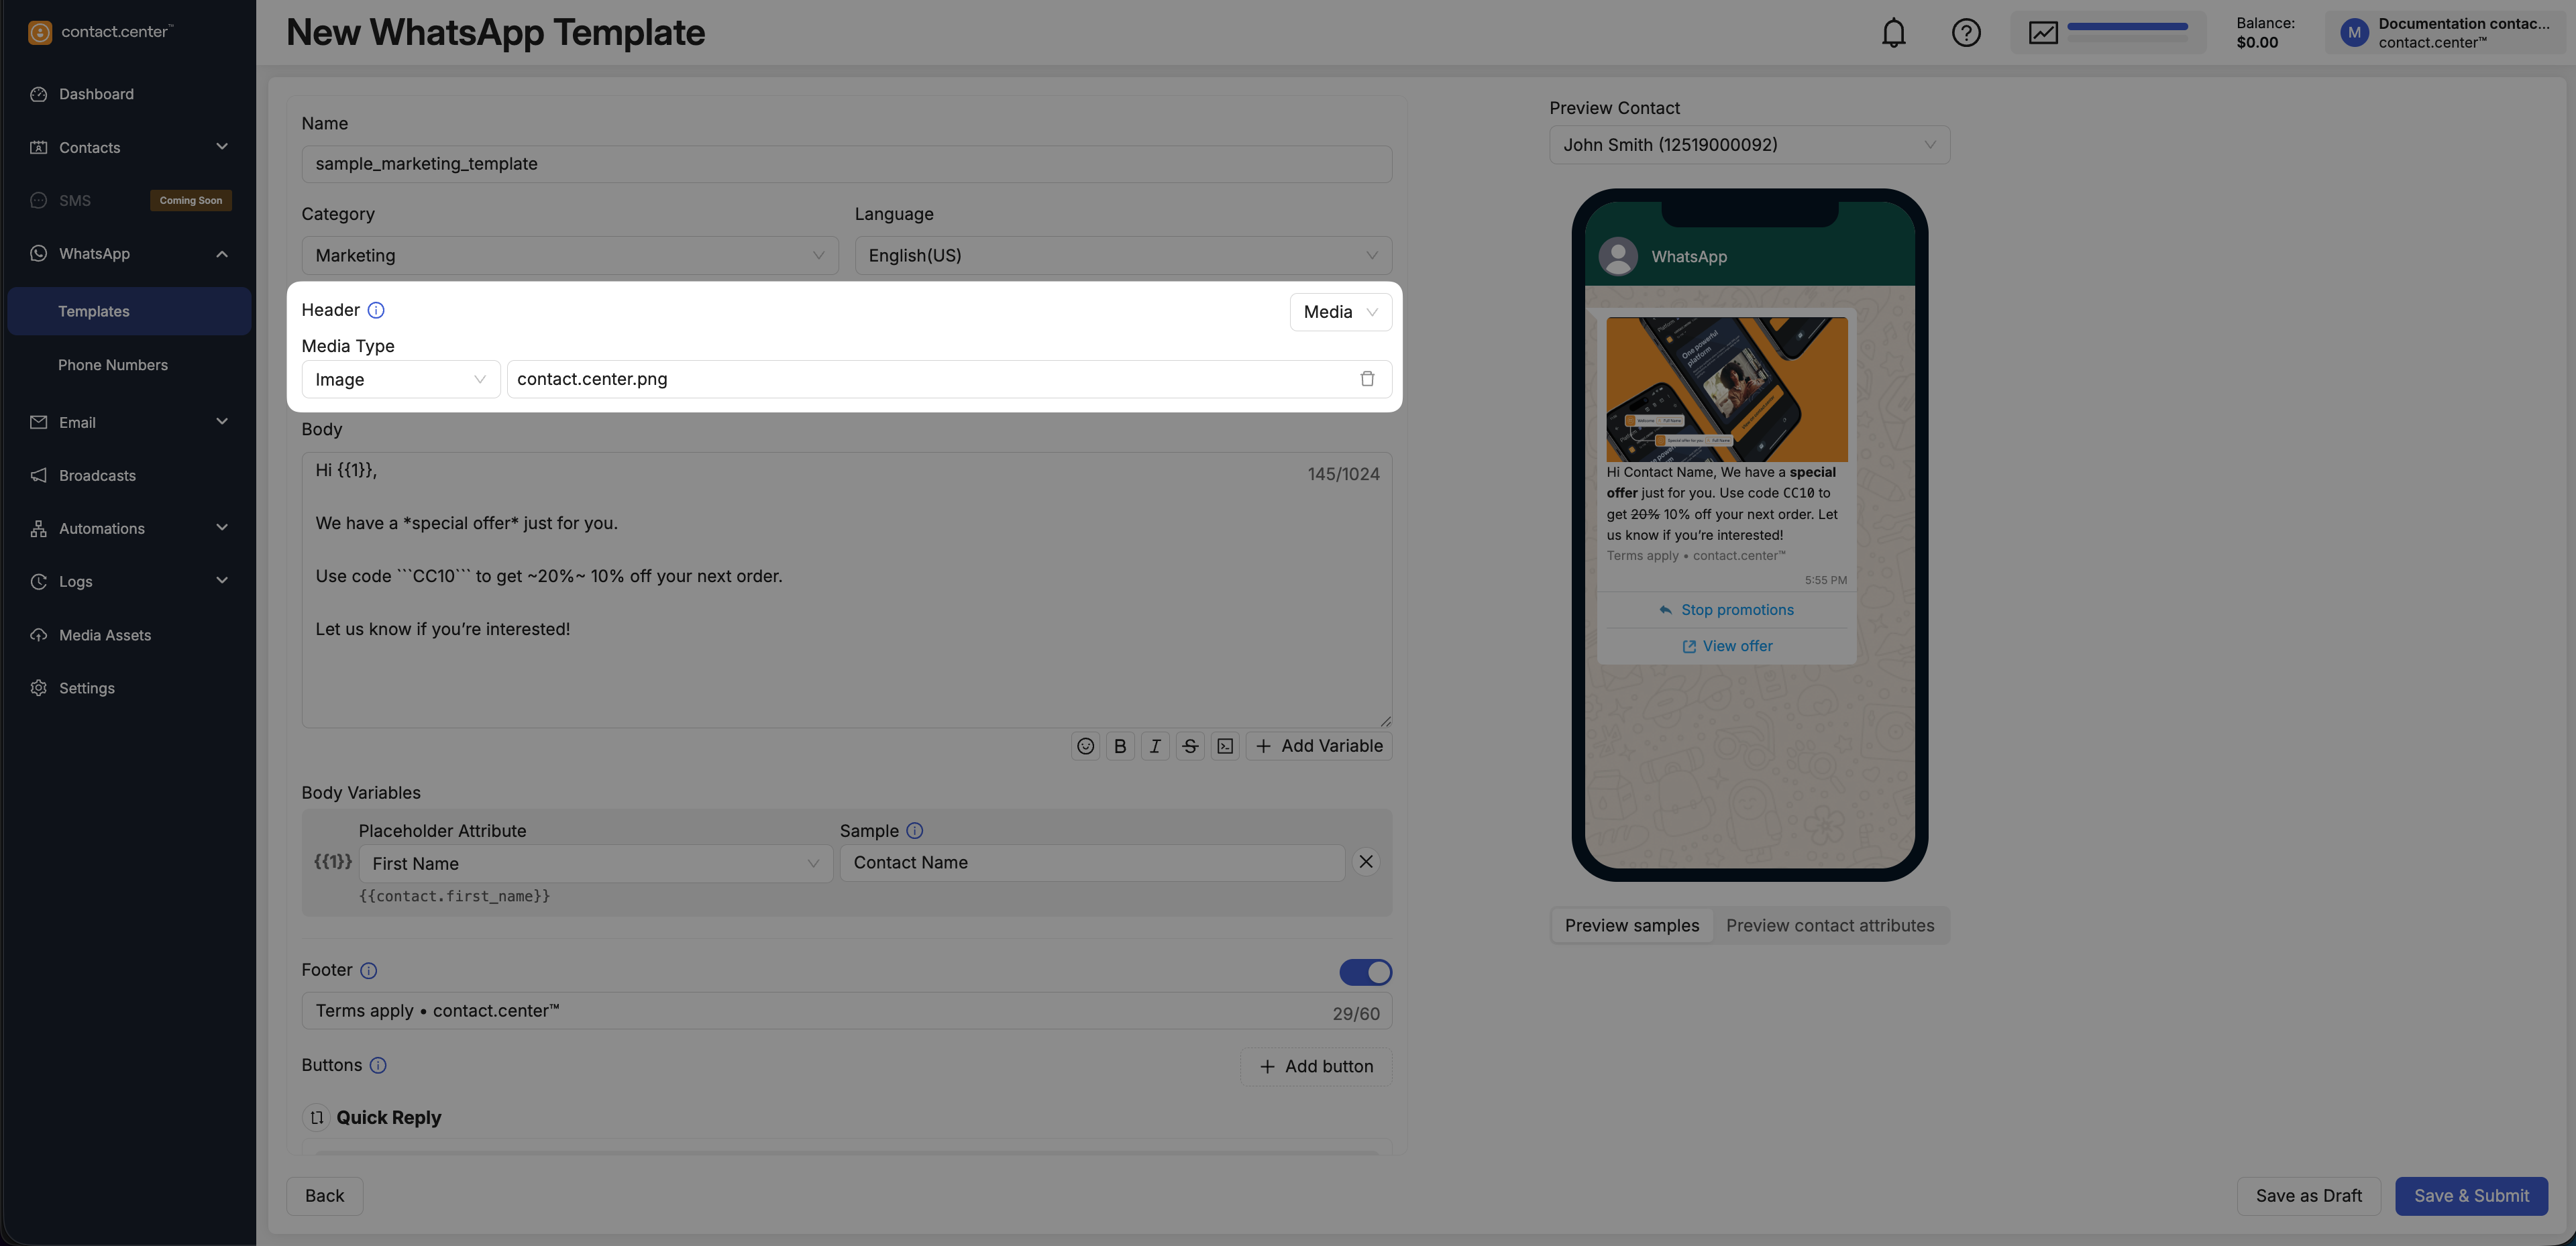
Fig. 5. Media header configured with an attached file
2. Body
The Body contains the main message text shown to the recipient.
Use the body to write the main message, apply formatting, and add variables for personalization.
You can also insert variables into the body to display dynamic values, such as a recipient name or another contact attribute.
Click Add Variable to insert a placeholder such as {{1}} into the message text. Then select the Placeholder Attribute and enter a Sample value for preview purposes.
Note
The body text can be up to 1024 characters long. Always check the preview to confirm the final formatting.
The available Placeholder Attributes come from your contact attributes, including system and custom attributes. For more information, see Contact Attributes.
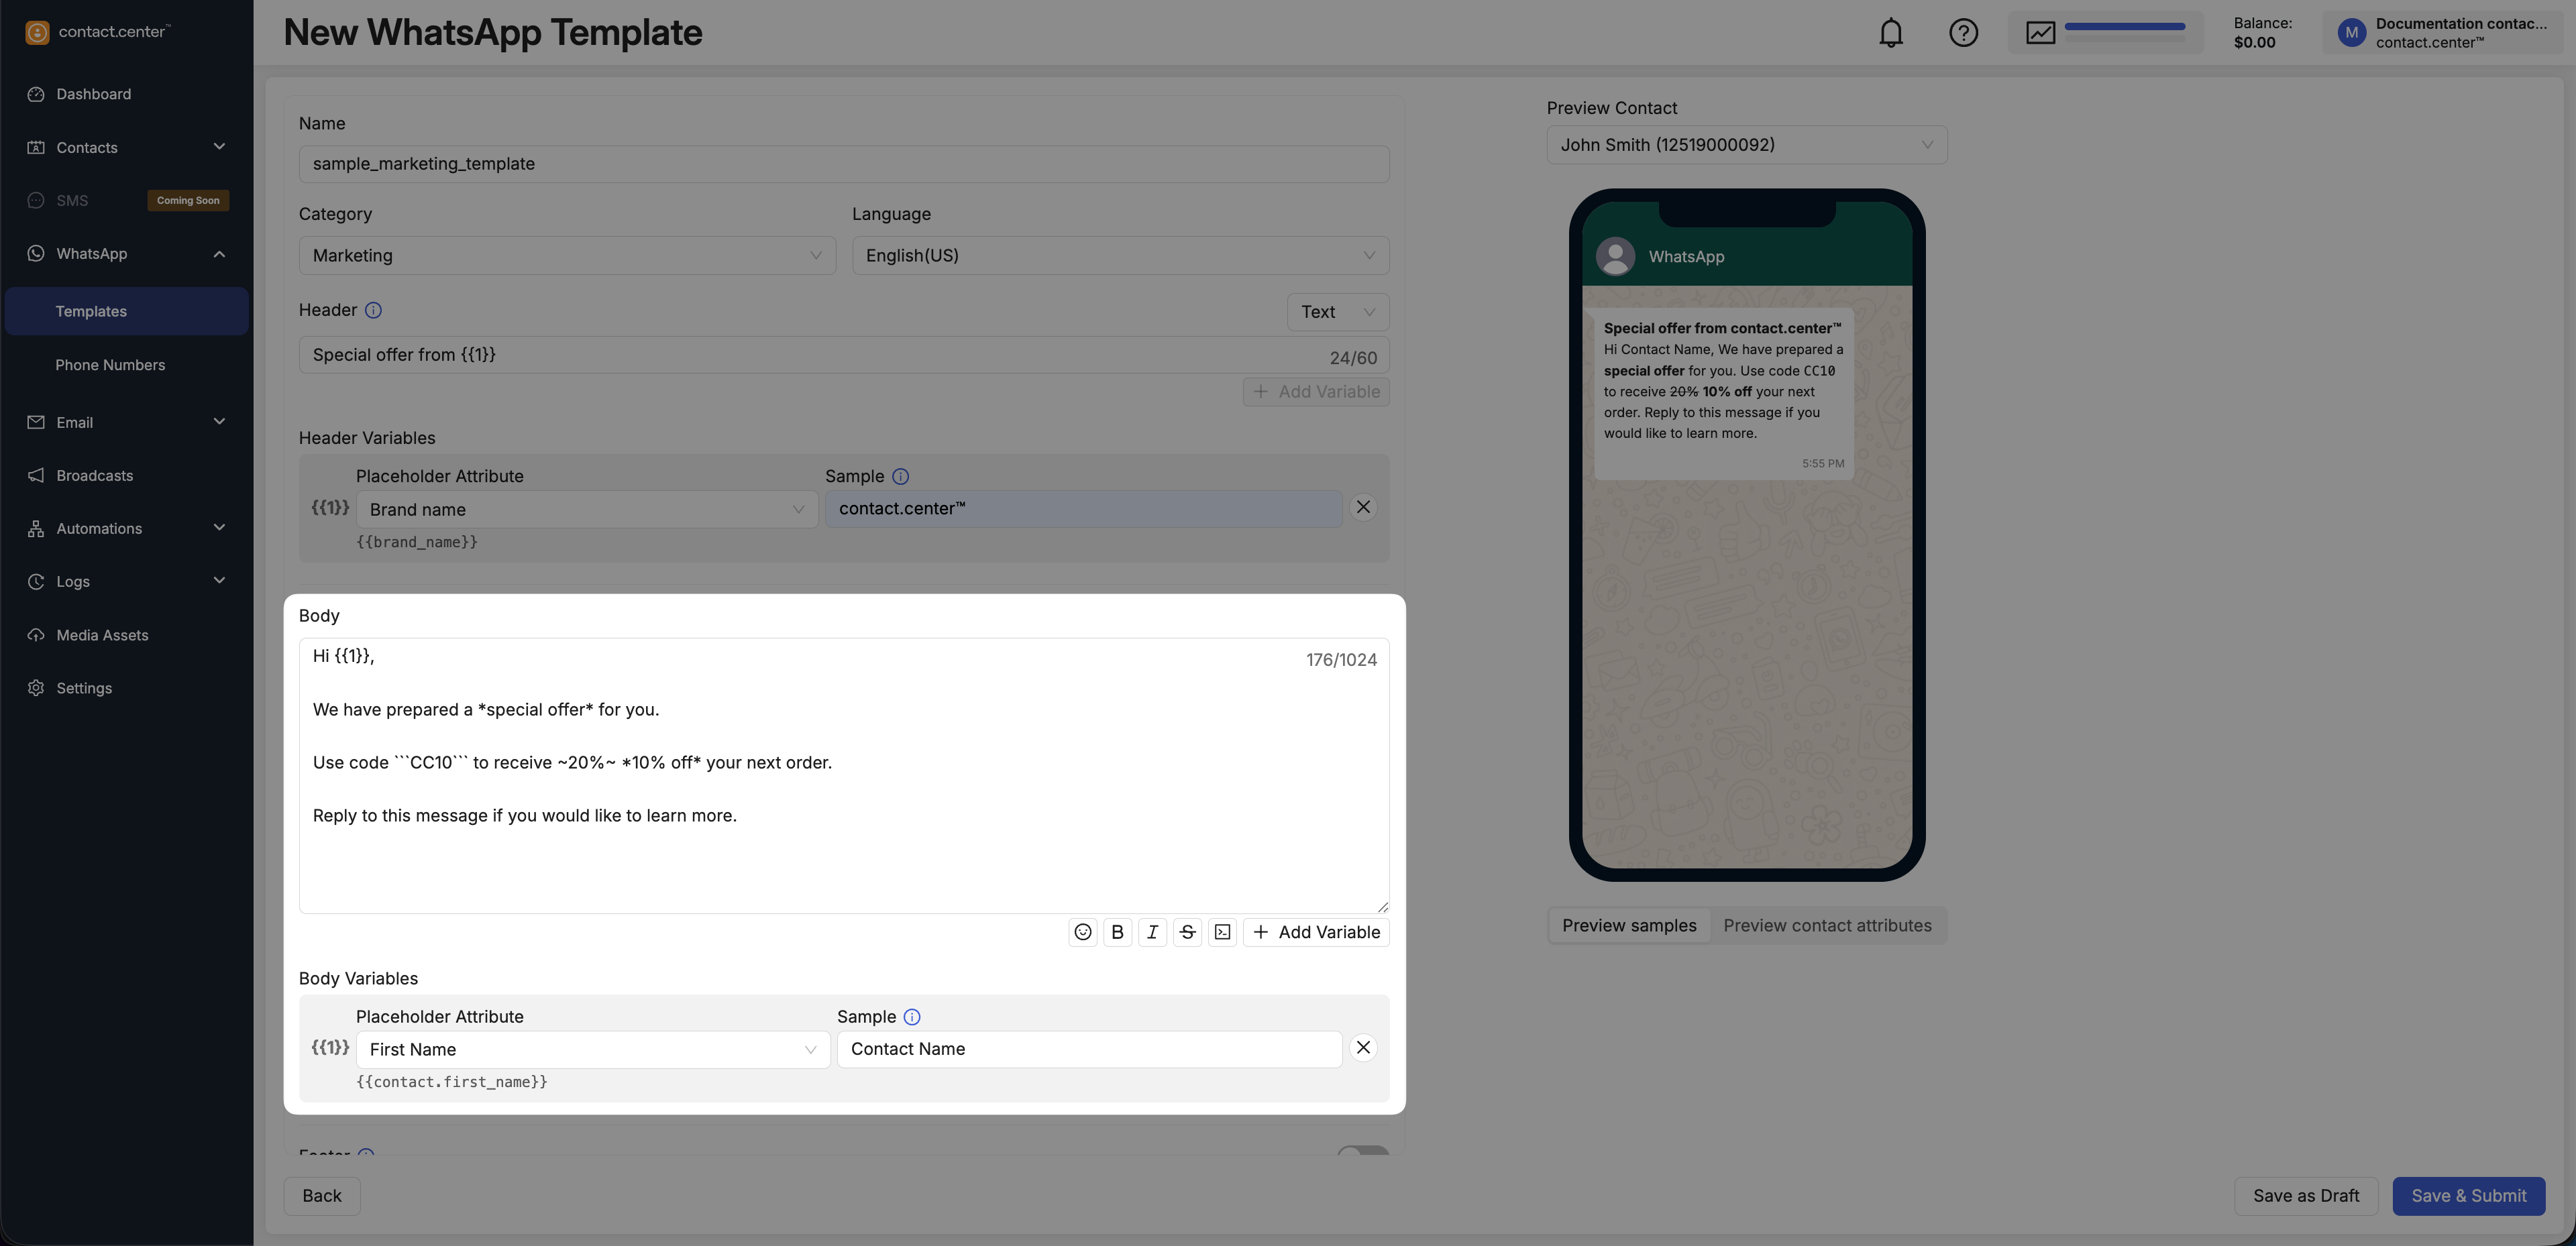
Fig. 6. Body editor
3. Footer
The Footer is an optional short line shown below the body, typically used for a disclaimer, supporting note, or brand message.
In the Footer section, turn on the footer toggle.
Enter the footer text.
Note
The footer text can be up to 60 characters long.
Footer text does not support variables.
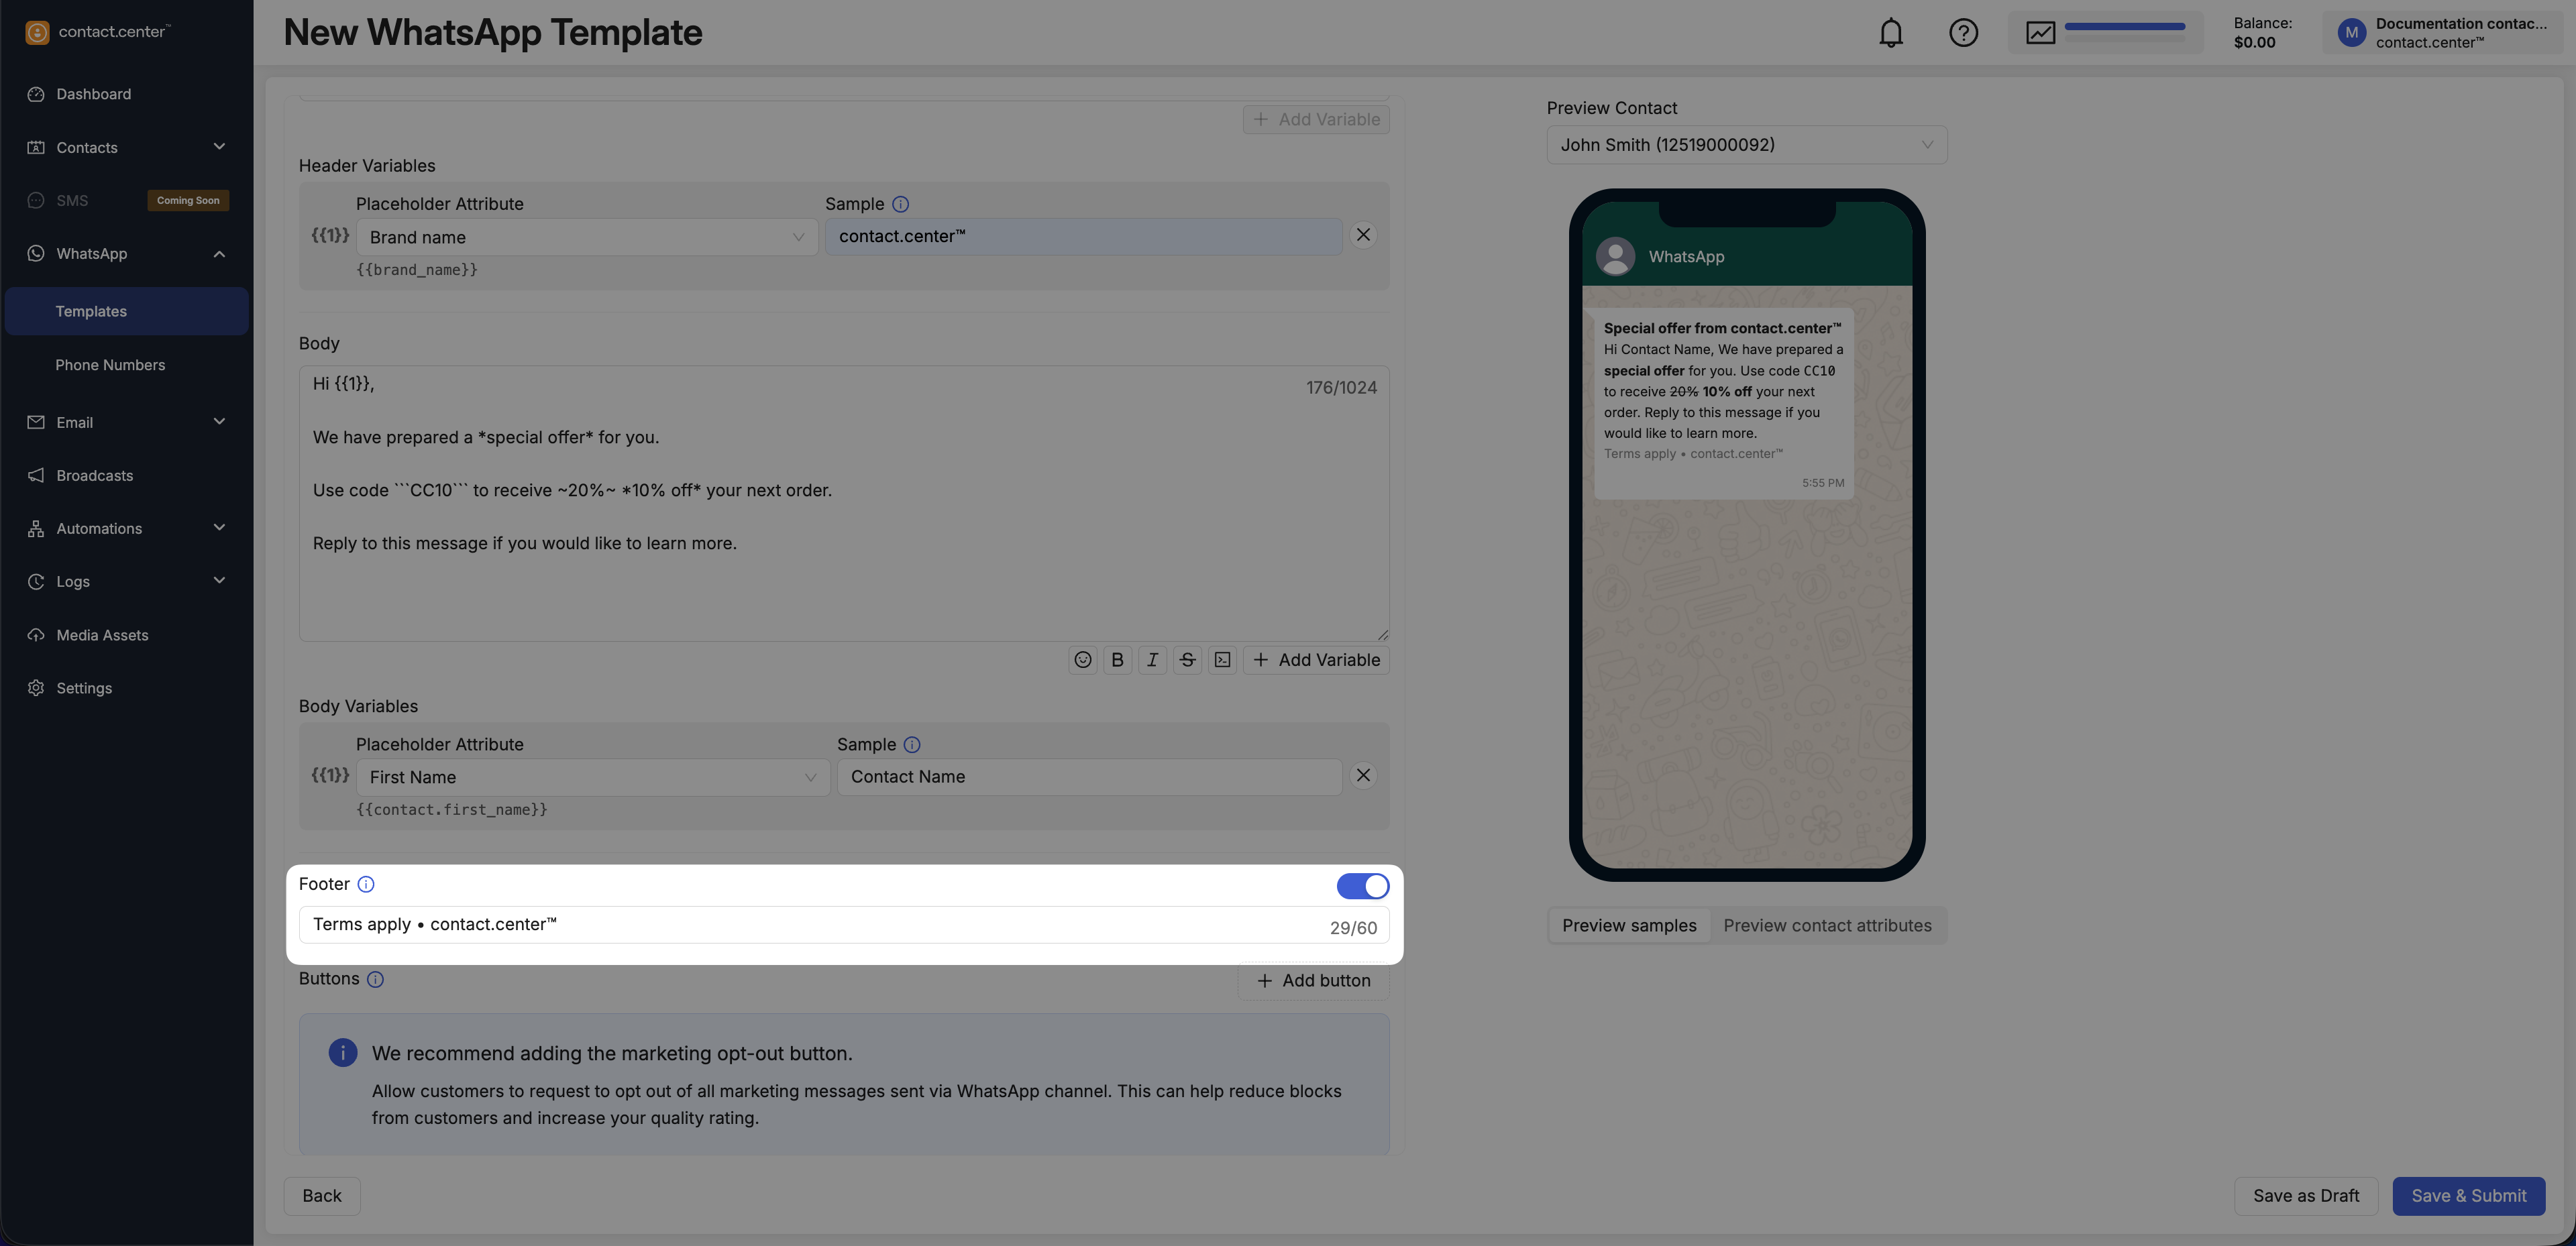
Fig. 7. Footer enabled and configured
Step 4: Add Interactive Buttons (Optional)
Add Quick reply or Call to action buttons to make it easier for recipients to respond or take the next step directly from the message.
Click Add button.
Select a button group and button type.
Configure the fields that appear for the selected option.
Note
You can add up to 10 buttons to a single WhatsApp template.
Quick reply buttons
Custom — Allows the recipient to respond with a custom message.
Marketing opt-out — Enables the recipient to opt out of marketing messages.
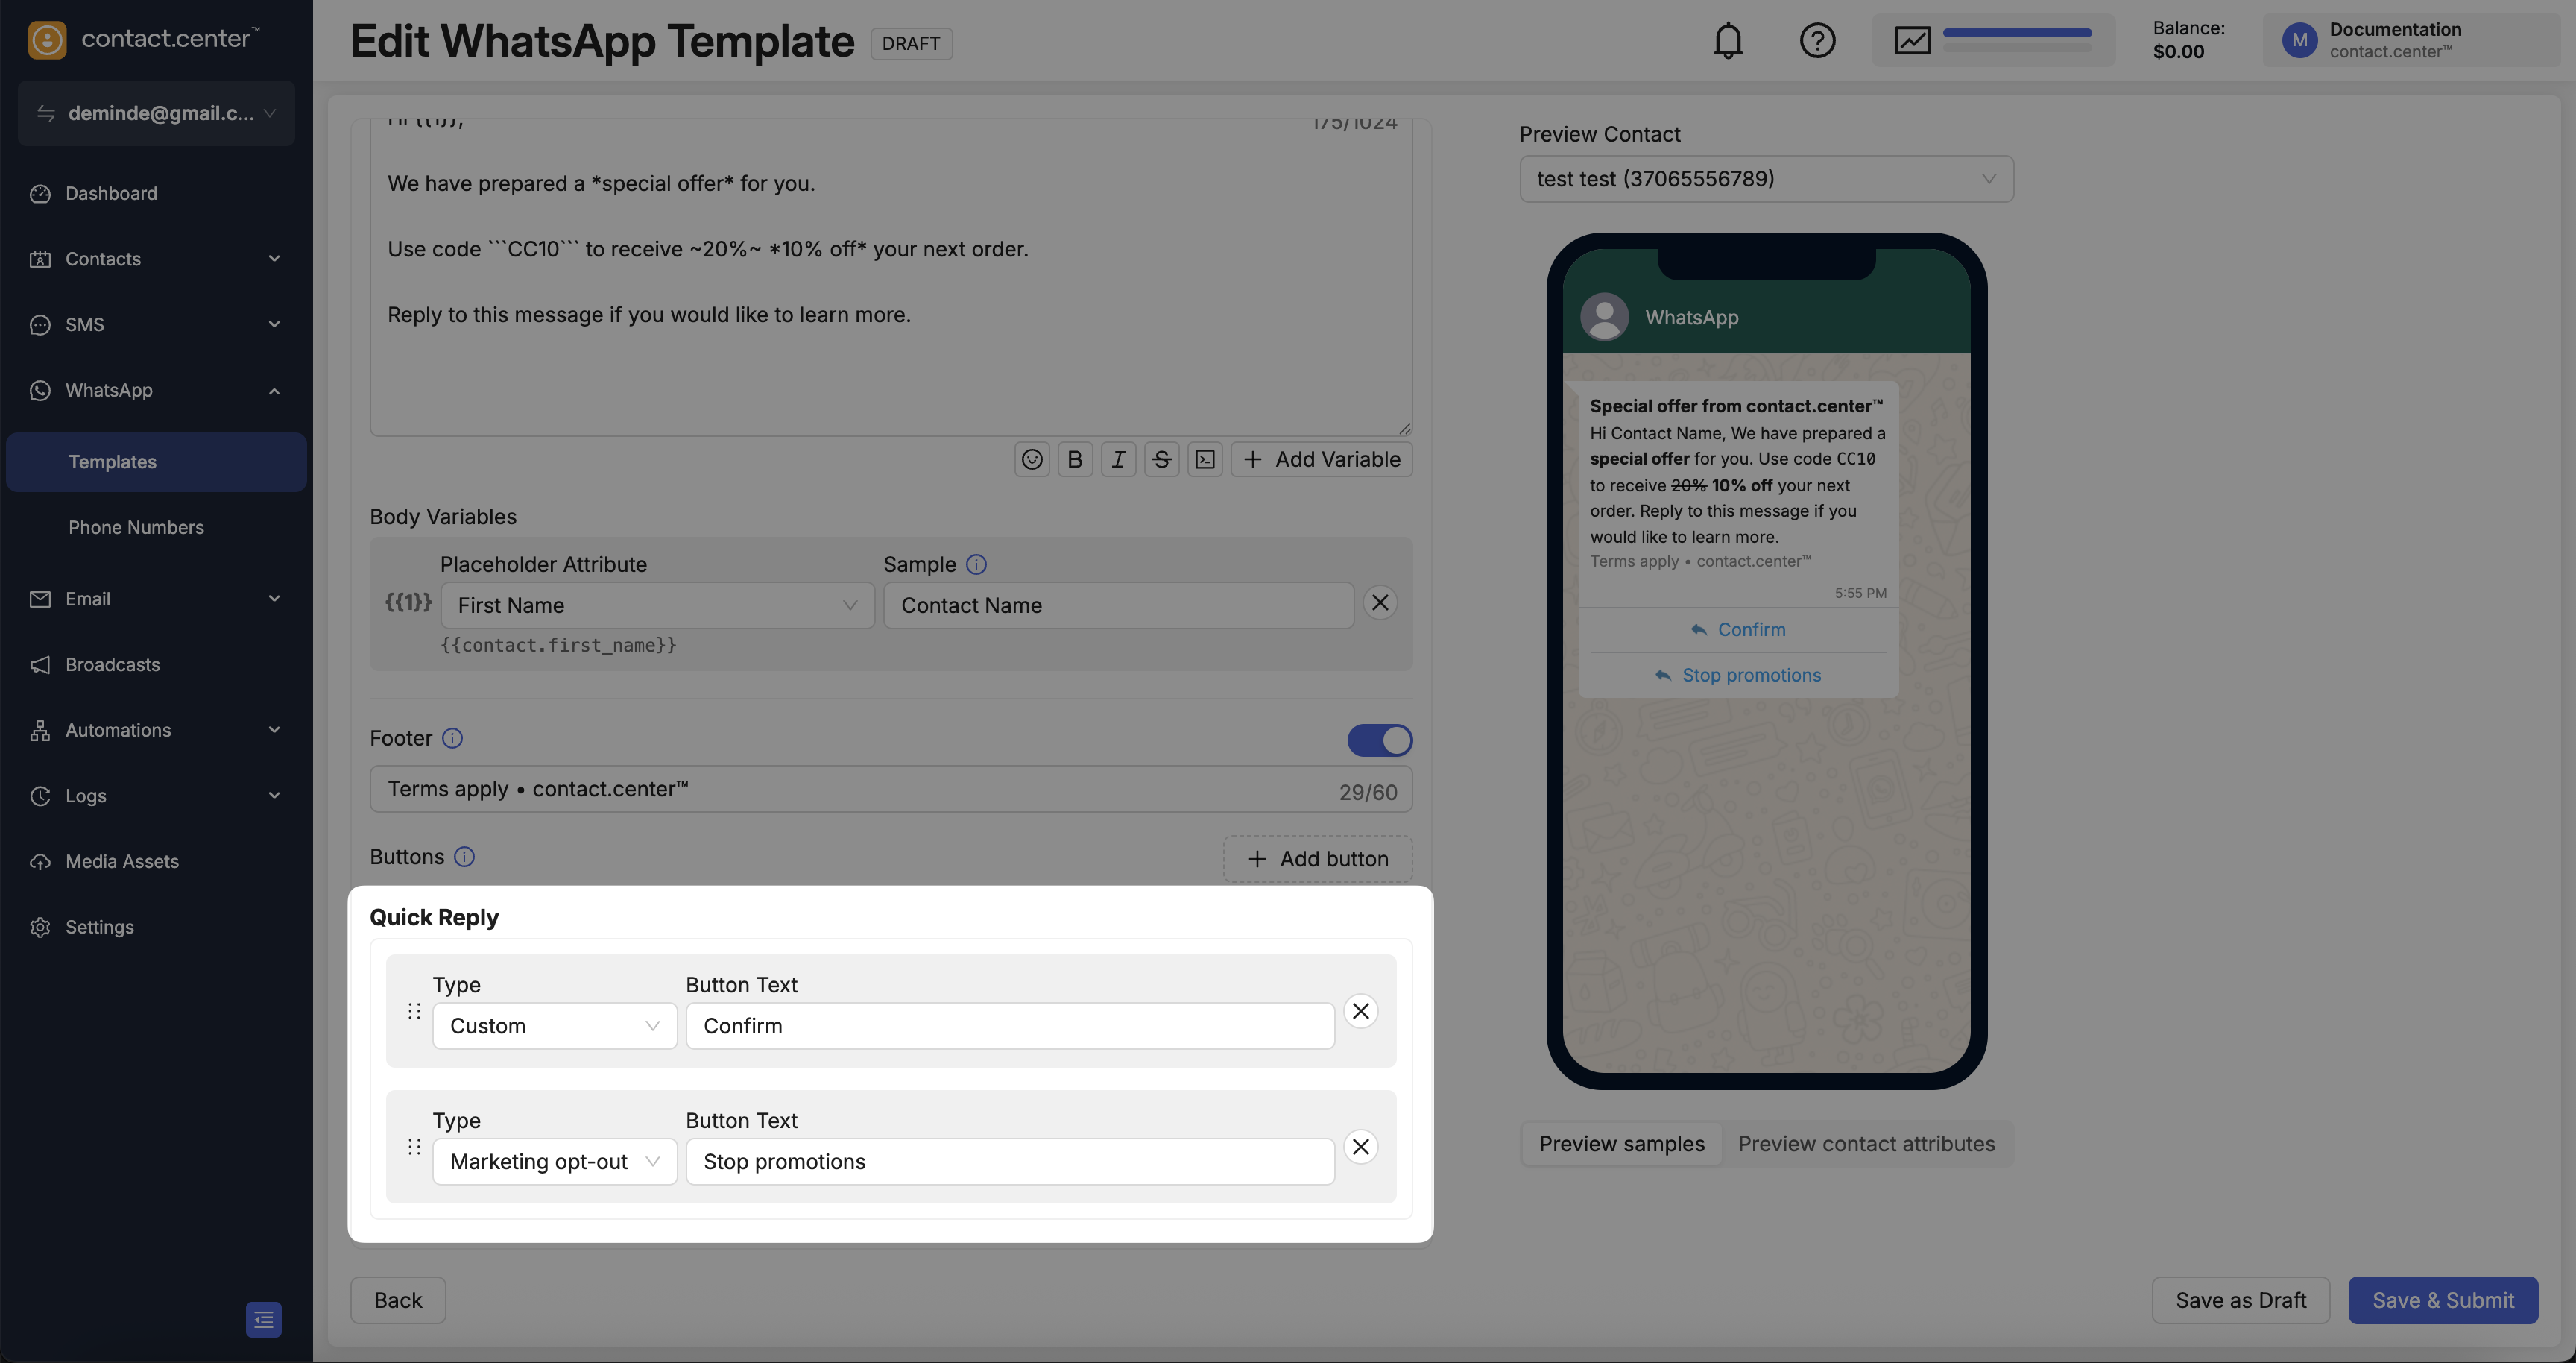
Fig. 8. Quick reply buttons: Custom and Marketing opt-out.
Call to action buttons
Visit website — Opens a specified URL.
Call phone number — Dials a specified phone number.
Copy offer code — Copies a specified code.
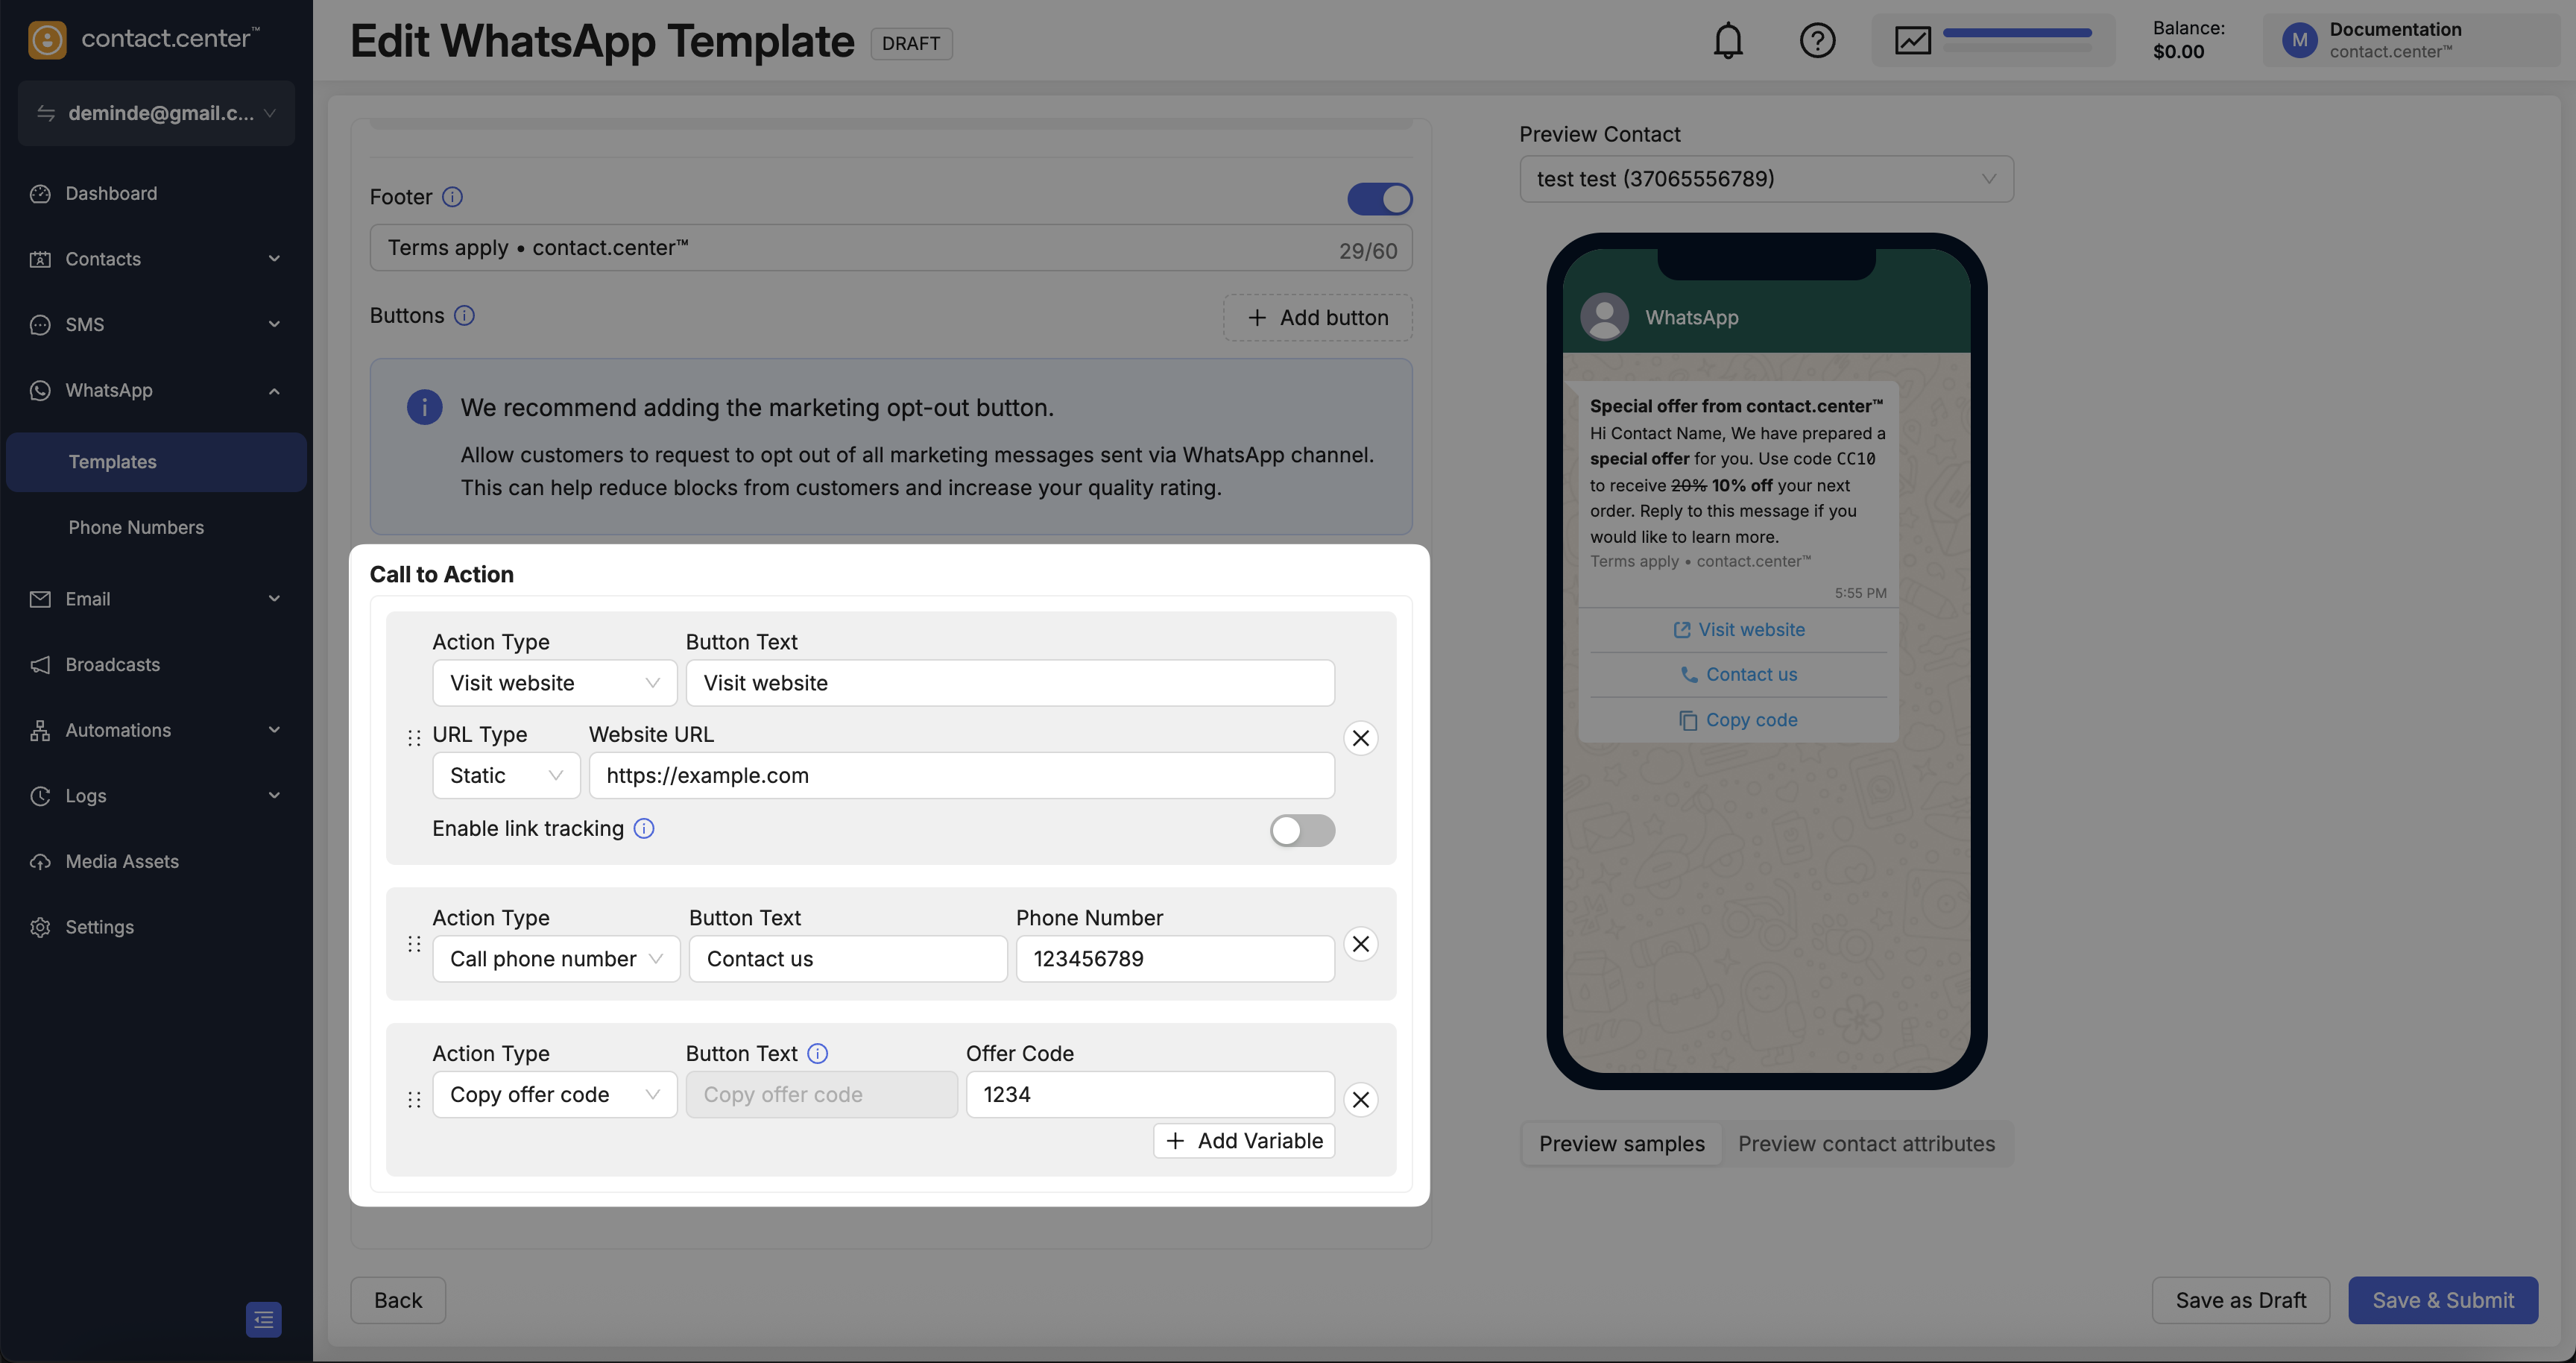
Fig. 9. Call to action buttons: Visit website, Call phone number, and Copy offer code.
Step 5: Preview WhatsApp Template Sample
After configuring the template, review the preview on the right to make sure the message layout, variables, buttons, and formatting appear correctly before saving or submitting it.
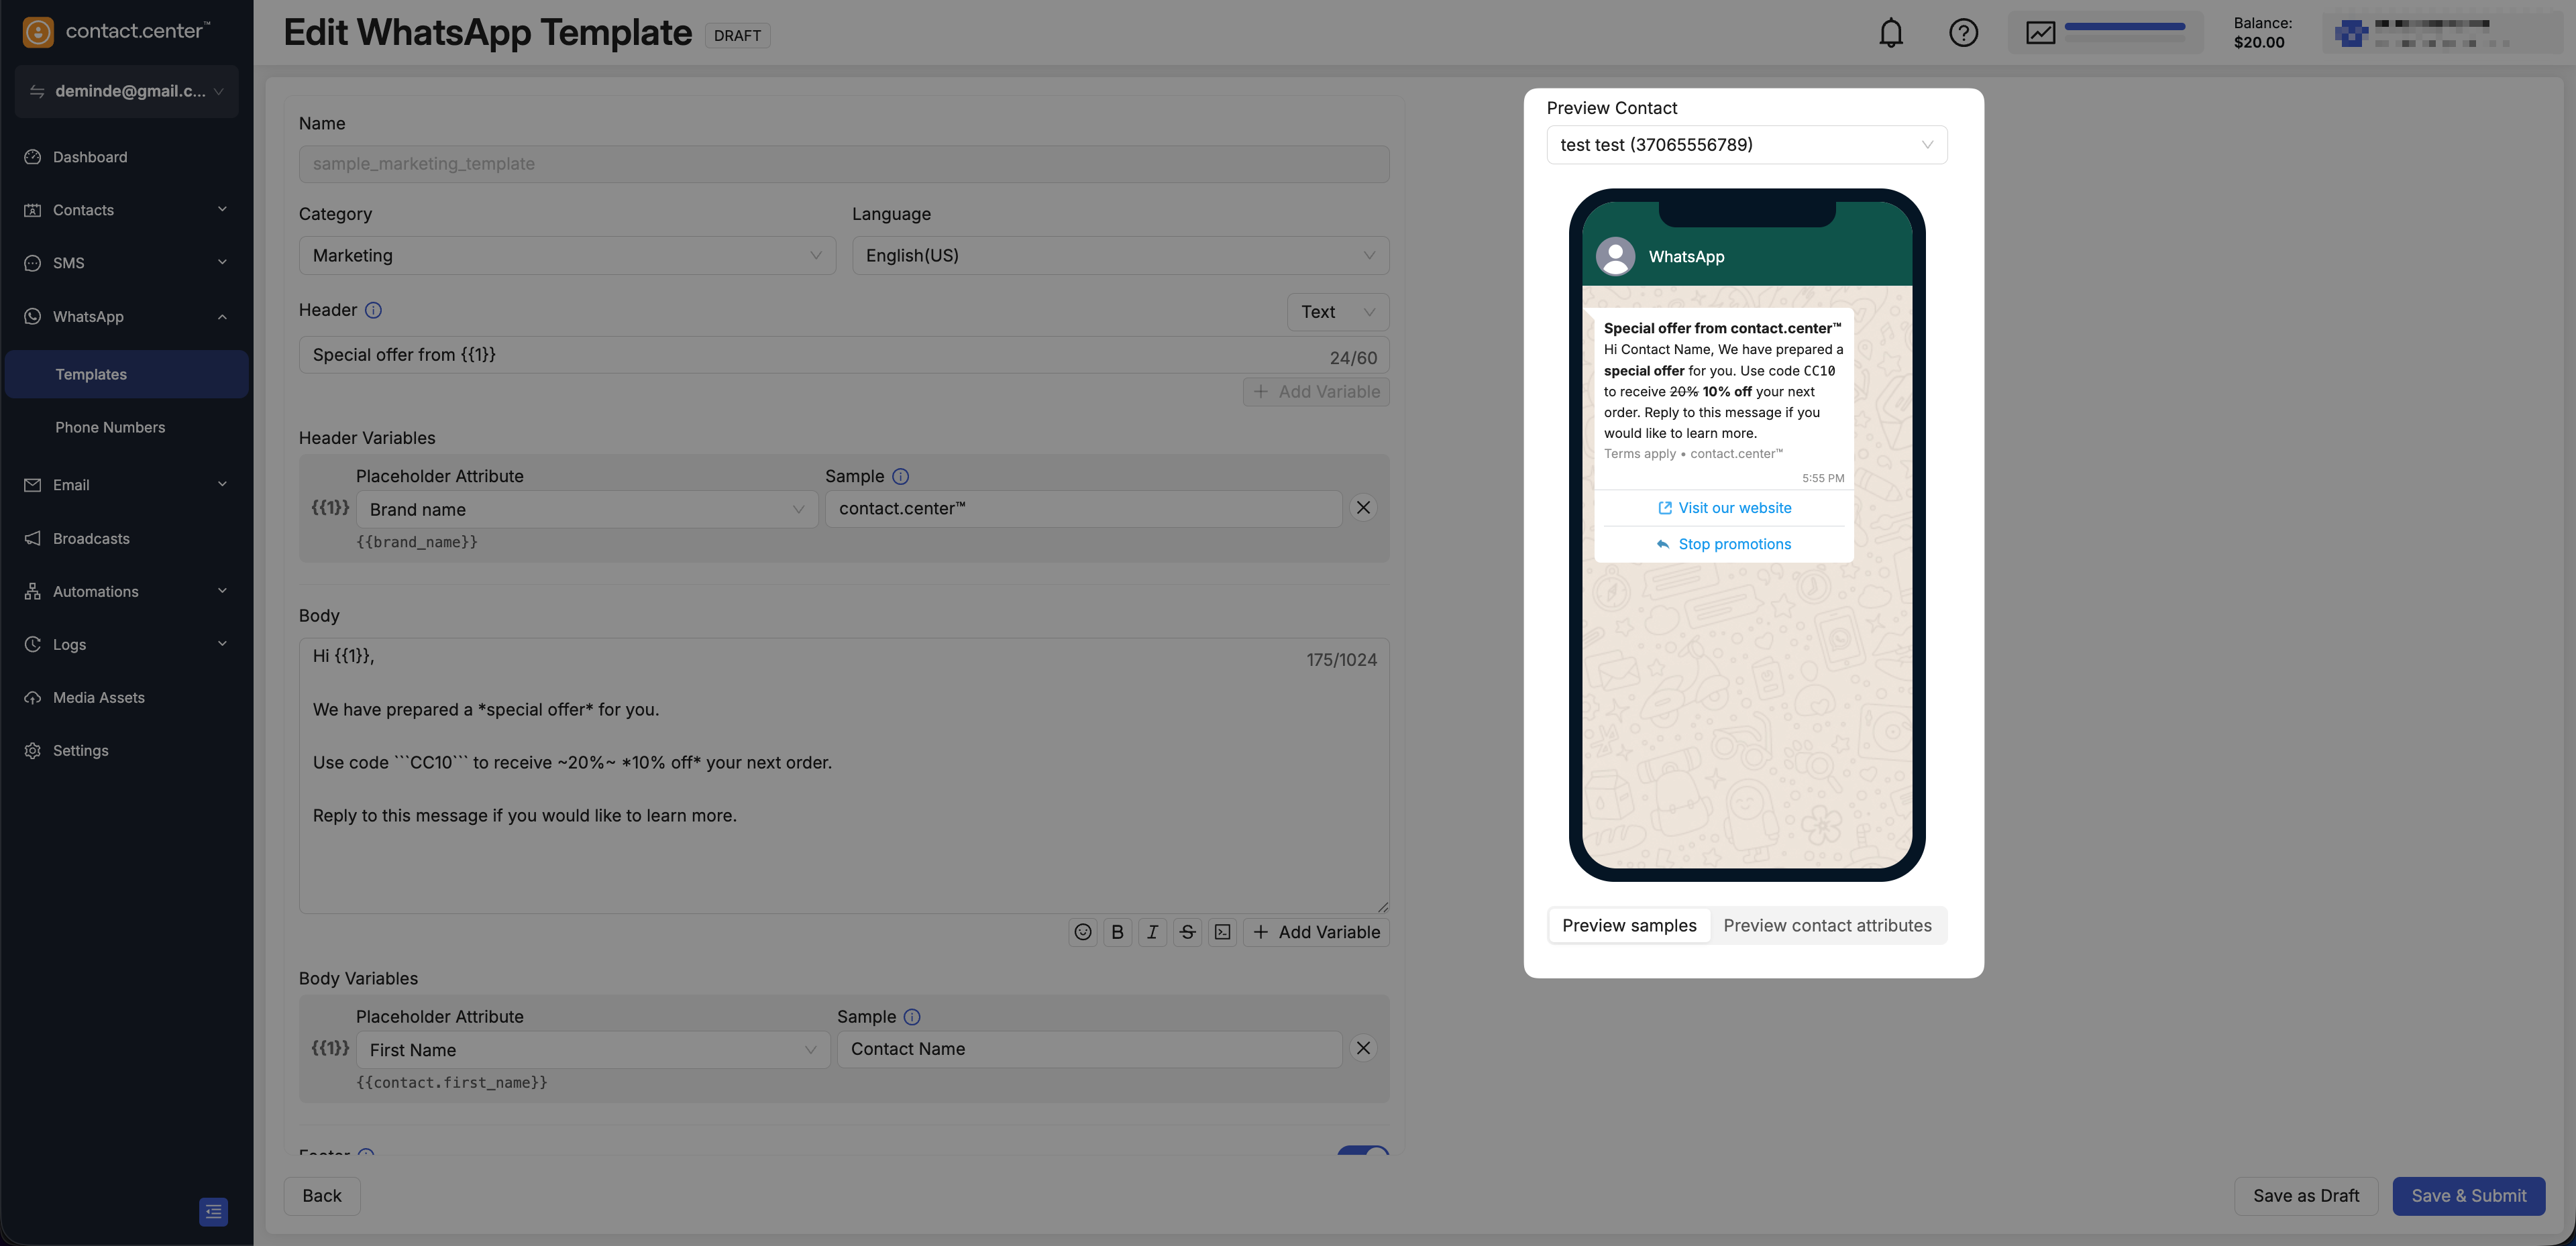
Fig. 10. WhatsApp template preview
Step 6: Save the Template
When the template is ready, use the action bar at the bottom of the page to save it.
Save as Draft — saves the template without submitting it.
Save & Submit — saves the template and submits it for review.
Note
After submission, the template status changes to Pending until Meta reviews it. Only Approved templates can be used in broadcasts or automations.
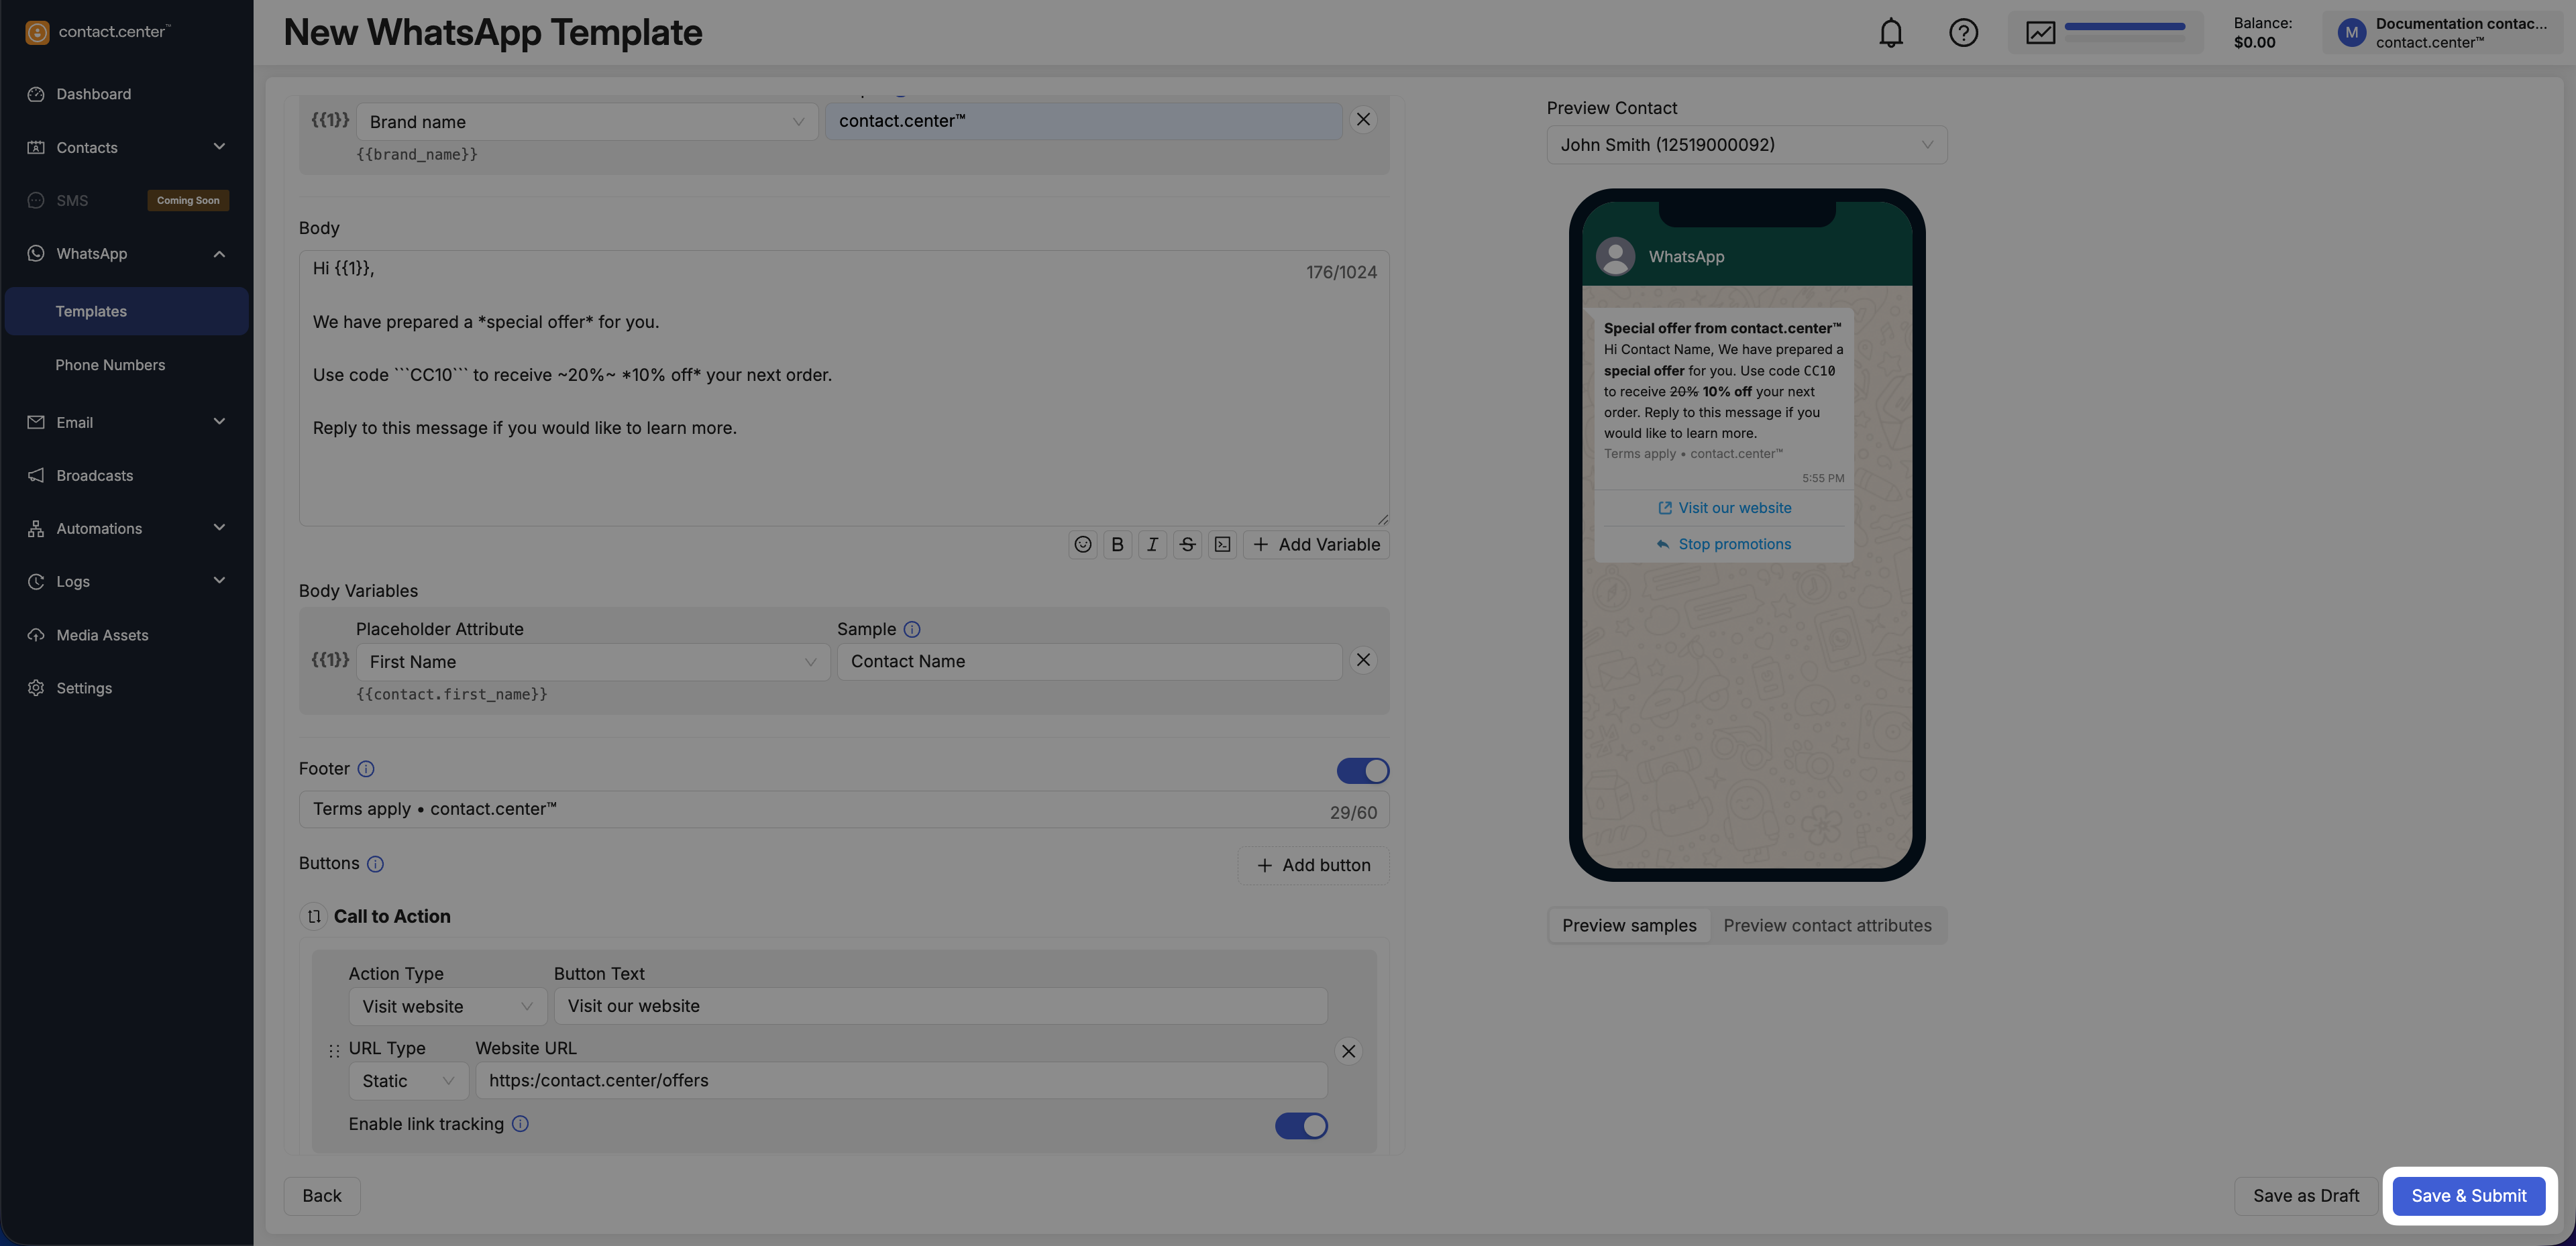
Fig. 11. Save actions for the WhatsApp template
Edit or Delete Templates
Use the template actions menu to edit or delete an existing WhatsApp template.
Note
The Edit action is available only when the template status is Approved, Rejected, or Paused. For other statuses, such as Draft or Pending, the Edit action is unavailable.
Warning
Before deleting a template, make sure it is not used by any active or scheduled broadcasts or automations.
To edit or delete a template:
Go to WhatsApp → Templates.
Locate the template you want to manage.
Click the actions menu for that template.
Select Edit to update the template, or Delete to remove it permanently.
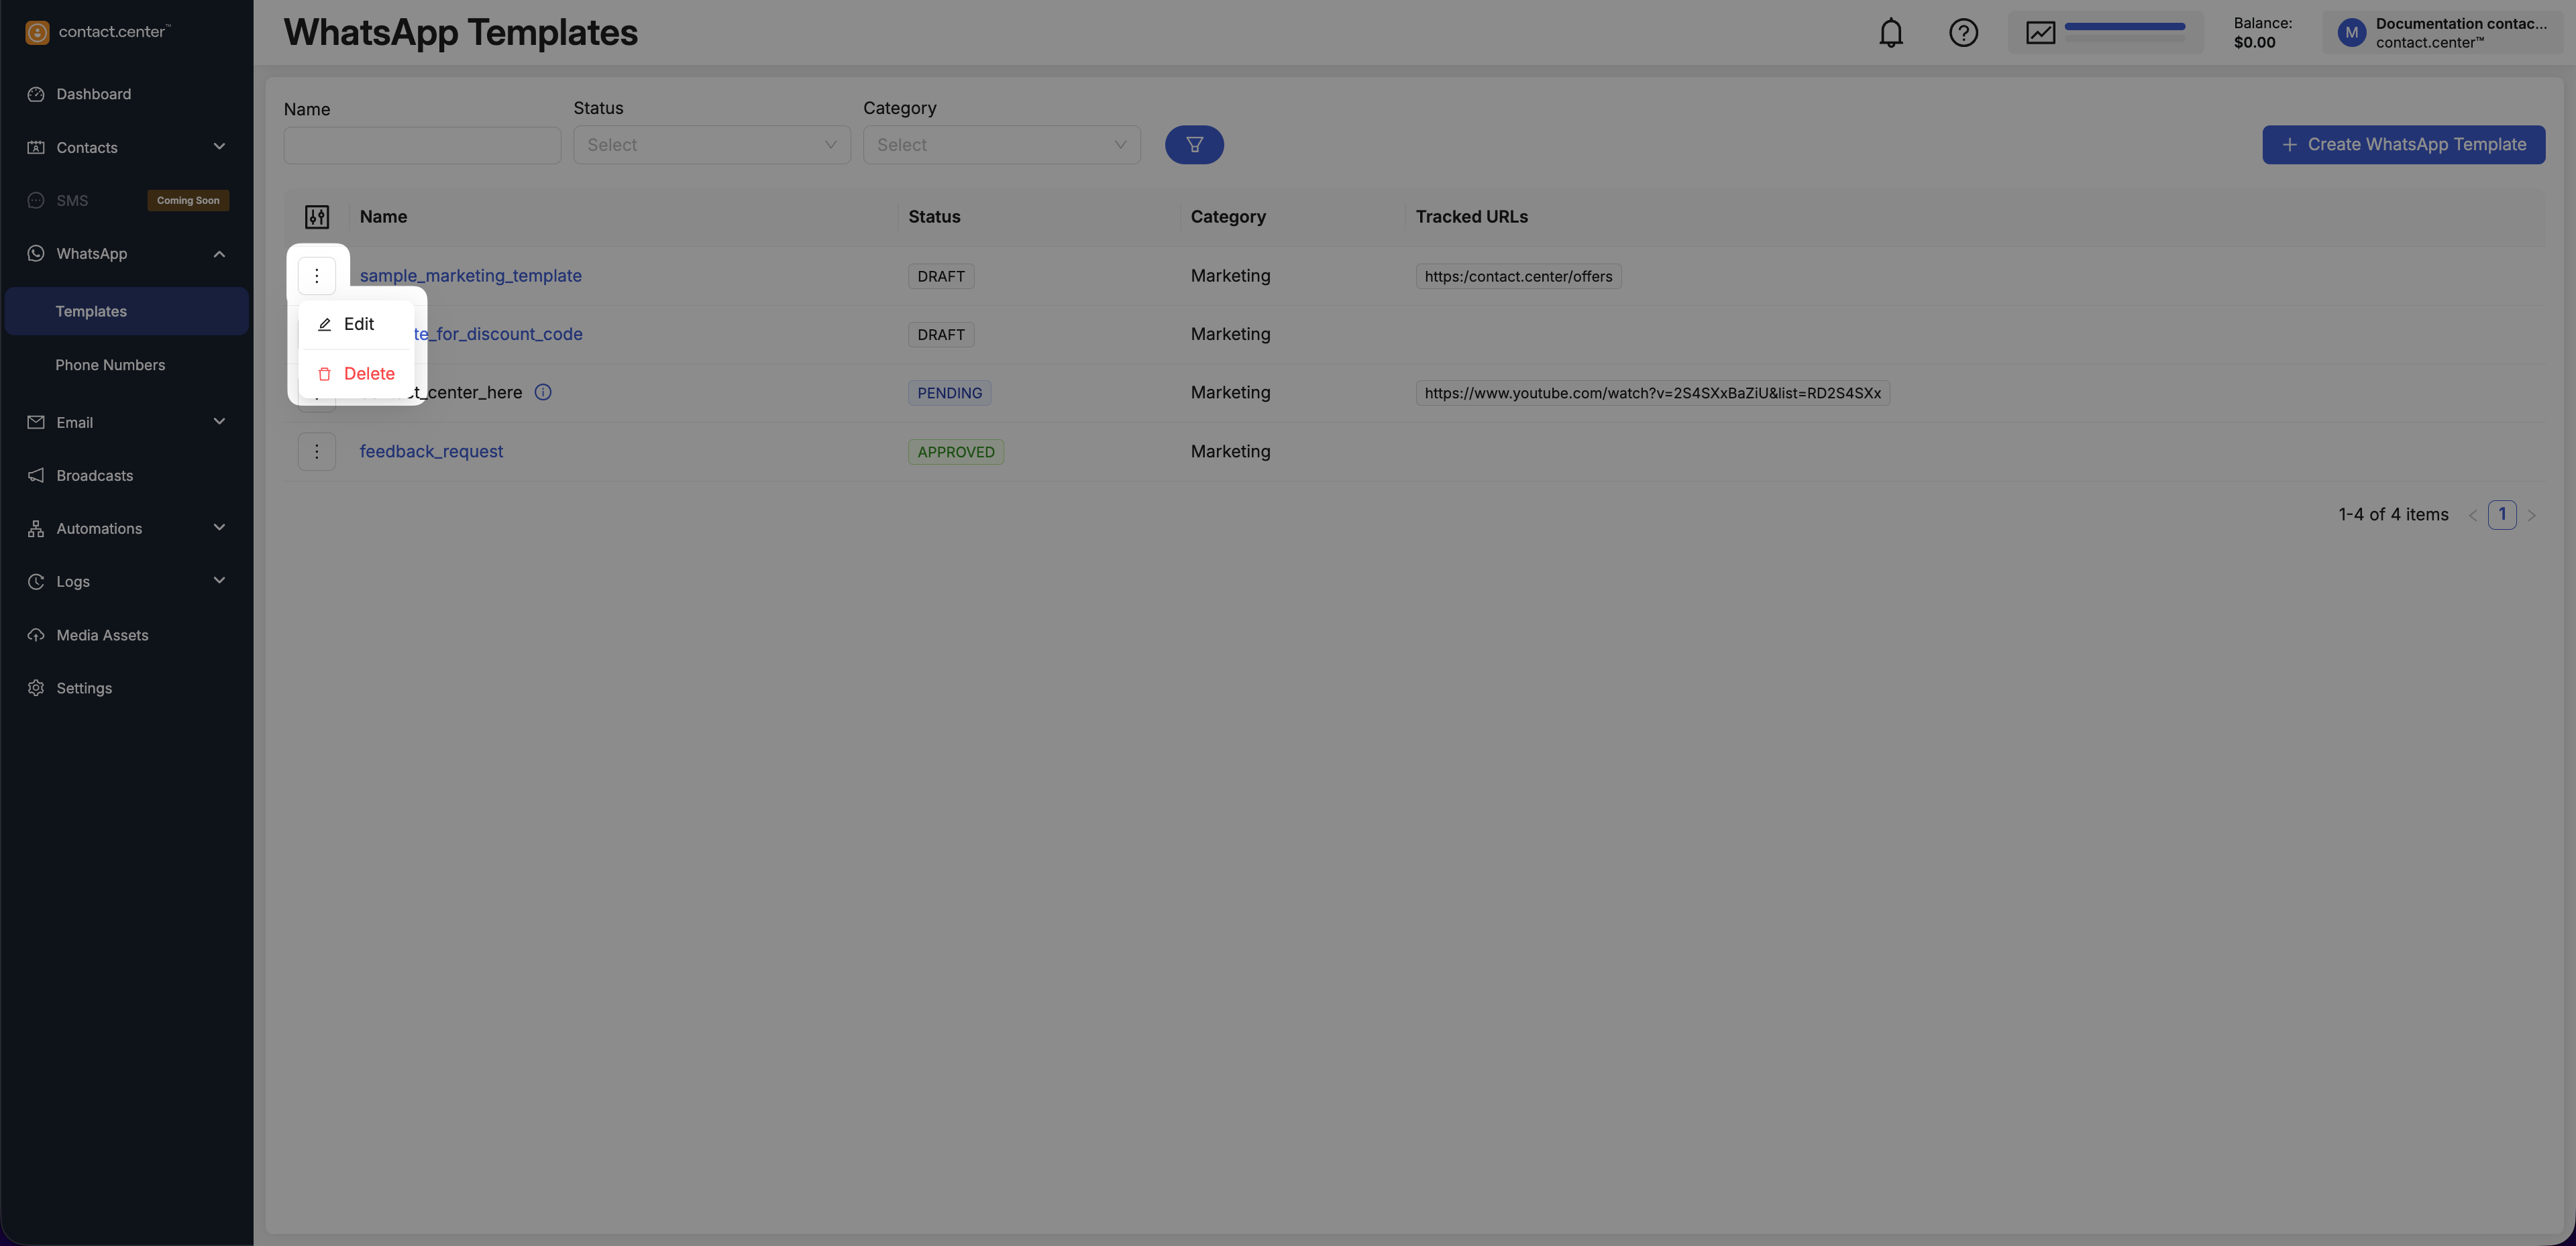
Fig. 12. Templates actions menu
WhatsApp Template Reference
Use this reference to understand WhatsApp template statuses, table columns, and available filters in the Templates list.
WhatsApp Template Statuses
Status |
Meaning |
|---|---|
Draft |
The template is saved in your workspace but has not been submitted for review. |
Pending |
The template is submitted and awaiting review by Meta. |
Approved |
The template is approved and can be used in messaging flows. |
Rejected |
The template was rejected and must be updated before submitting again. |
In Appeal |
The rejection is under appeal/review by Meta. |
Paused |
The template is temporarily paused and cannot be used until it is unpaused by Meta. |
Disabled |
The template is disabled and cannot be used. |
Limit Exceeded |
The template cannot be used due to a Meta-imposed limit (shown directly in the UI). |
Table Columns
Column |
Description |
|---|---|
Name |
The template name. |
Status |
Current template status (e.g., Draft, Pending, Approved). |
Category |
Template category (e.g., Marketing or Utility). |
Tracked URLs |
URLs associated with the template (when available). |
Note
To change which columns are visible in the templates table, click the Customize columns icon and turn columns on or off as needed.
Available Filters
Filter |
Description |
|---|---|
Name |
Filters templates by template name. |
Status |
Filters templates by status (e.g., Draft, Pending, Approved, Rejected, Paused). |
Category |
Filters templates by category (e.g., Marketing or Utility). |