Contact Lists
The Lists page allows you to manually group contacts into reusable sets. Lists do not update automatically — contacts are added to or removed from a list only when you perform an action, such as adding or removing contacts manually.
Use Lists when you want to:
Create a reusable set of contacts for broadcasts and automations.
Control exactly which contacts are included in a list at any point in time.
Maintain curated groups (VIP customers, test users, event attendees, etc.).
Note
If you need contacts to be included automatically based on conditions and rules, use contact segments instead.
Before You Begin
Lists contain contacts that you add manually (or through Contact List Automation Flow).
Make sure your workspace already contains contacts so you can select them when creating or updating a list.
Note
Lists can only include contacts that already exist in your workspace. If you do not have contacts yet, add them in All Contacts.
Manage Your Contact Lists
Create a new contact list to manually group selected contacts.
View contact list members and manage the contacts included in the list.
Add one or more existing contacts to a contact list.
Remove contacts from a contact list without deleting them from your workspace.
Permanently delete a contact list when it is no longer needed.
Create Contact List
Follow these steps to create a new contact list.
Step 1: Add a New List
Go to Contacts → Lists.
Click + Add List.
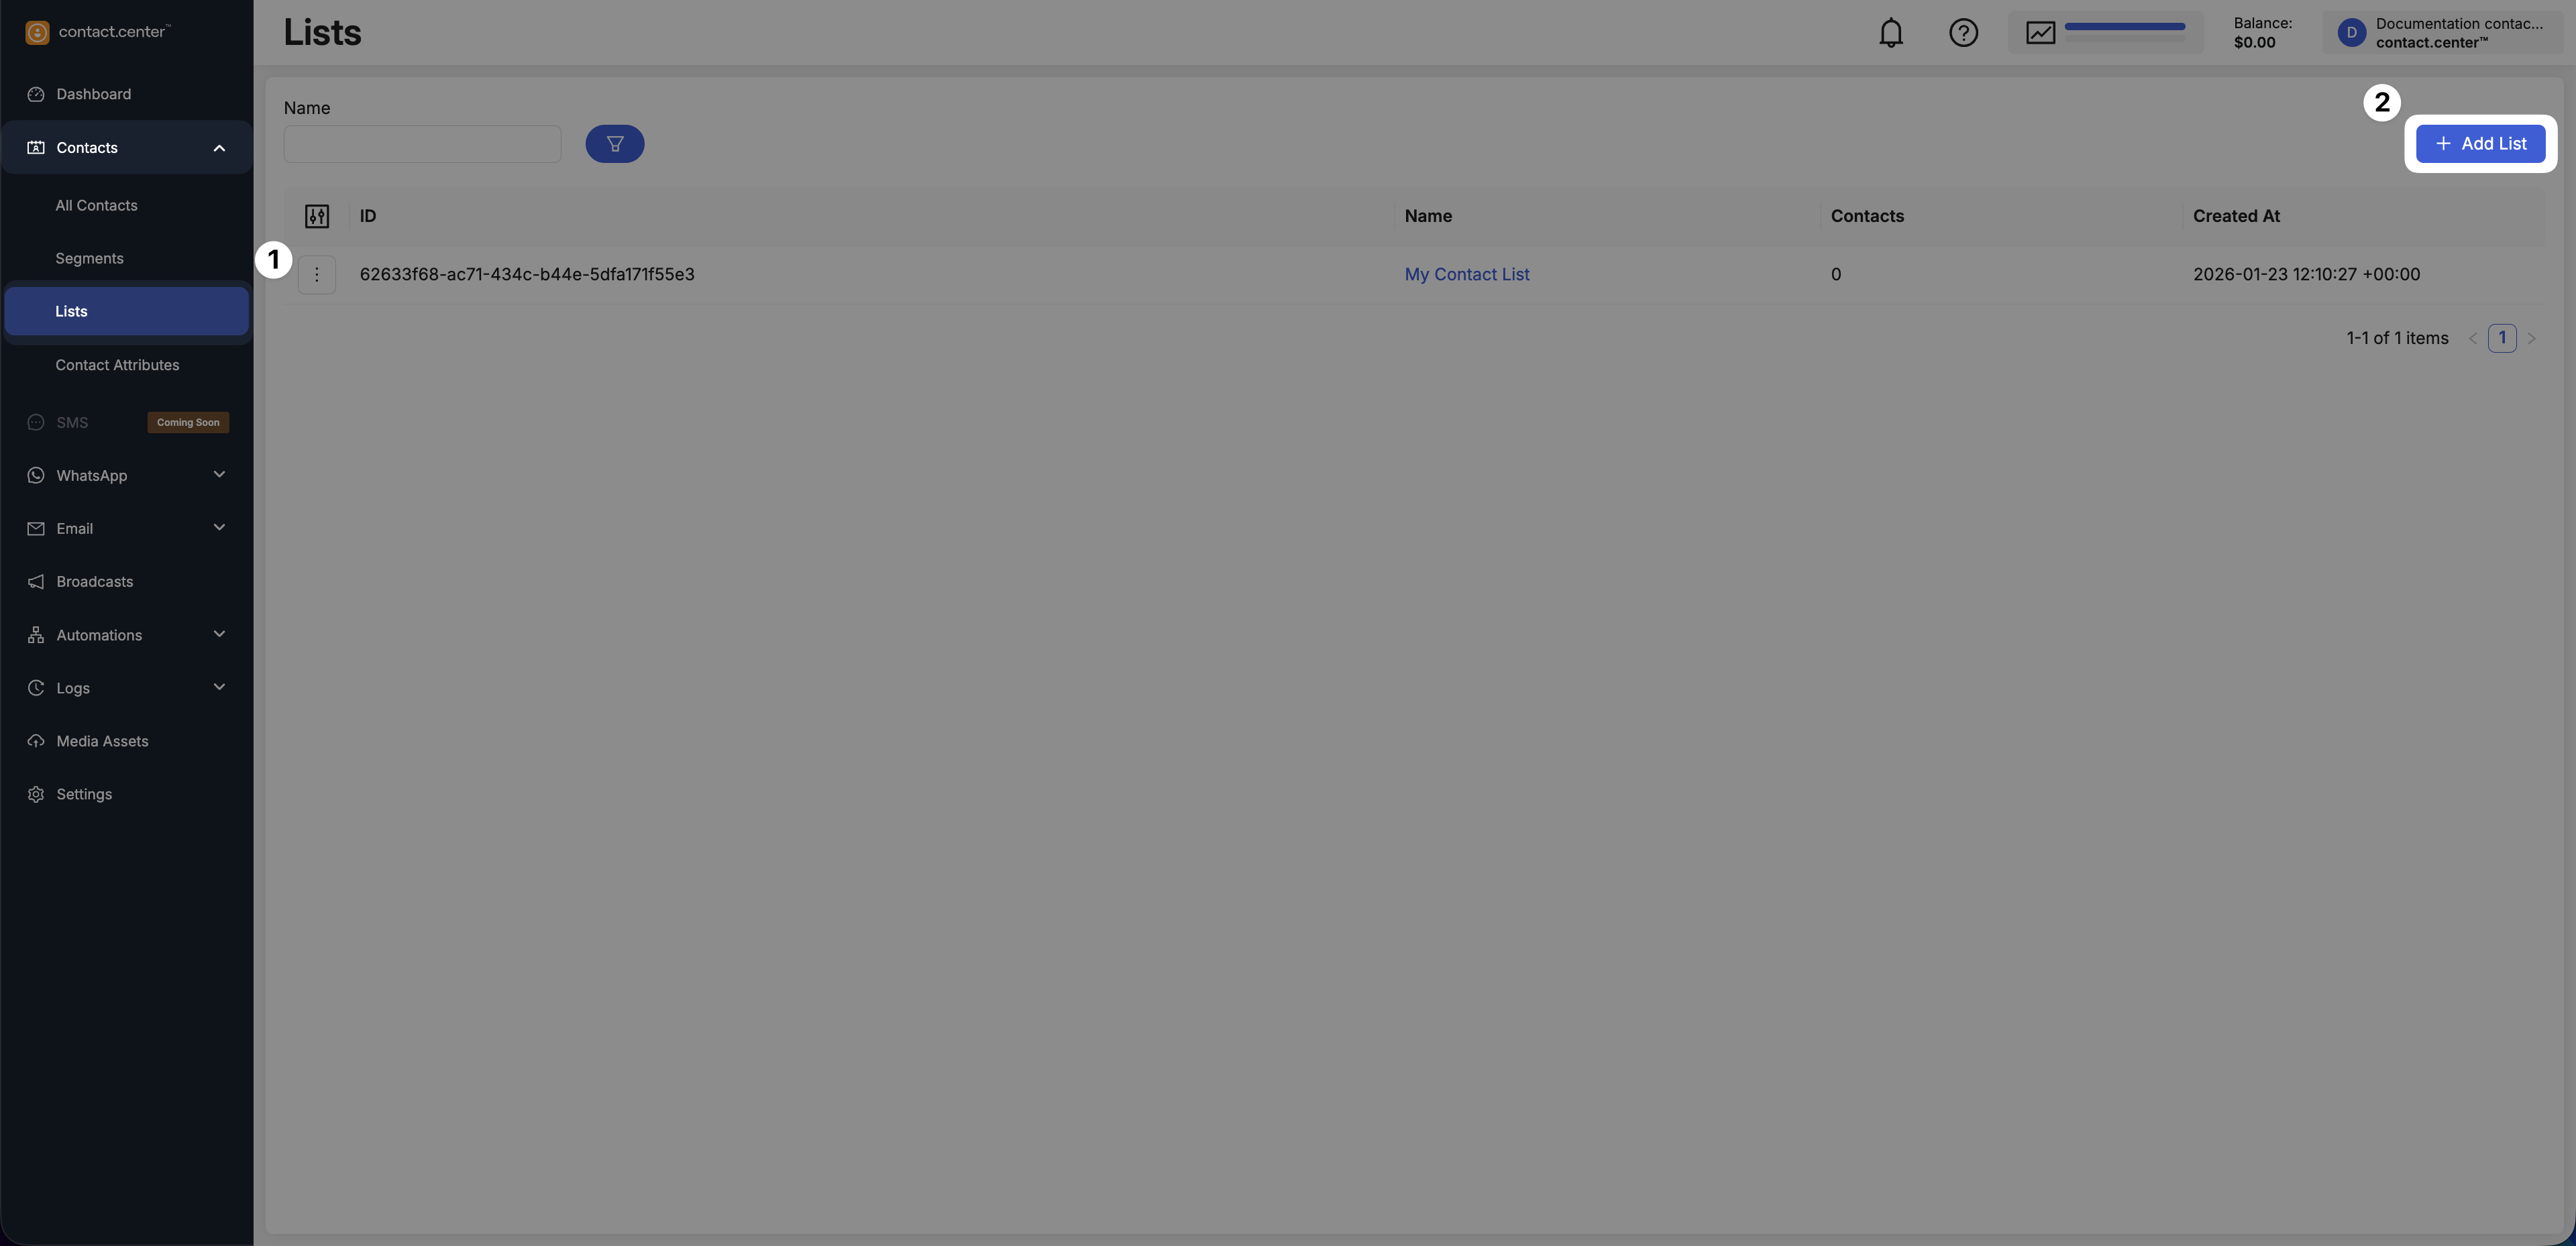
Fig. 1. Add List button.
Step 2: Enter a List Name
A Create List window appears.
Enter the list Name.
Click OK.
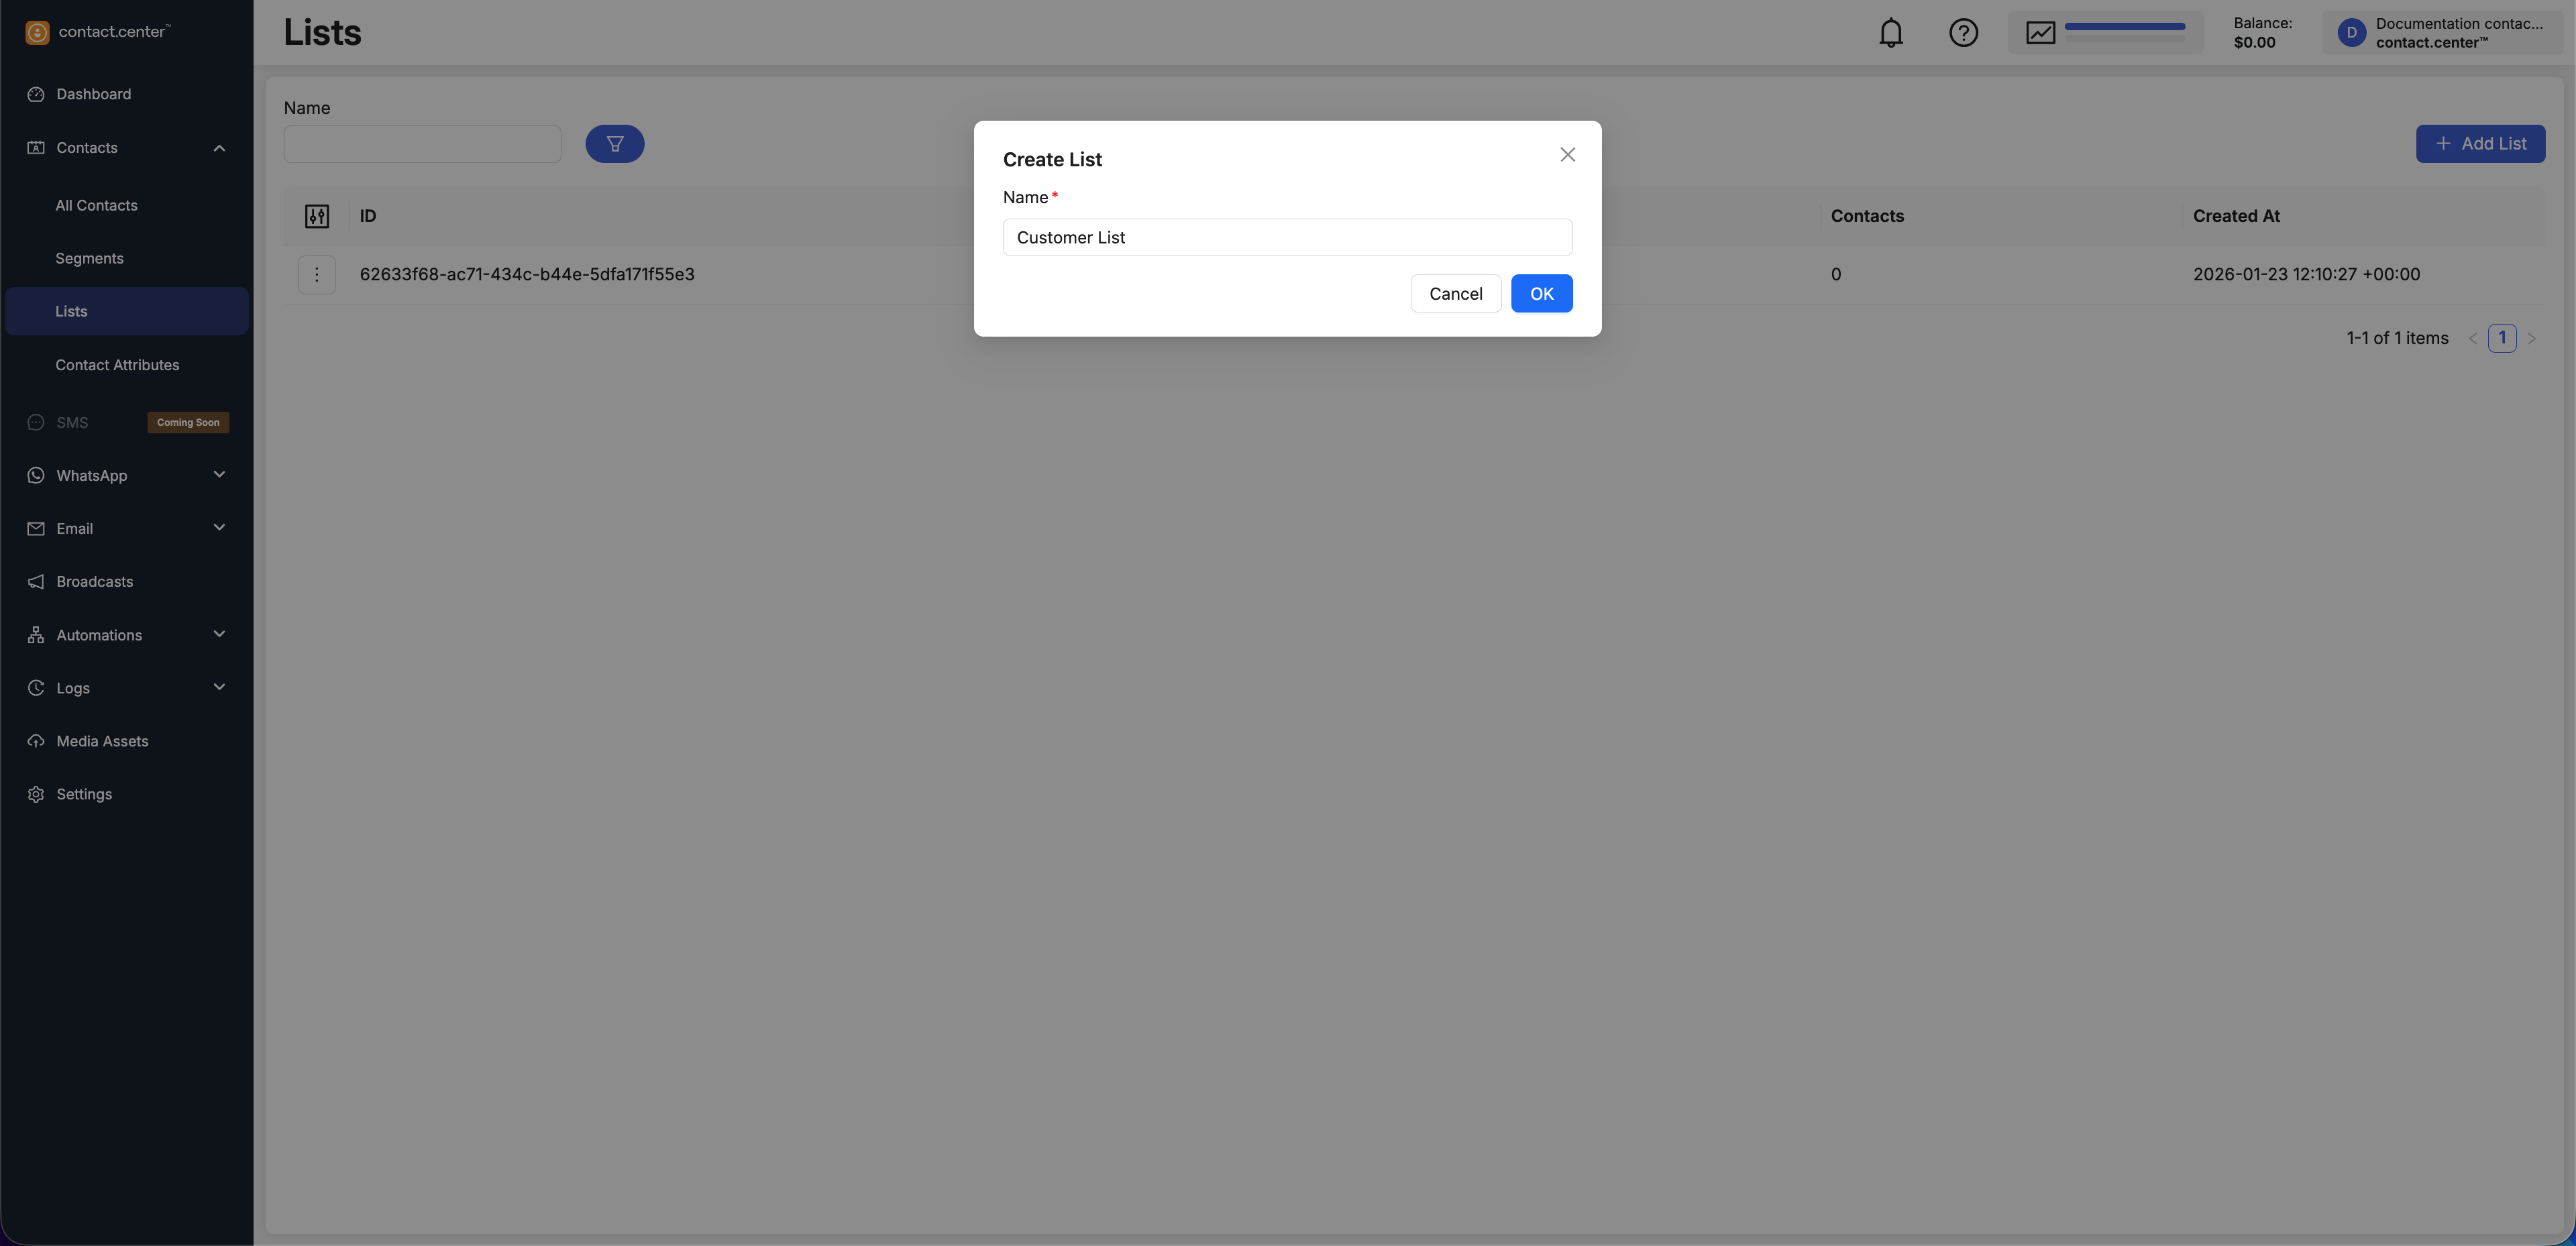
Fig. 2. Create List window.
Step 3: Add Contacts to the List
After the list is created, add contacts to the list.
Click Add contacts.
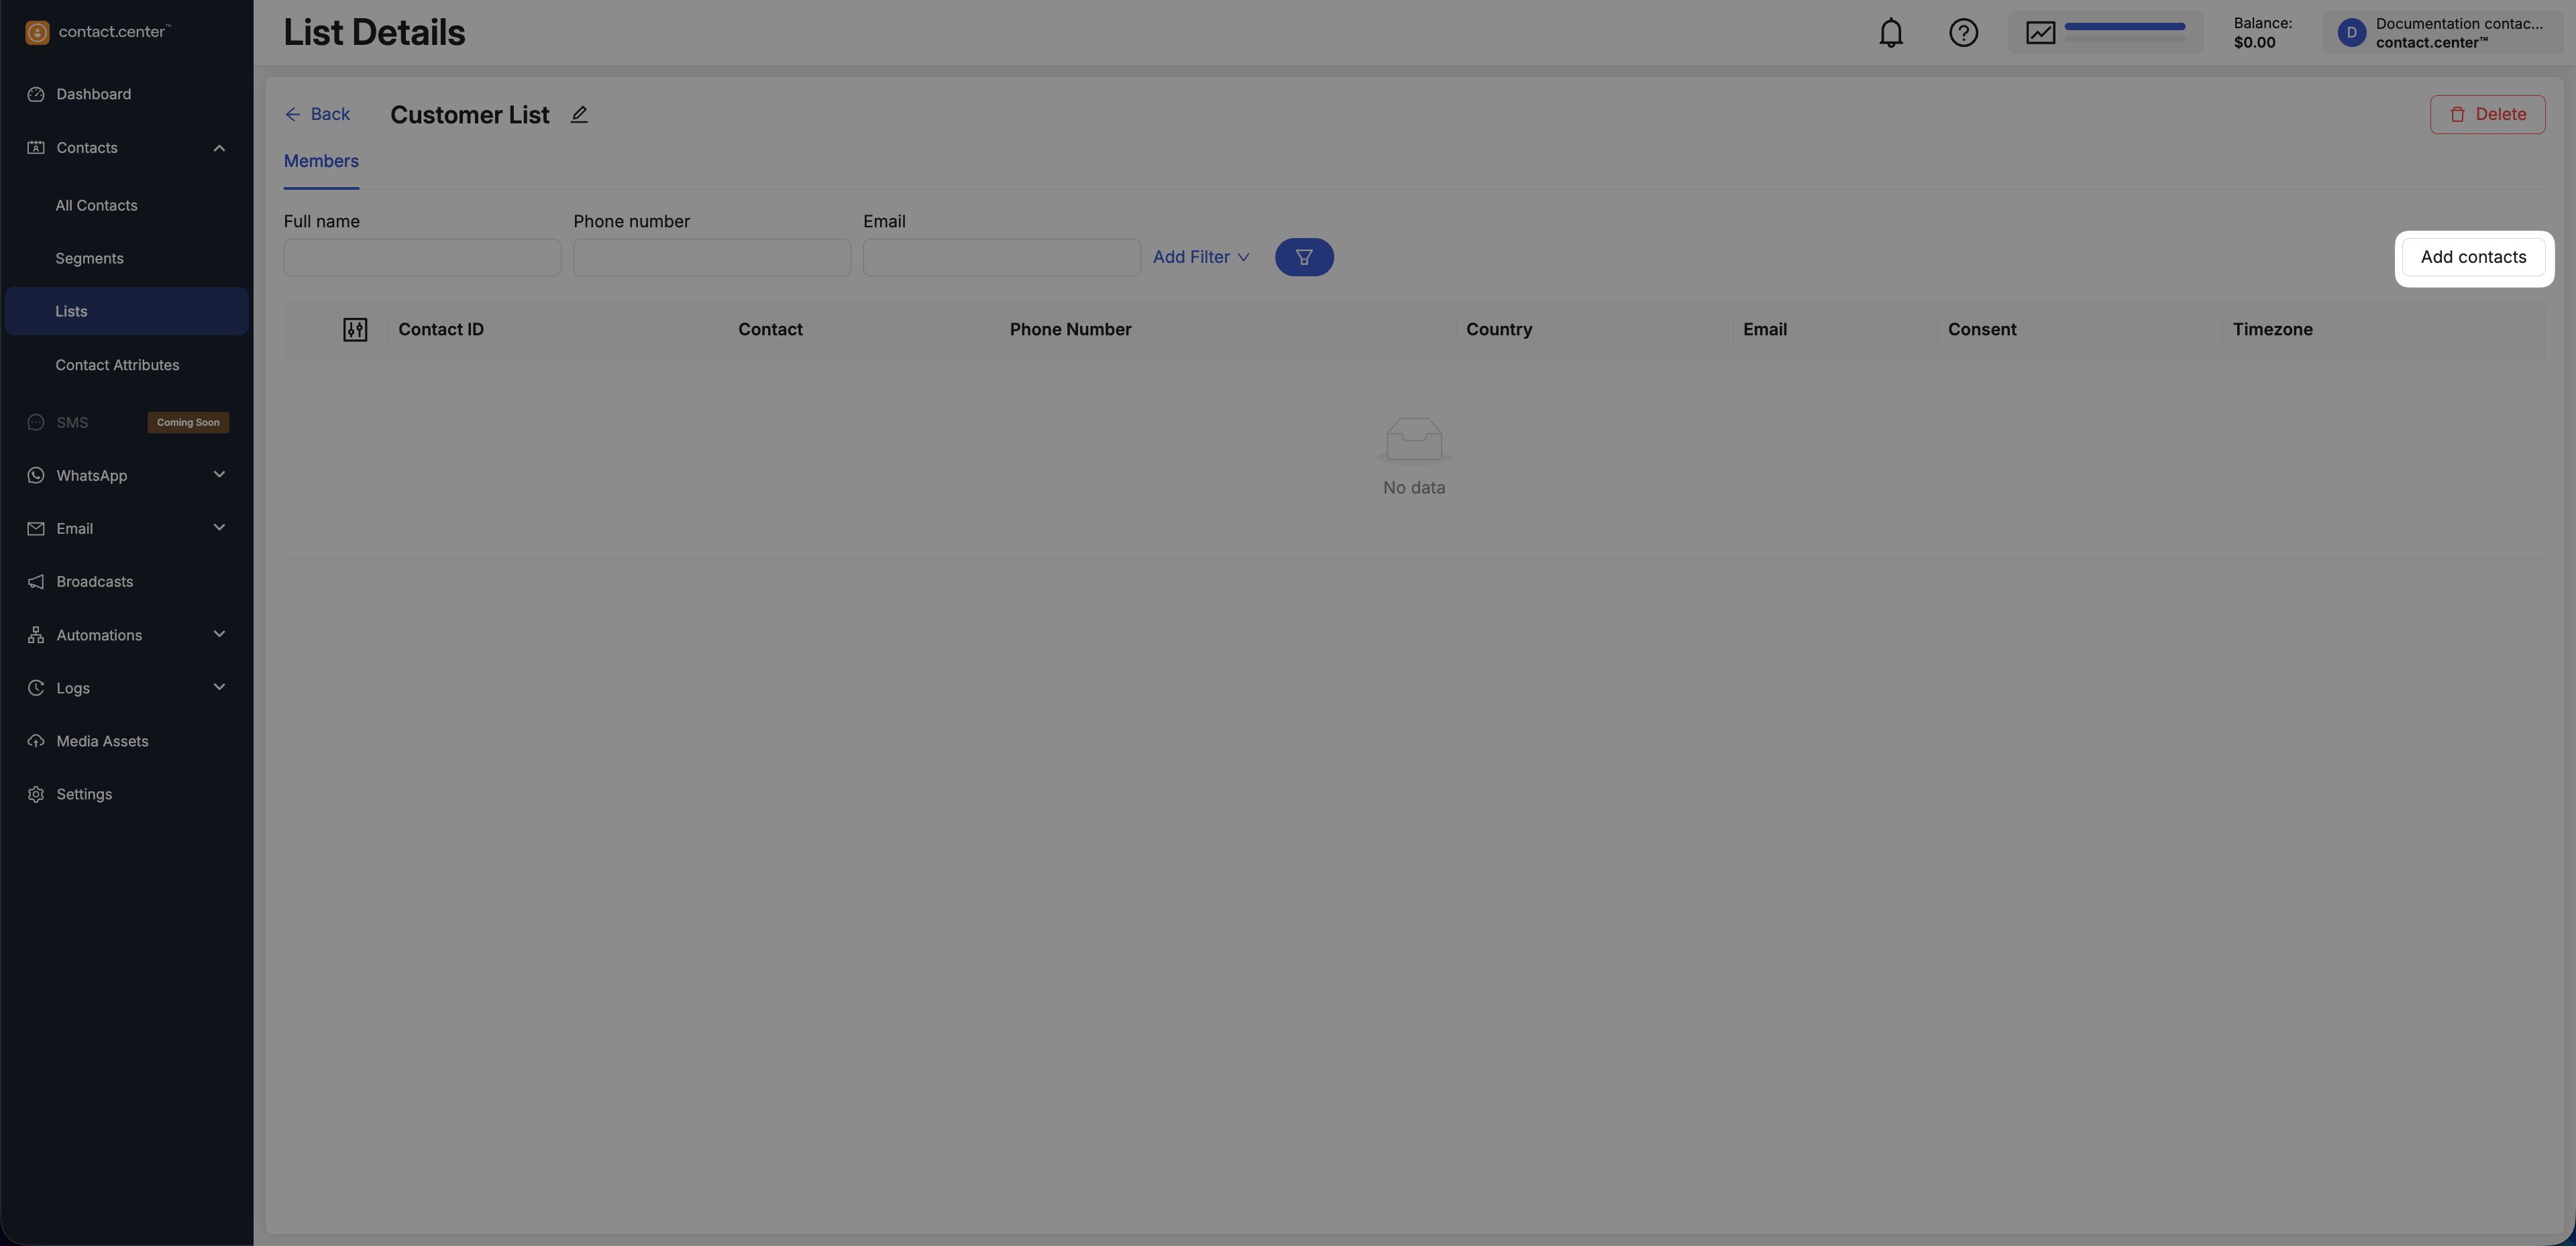
Fig. 3. Add contacts button.
In the Add contacts to list window, select one or more contacts.
Click Save.
Note
If you do not have contacts to add yet, you can add contacts to the list later.
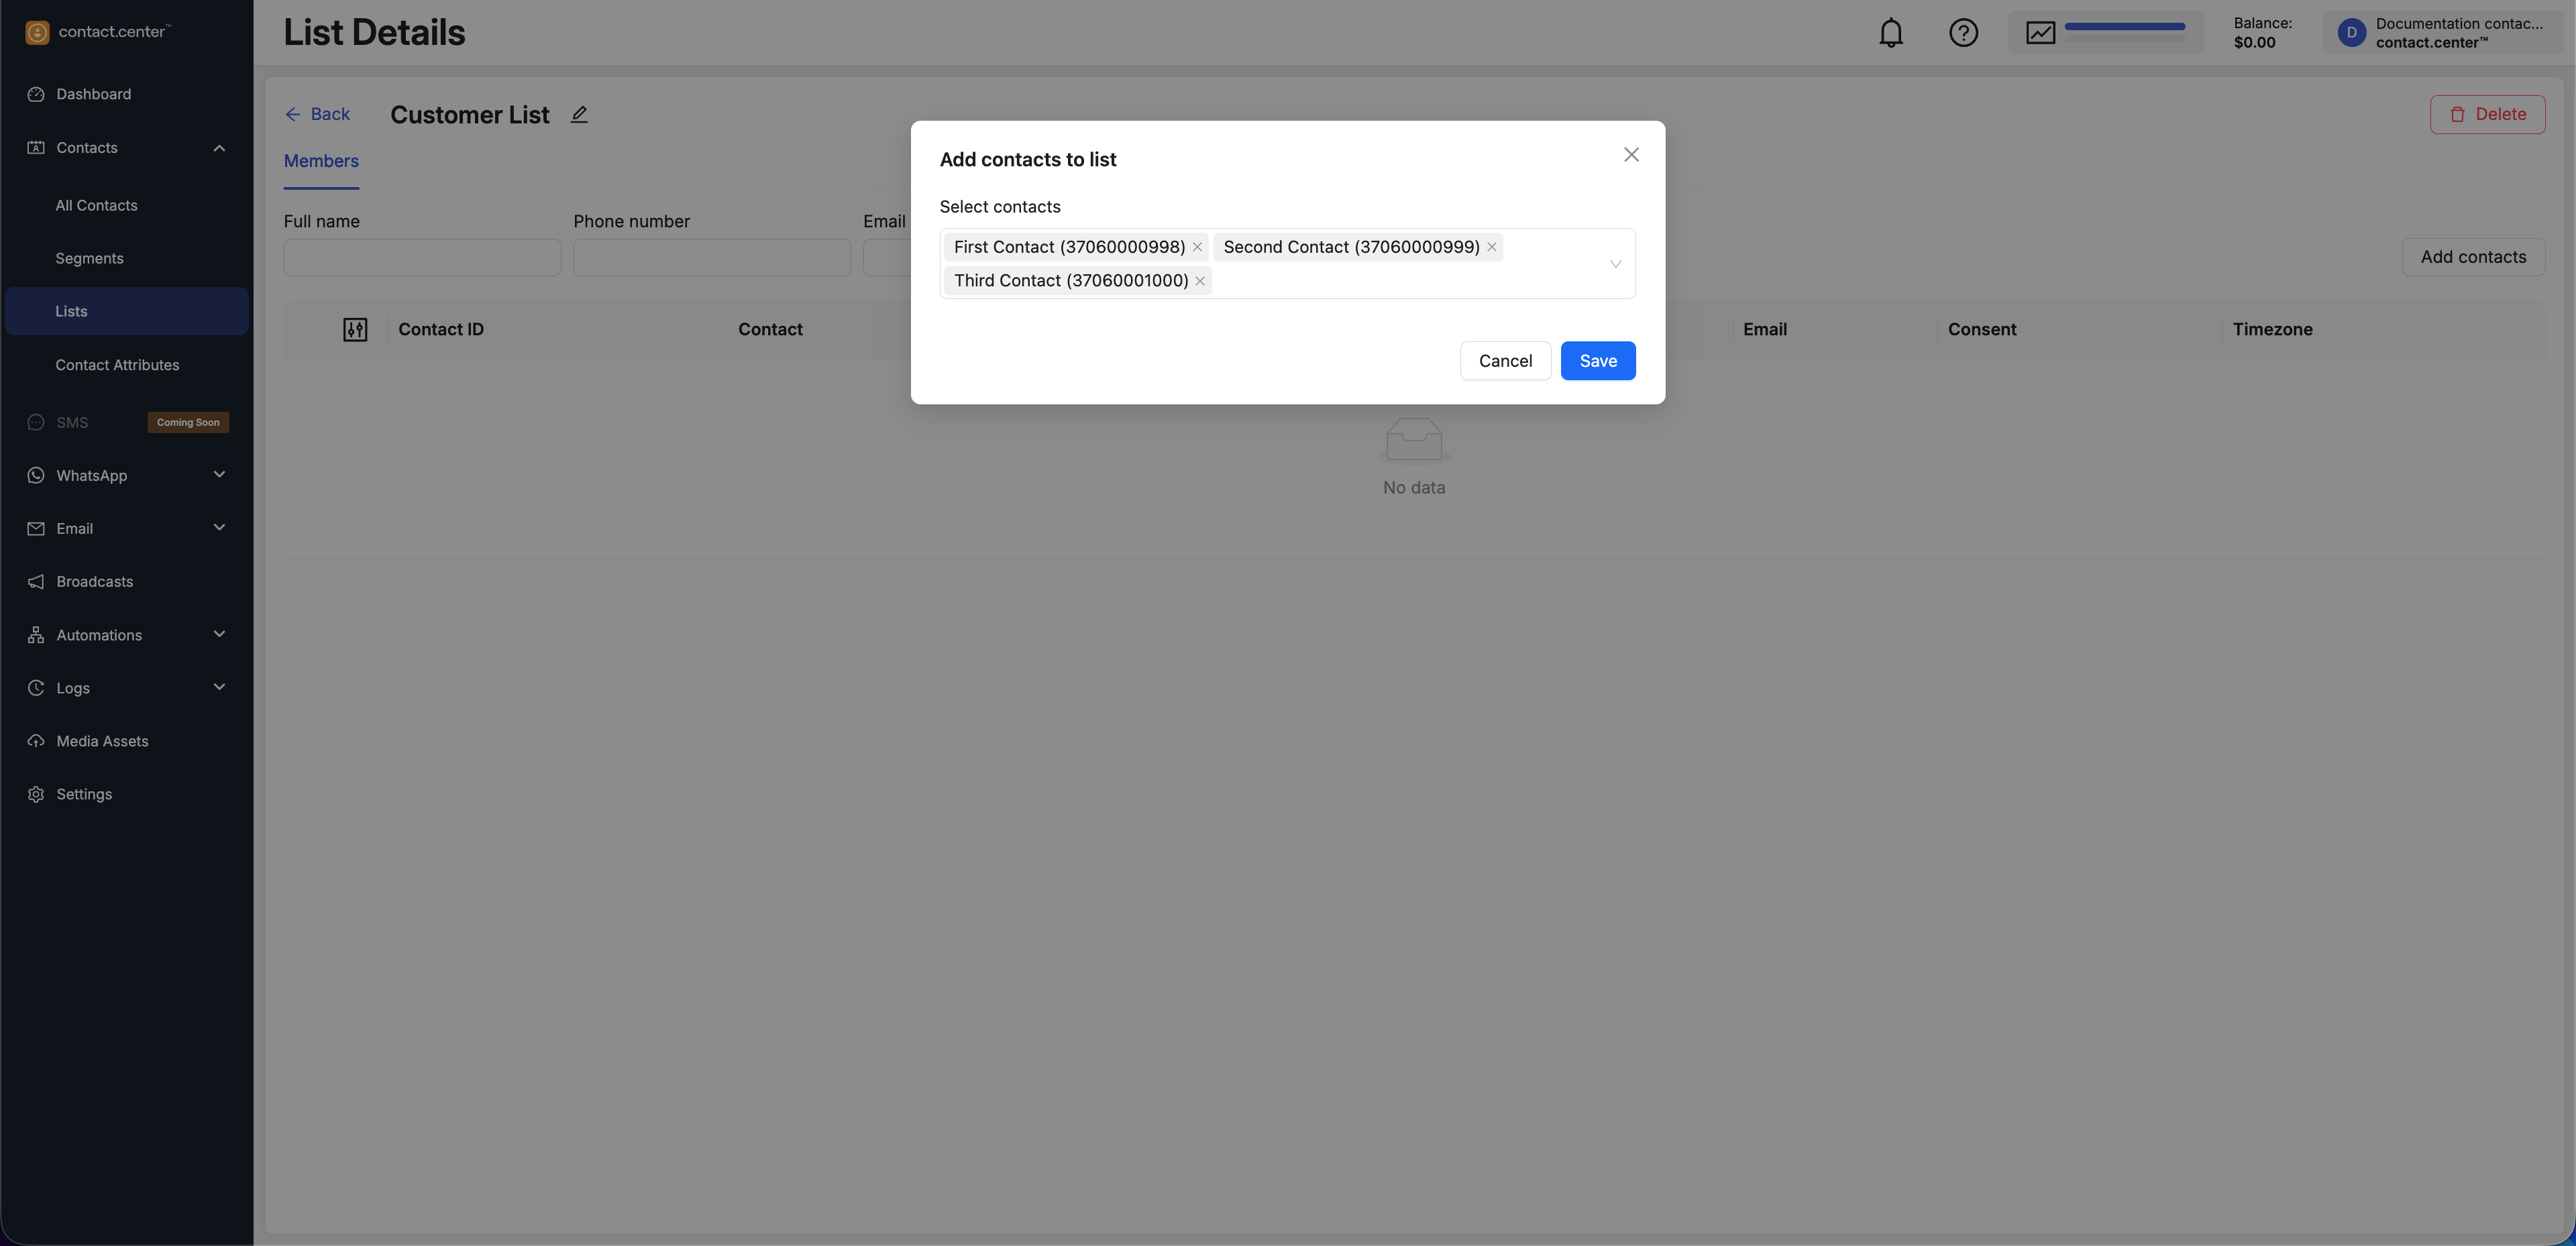
Fig. 3. Selecting contacts to add to a list.
View Contact List Details
Use list details to view list members and manage contacts in the list.
You can add or remove contacts, apply filters, and review membership at any time.
Go to Contacts → Lists.
Locate the list you want to update.
Click Details in the actions menu.
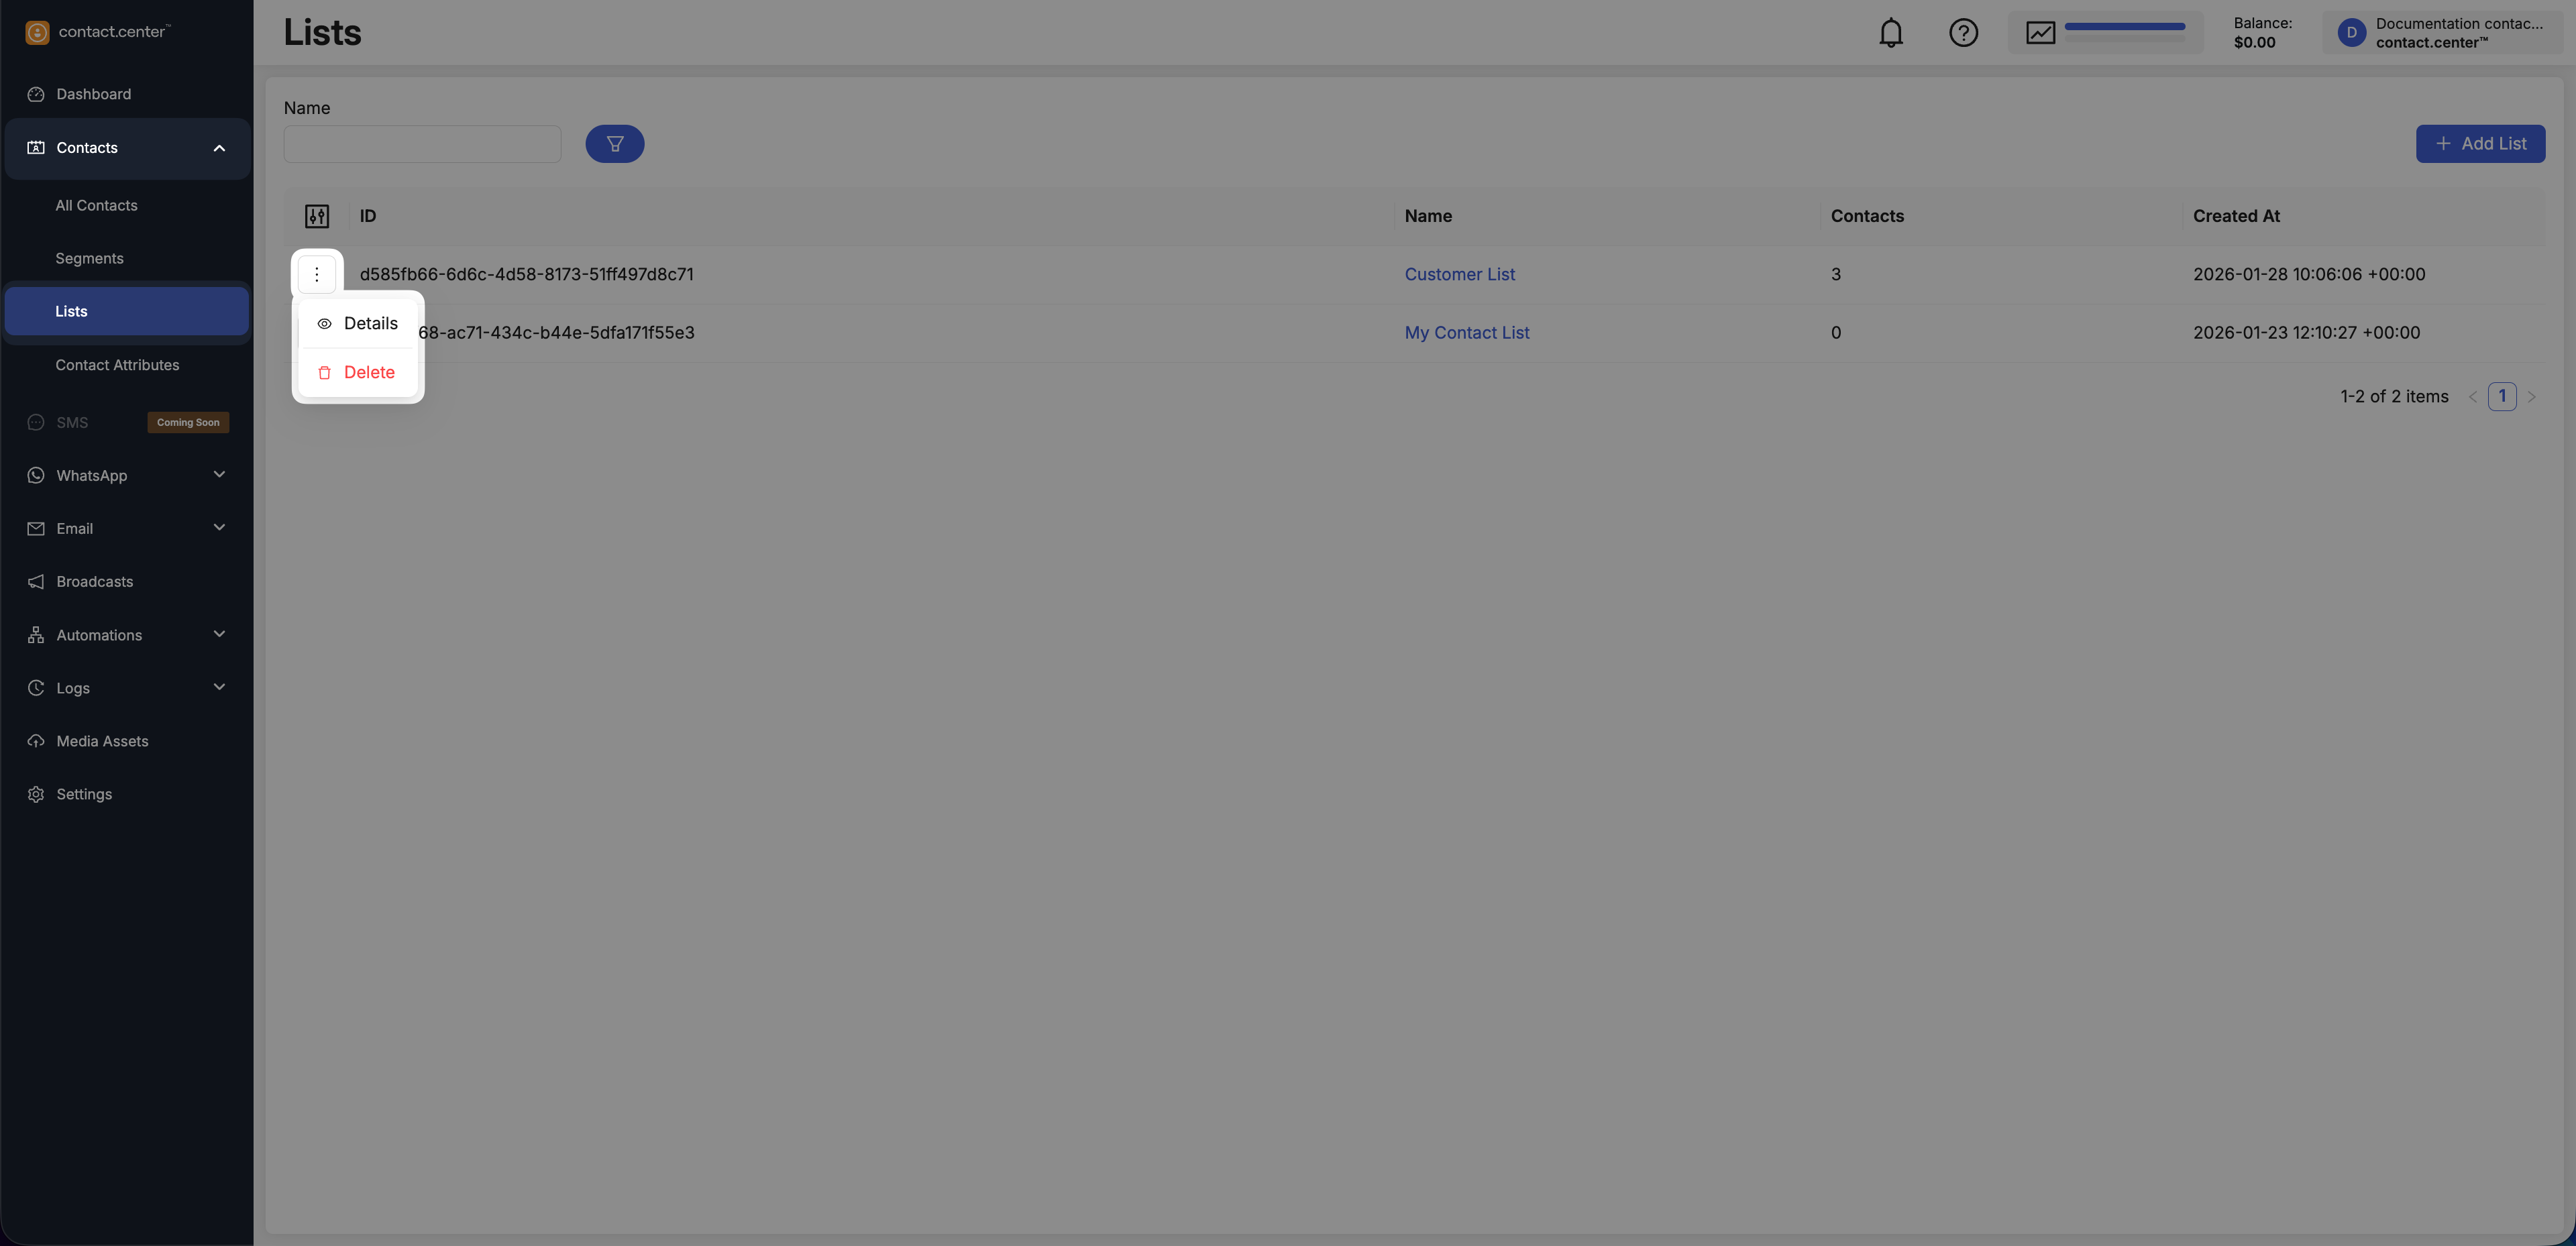
Fig. 7. Lists actions menu.
The List Details page opens and shows list contacts in a table.
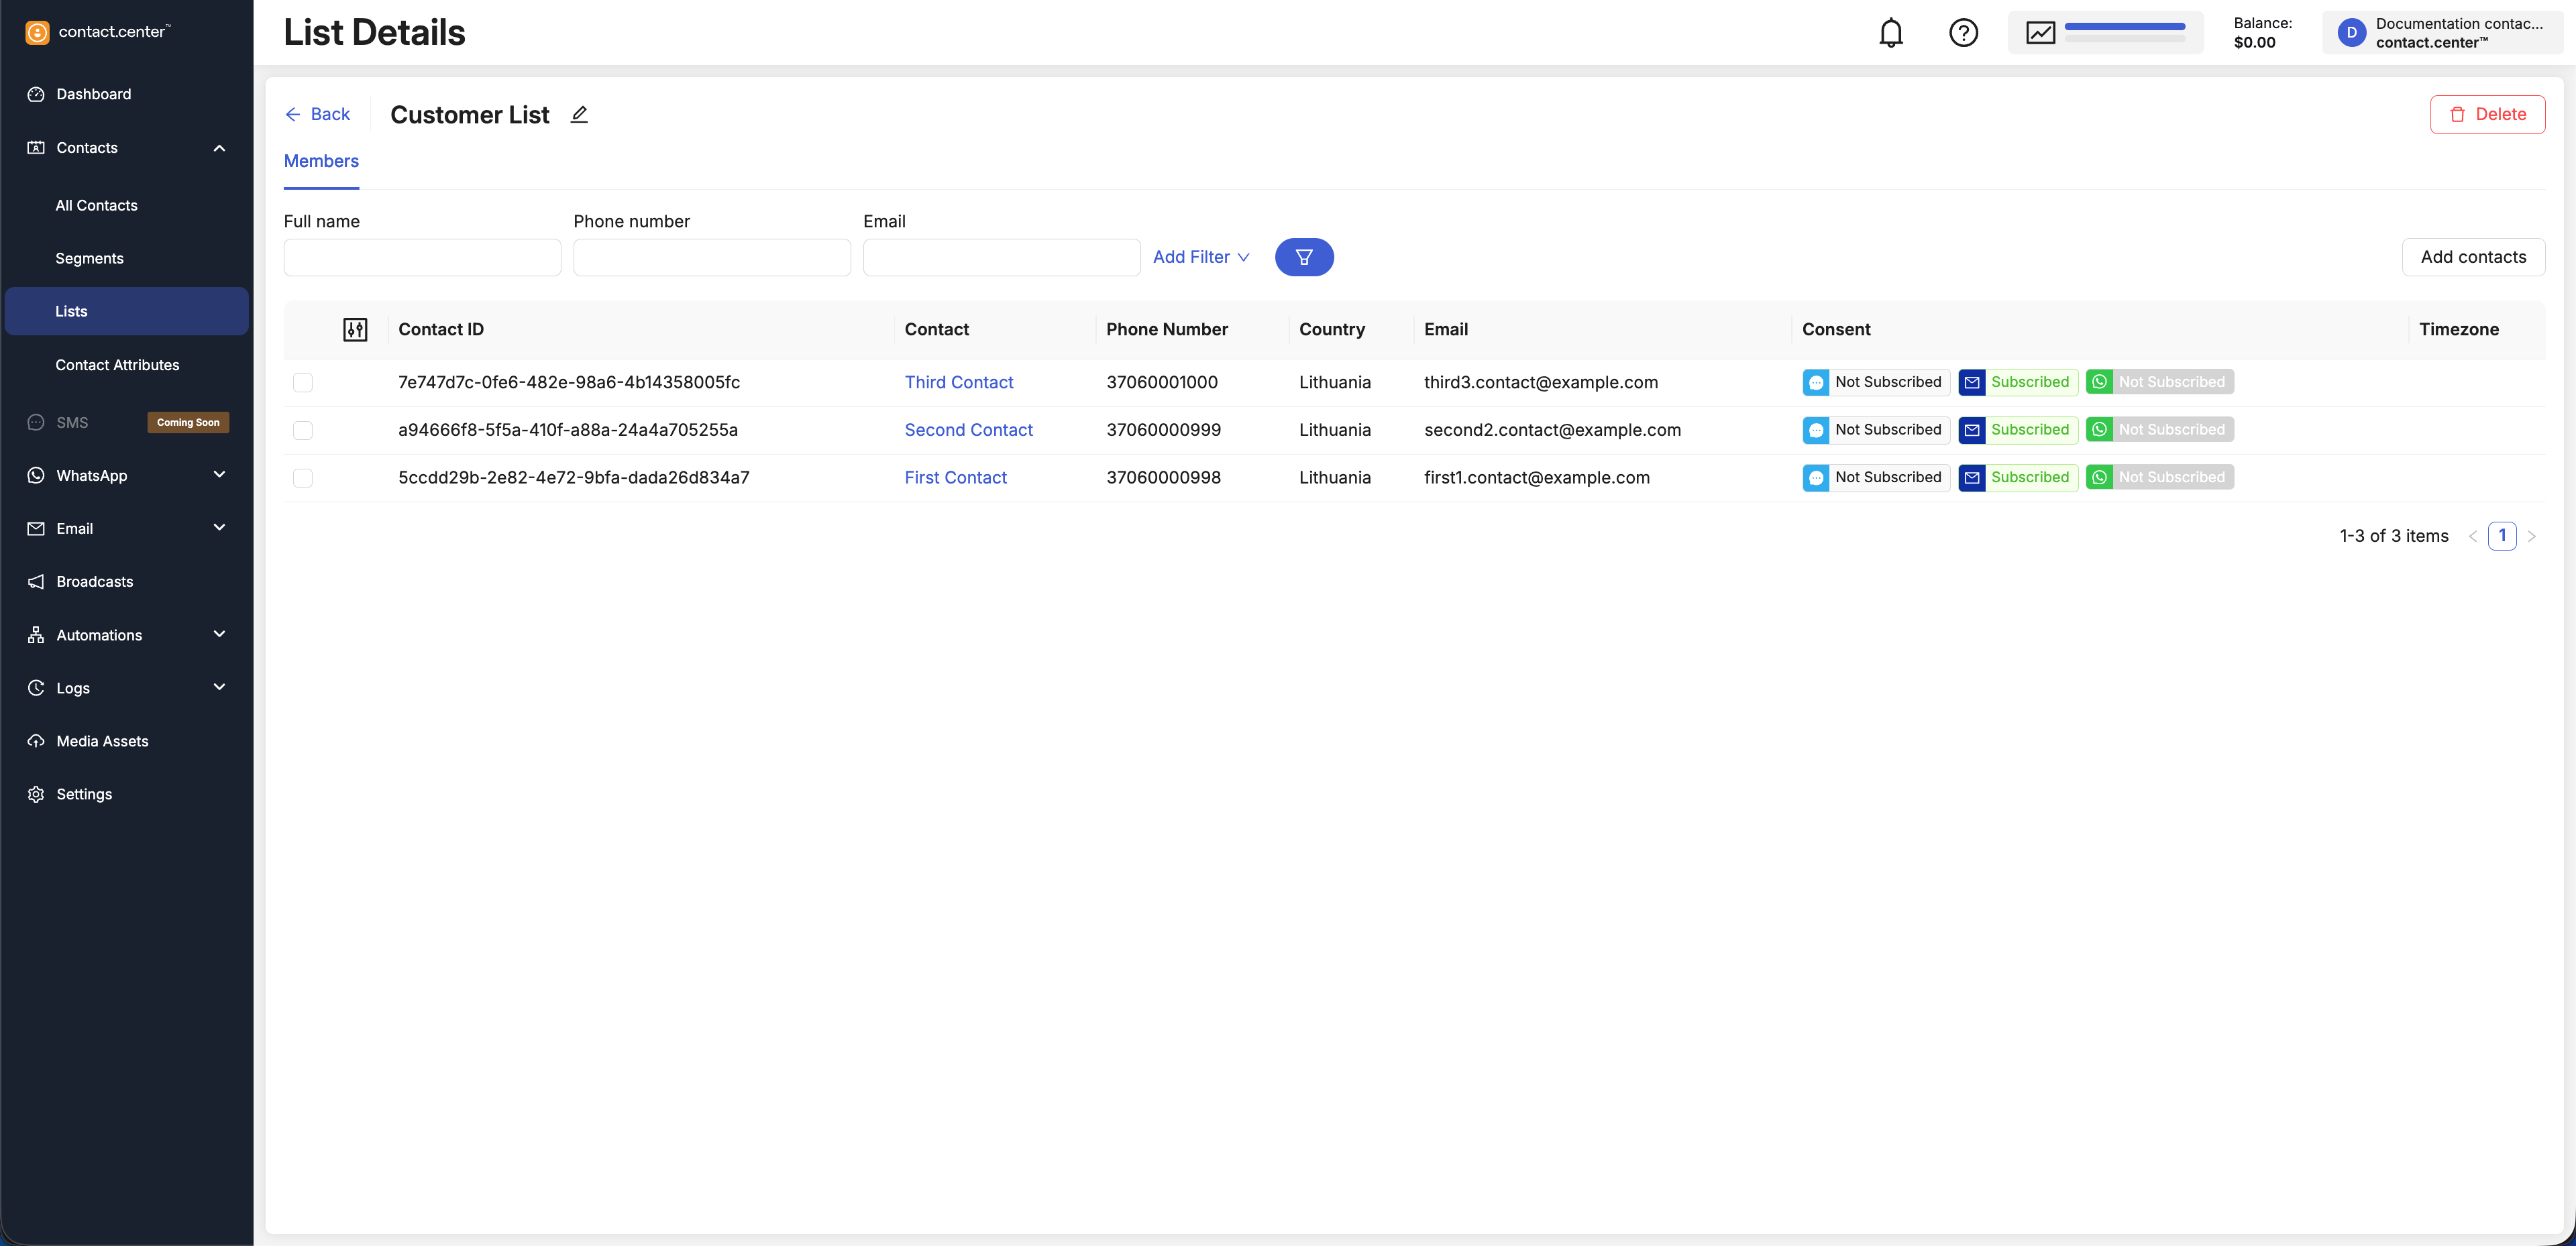
Fig. 7. List Details page.
Filter Contacts in a List
Use filters above the list members table to narrow down the displayed contacts based on contact attributes.
Enter values in one or more filter fields.
Click the Filter button to apply the selected filters.
The list members table is updated only after the Filter button is clicked.
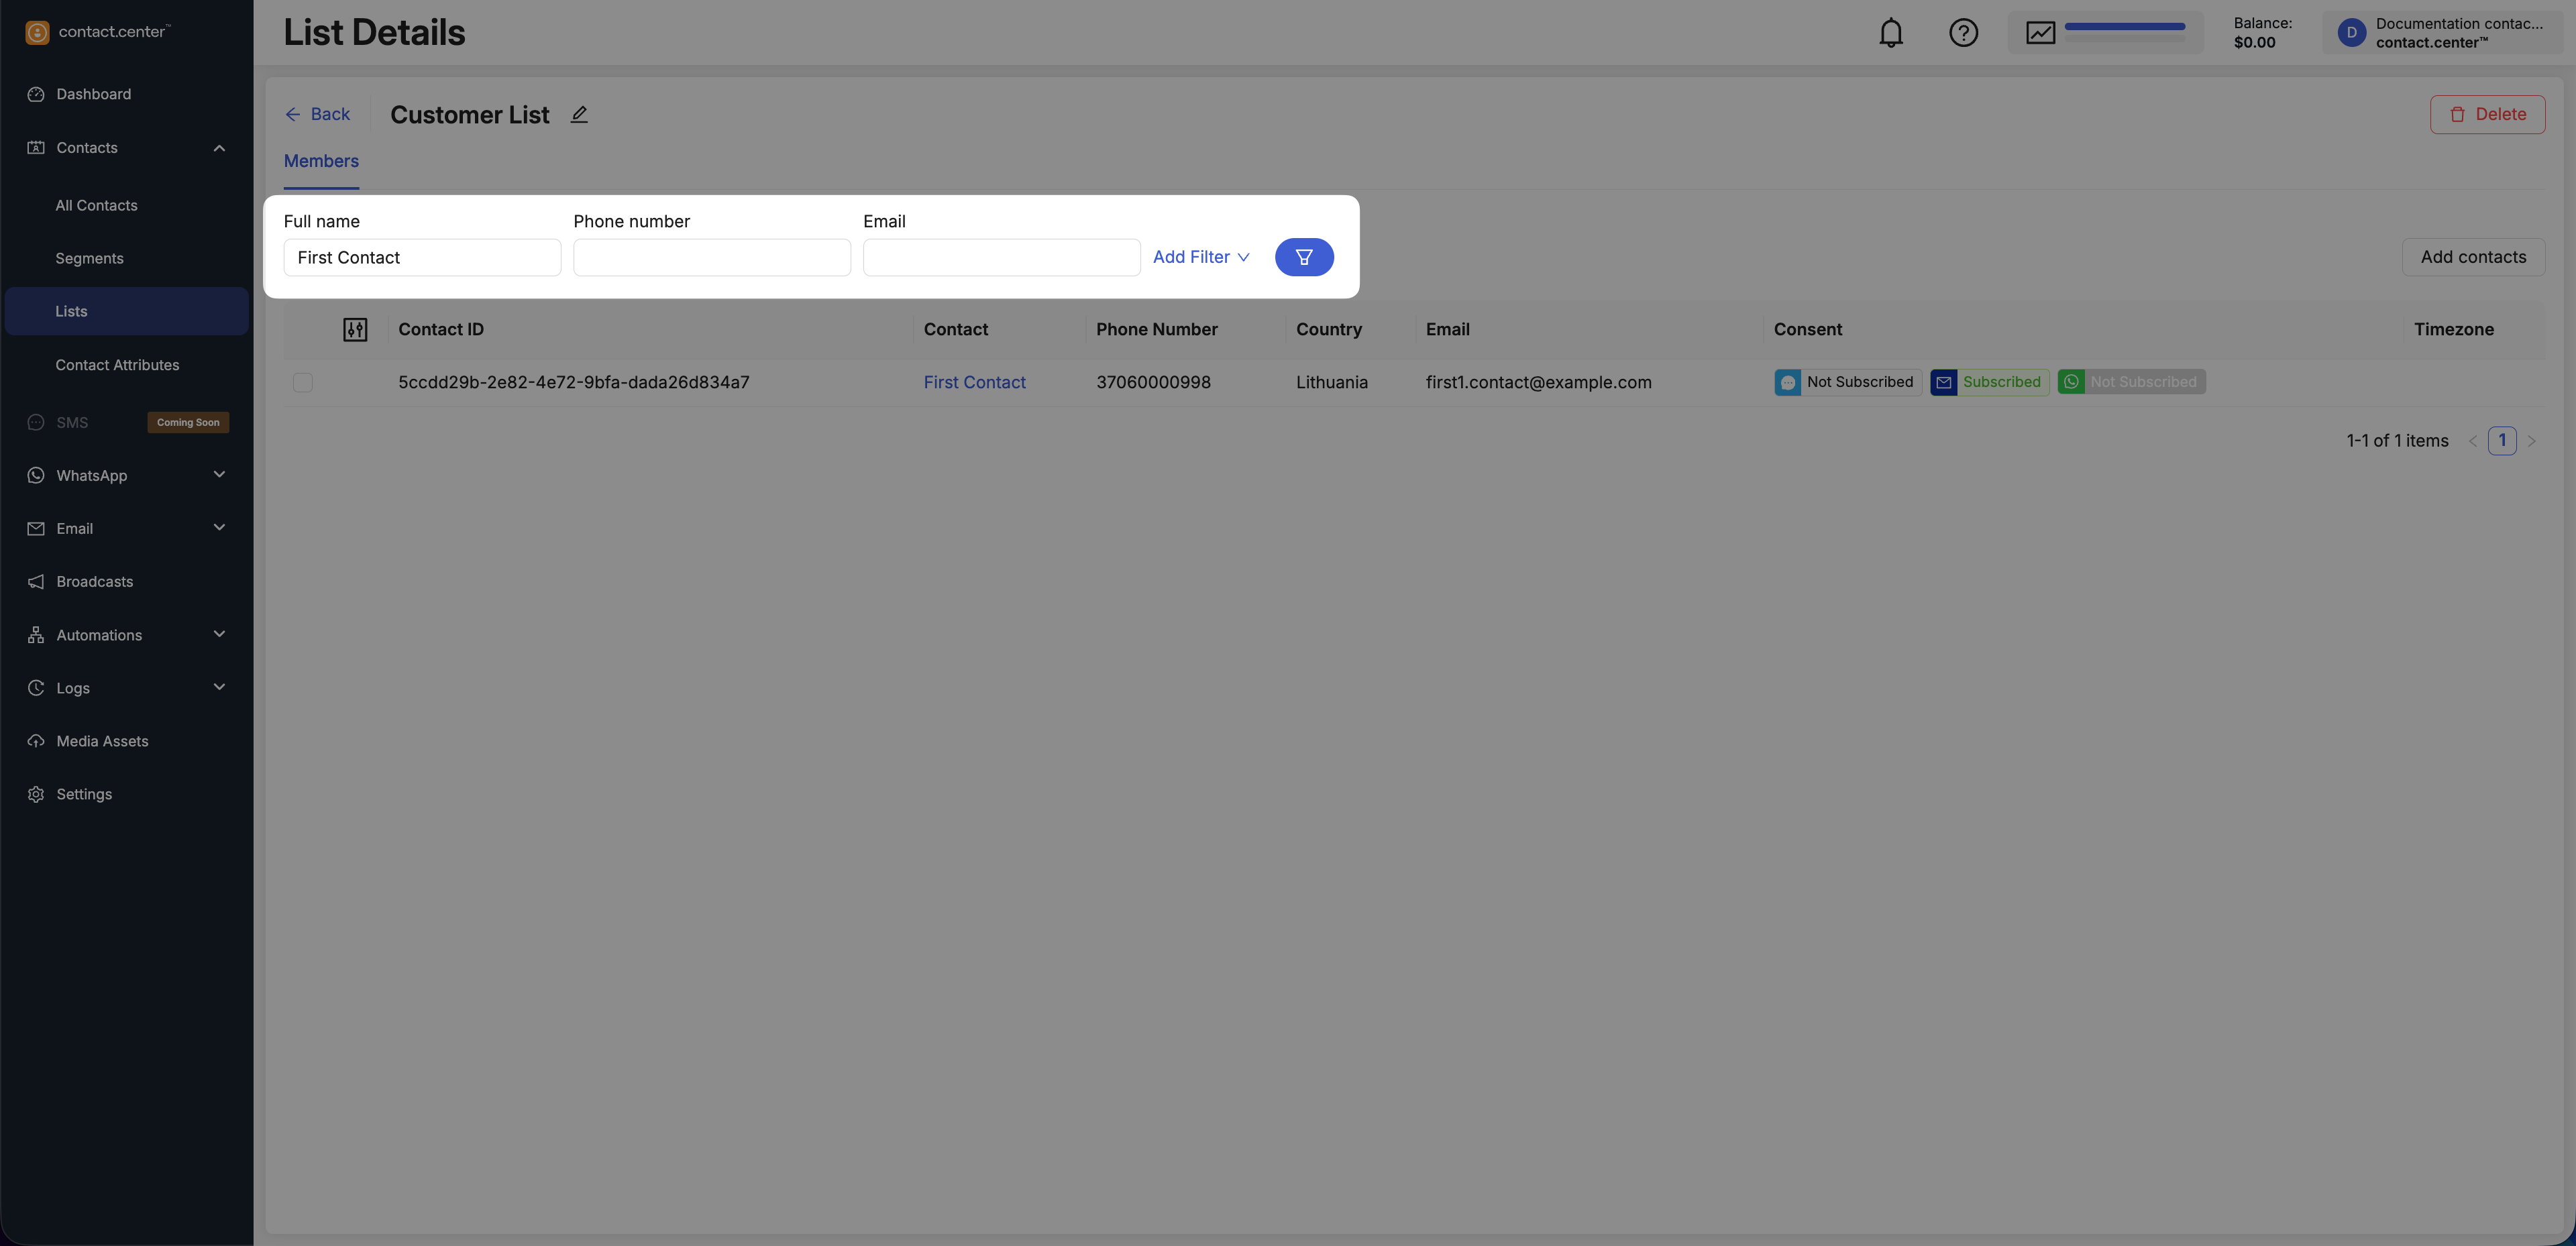
Fig. 4. Filter fields in List Details.
Add a Filter
Use Add Filter to access additional filters based on additional contact attributes.
Click Add Filter.
Select an available filter from the list.
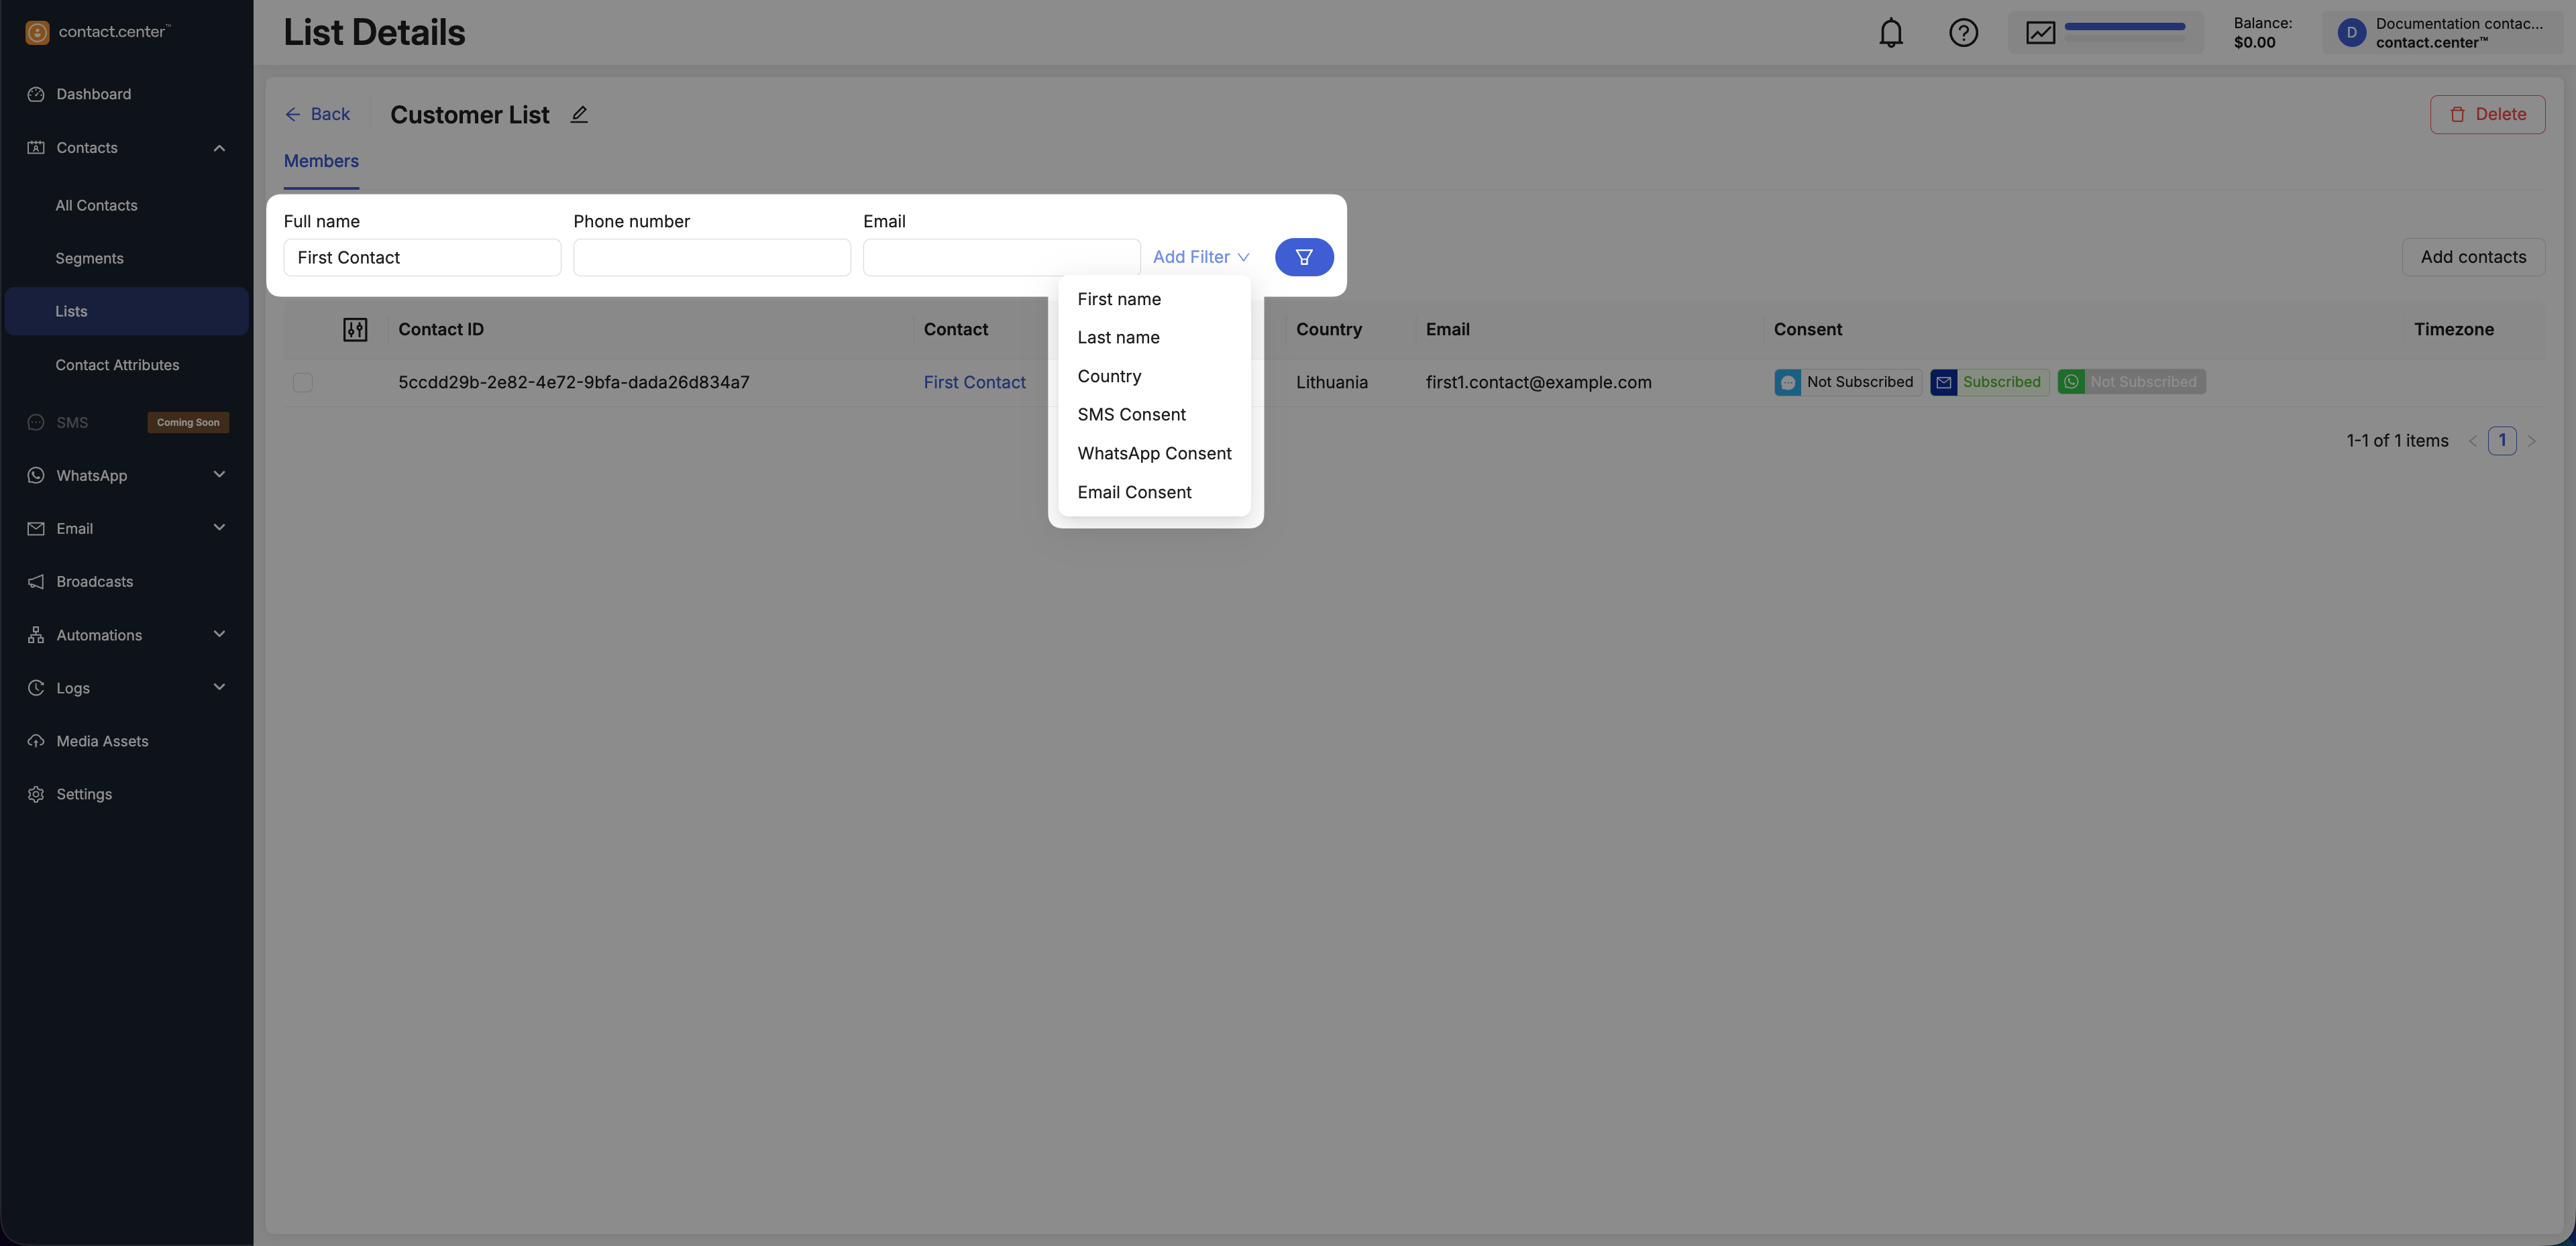
Fig. 5. Add a filter in List Details.
Available Filters
The following filters are available for use. This includes both default filters and filters added via Add Filter.
Filter |
Description |
|---|---|
Full name |
Filters contacts by full name |
Phone number |
Filters contacts by phone number |
Filters contacts by email address |
|
First name |
Filters contacts by first name |
Last name |
Filters contacts by last name |
Country |
Filters contacts by country |
SMS Consent |
Filters contacts by SMS subscription status |
WhatsApp Consent |
Filters contacts by WhatsApp subscription status |
Email Consent |
Filters contacts by email subscription status |
Note
The list of available filters is based on contact attributes defined in your workspace. To make additional attributes available for filtering, create them in Contact Attributes.
Customize Visible Columns
You can choose which columns are shown in the list members table.
Click the Customize columns icon on the left side of the table.
Toggle columns on or off.
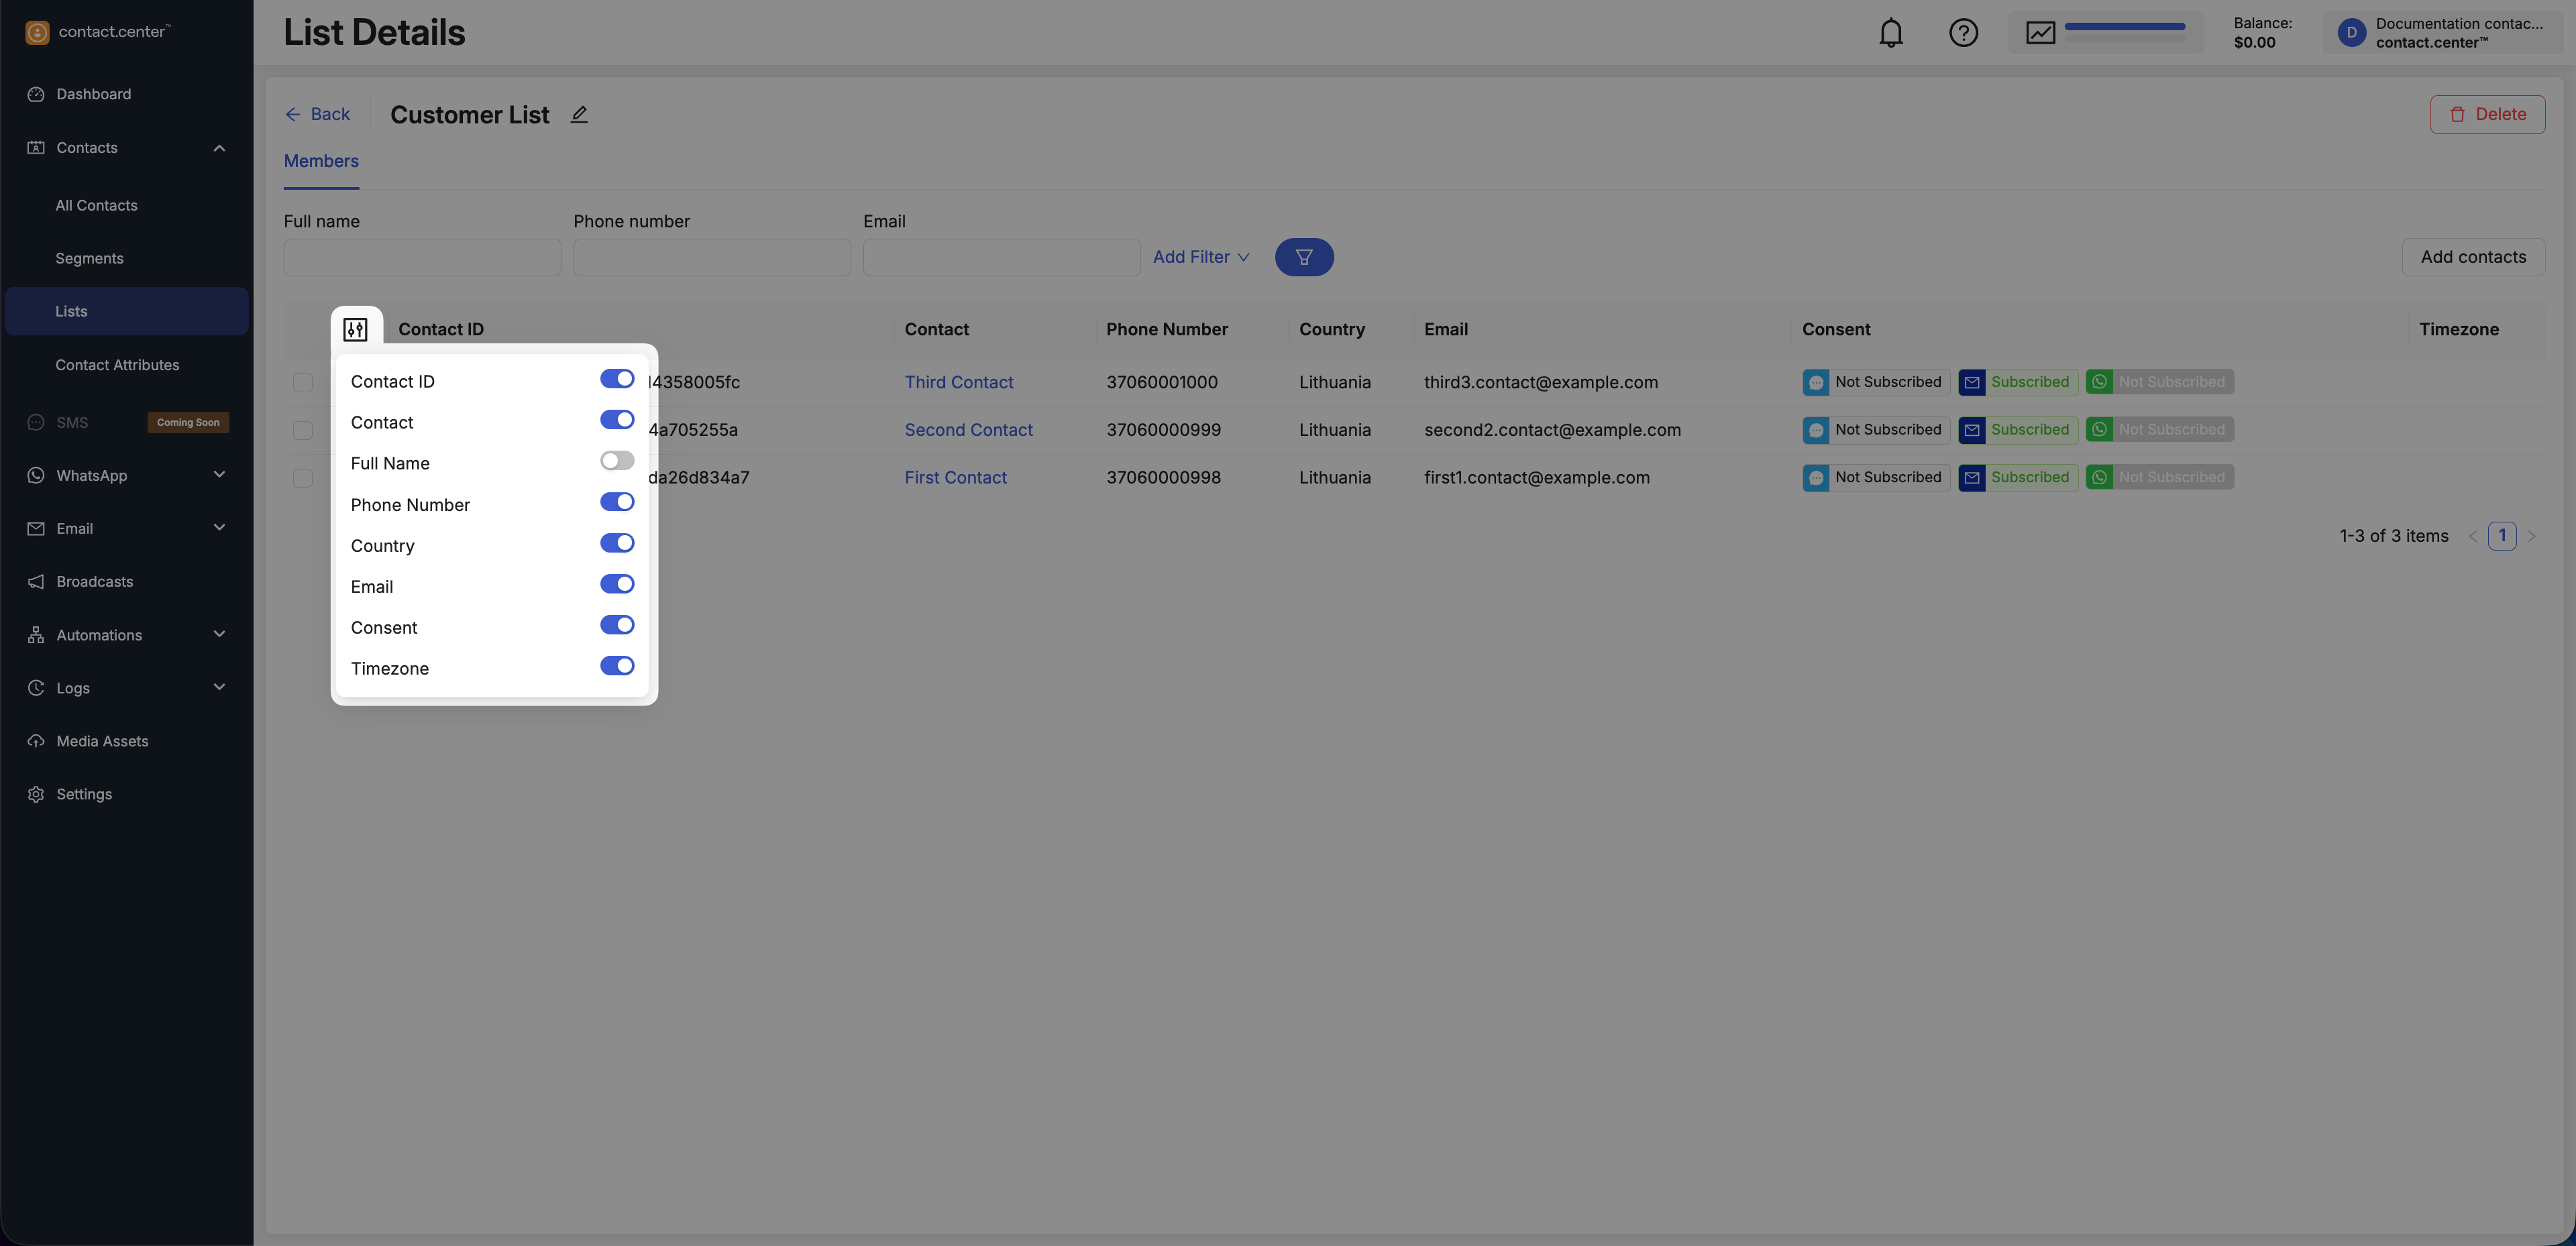
Fig. 6. Customize visible columns in List Details.
Add Contacts to a List
Follow these steps to add one or more contacts to an existing contact list.
Note
Adding contacts to a list can also be automated. For more information, see Add to list action.
Step 1: Open the List
Go to Contacts → Lists.
Locate the list you want to update.
Click Details in the actions menu.
Fig. 7. Lists actions menu.
Step 2: Add Contacts
Click Add contacts.
Fig. 8. Add Contact button.
In the Add contacts to list window, select one or more contacts from your workspace.
Click Save to confirm.
Fig. 8. Selecting contacts to add to a list.
Remove Contacts from a List
Follow these steps to remove one or more contacts from an existing contact list.
Note
Removing contacts from a list does not delete them from your workspace.
Removing contacts from a list can also be automated. For more information, see Remove from list action.
Step 1: Open the List
Go to Contacts → Lists.
Locate the list you want to update.
Click Details in the actions menu.
Fig. 7. Lists actions menu.
Step 2: Find the Contact
Use the available filters to locate the contact you want to remove. For more information, see Filter contacts in a list.
Fig. 4. Find the contact using filters.
Step 3: Remove the Contact
Select the checkbox next to the contact.
Click the Delete icon to remove the selected contact from the list.
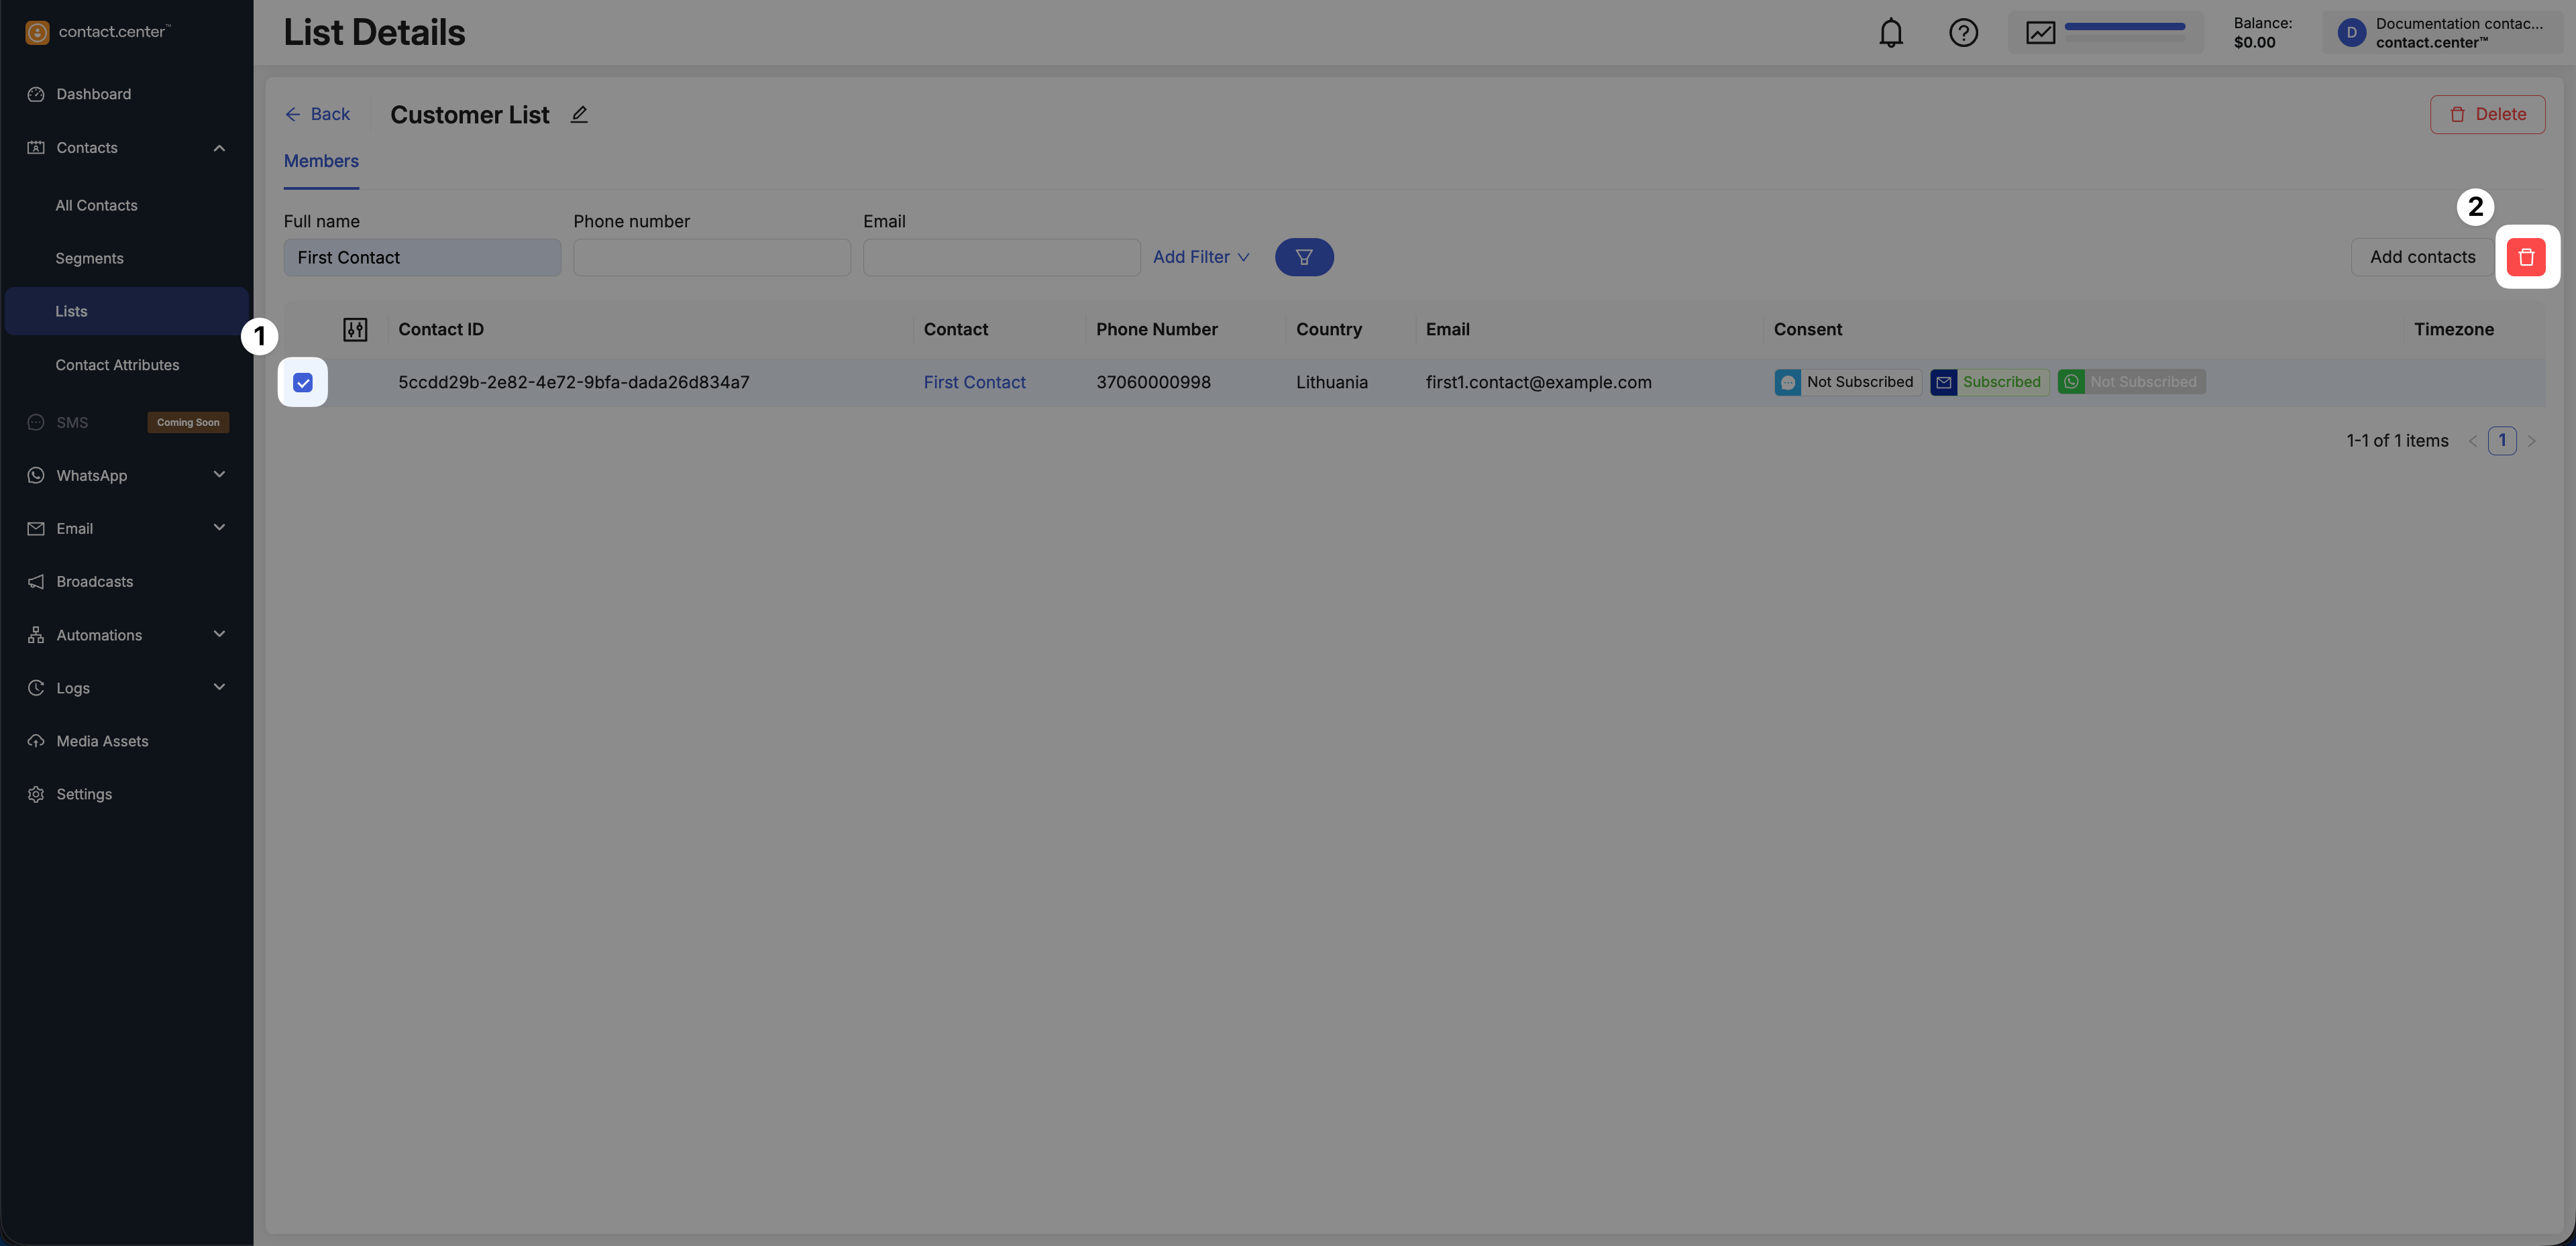
Fig. 9. Removing a contact from a list.
In the Remove contact from list window, click Delete to confirm the action.
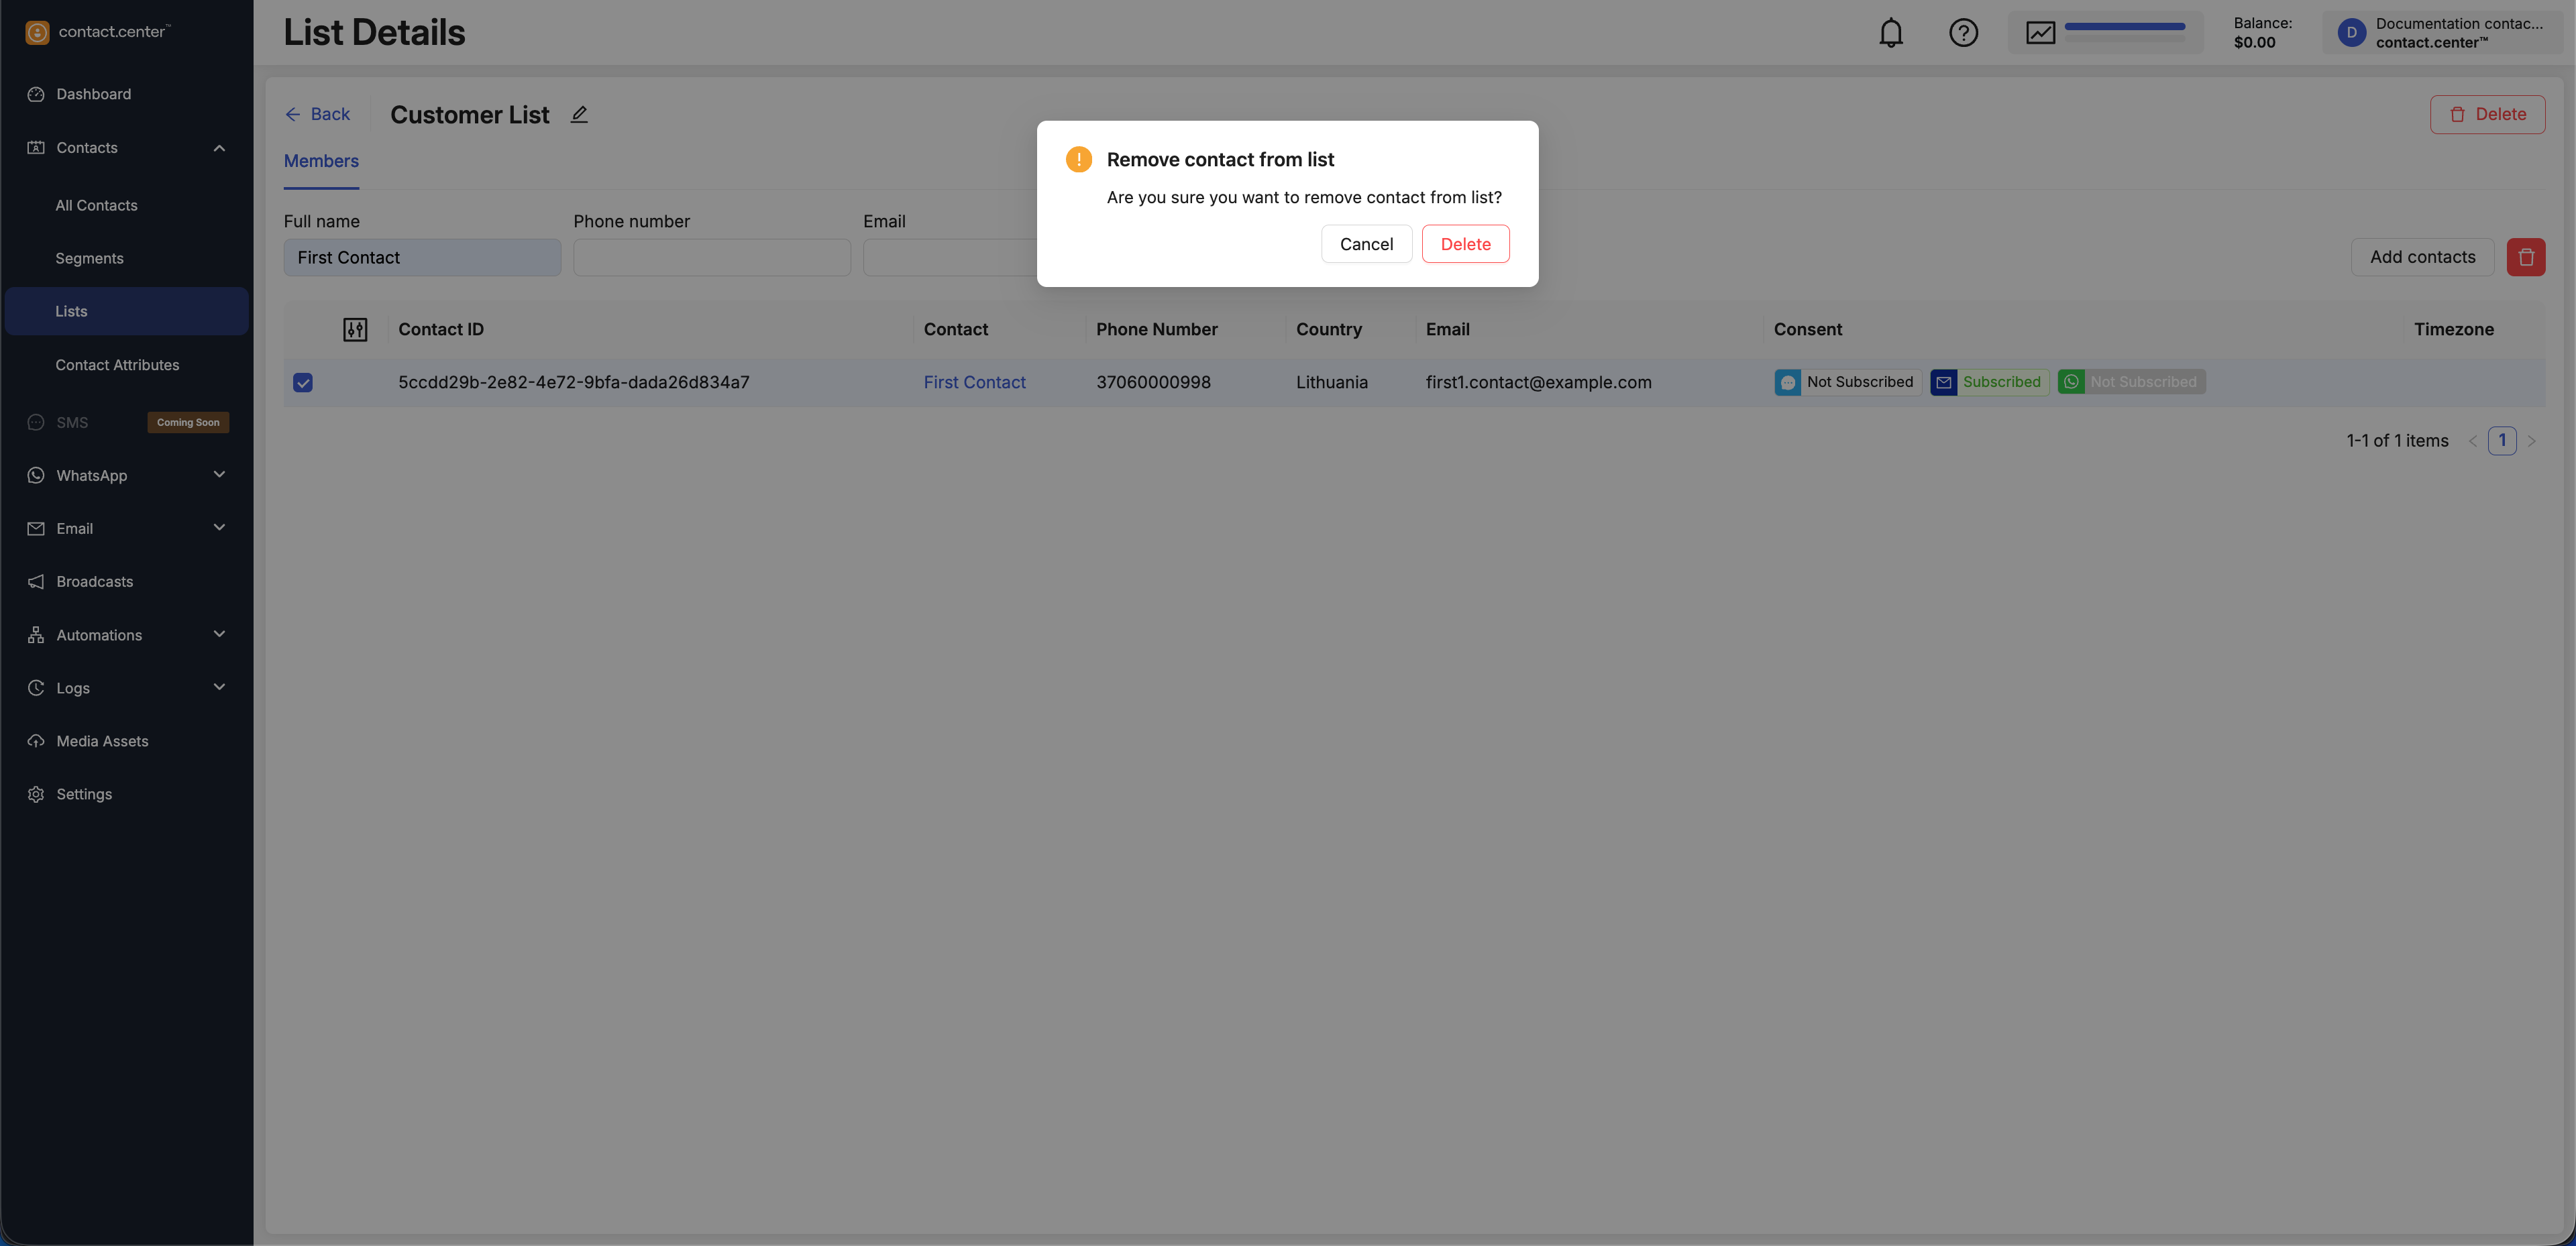
Fig. 9. Remove contact from list confirmation window.
Delete Contact List
Deleting a list permanently removes the list itself, but does not delete any contacts.
Warning
Before deleting a list, make sure it is not used by any active or scheduled broadcasts or automations.
Go to Contacts → Lists.
Locate the list you want to delete.
Click Delete in the actions menu.
Fig. 7. Lists actions menu.
In the Delete list window, click Delete to confirm the action.
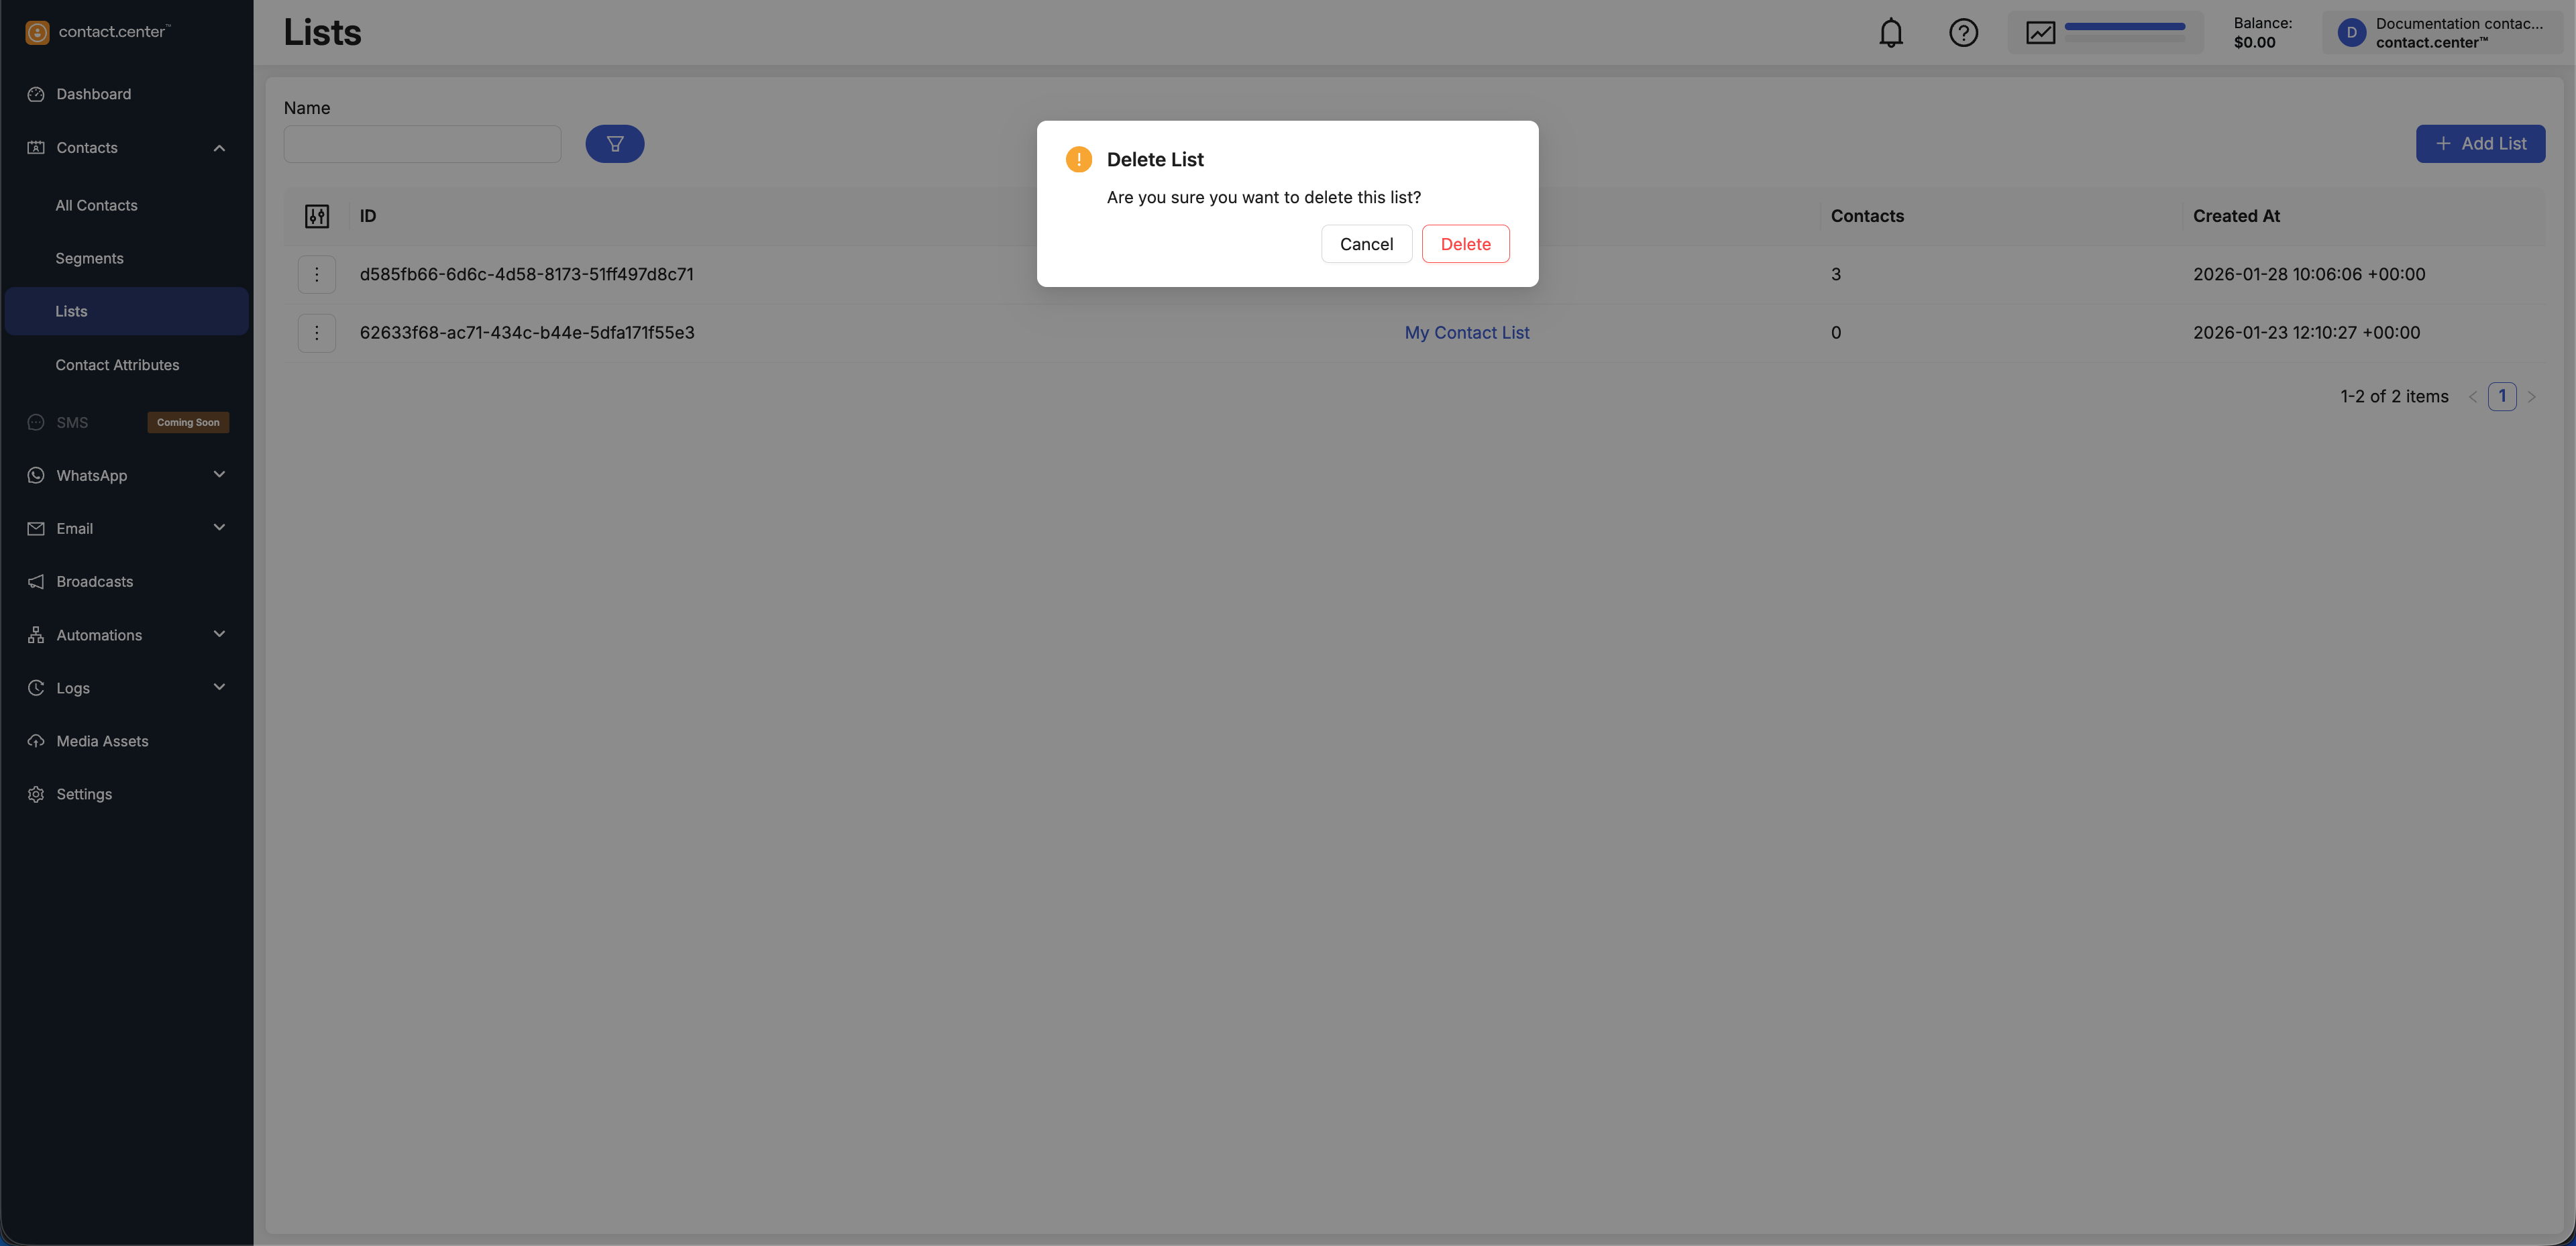
Fig. 7. Delete list confirmation window.