All Contacts
The All Contacts page provides a centralized view of all contacts in your contact.center™ workspace. It serves as the primary place for managing contacts, giving you easy access to tools for keeping contact information organized and up to date.
View, search, filter, and customize the contact list
Create, edit, or delete individual contacts
Import or update contacts in bulk using CSV files
Download contacts to CSV for reporting or backup
Review contact details and manage consent status
Manage Your Contacts
Add a single contact manually or import multiple contacts from a CSV file.
Download contacts to a CSV file for reporting, backup, or offline editing.
Bulk update existing contacts using a CSV file.
Filter contacts and customize which columns are shown in the table.
Open a contact profile to view contact information and list membership.
Update generic and custom contact information.
Change subscription consent for SMS, WhatsApp, or Email channels.
Permanently remove a contact from your workspace.
Create Contacts
Add one contact using the New Contact form.
Create or update multiple contacts from a CSV file.
Create a Single Contact
Use this option when you want to add one contact at a time.
Step 1: Open the New Contact Form
Go to Contacts → All Contacts.
Click Add New and select Create Contact.
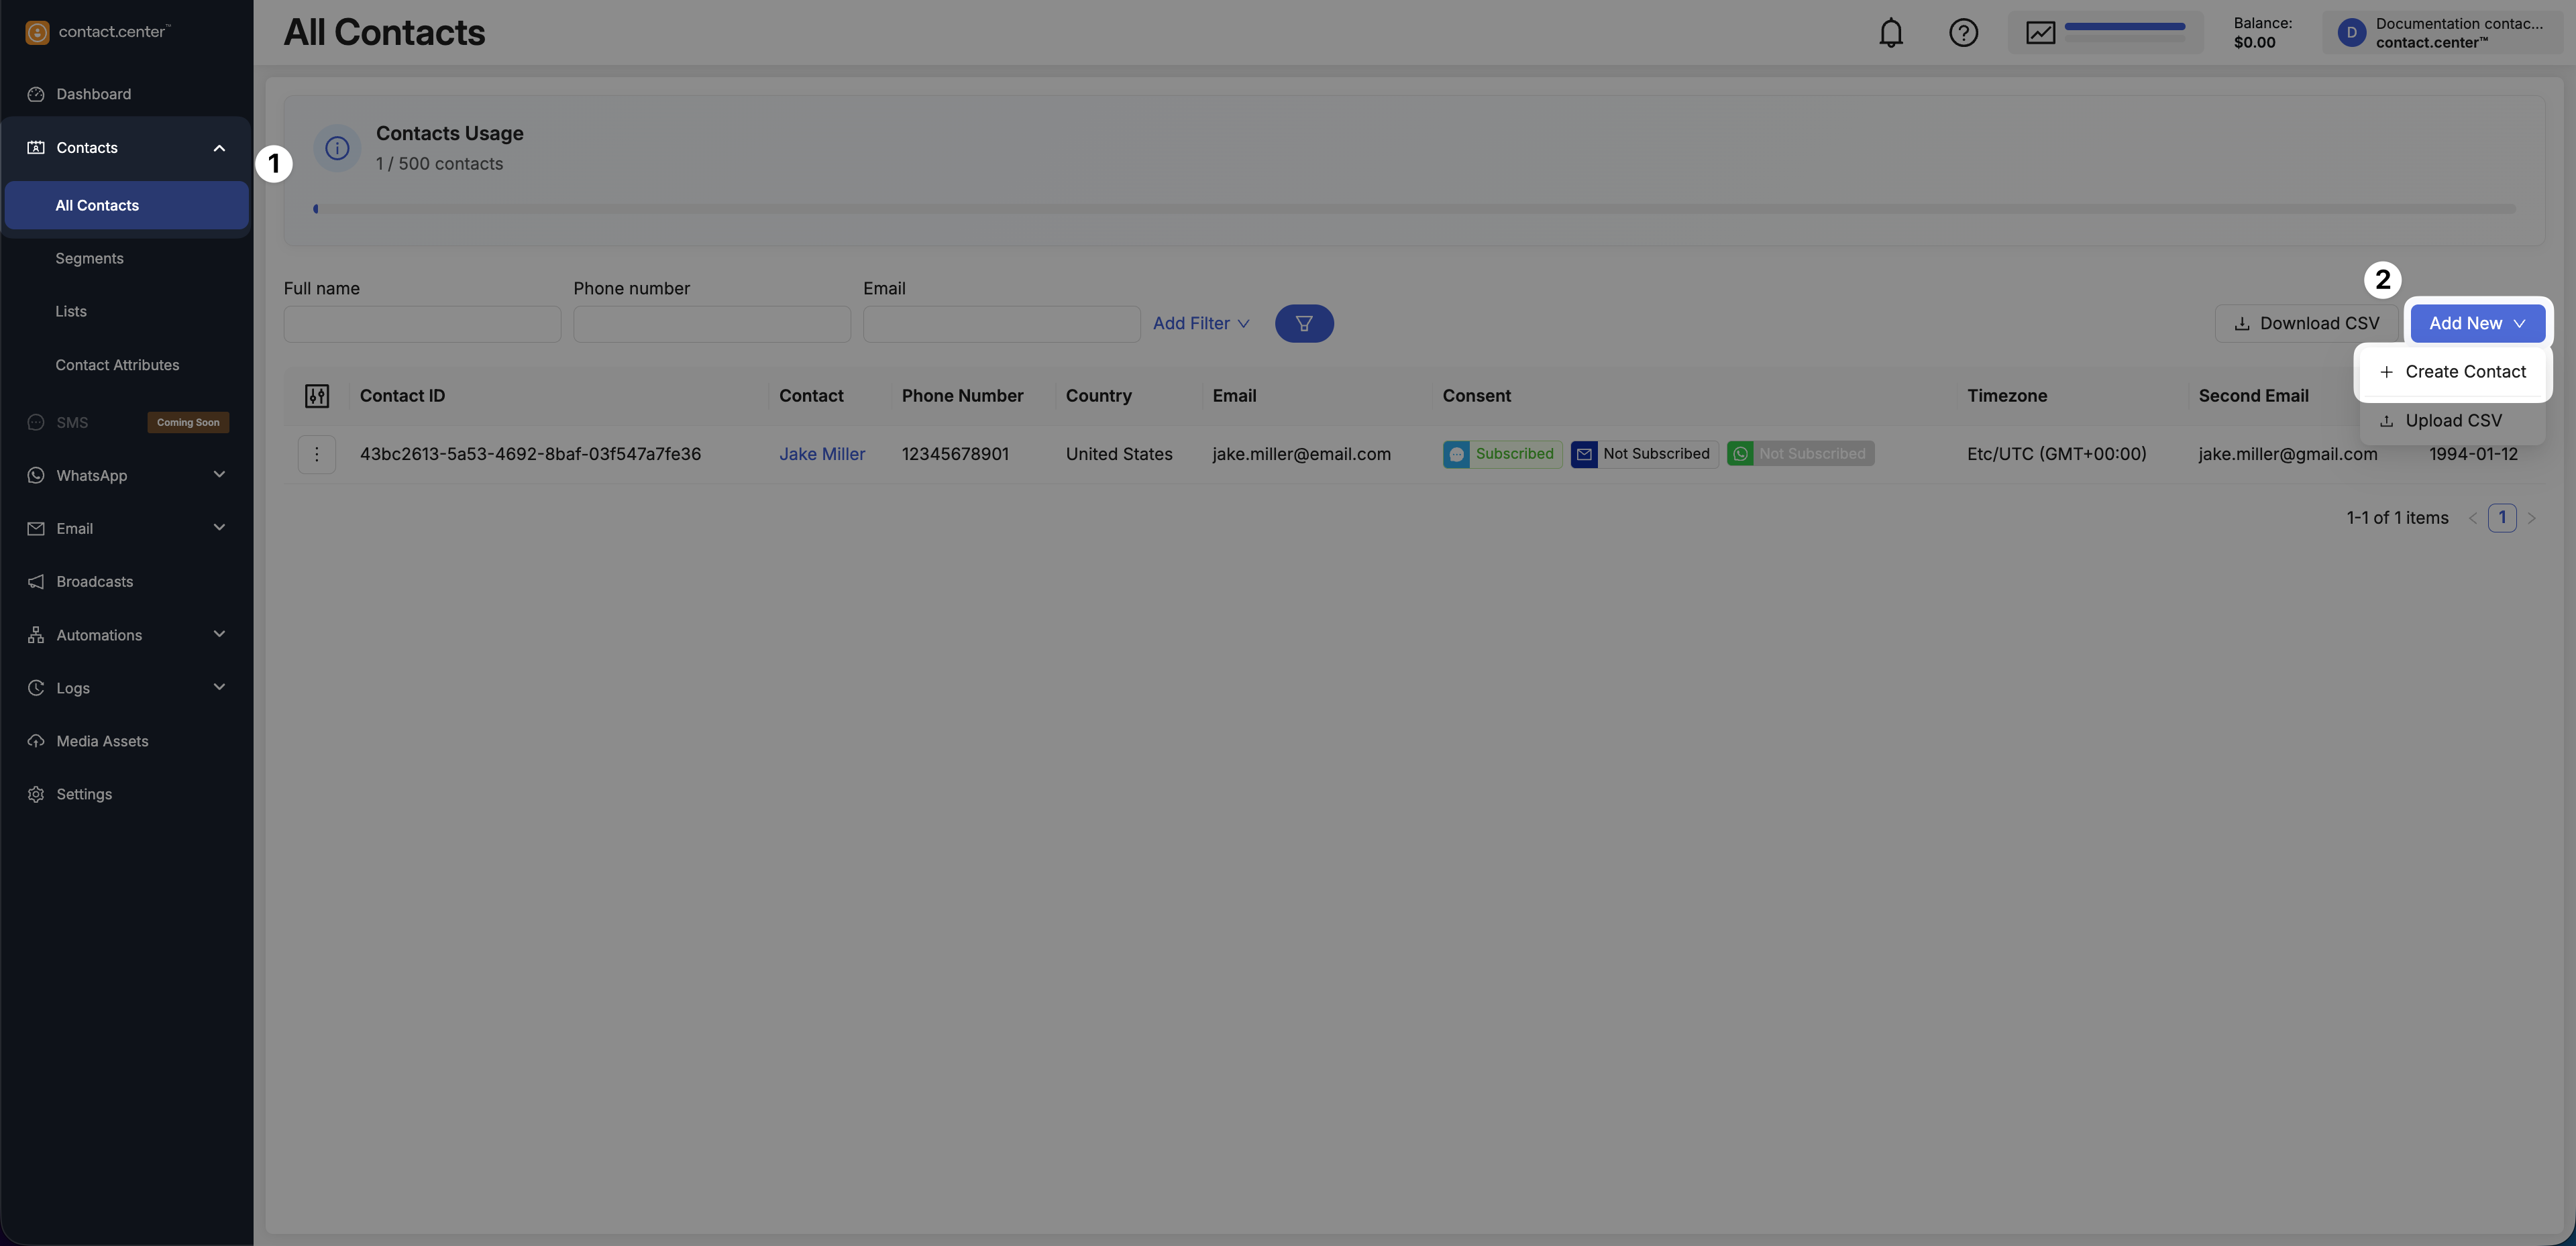
Fig. 1. Open the New Contact form.
Step 2: Fill in Contact Information
The form is divided into two sections:
Generic Attributes - core contact information such as name, contact details, identifiers, timezone, and list assignment.
Custom Attributes - additional fields configured for your workspace.
Custom attributes appear automatically based on your configuration. To review or manage available attributes, see Contact Attributes.
You can optionally assign the contact to one or more lists using the Lists field.
Note
External ID is required.
You must also provide at least one of the following: Phone Number or Email.
Phone Number must be in E.164 format (for example,
+12345678902).
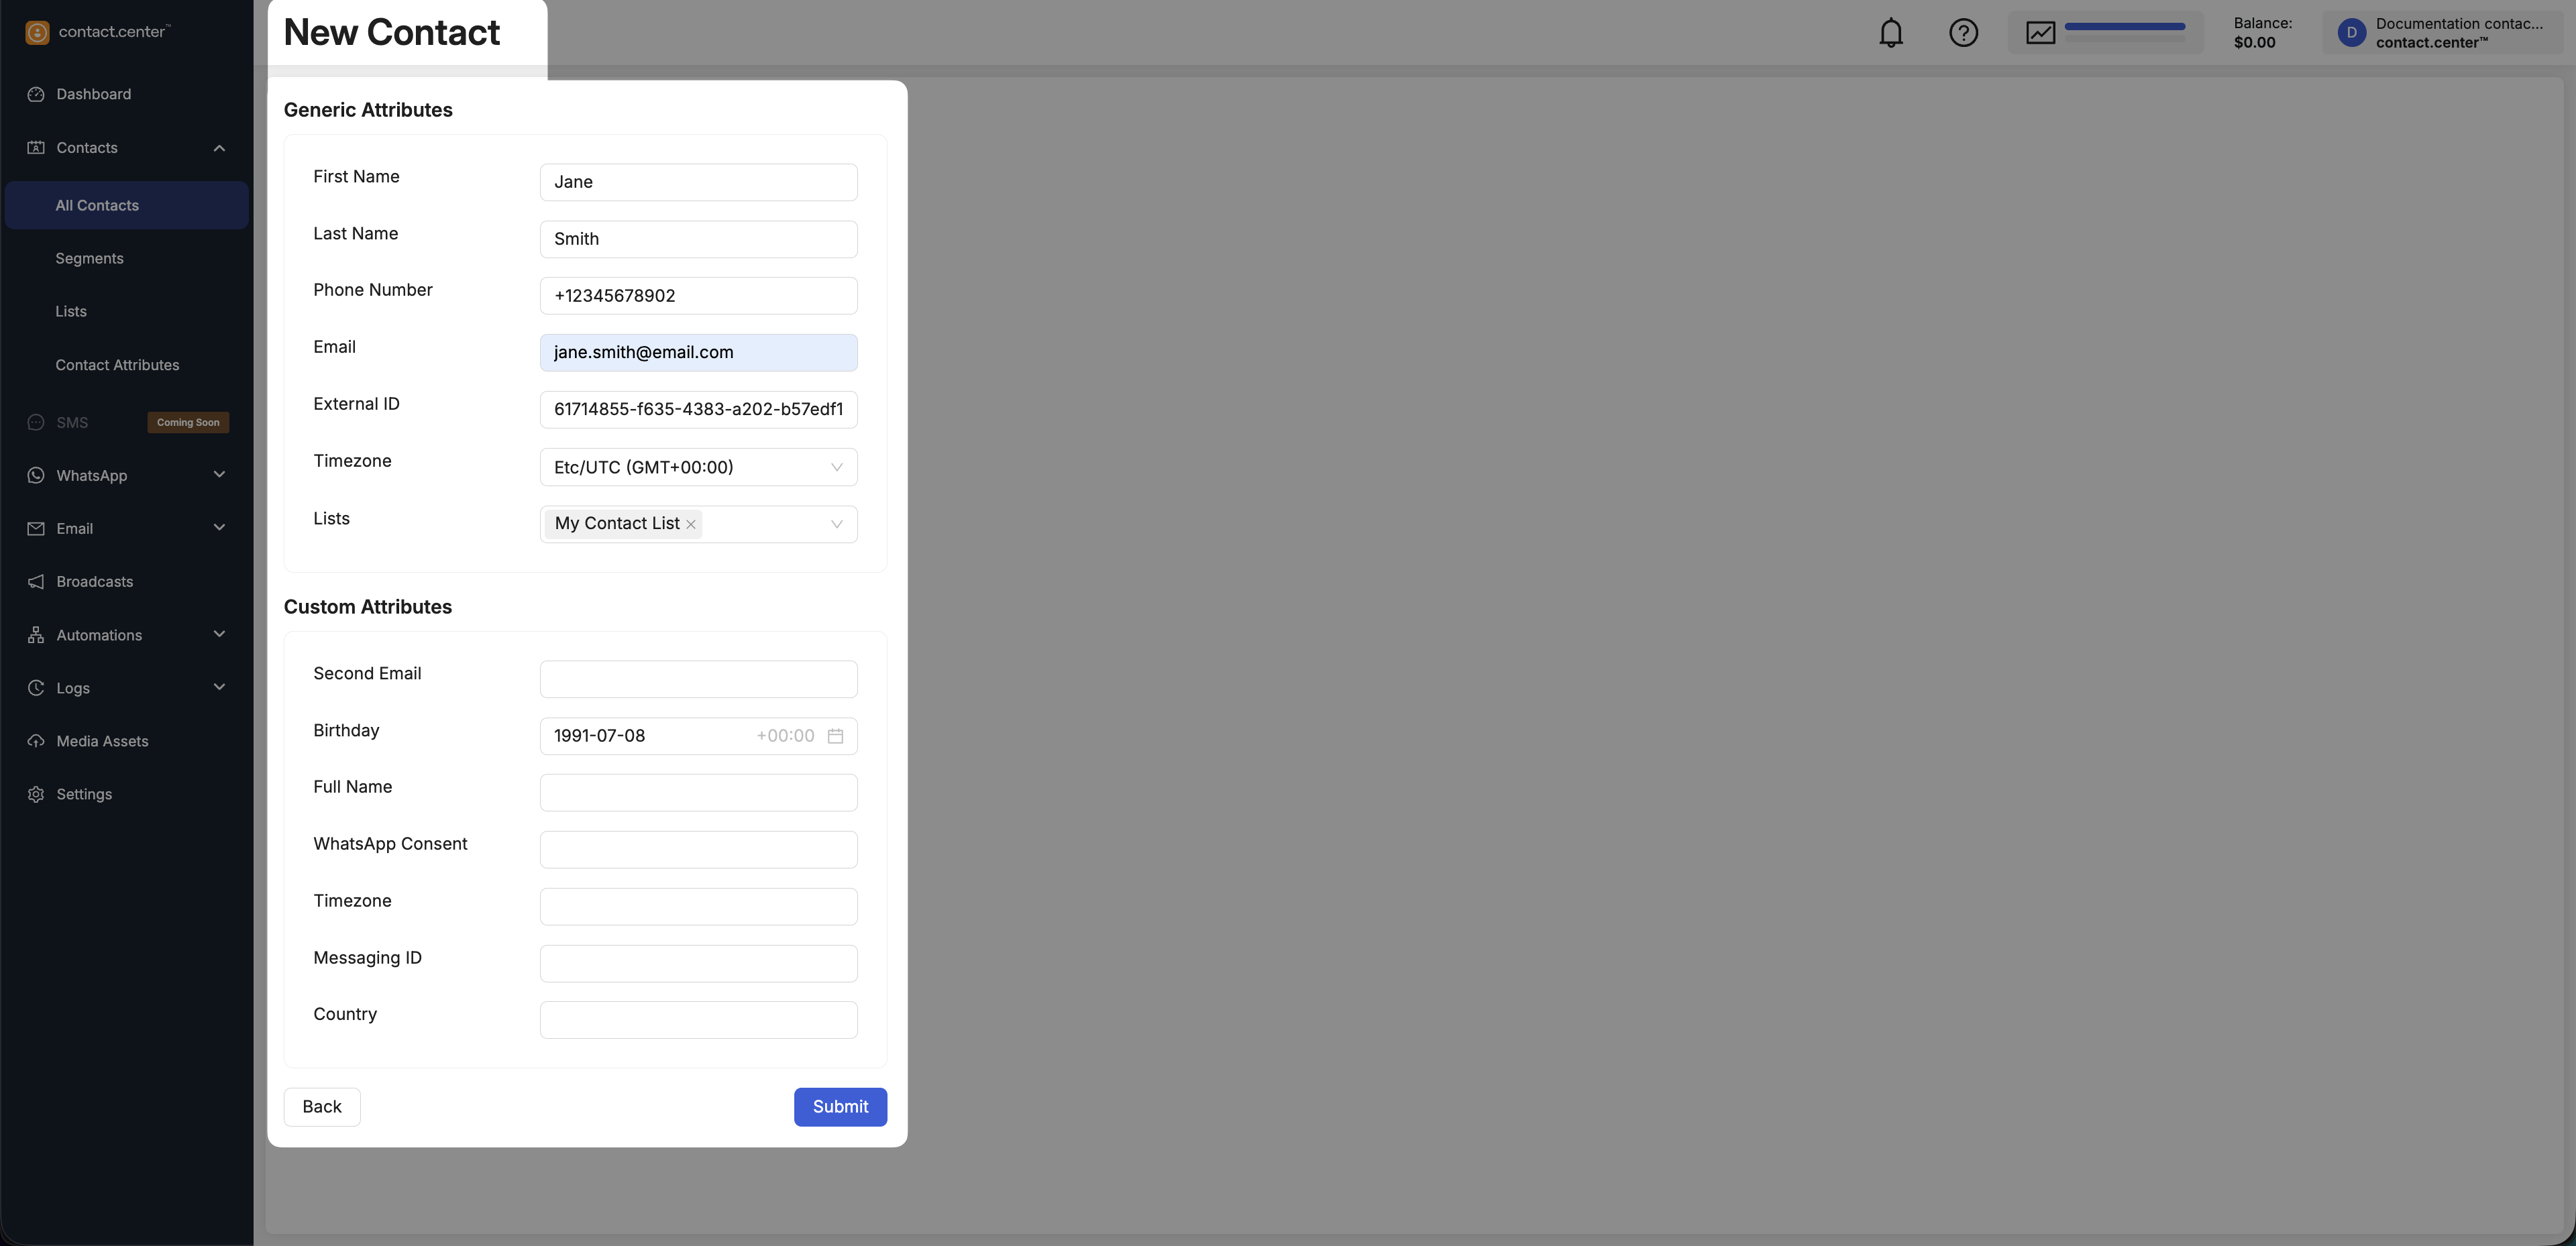
Fig. 2. Generic and custom attributes in the New Contact form.
Step 3: Save the Contact
Click Submit to save the new contact to your workspace.
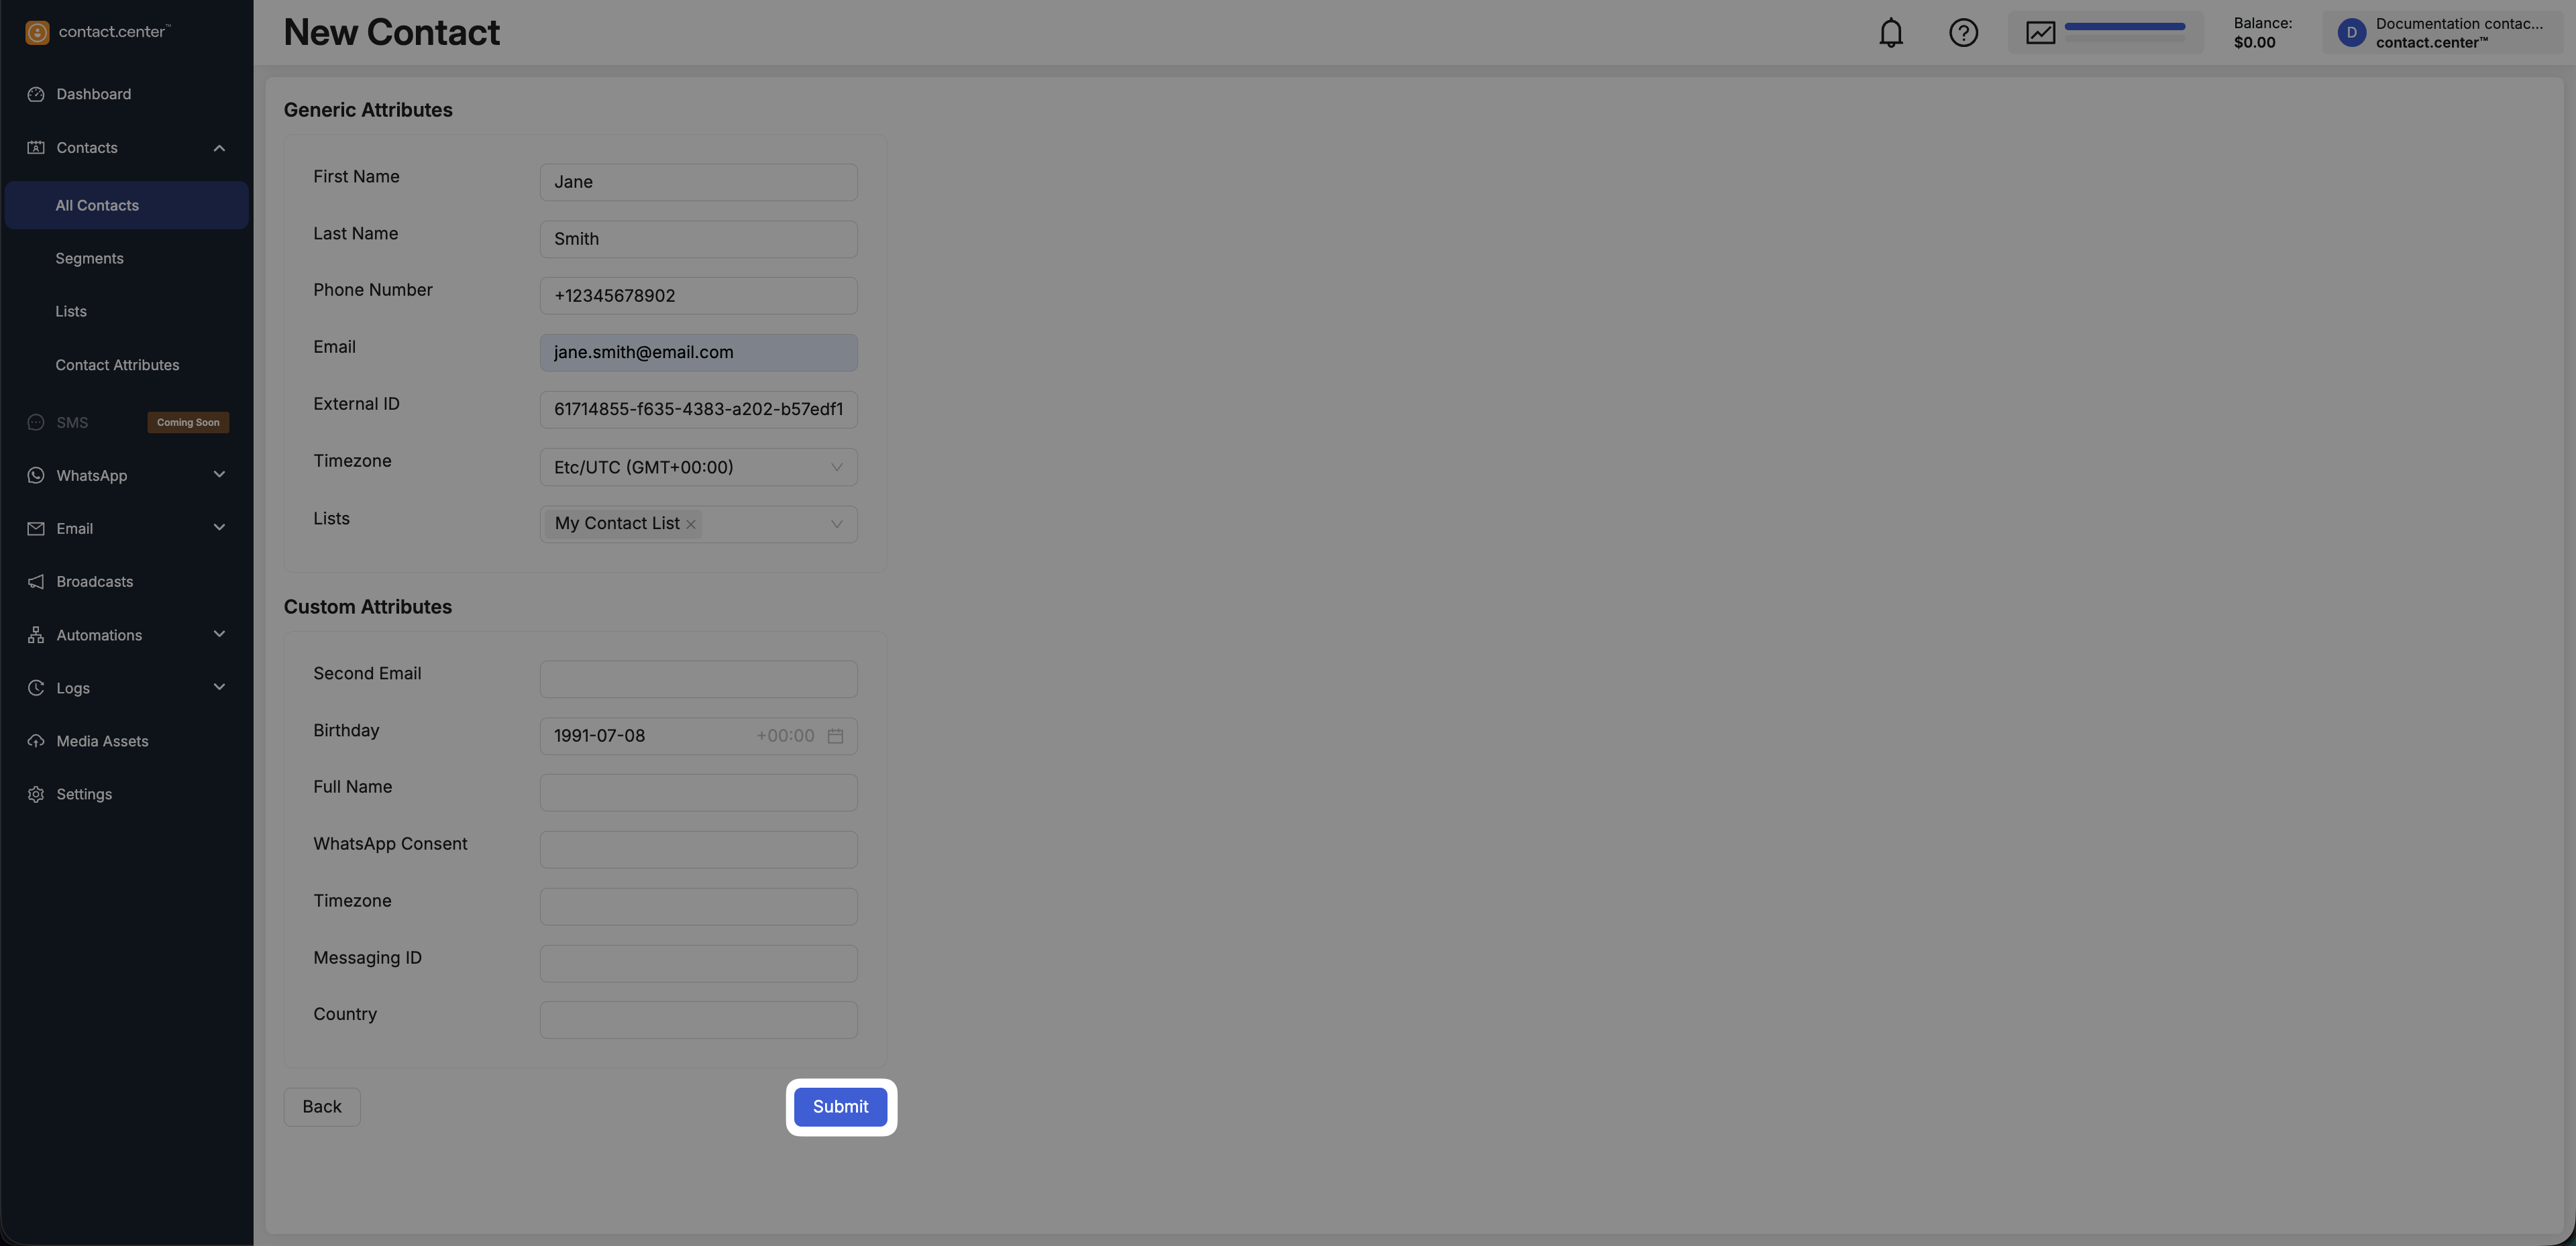
Fig. 3. Submit the New Contact form.
Upload Contacts from CSV
Uploading contacts from CSV is the fastest way to onboard large contact lists or synchronize updates from external systems. It helps you maintain consistent data at scale by applying the same rules (lists, timezone, update behavior) across all imported contacts.
Before submitting, review your update and deletion options carefully to avoid unintended changes to existing records.
Before You Begin
Use the provided CSV template to get started:
Download example CSV
Note
Replace the sample values in the CSV file with your actual contact data.
The file must be saved in
.csvformat and encoded in UTF-8.The maximum file size is 50 MB.
Required columns depend on the selected import options:
When importing new contacts only, at least one unique identifier (for example, Phone Number or Email) is required.
When updating existing contacts, the CSV must include one of the identifiers used to recognize contacts (Messaging ID or External ID).
Step 1: Open the Upload CSV Flow
Go to Contacts → All Contacts.
Click Add New and select Upload CSV.
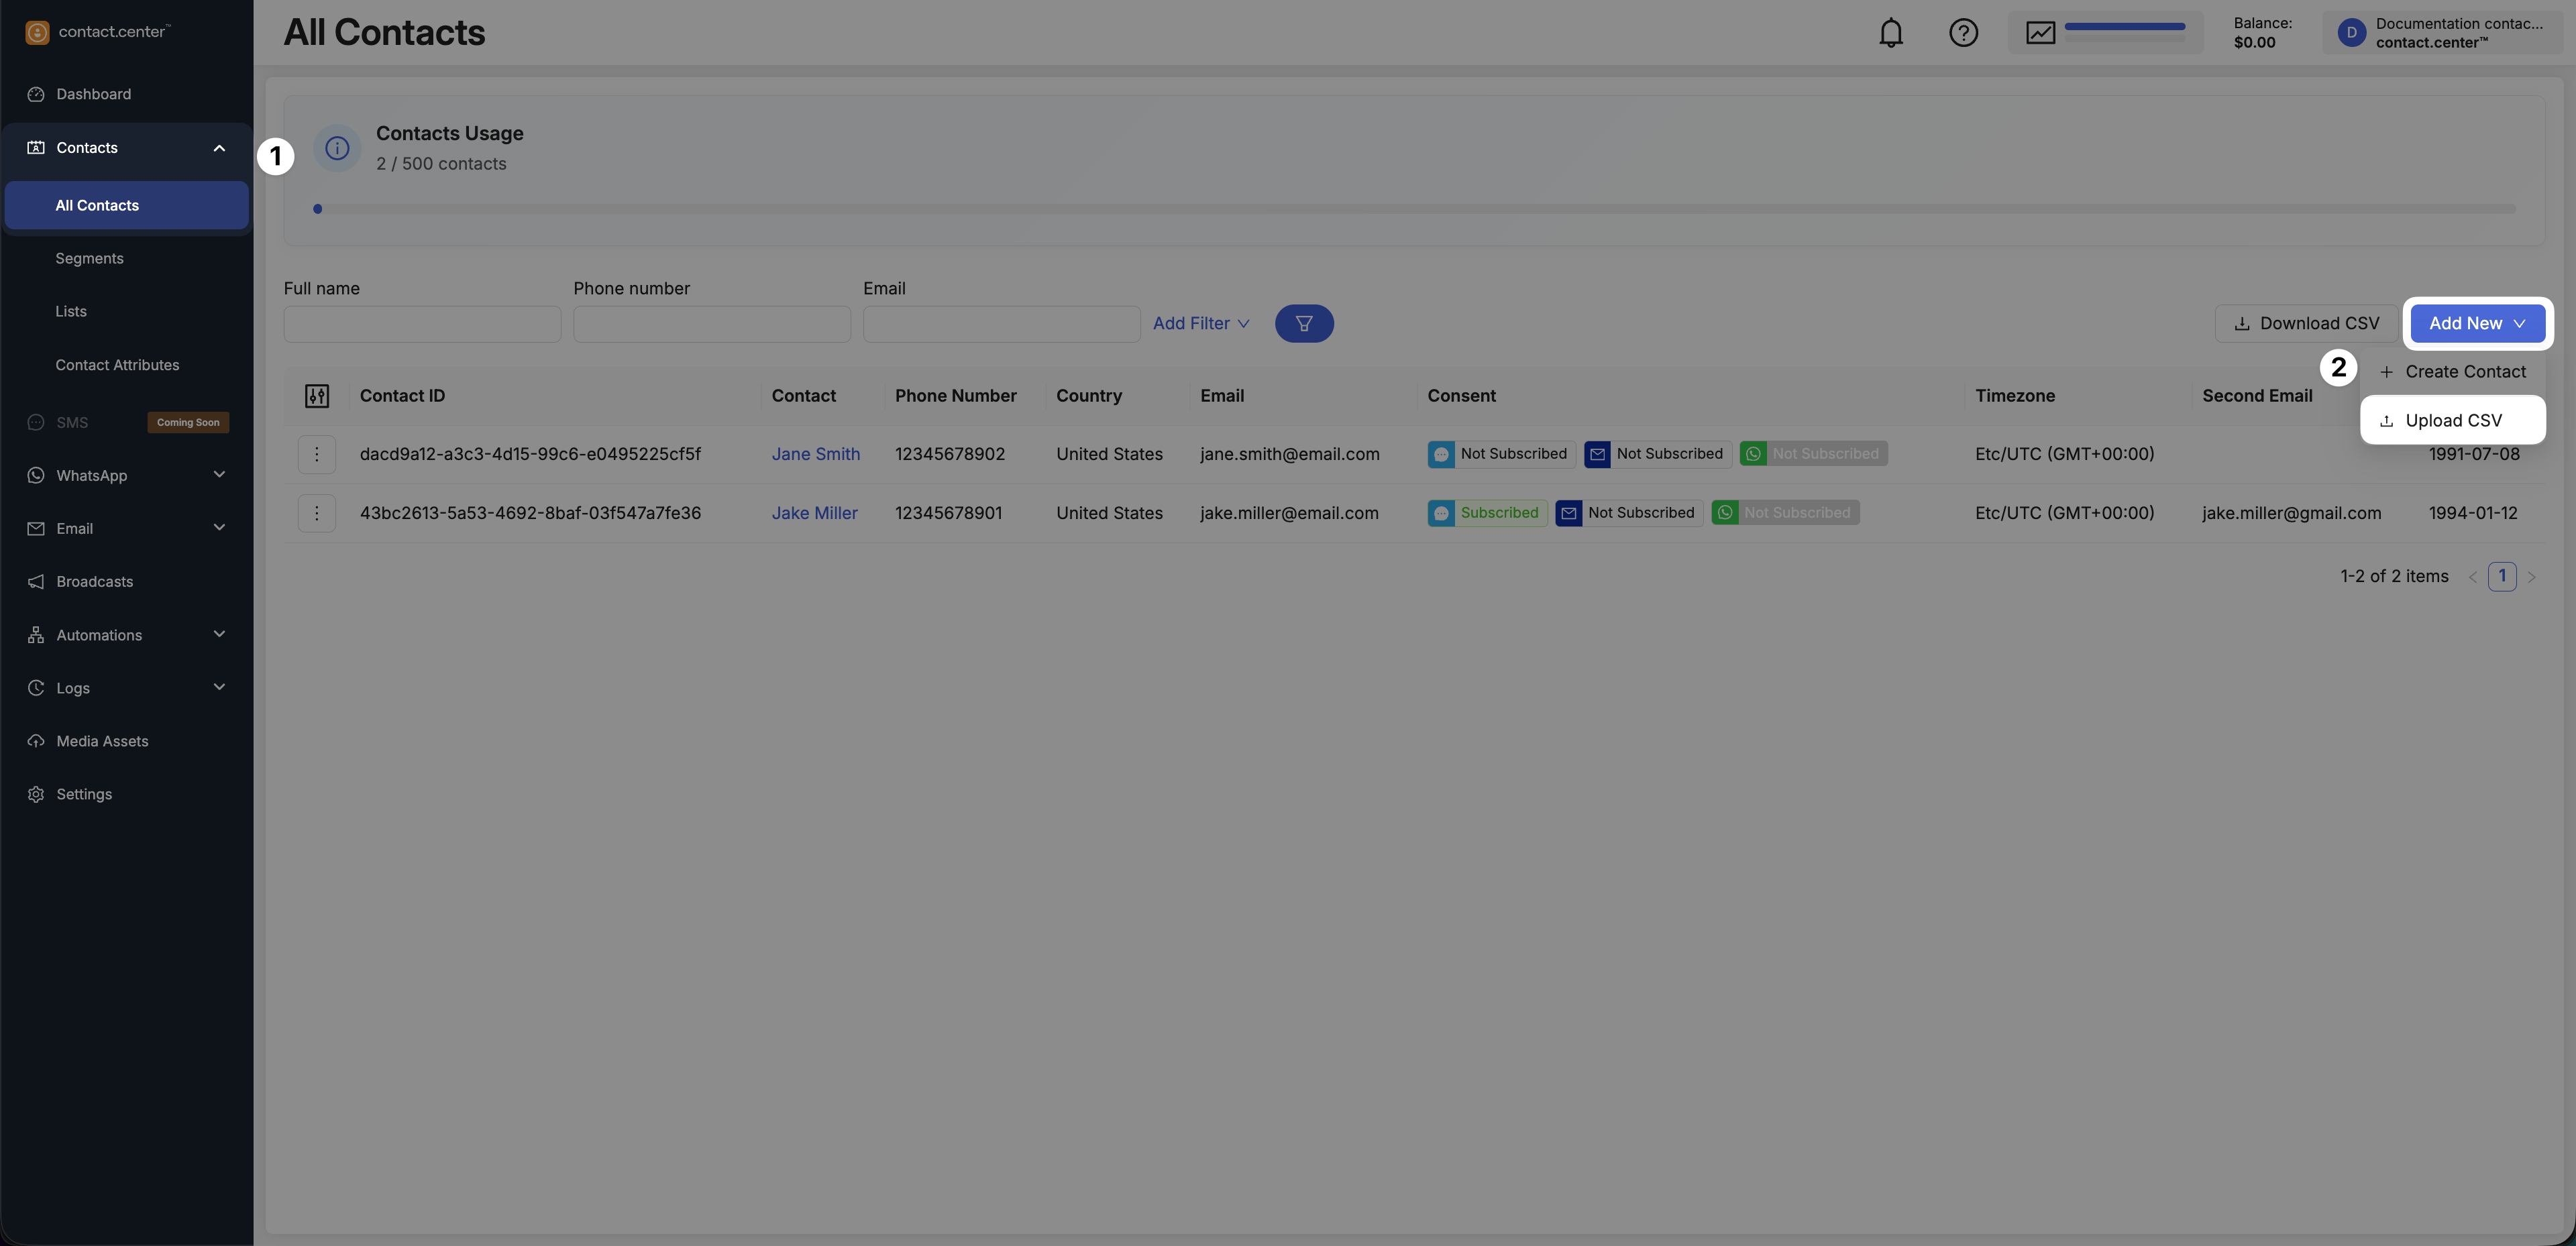
Fig. 4. Start the Upload CSV flow.
Step 2: Upload the CSV File
Click the upload area or drag and drop your CSV file.
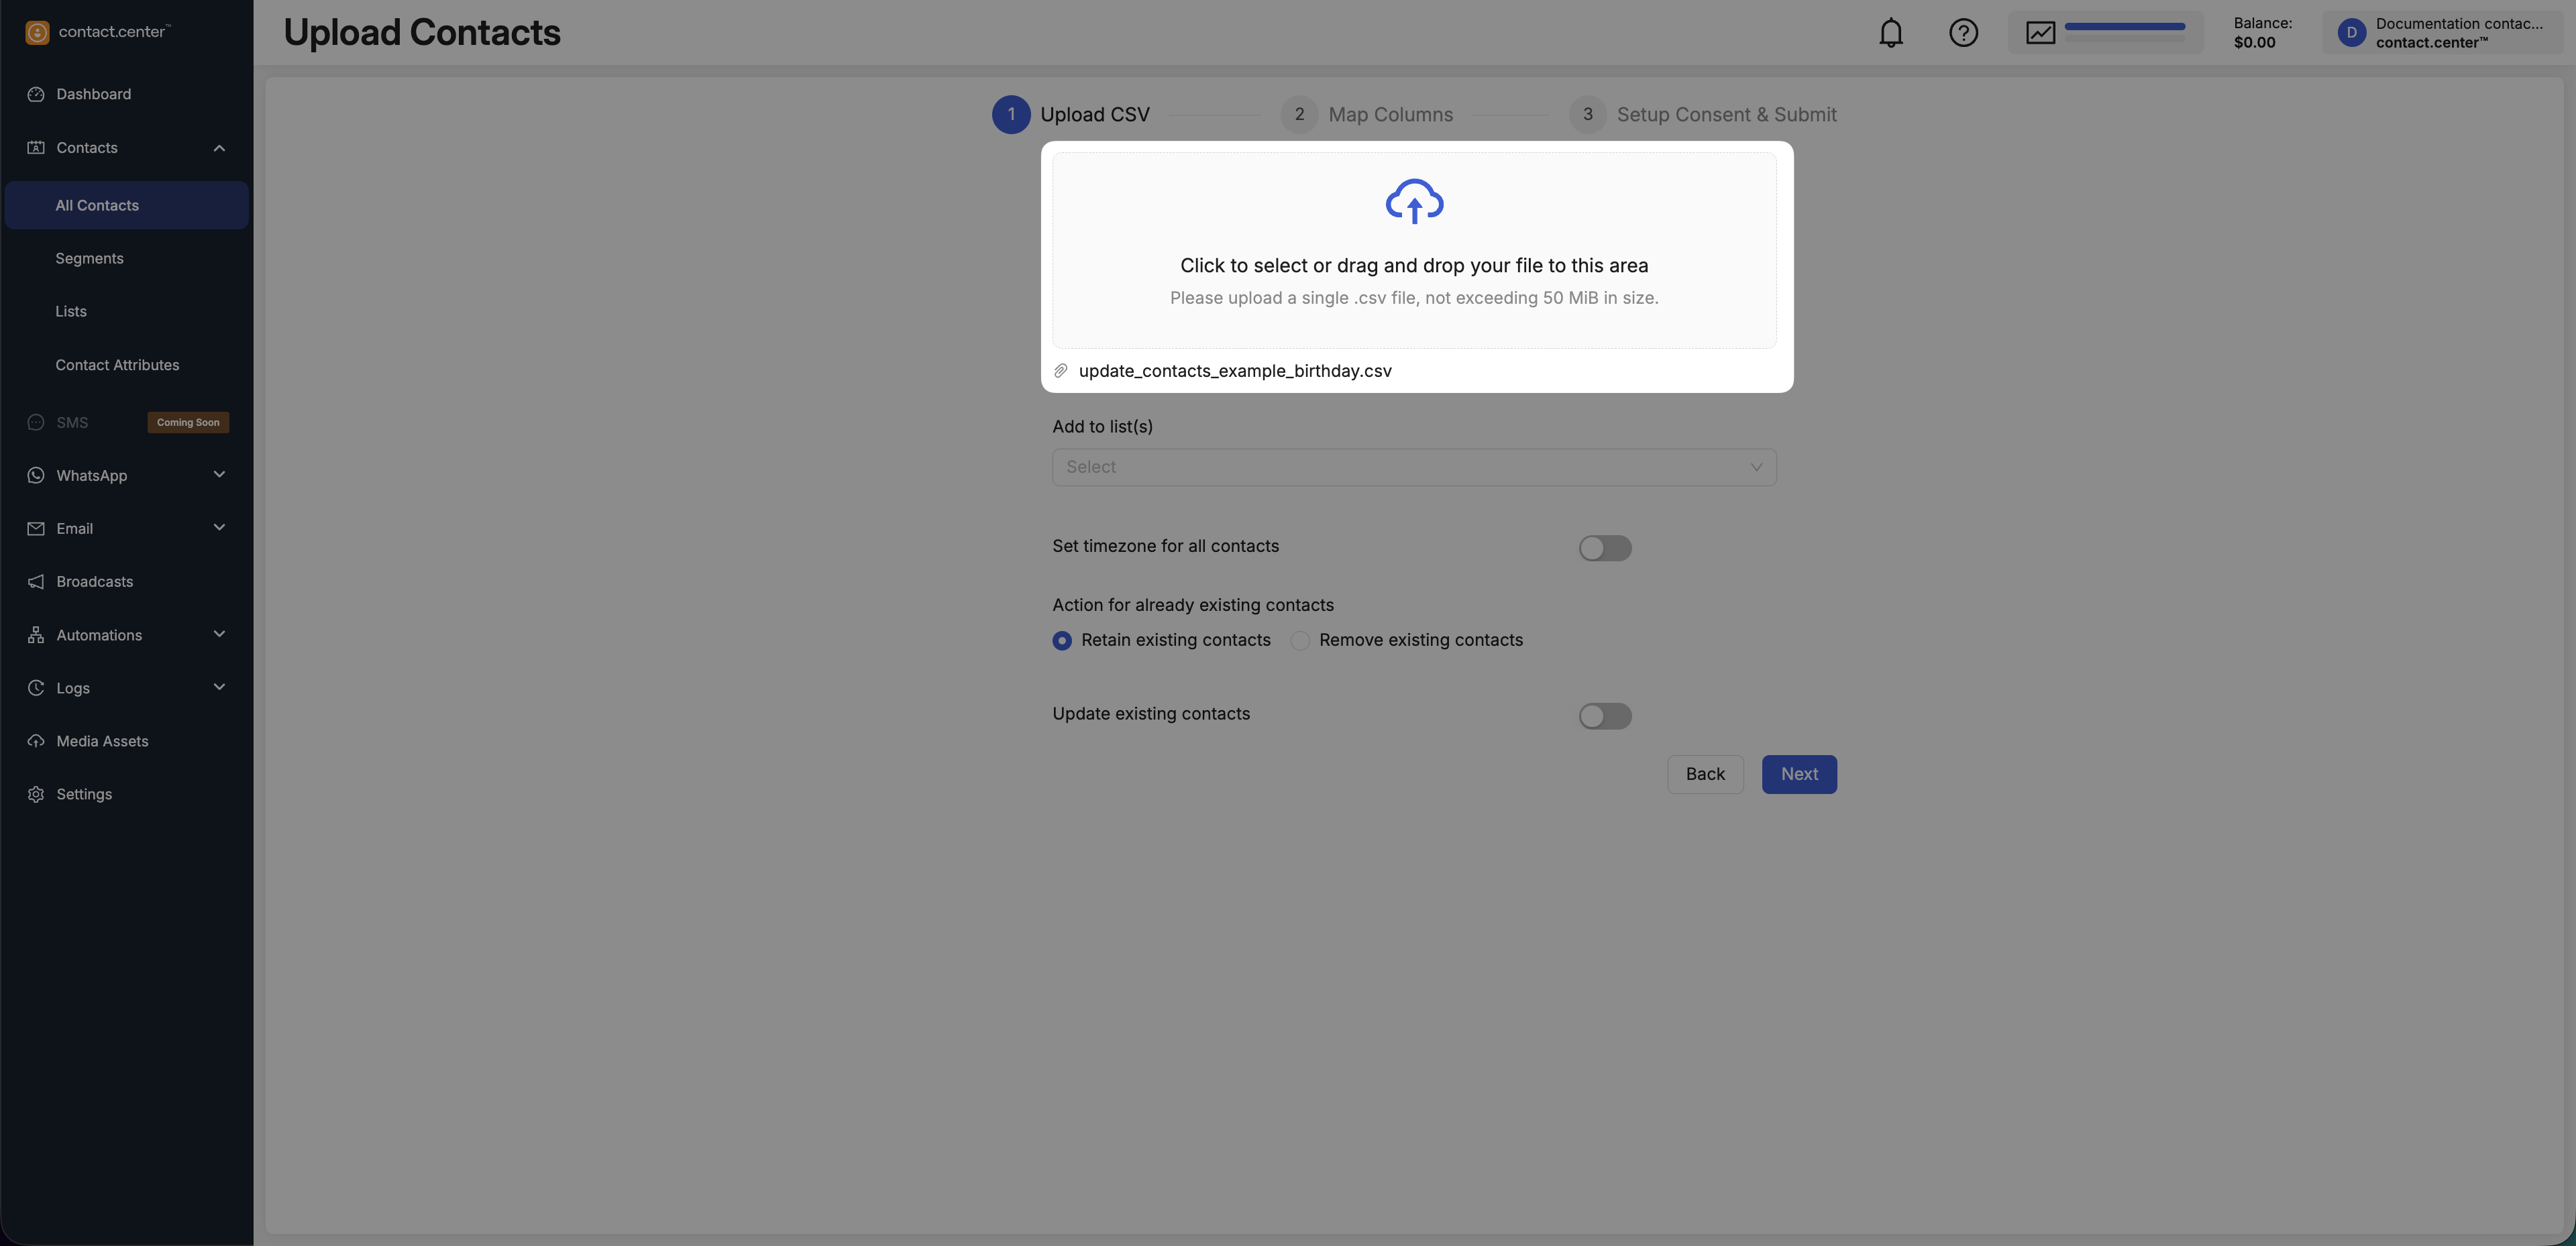
Fig. 5. Upload a CSV file.
Step 3: Configure Upload Settings
After the file is uploaded, configure how contacts should be handled during import.
These settings determine how the import behaves, including whether contacts are added to lists, how timezones are applied, and whether existing records are updated, retained, or removed.
Add to list(s) - Optionally assign all imported contacts to one or more existing contact lists. For more information, see Contact Lists.
Set timezone for all contacts - Control whether a timezone is applied during import.
No timezone is applied during import.
Existing timezone values from the CSV are preserved.
If no timezone exists, the contact remains without one.
Select a timezone from the Timezone dropdown.
The selected timezone is applied to all imported contacts.
Any timezone values in the CSV are overridden.
Action for already existing contacts - define how contacts that already exist in your workspace are handled in relation to the uploaded CSV file.
Retain existing contacts - keep contacts that are not present in the uploaded CSV file. Contacts included in the CSV are created or updated based on the selected import options.
Remove existing contacts - delete any contacts that are not present in the uploaded CSV file. Only contacts included in the CSV remain after the import.
Warning
Selecting Remove existing contacts permanently deletes all contacts that are missing from the uploaded CSV file. This action cannot be undone.
Update existing contacts Control whether existing contacts are updated using CSV data.
The CSV is treated as a new contact import.
Existing contacts are not modified, even if identifiers match.
Note
If you are importing new contacts only, keep this option Disabled.
Existing contacts are updated using data from the CSV.
Additional options become available:
Select a method to recognize contacts
By Messaging ID
By External ID
What should be done with missing attributes?
Keep previous values - attributes not present in the CSV remain unchanged.
Delete previous values - attributes not present in the CSV are cleared.
Note
To update existing contacts, the CSV must include a valid identifier (for example, External ID).
Click Next to proceed to mapping columns.
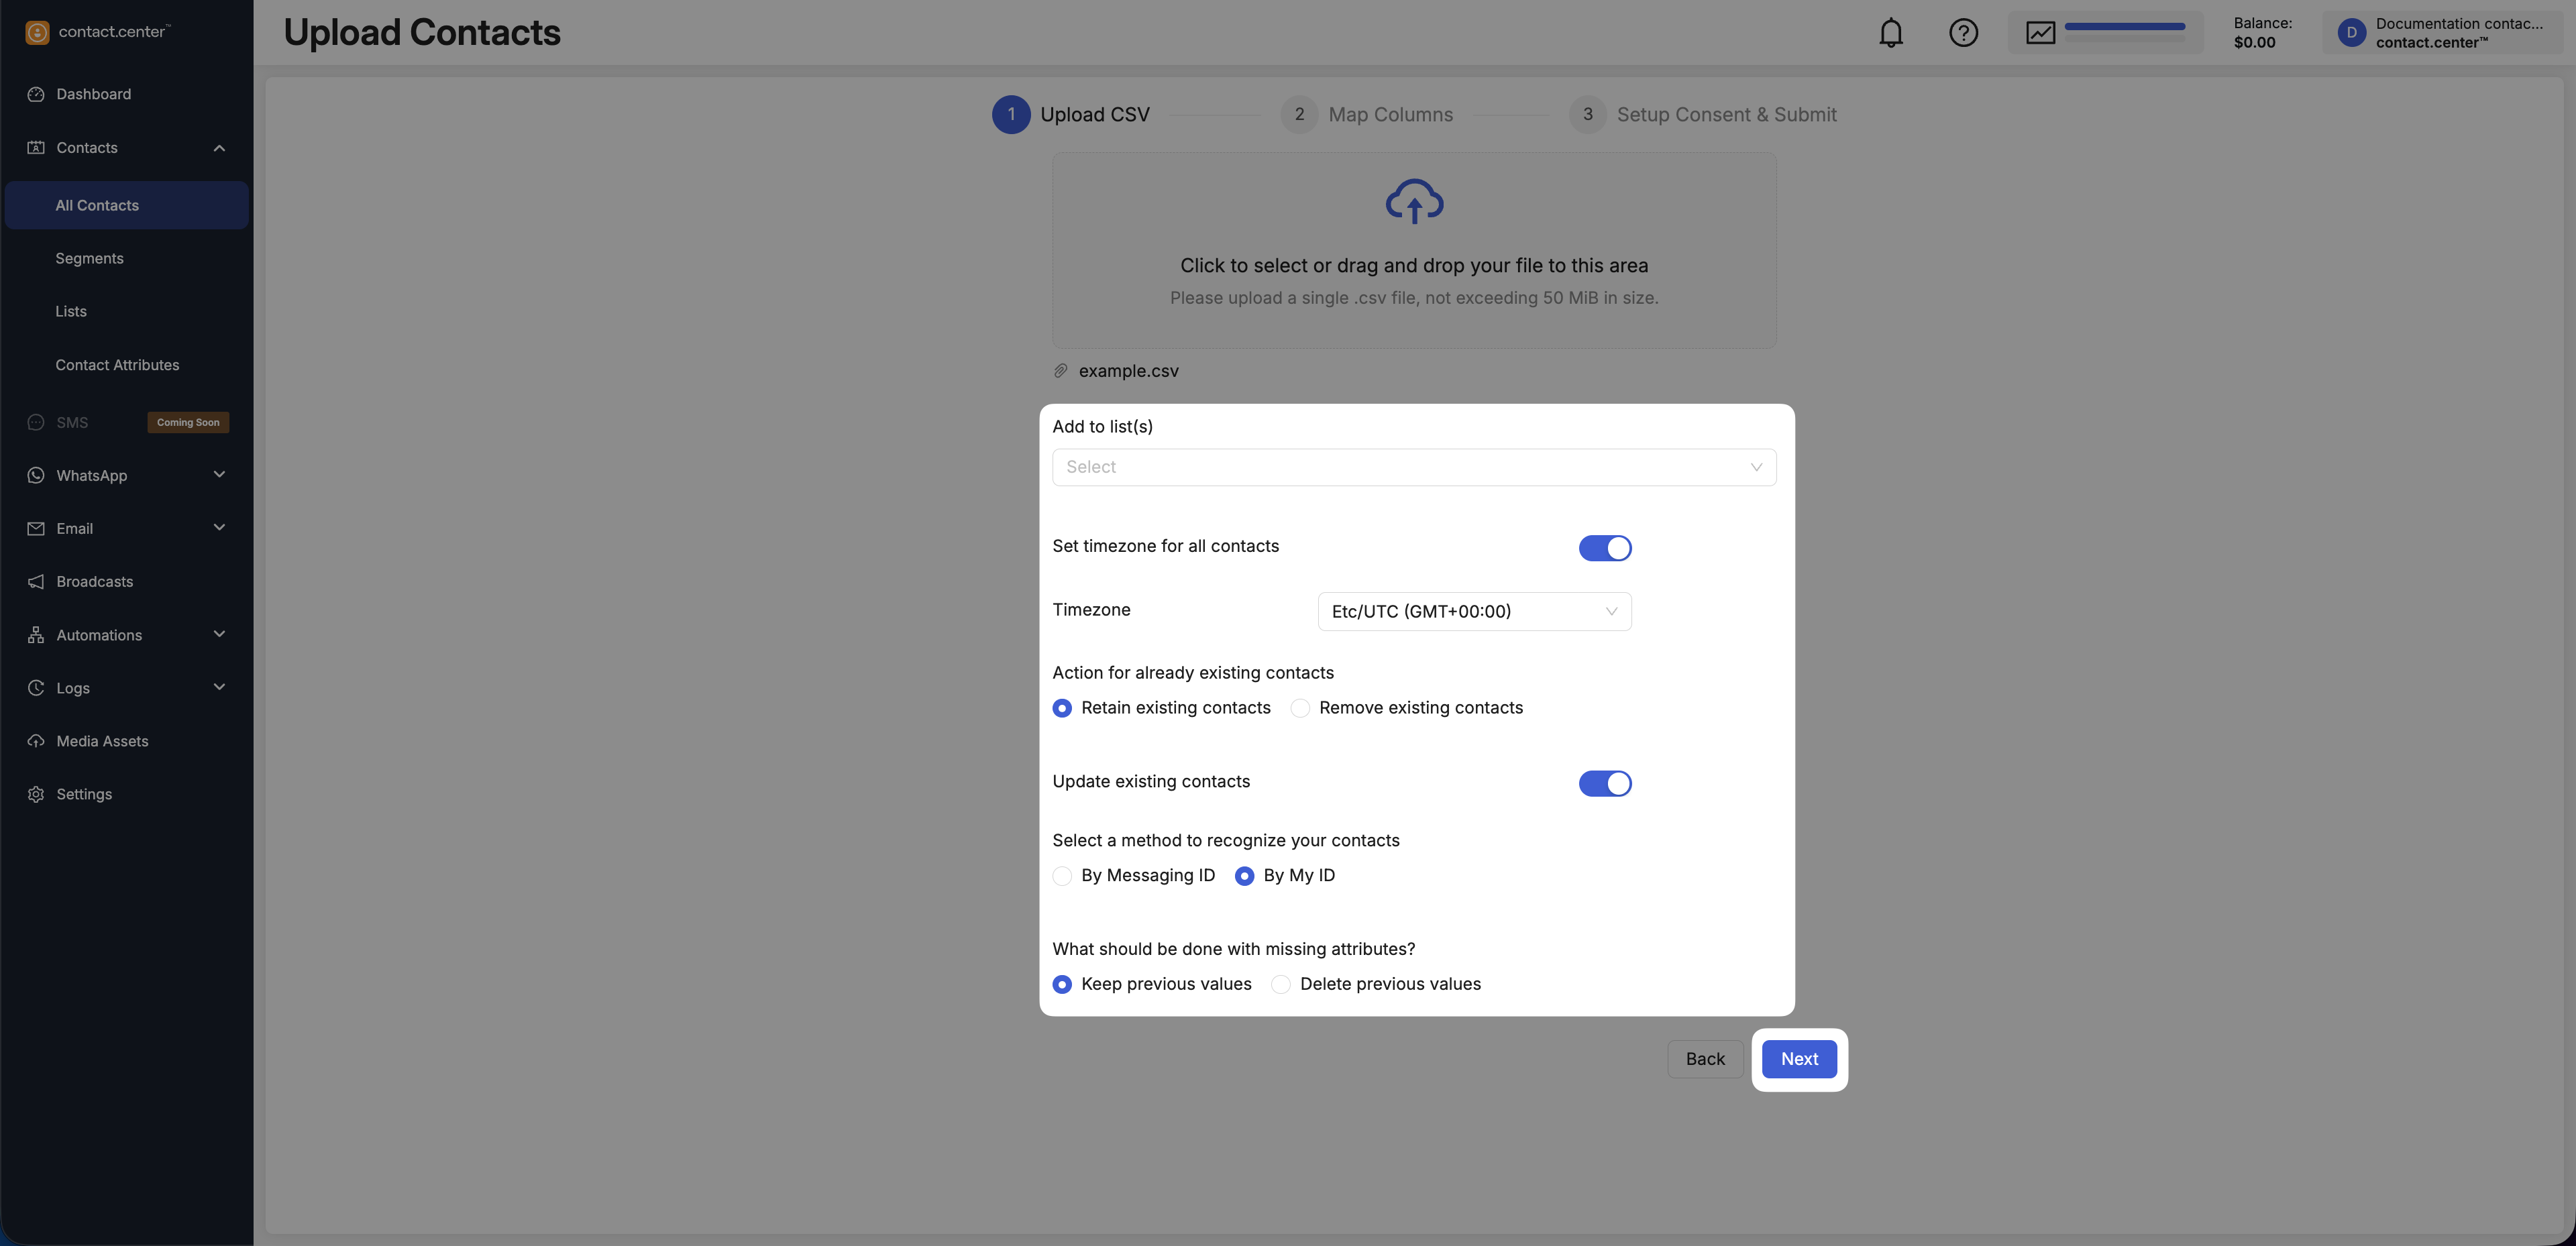
Fig. 6. Configure Upload CSV settings.
Step 4: Map CSV Columns
Review the detected CSV columns and verify that each column is mapped to the correct contact attribute.
If a CSV column does not match any existing contact attribute, the system offers you the option to create a new contact attribute directly in this step.
If a column contains values that are invalid for the selected attribute type (e.g., incorrectly formatted dates), you can enable Replace Invalid Values to replace those values during the import.
When importing new contacts, select only the columns you want to import.
Note
To successfully create contacts, include at least one of the following attributes:
Email
Phone Number
When updating existing contacts, make sure the CSV includes an identifier that matches existing records.
Note
To update existing contacts, your CSV must include one of the following identifiers:
Messaging ID, if you selected By Messaging ID
External ID, if you selected By External ID
In addition, include at least one of the following attributes:
Email
Phone Number
Click Next to proceed to consent setup.
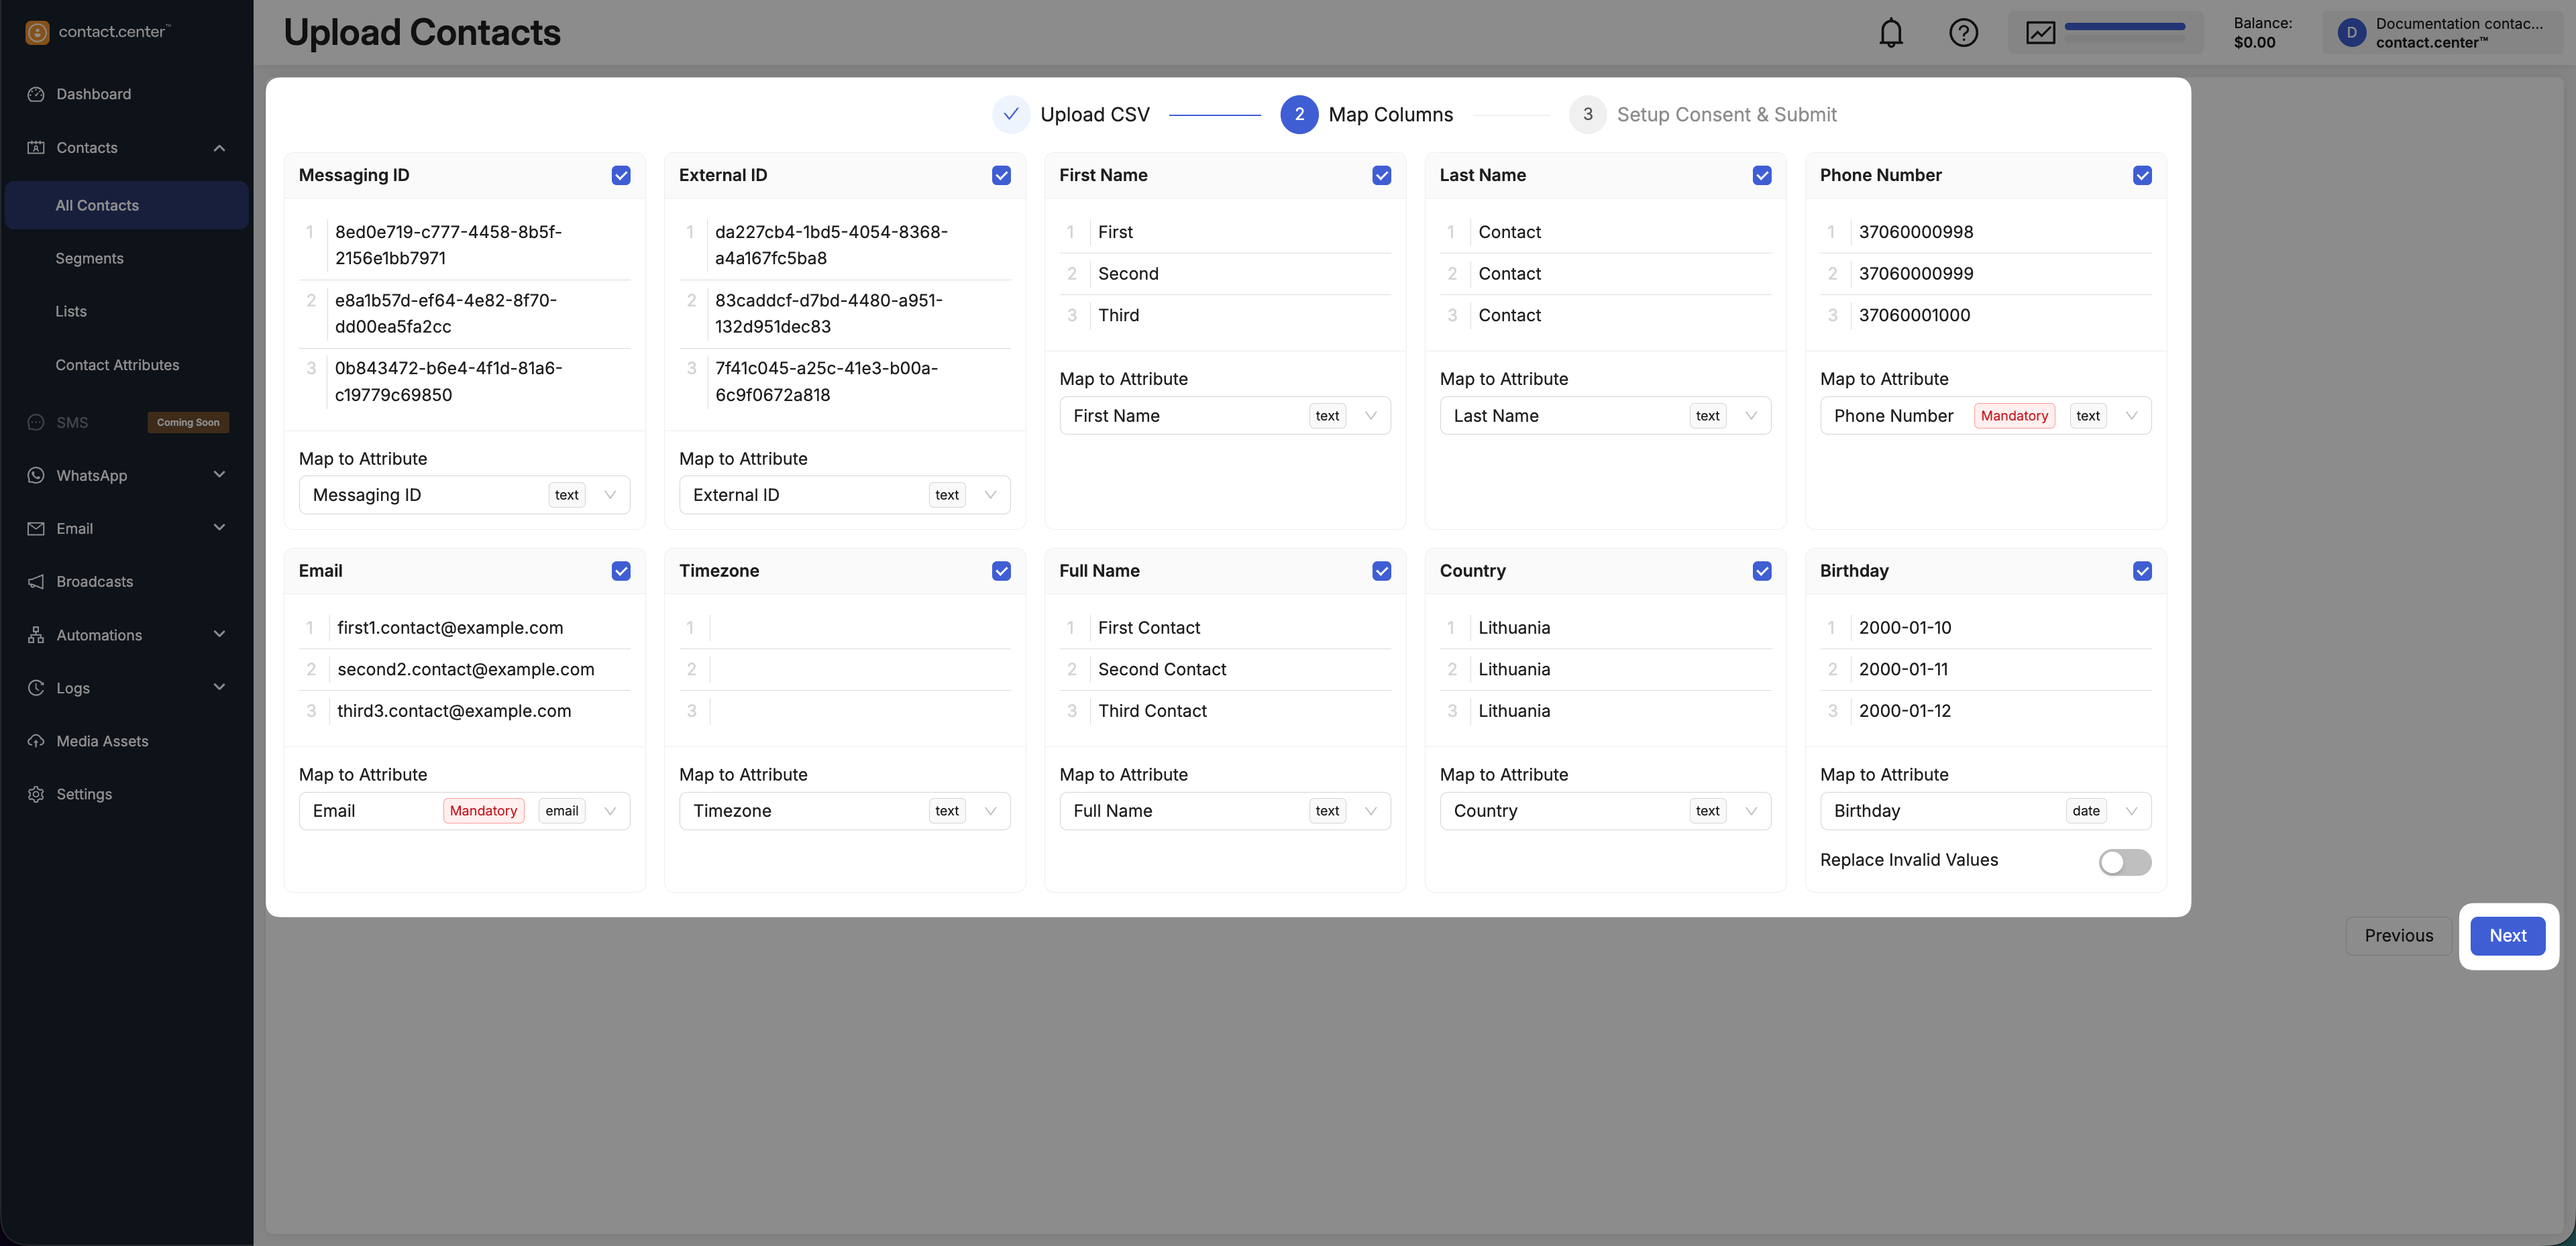
Fig. 7. Map CSV columns to contact attributes.
Step 5: Setup Consent and Submit
Define the default consent status for contacts where consent information is missing or cannot be determined from the CSV file.
Set the default consent status for:
SMS
WhatsApp
Email
Confirm that all imported contacts have provided valid consent in accordance with applicable data protection laws.
Click Submit to complete the import.

Fig. 9. Submit CSV import.
Download Contacts
Downloading contacts to CSV is useful for reporting and backup, and it is also the recommended starting point for bulk updates. Exporting your existing contacts ensures you keep the correct identifiers, so updates are applied to the intended records.
Go to Contacts → All Contacts.
Click Download CSV.
Choose a file name and save location.
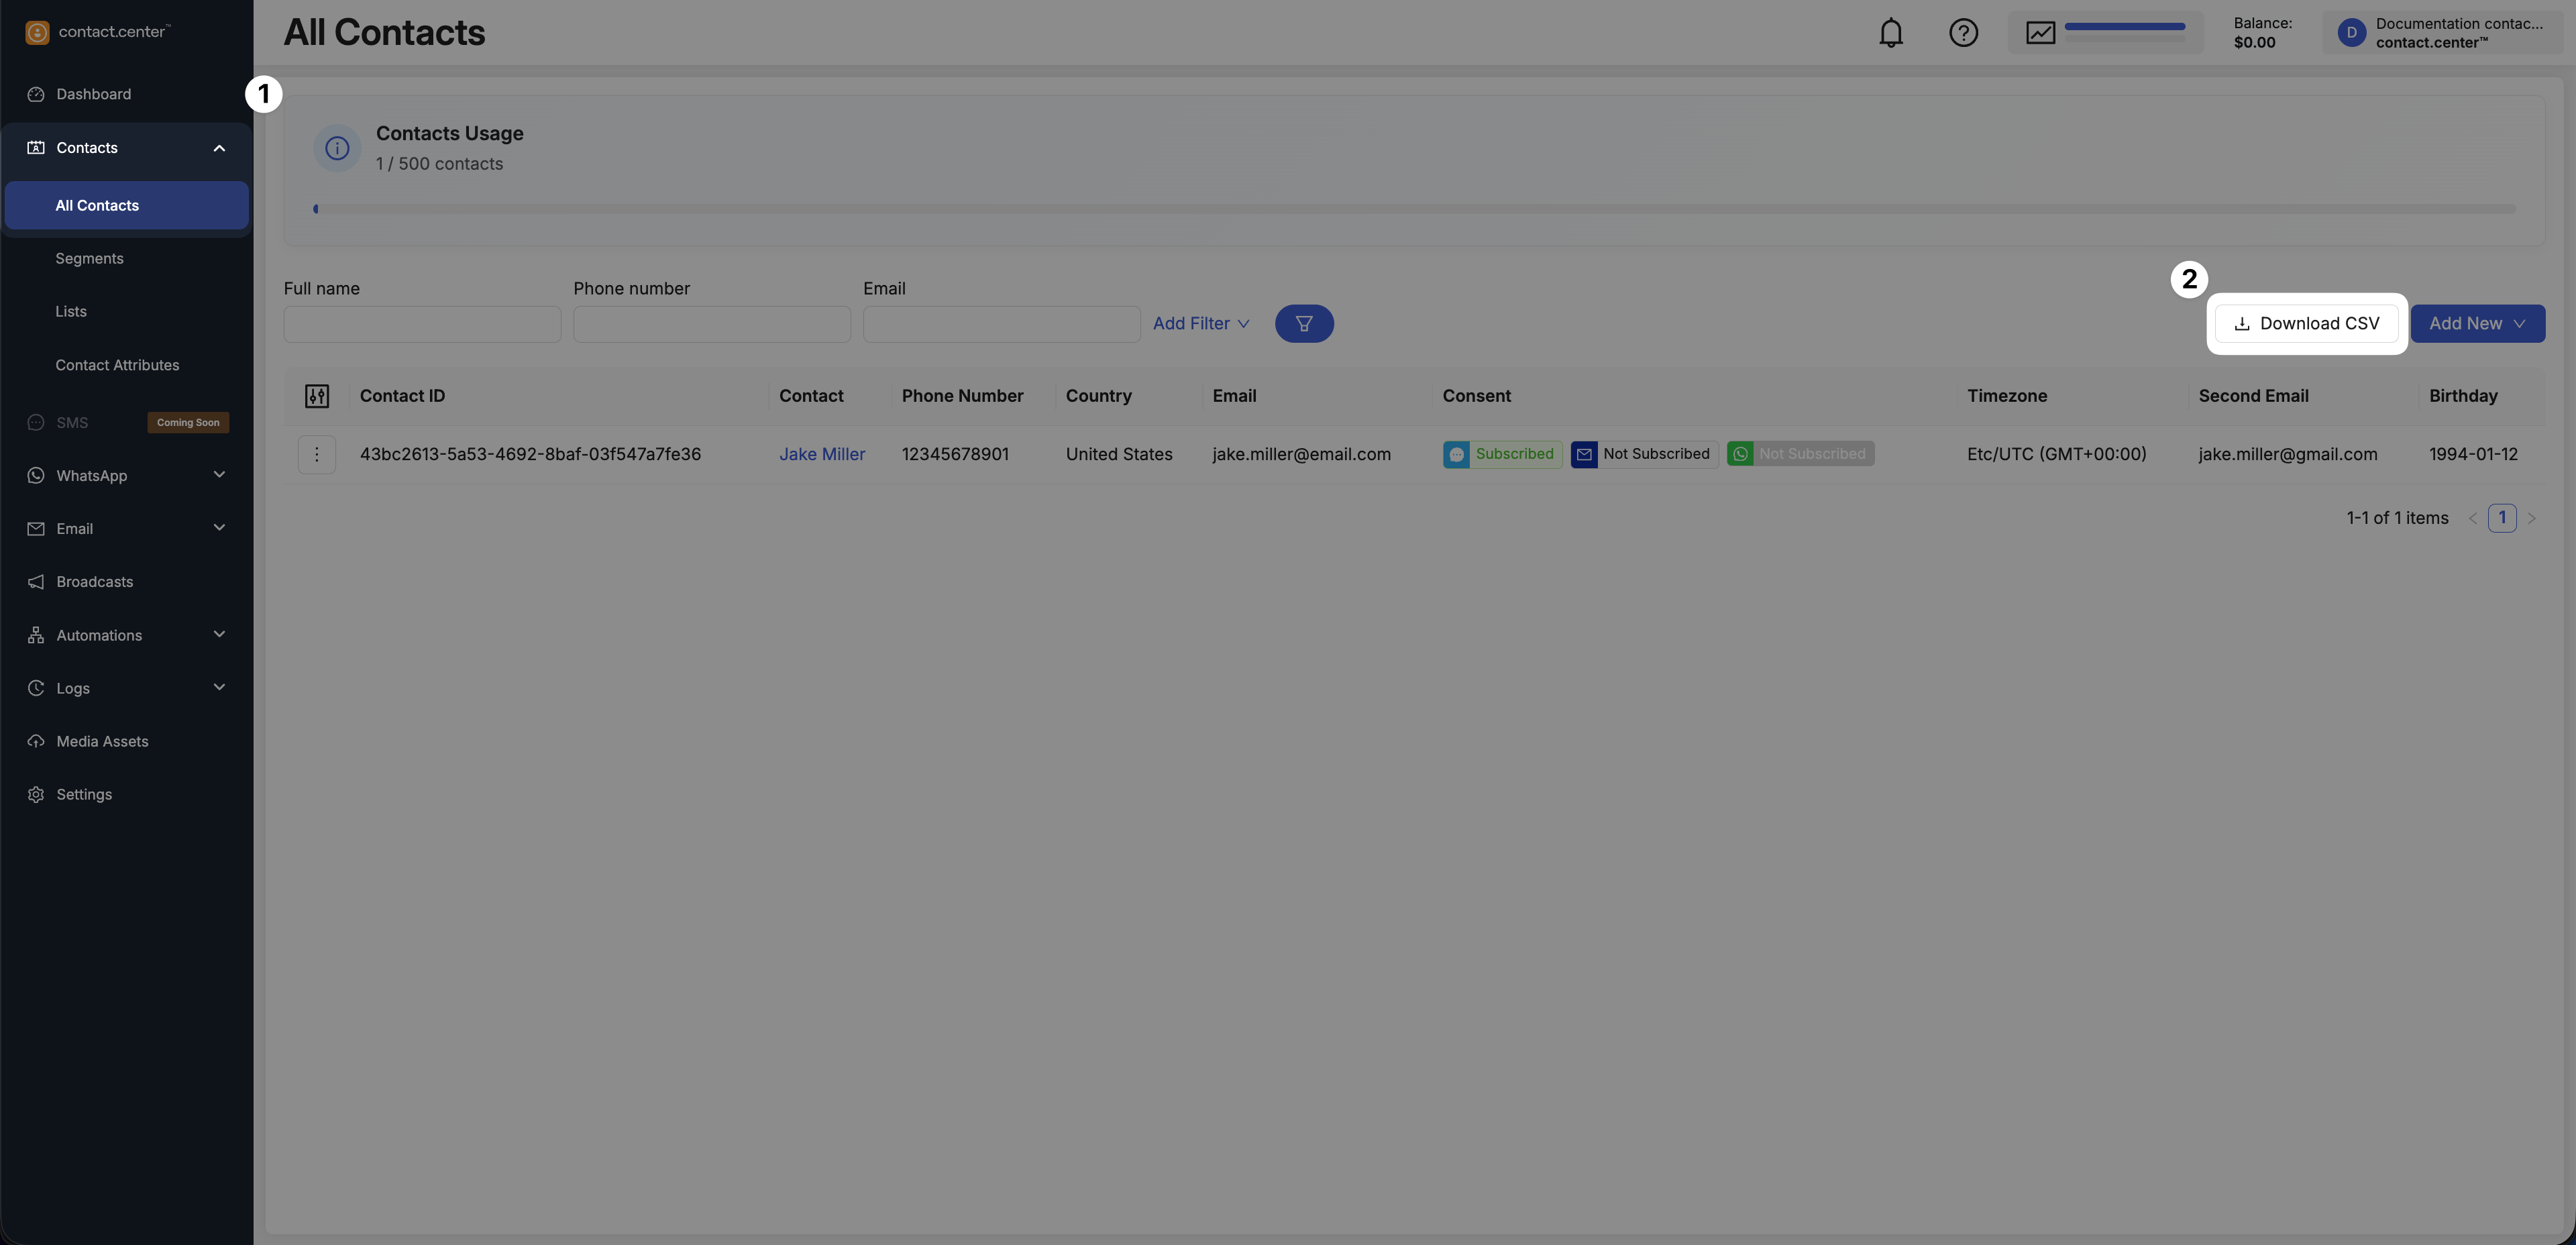
Fig. 10. Download contacts to a CSV file.
Update Contacts
Updating contacts by CSV is ideal when you need to change many records at once (for example, updating attributes, assigning values, or cleaning up data). Starting from an exported CSV helps ensure updates match the correct contacts and minimizes the risk of accidental duplicates.
Before You Begin
Download your current contacts so you have the correct identifiers. See Download all contacts to a CSV file.
In the downloaded CSV file:
Keep at least one identifier column used for matching contacts (e.g., External ID or Messaging ID).
Edit values for the attributes you want to update.
Remove columns you do not intend to update, so only intended fields are modified.
Note
If your CSV includes a column for an attribute that does not exist in contact.center™, the system may create the attribute automatically. To ensure the correct value type, define the attribute in advance in Contact Attributes.
Step 1: Open the Upload CSV Flow
Go to Contacts → All Contacts.
Click Add New and select Upload CSV.
Fig. 11. Start the Upload CSV flow for updates.
Step 2: Upload the Updated CSV File
Click the upload area or drag and drop your updated CSV file.
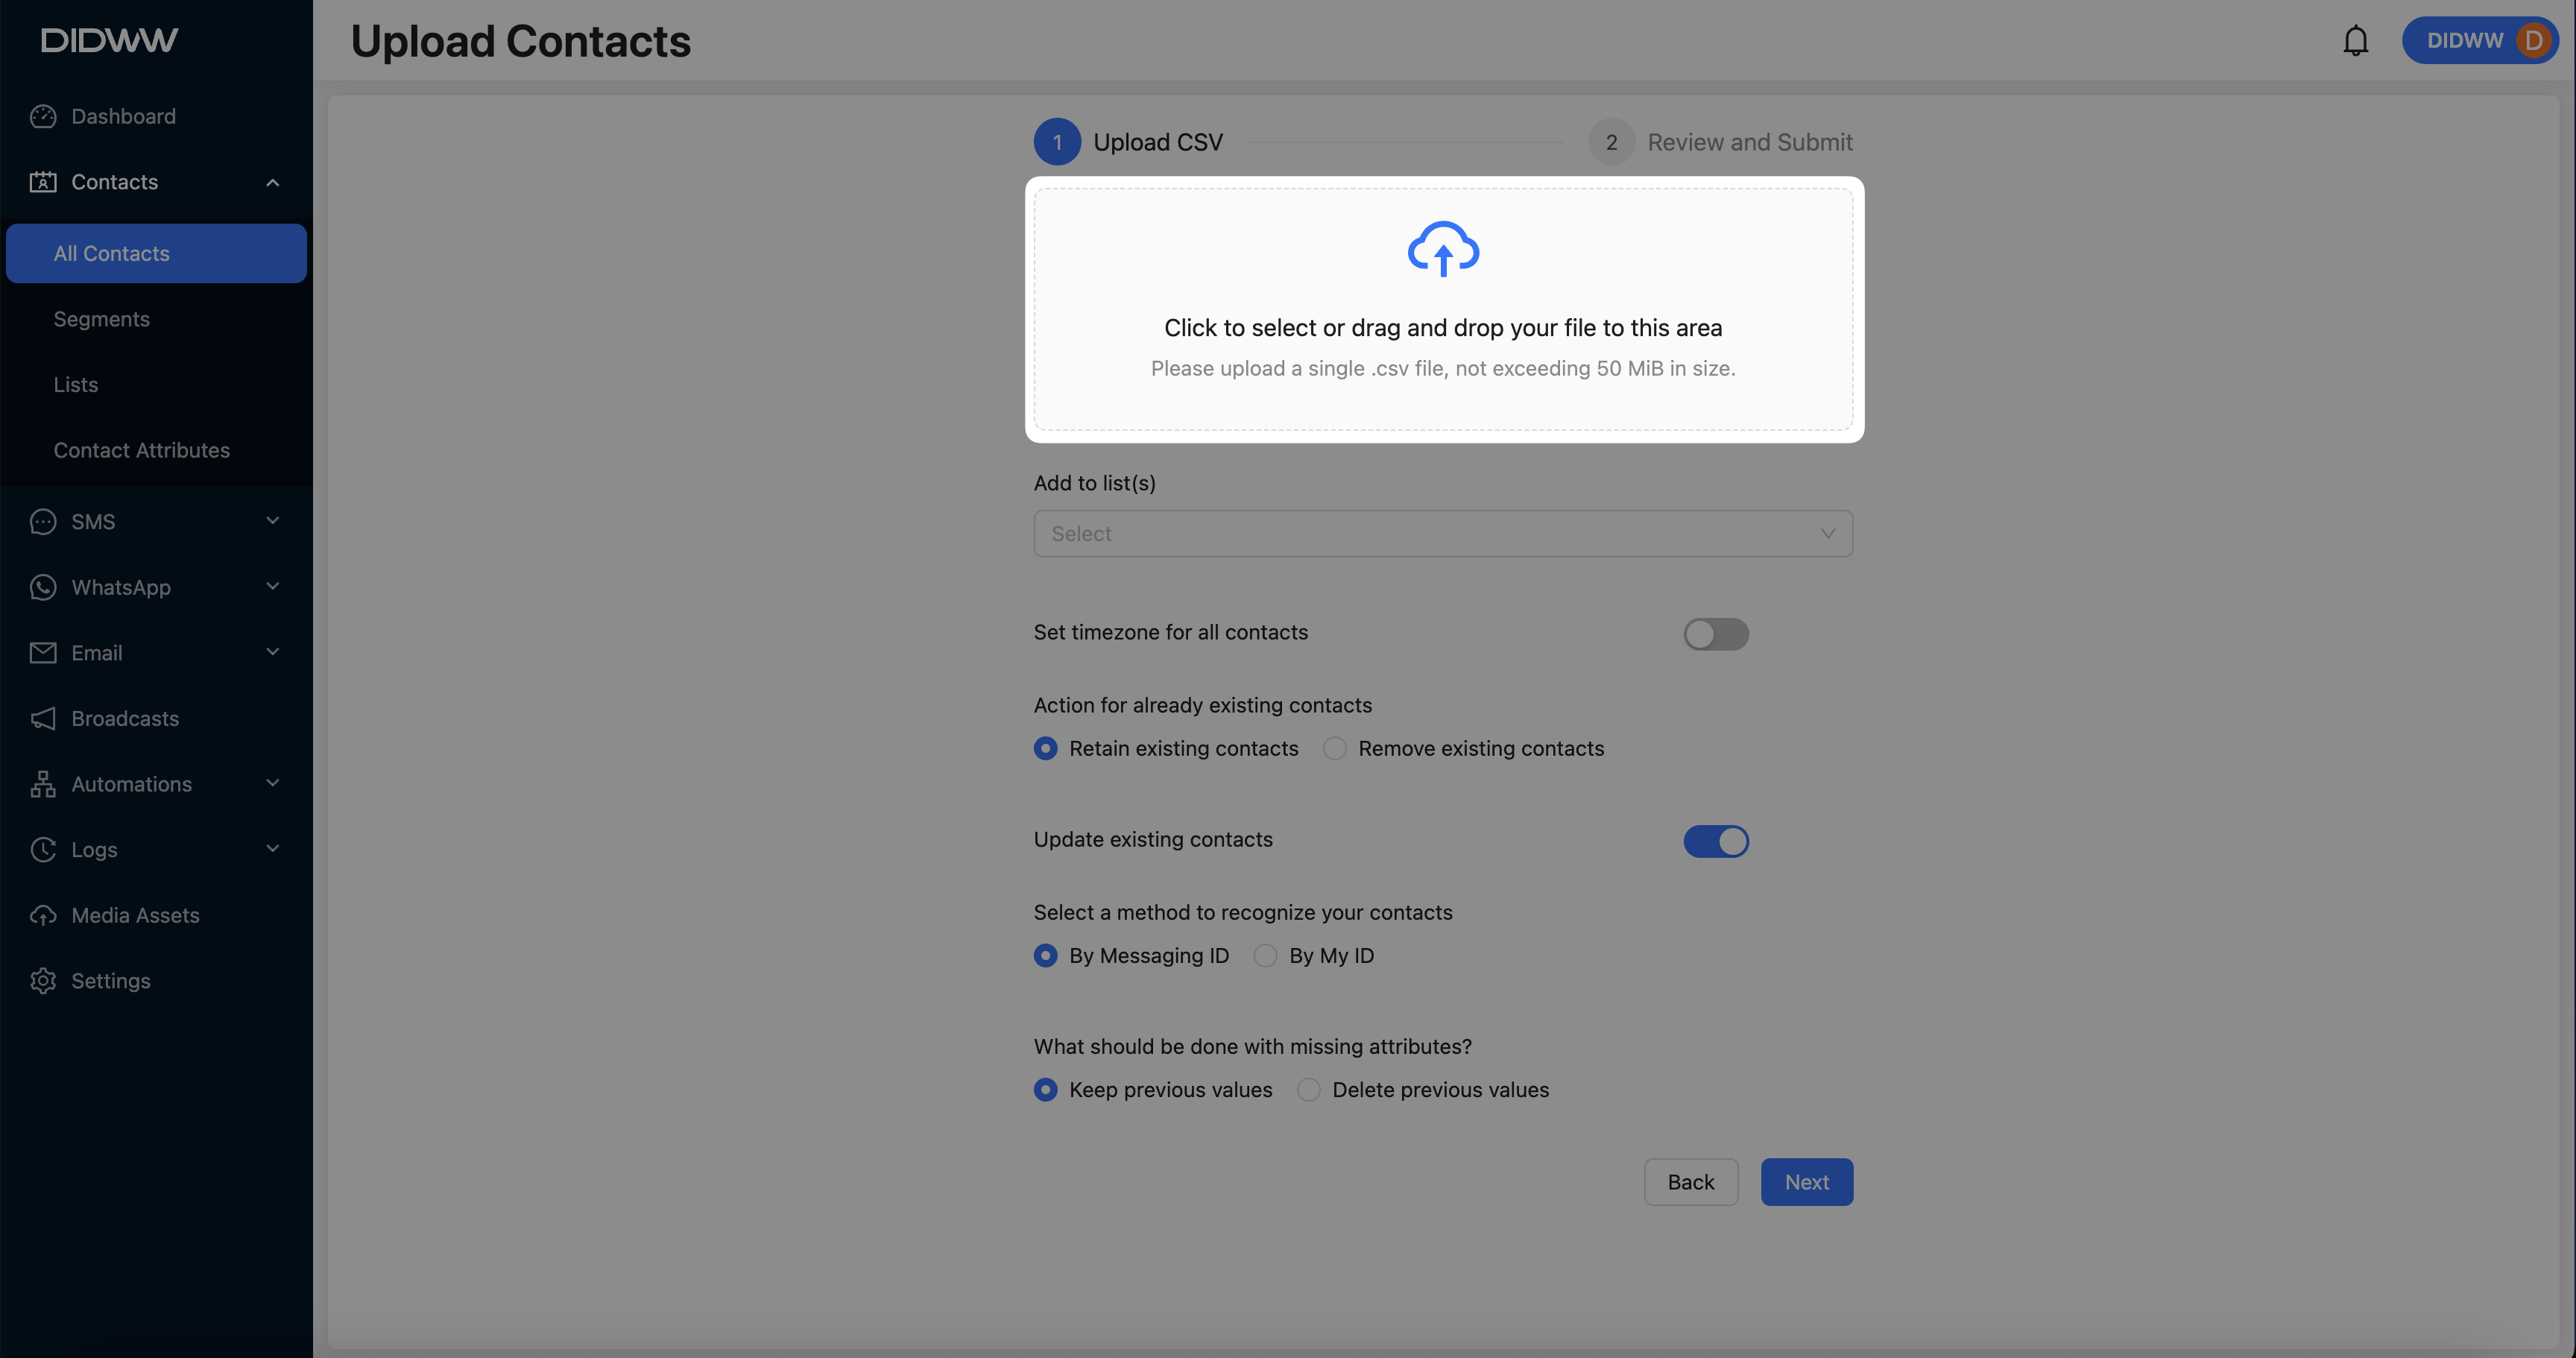
Fig. 12. Upload the CSV file.
Step 3: Configure Update Settings
Configure the options for updating existing contacts:
Action for existing contacts - Retain existing contacts.
Update existing contacts - enable this option.
Select a method to recognize contacts - choose one of the following:
By Messaging ID
By External ID
Handle missing attributes - choose how attributes not present in the CSV are handled:
Keep previous values - attributes not included in the CSV remain unchanged.
Delete previous values - attributes not included in the CSV are cleared.
Click Next to proceed.
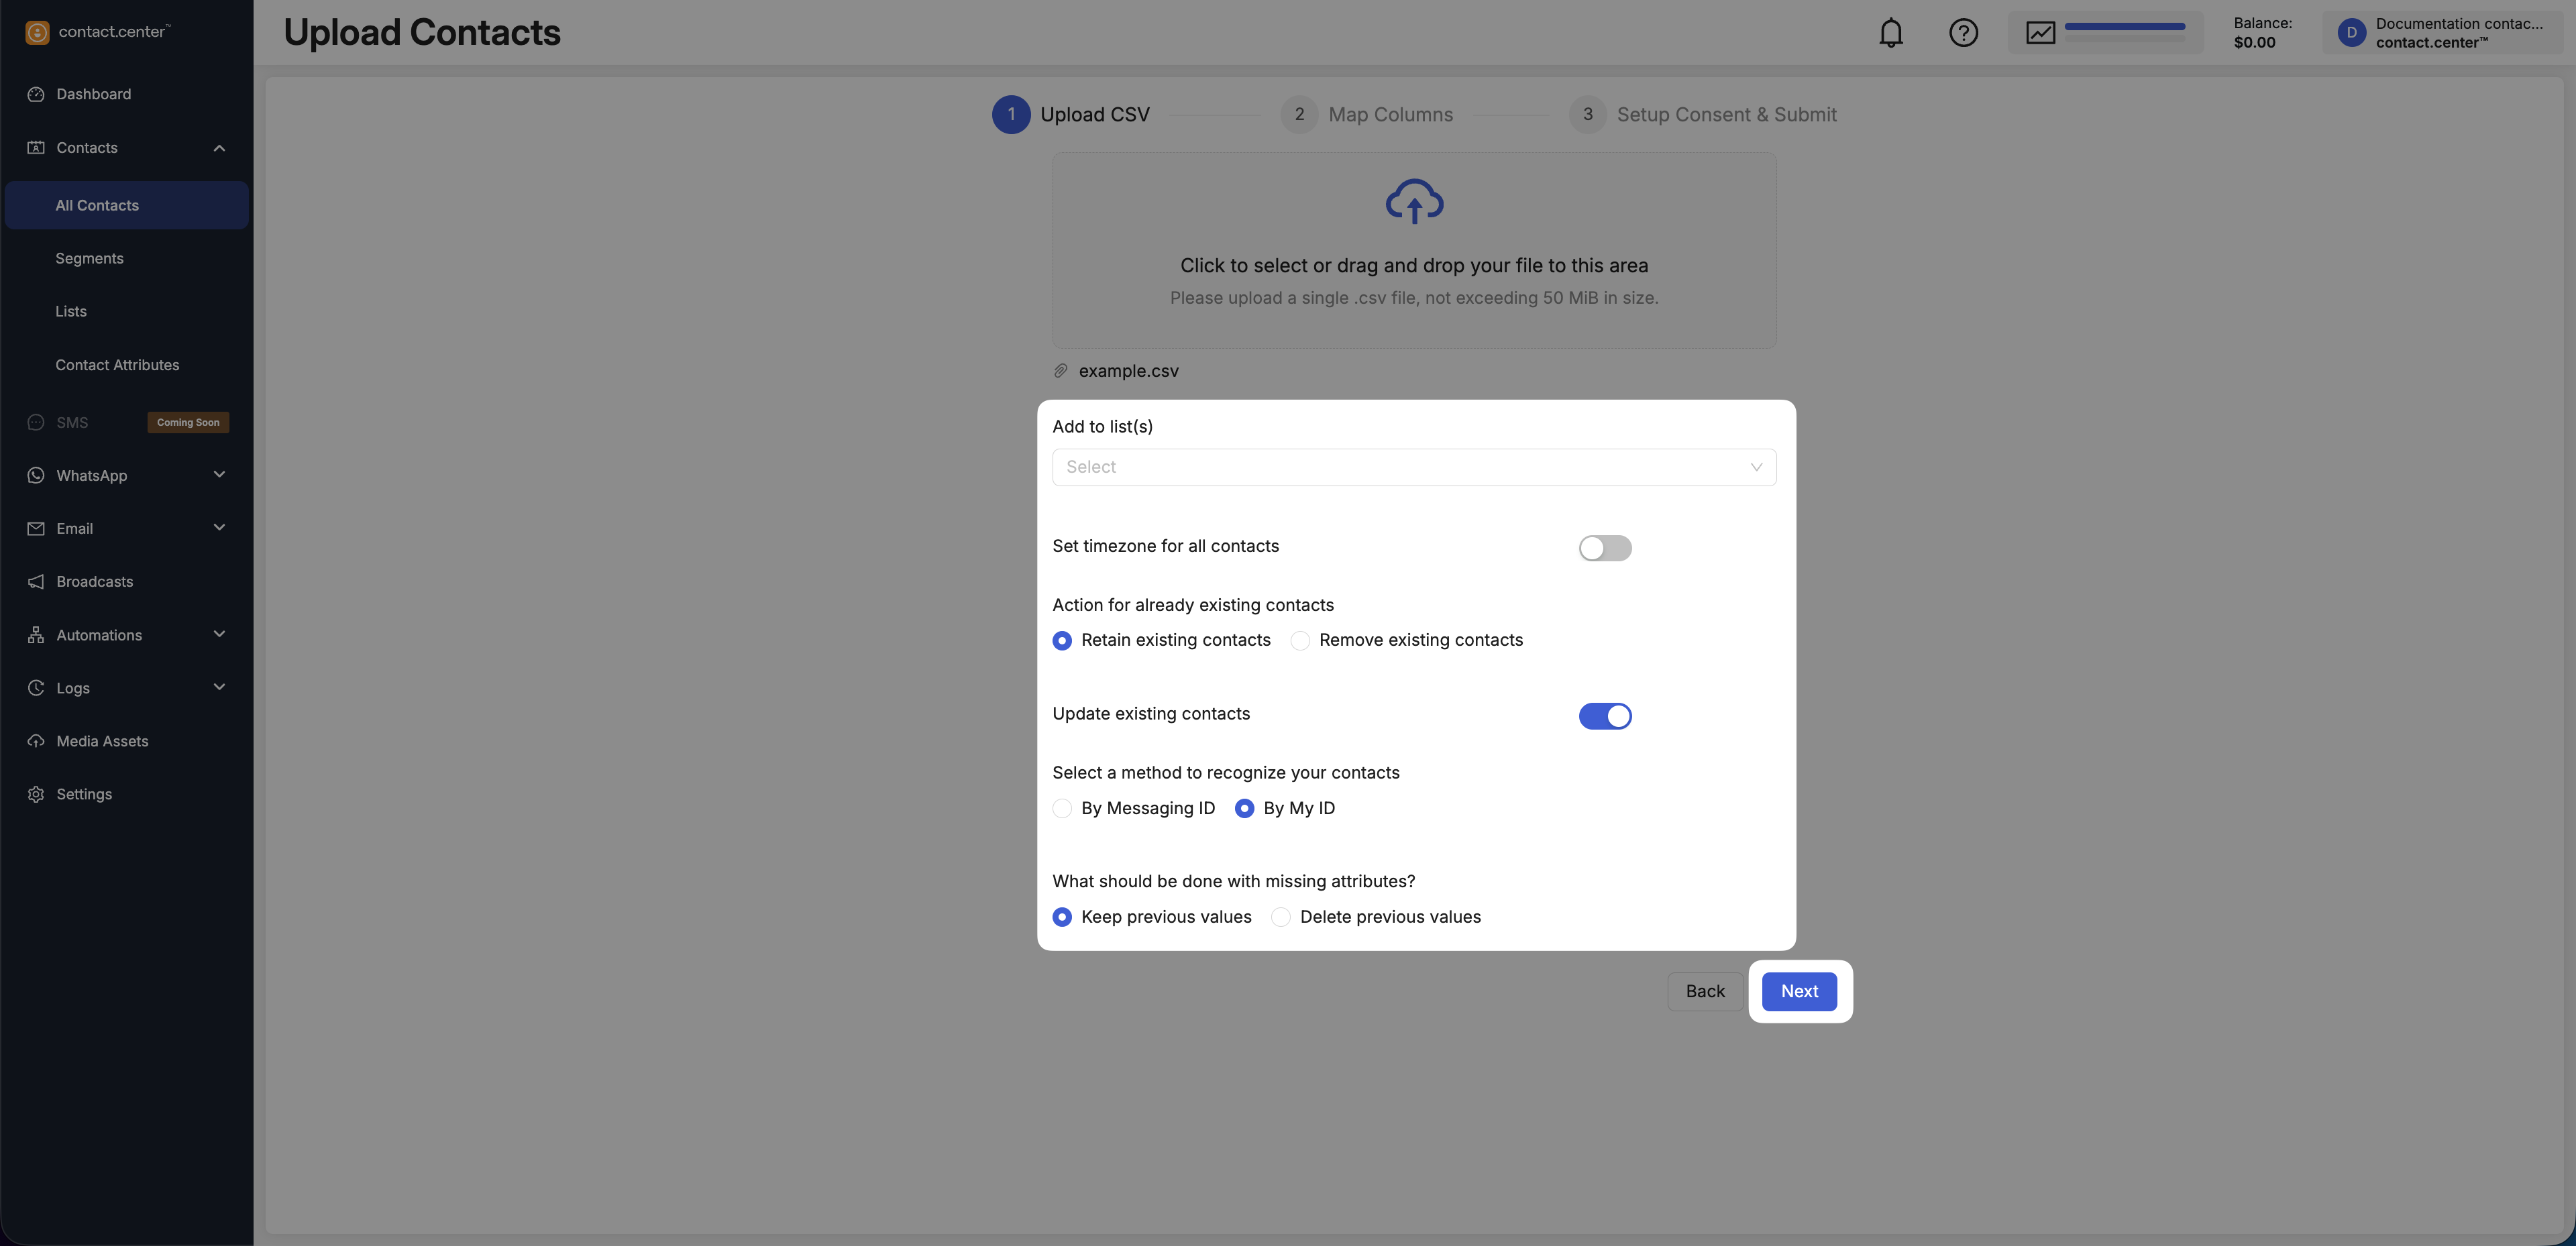
Fig. 13. Configure Upload CSV settings for updates.
Step 4: Review and Assign Columns
In Review and Submit:
Confirm the selected identifier field used for matching contacts:
Messaging ID, if you selected By Messaging ID
External ID, if you selected By External ID
Include at least one of the following attributes:
Email
Phone Number
Select only the columns you want to update.
Verify that each selected column is mapped to the correct contact attribute.
Click Next to proceed to consent setup.
Fig. 14. Review selected columns before updating.
Step 5: Setup Consent and Submit
Define the default consent status for contacts where consent information is missing or cannot be determined from the CSV file.
Set the default consent status for:
SMS
WhatsApp
Email
Confirm that all contacts have provided valid consent in accordance with applicable data protection laws.
Click Submit to update the contacts.
Fig. 15. Submit CSV import.
Browse and Filter Contacts
As your contact list grows, filters and table settings help you quickly find contacts and focus on the details you want to see.
Contacts Usage
At the top of the page, Contacts Usage shows how many contacts you currently have in your workspace.
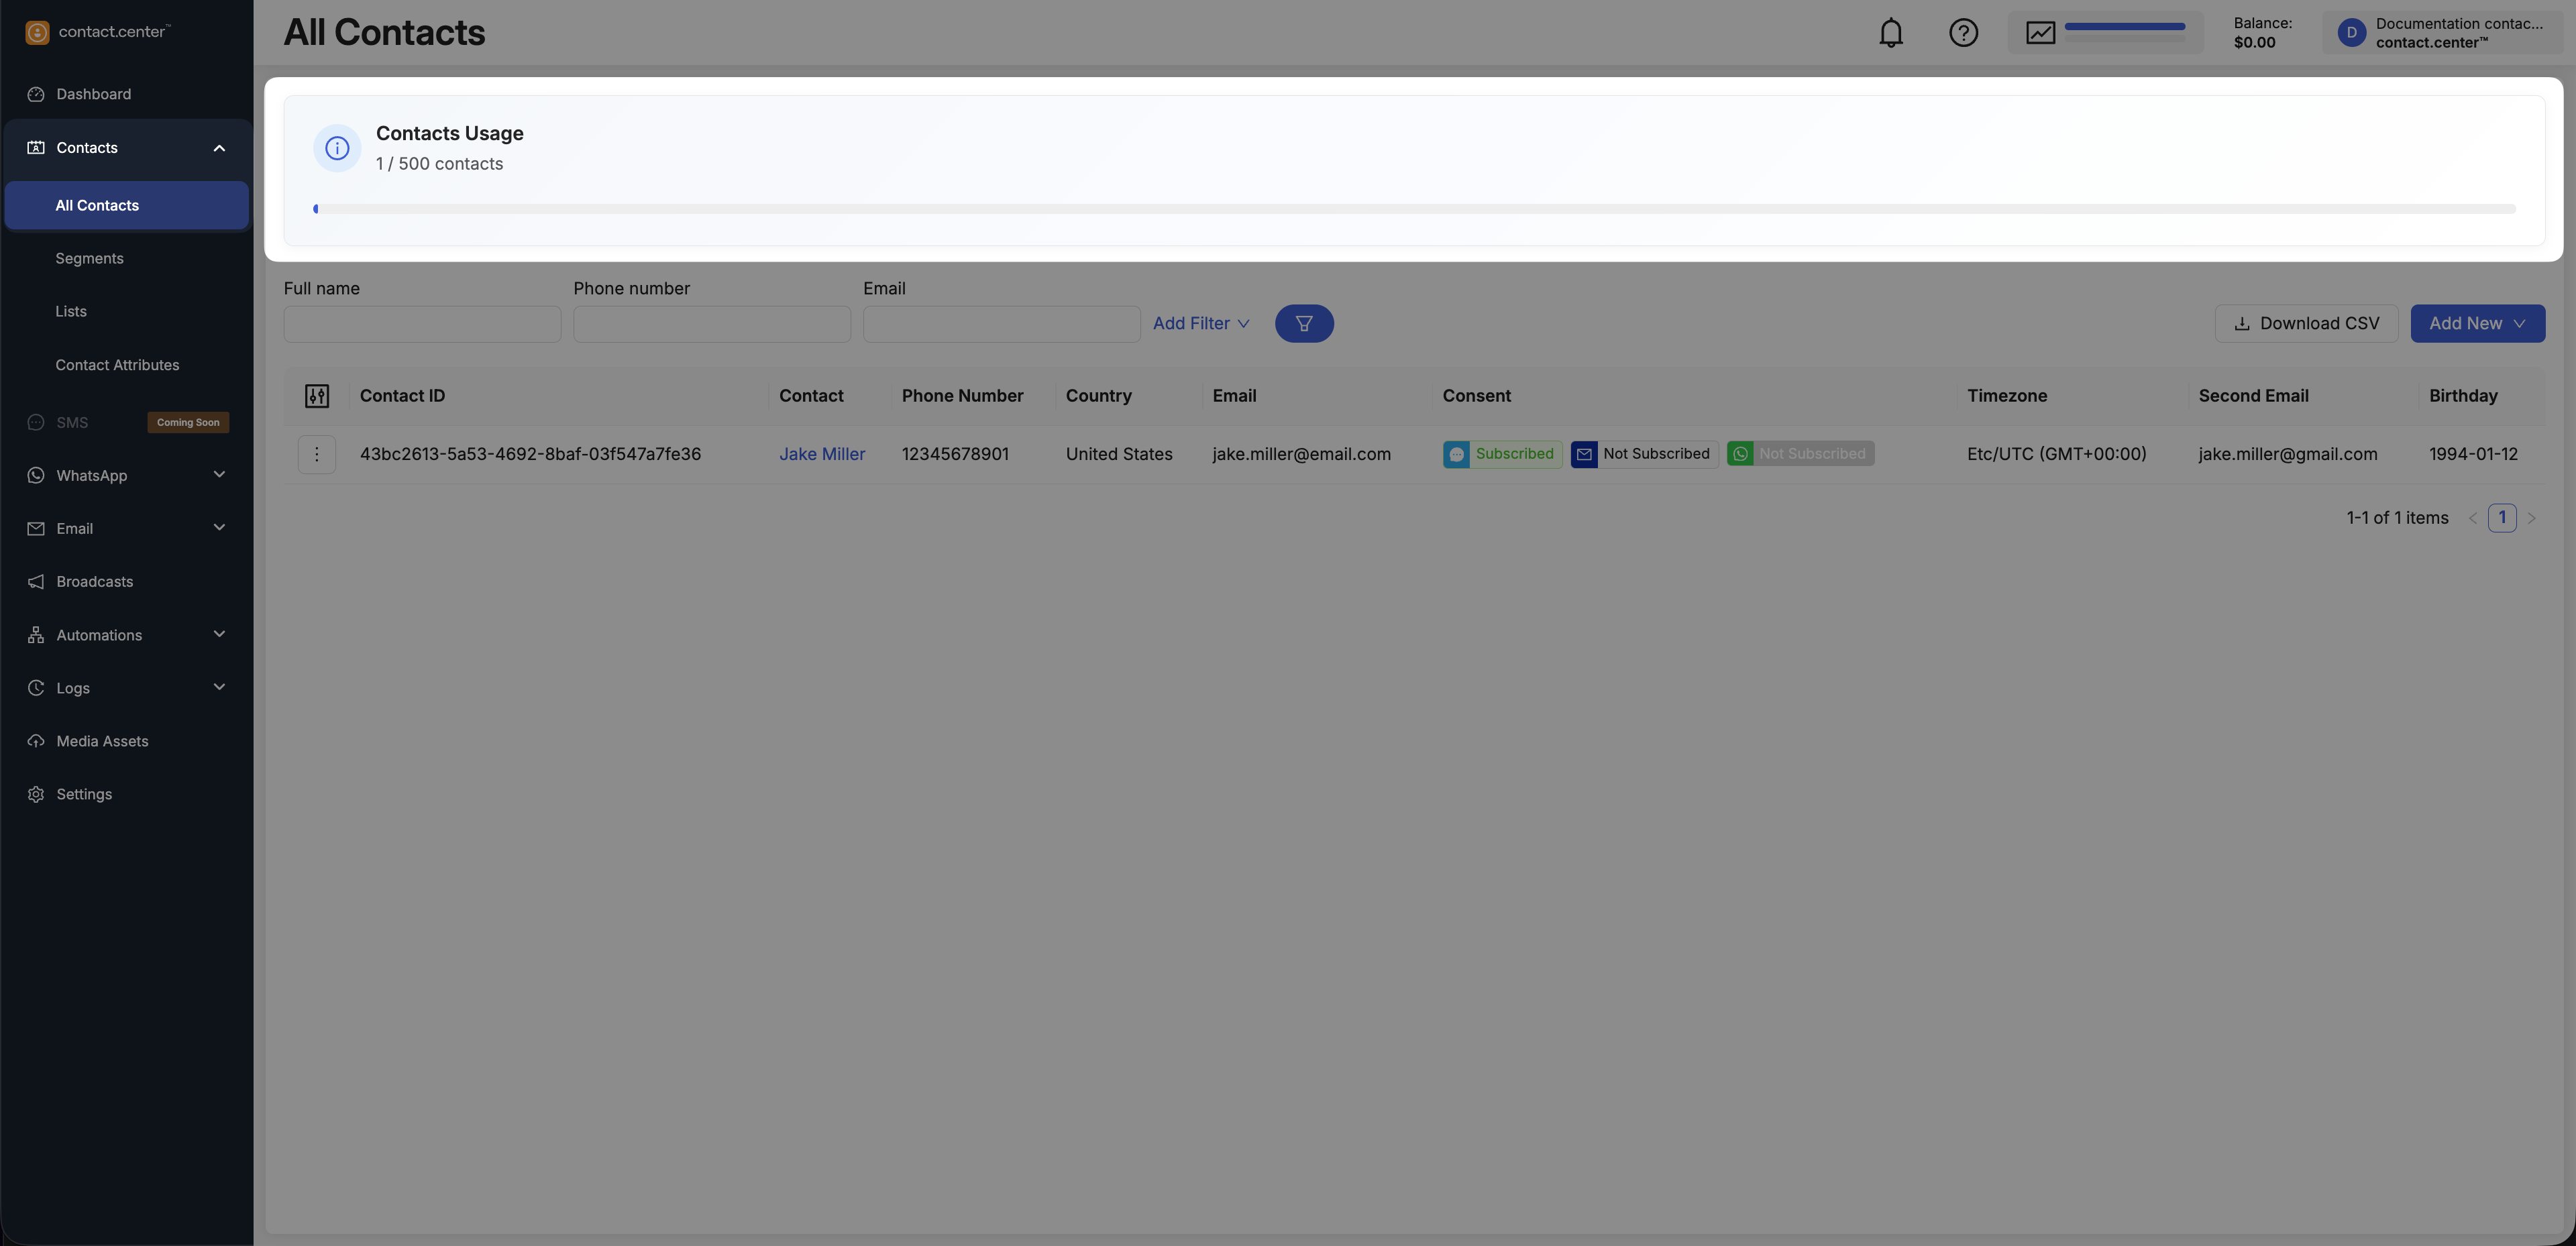
Fig. 16. Contacts usage indicator.
Filter Contacts
Use filters above the contacts table to narrow down the list of contacts based on contact attributes.
The contact list is updated only after the Filter button is clicked.

Fig. 17. Contact filters.
Add Additional Filters
Use Add Filter to access additional filters based on additional contact attributes.
Click Add Filter.
Select an available filter from the list.
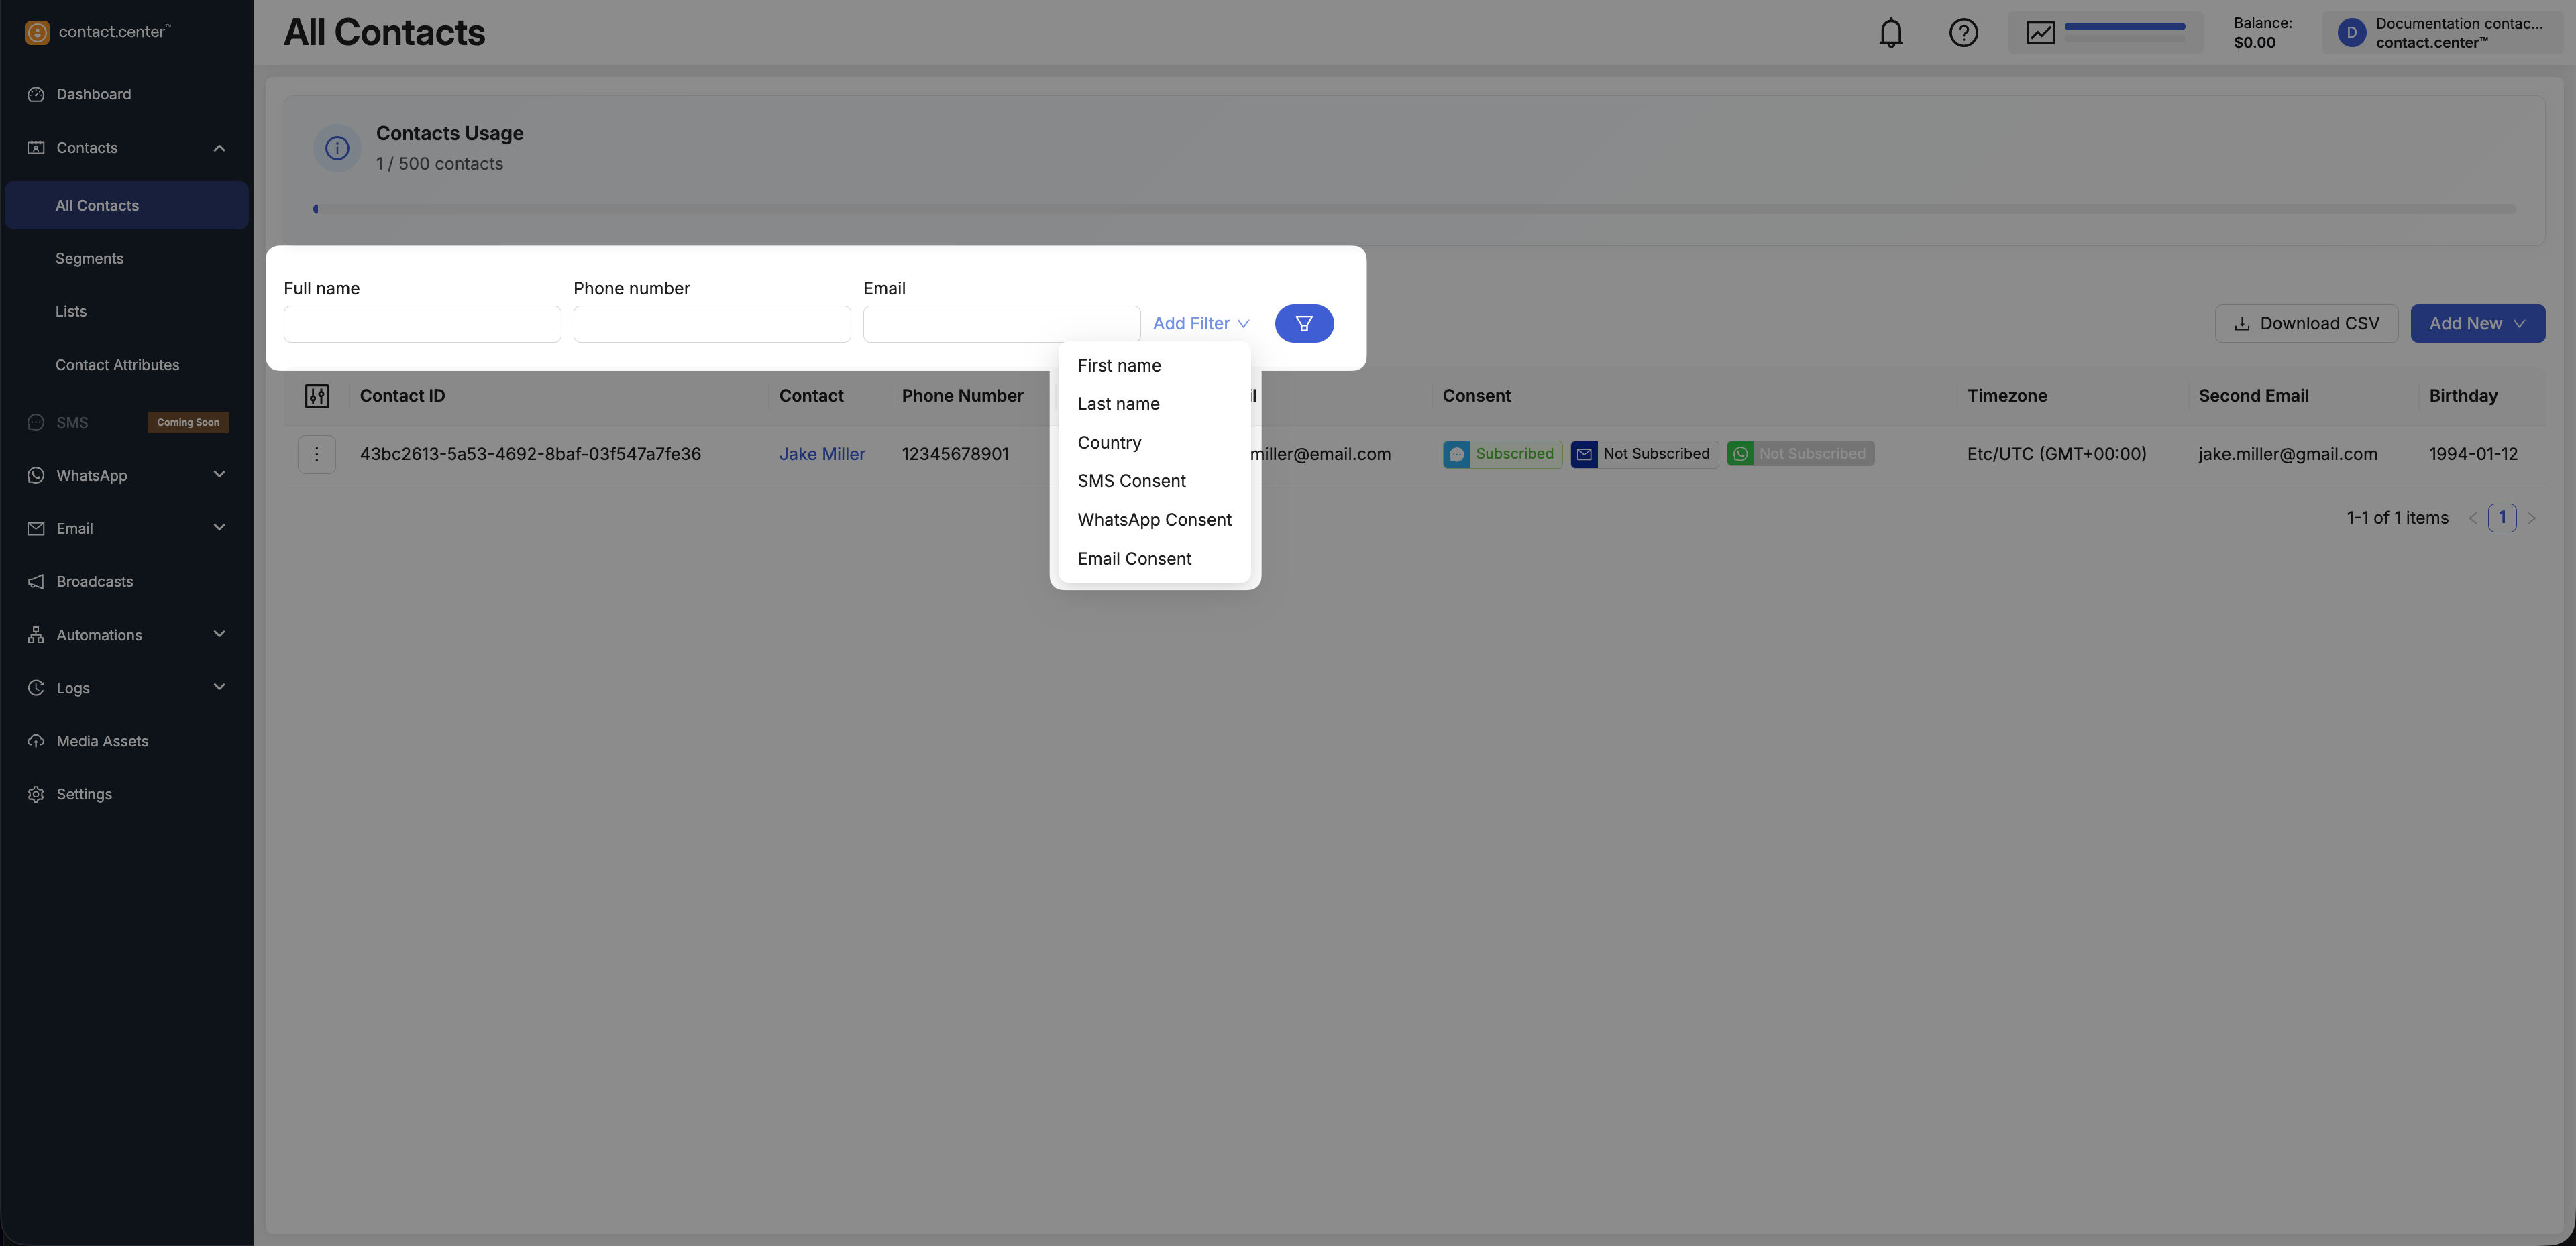
Fig. 18. Add a filter.
Available Filters
The following filters are available for use. This includes both default filters and filters added via Add Filter.
Filter |
Description |
|---|---|
Full name |
Filters contacts by full name |
Phone number |
Filters contacts by phone number |
Filters contacts by email address |
|
First name |
Filters contacts by first name |
Last name |
Filters contacts by last name |
Country |
Filters contacts by country |
SMS Consent |
Filters contacts by SMS subscription status |
WhatsApp Consent |
Filters contacts by WhatsApp subscription status |
Email Consent |
Filters contacts by email subscription status |
Note
The list of available filters is based on contact attributes defined in your workspace. To make additional attributes available for filtering, create them in Contact Attributes.
Customize Visible Columns
You can choose which columns are shown in the All Contacts table, including both default fields (such as name and contact details) and any custom contact attributes added to your contacts.
Enable or disable columns depending on the information you want to see.
Click the Customize columns icon on the left side of the table.
Toggle columns on or off.
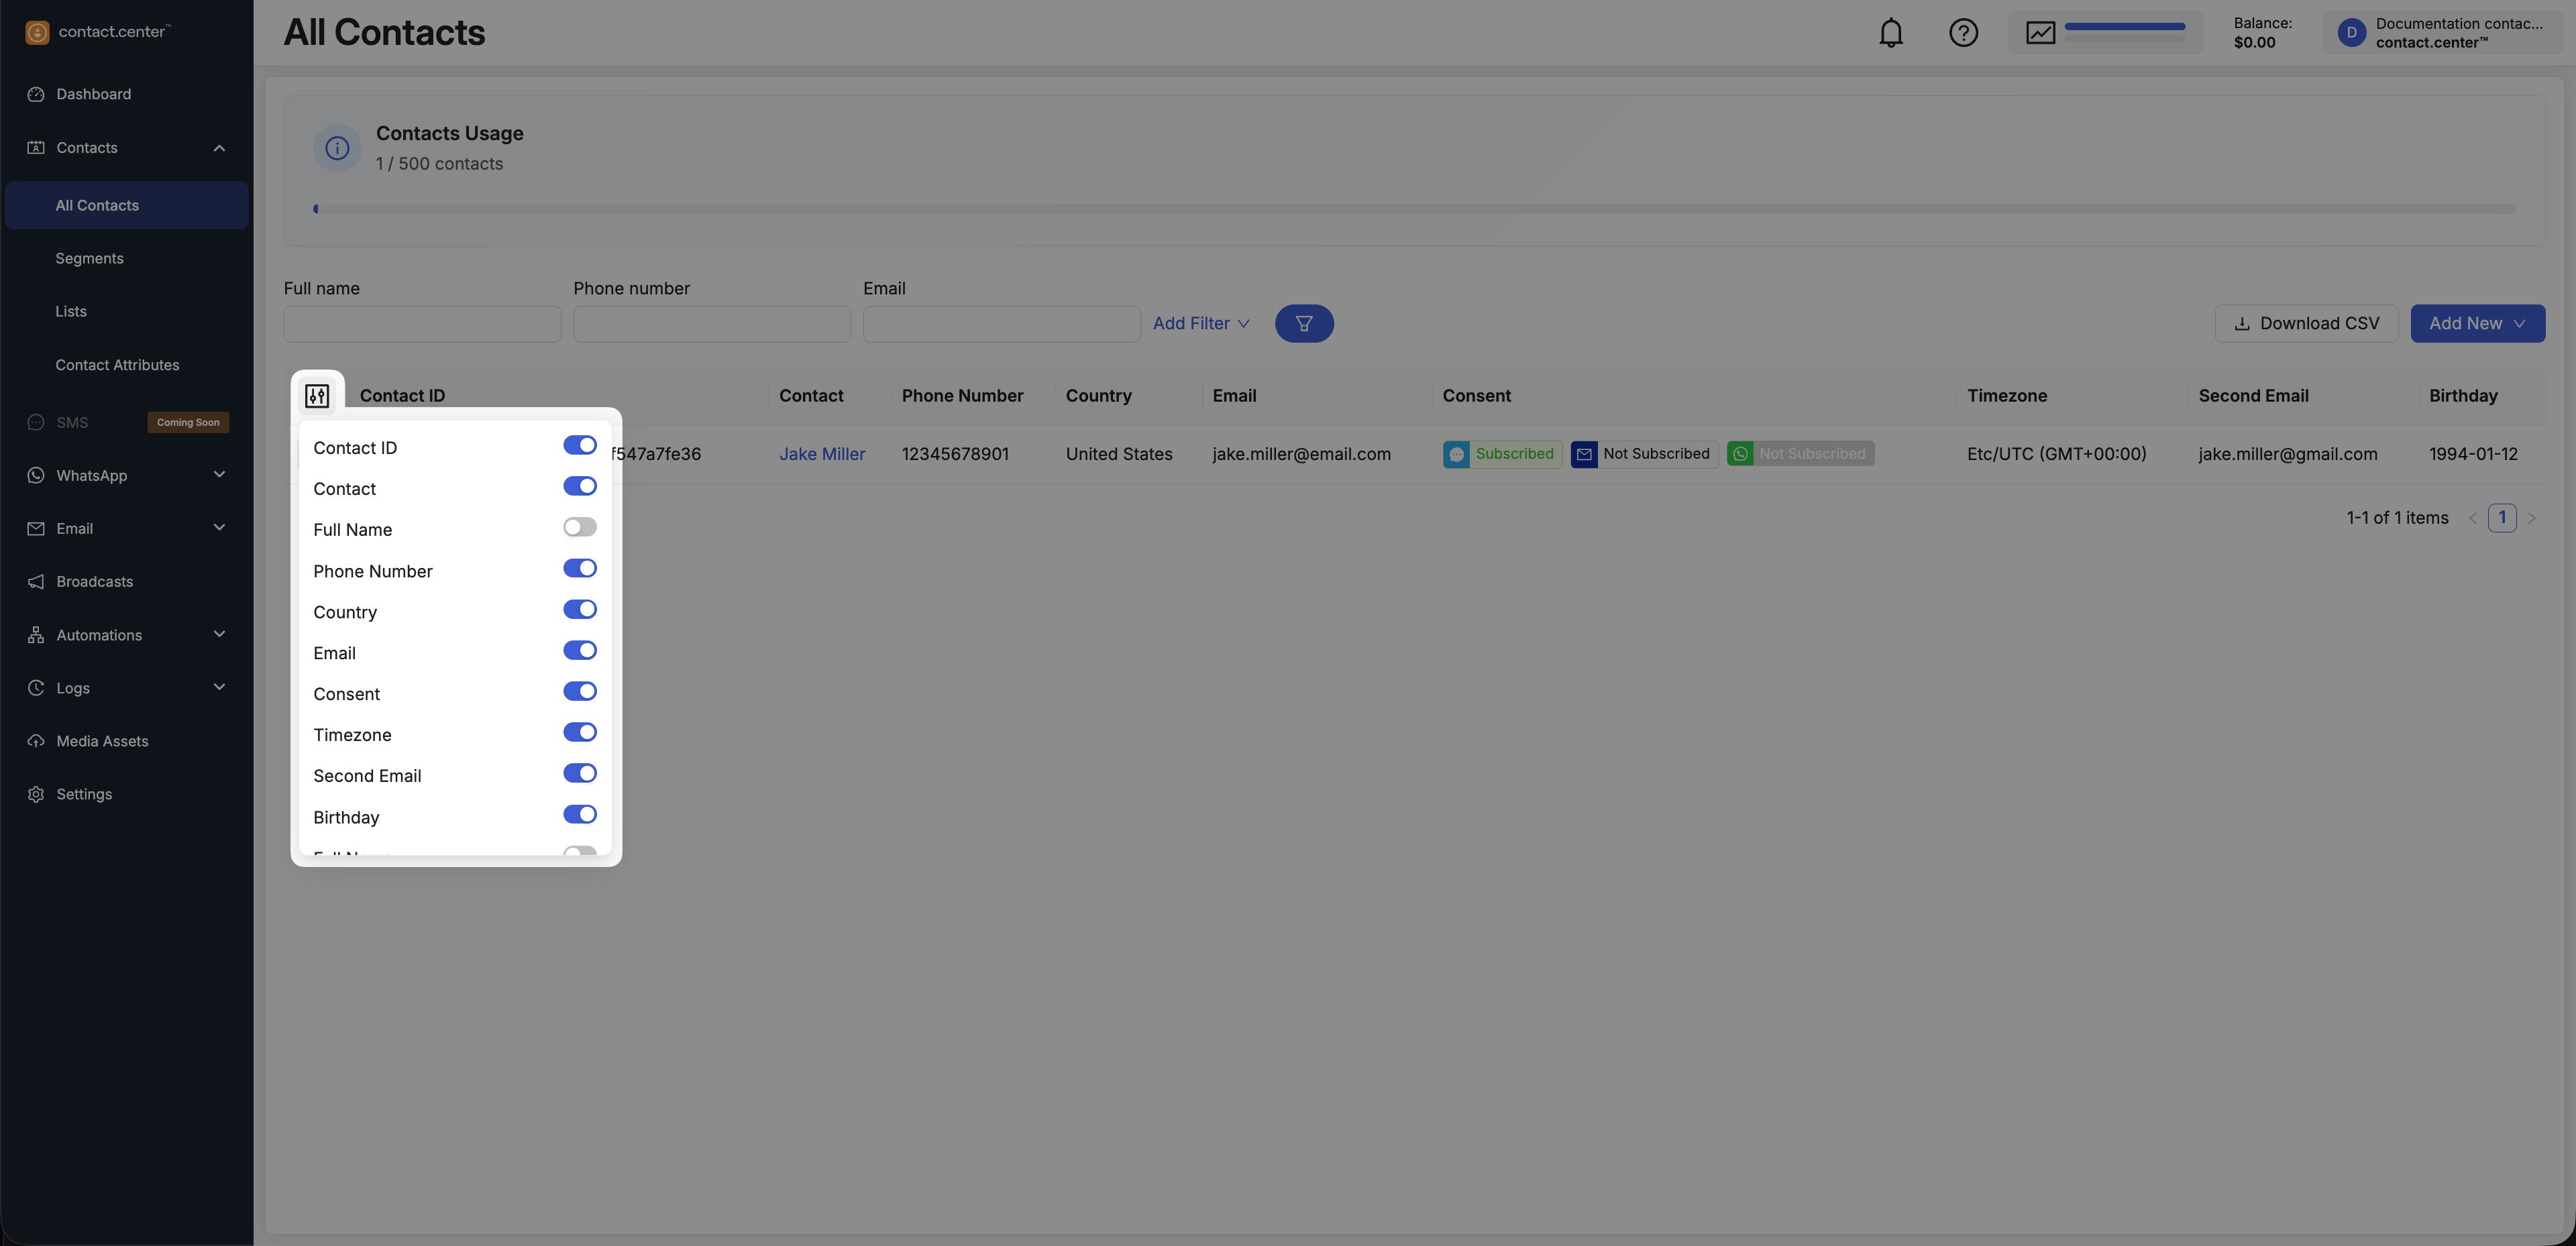
Fig. 19. Customize visible columns.
View Contact Details
Use Details to open a contact’s profile, where you can review all contact attributes in the Overview tab and see which lists the contact belongs to in the Lists tab.
Go to Contacts → All Contacts.
Locate the contact you want to view.
Click Details in the actions menu.
Overview
The Overview tab displays all contact attributes.
Attributes are grouped into:
Generic Attributes - core system attributes such as name, phone number, email, and identifiers.
Custom Attributes - additional fields defined for your workspace.
Note
To learn more about available attributes and how to manage them, see Contact Attributes.
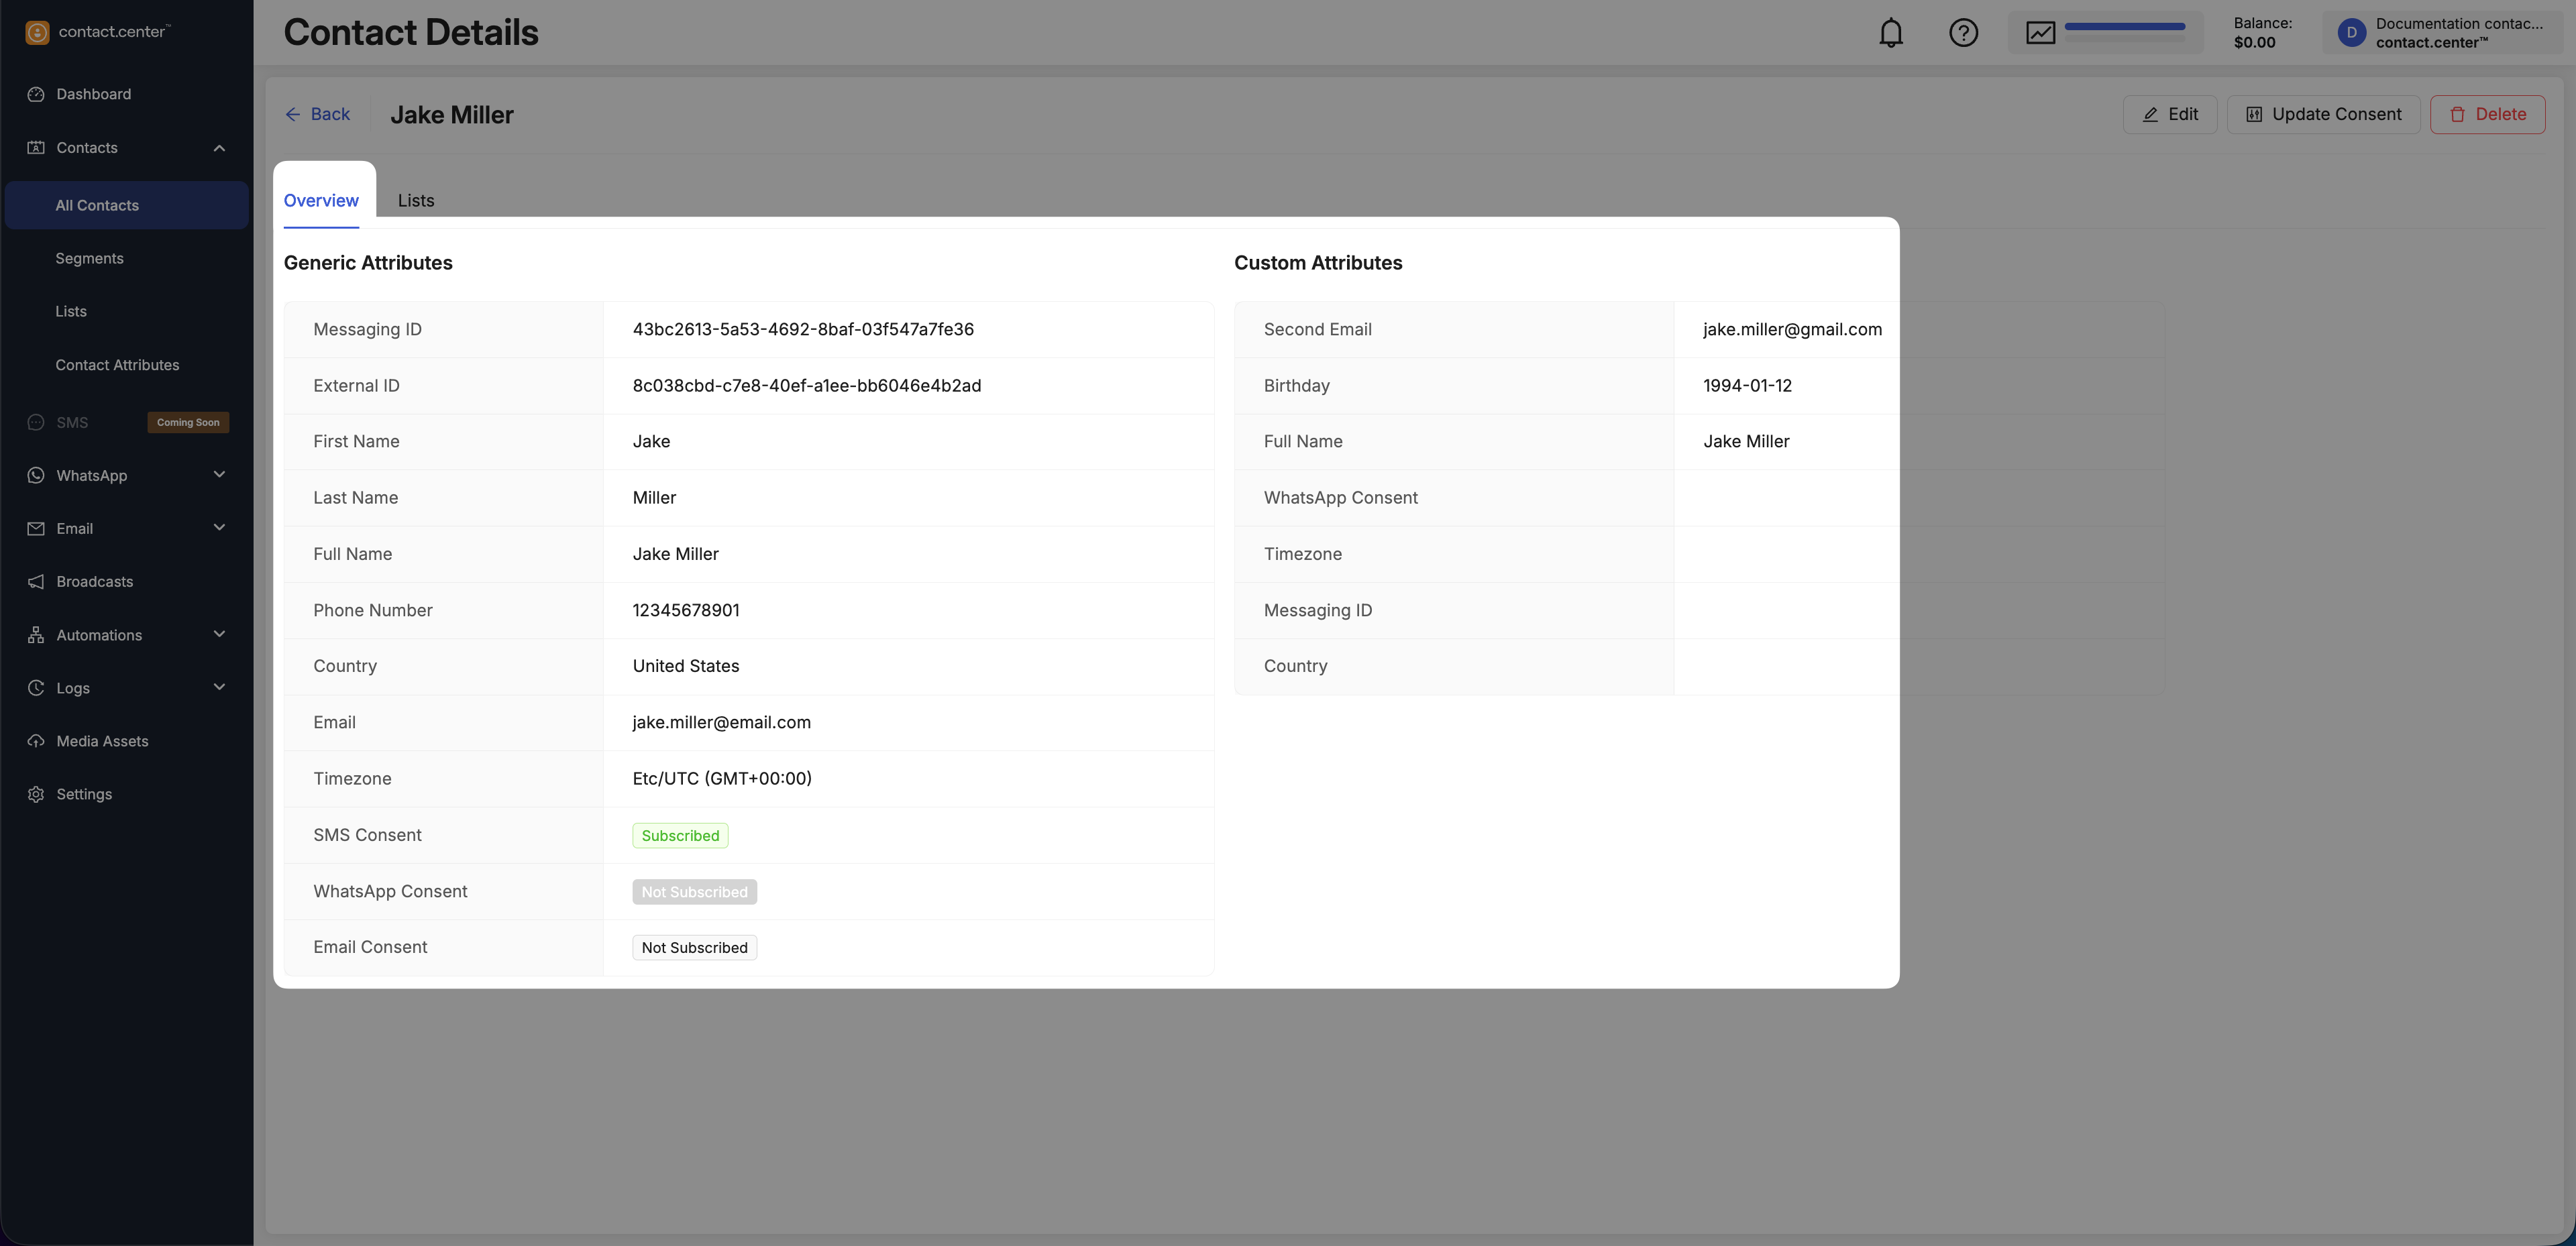
Fig. 21. Contact Details page – Overview tab.
Lists
The Lists tab shows all contact lists the contact is currently part of, and each list name is clickable to open the list details page where you can view members and manage list membership.
Note
If the contact is not assigned to any lists, the page displays No data. To learn more about contact lists, see Contact Lists.
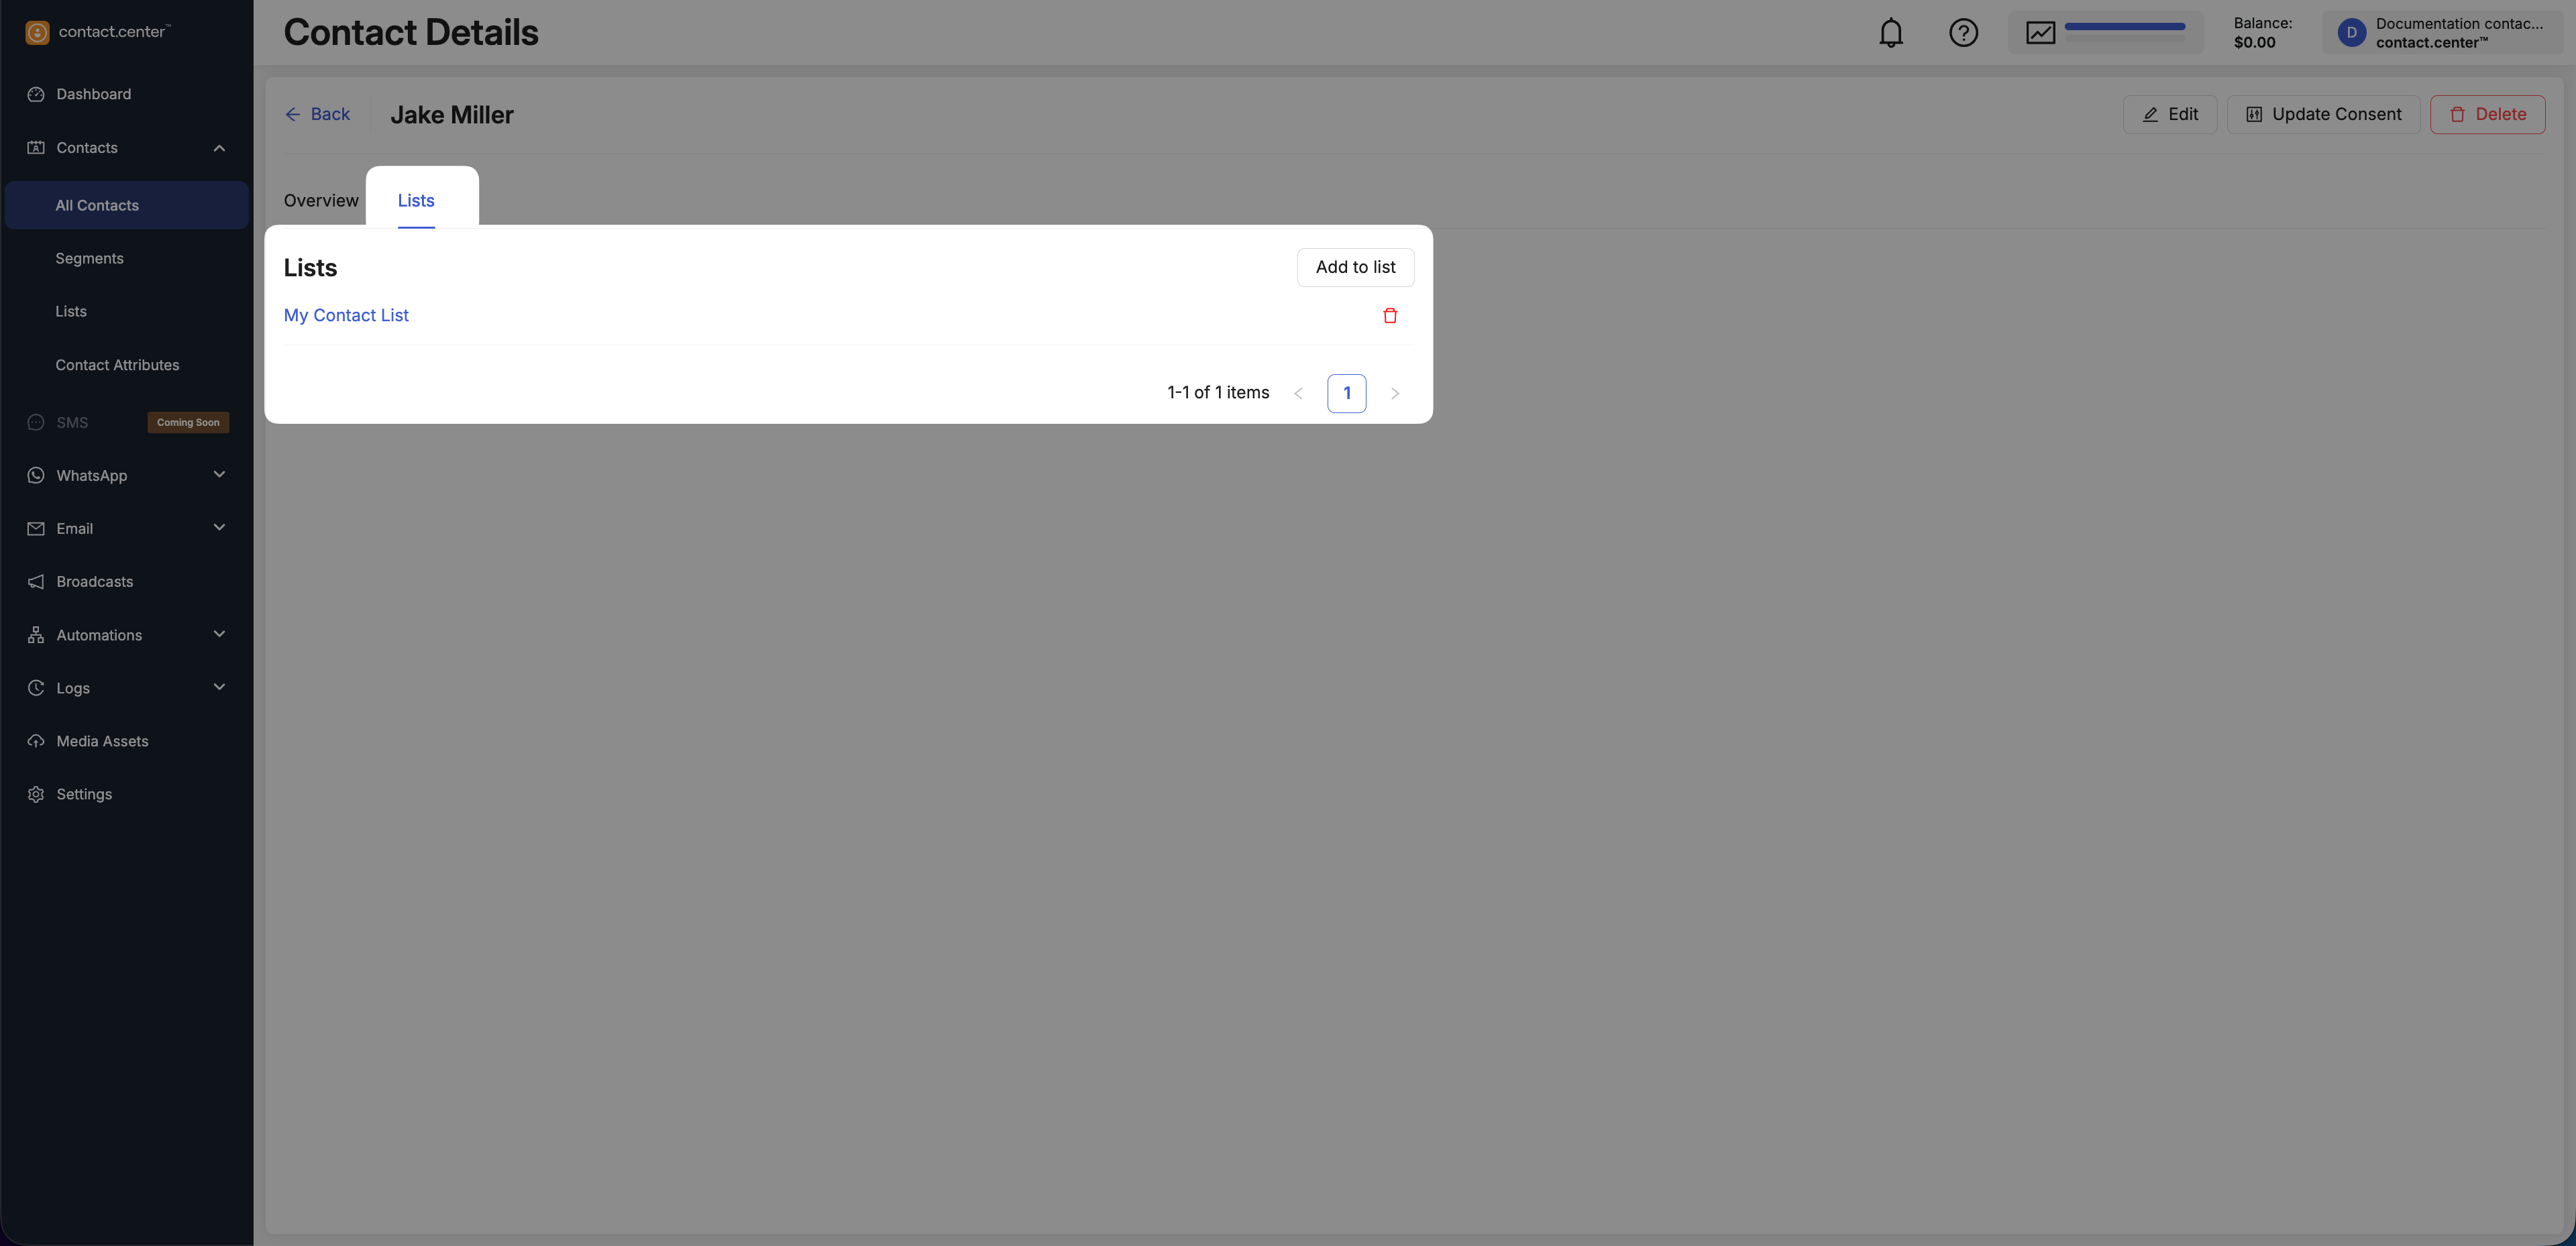
Fig. 22. Contact Details page – Lists tab.
Edit Contact Information
Update contact’s profile information, including both generic attributes and any custom attributes configured in your workspace.
Go to Contacts → All Contacts.
Locate the contact you want to edit.
Click Edit in the actions menu.
Update the contact information as needed. The edit form is divided into two sections:
Generic Attributes - core contact information such as name, contact details, and identifiers.
Custom Attributes - additional fields configured for your workspace.
Note
To learn more about system and custom contact attributes, supported value types, and attribute behavior, see Contact attributes.
Click Submit to save your changes.
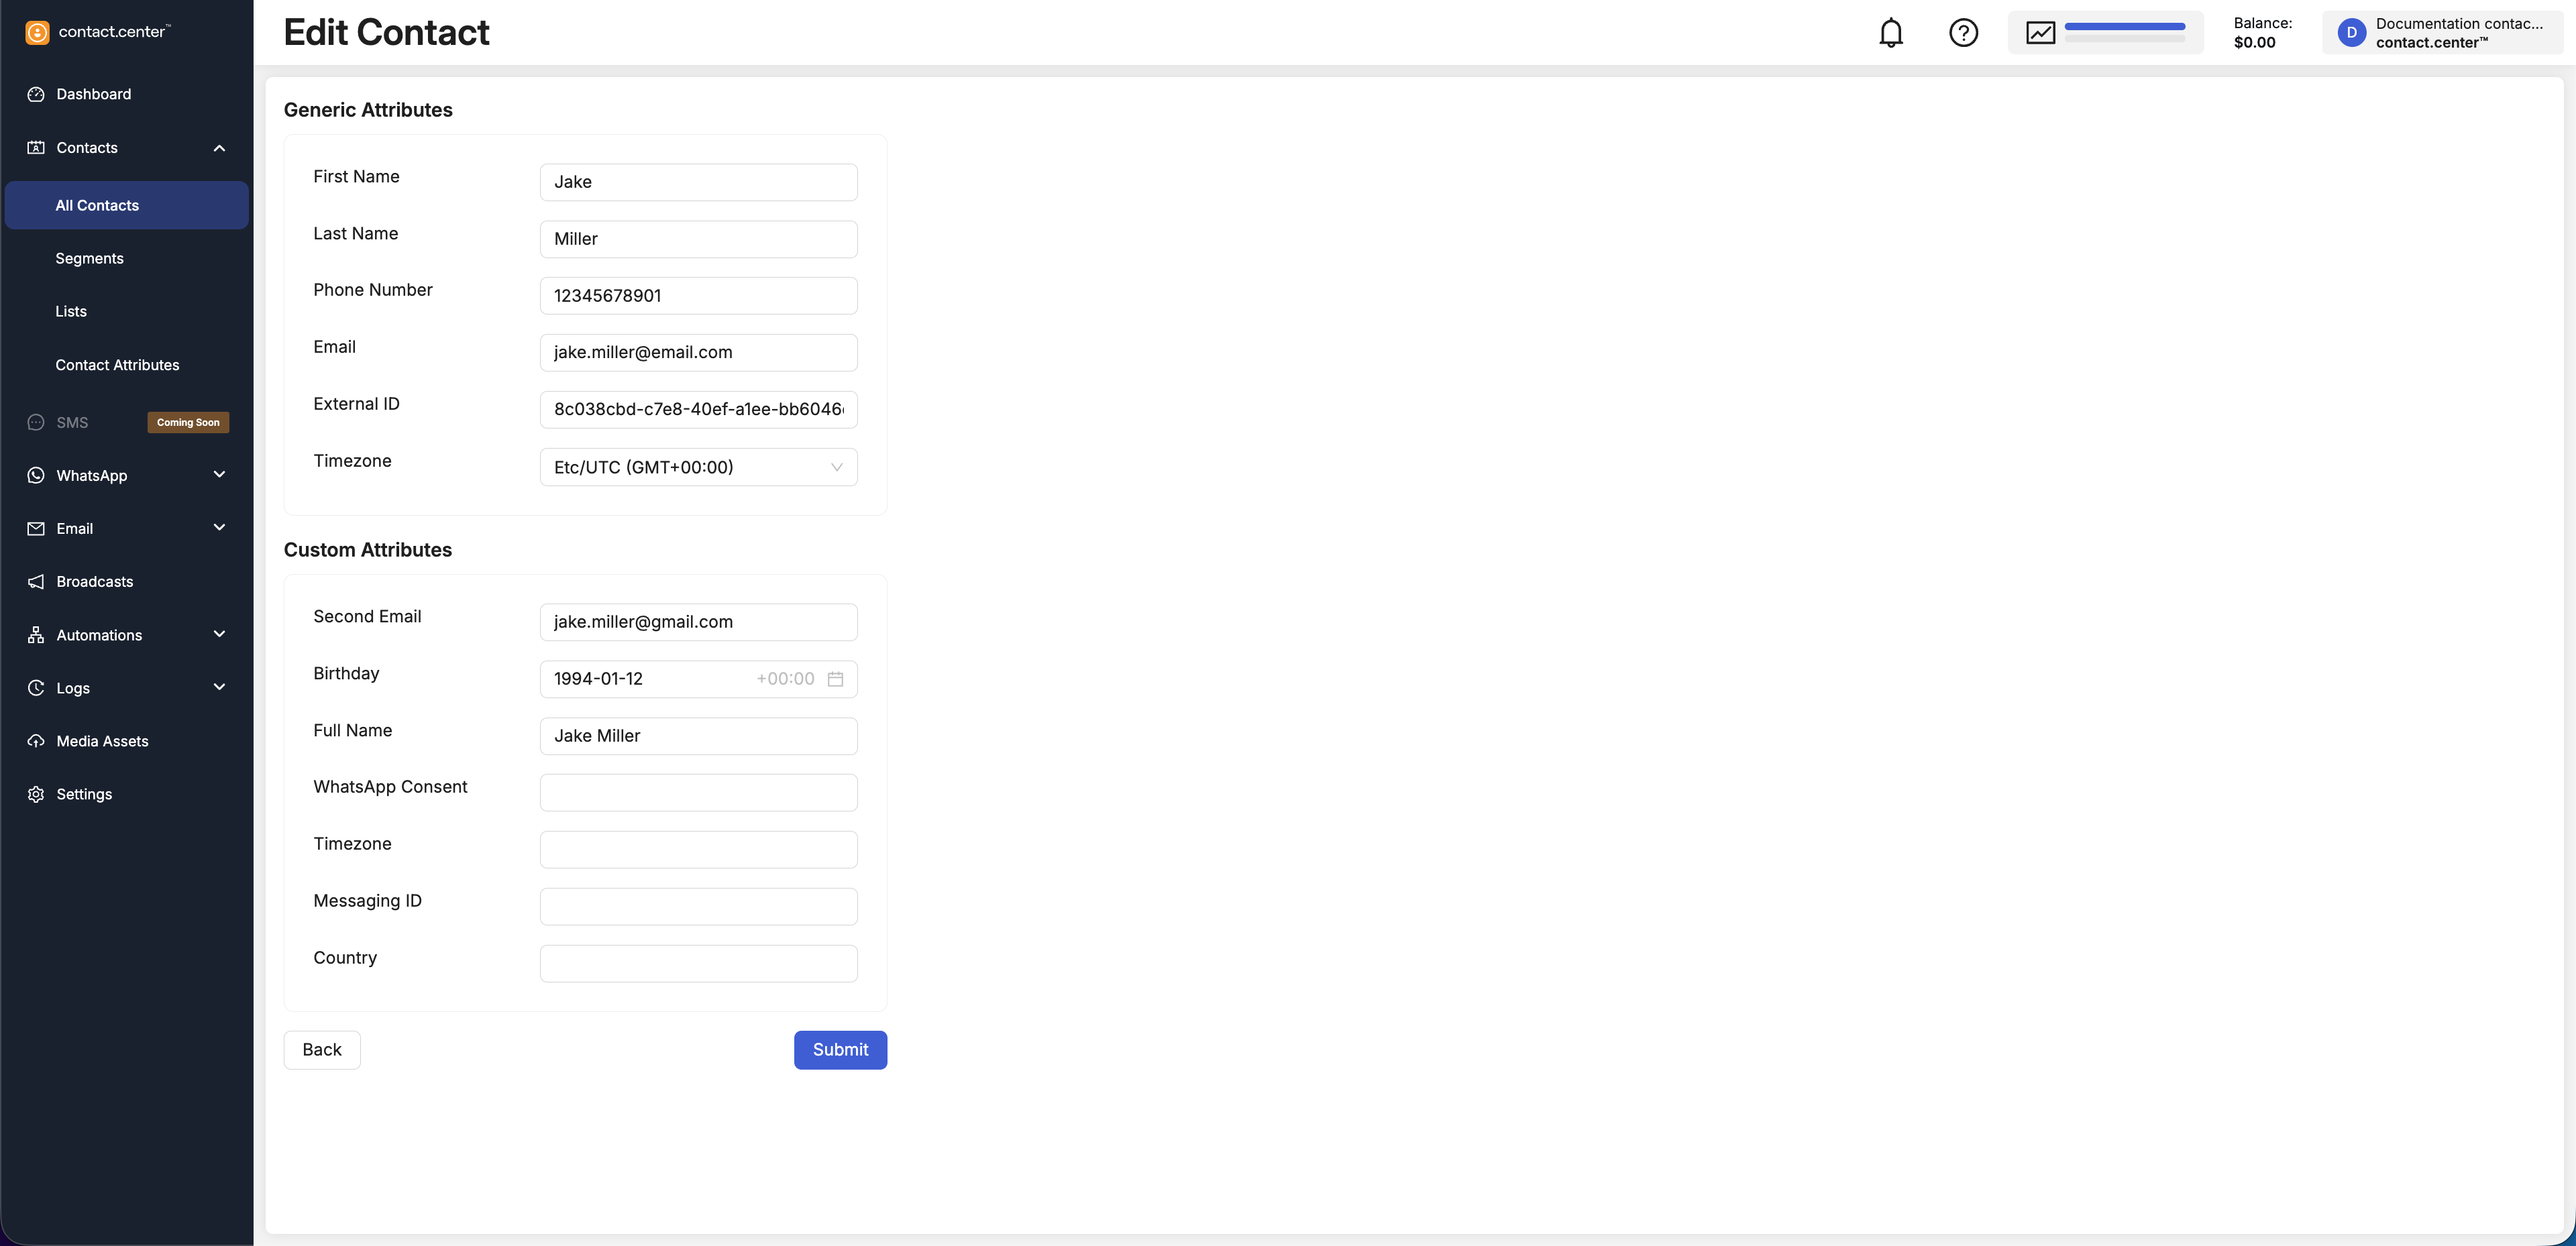
Fig. 24. Edit Contact form.
Update Contact Consent Settings
Use Update Consent to change a contact’s subscription status for supported messaging channels.
Go to Contacts → All Contacts.
Locate the contact whose consent you want to update.
Click Update Consent in the actions menu.
In the Update Consent dialog, review the current consent status and choose whether to change it or leave it unchanged for the following channels:
Click Submit to apply the changes.
Note
You can change consent only between Subscribed and Unsubscribed. It is not possible to set a consent status to Not Subscribed using this window. The Not Subscribed status indicates that consent has not been recorded yet.
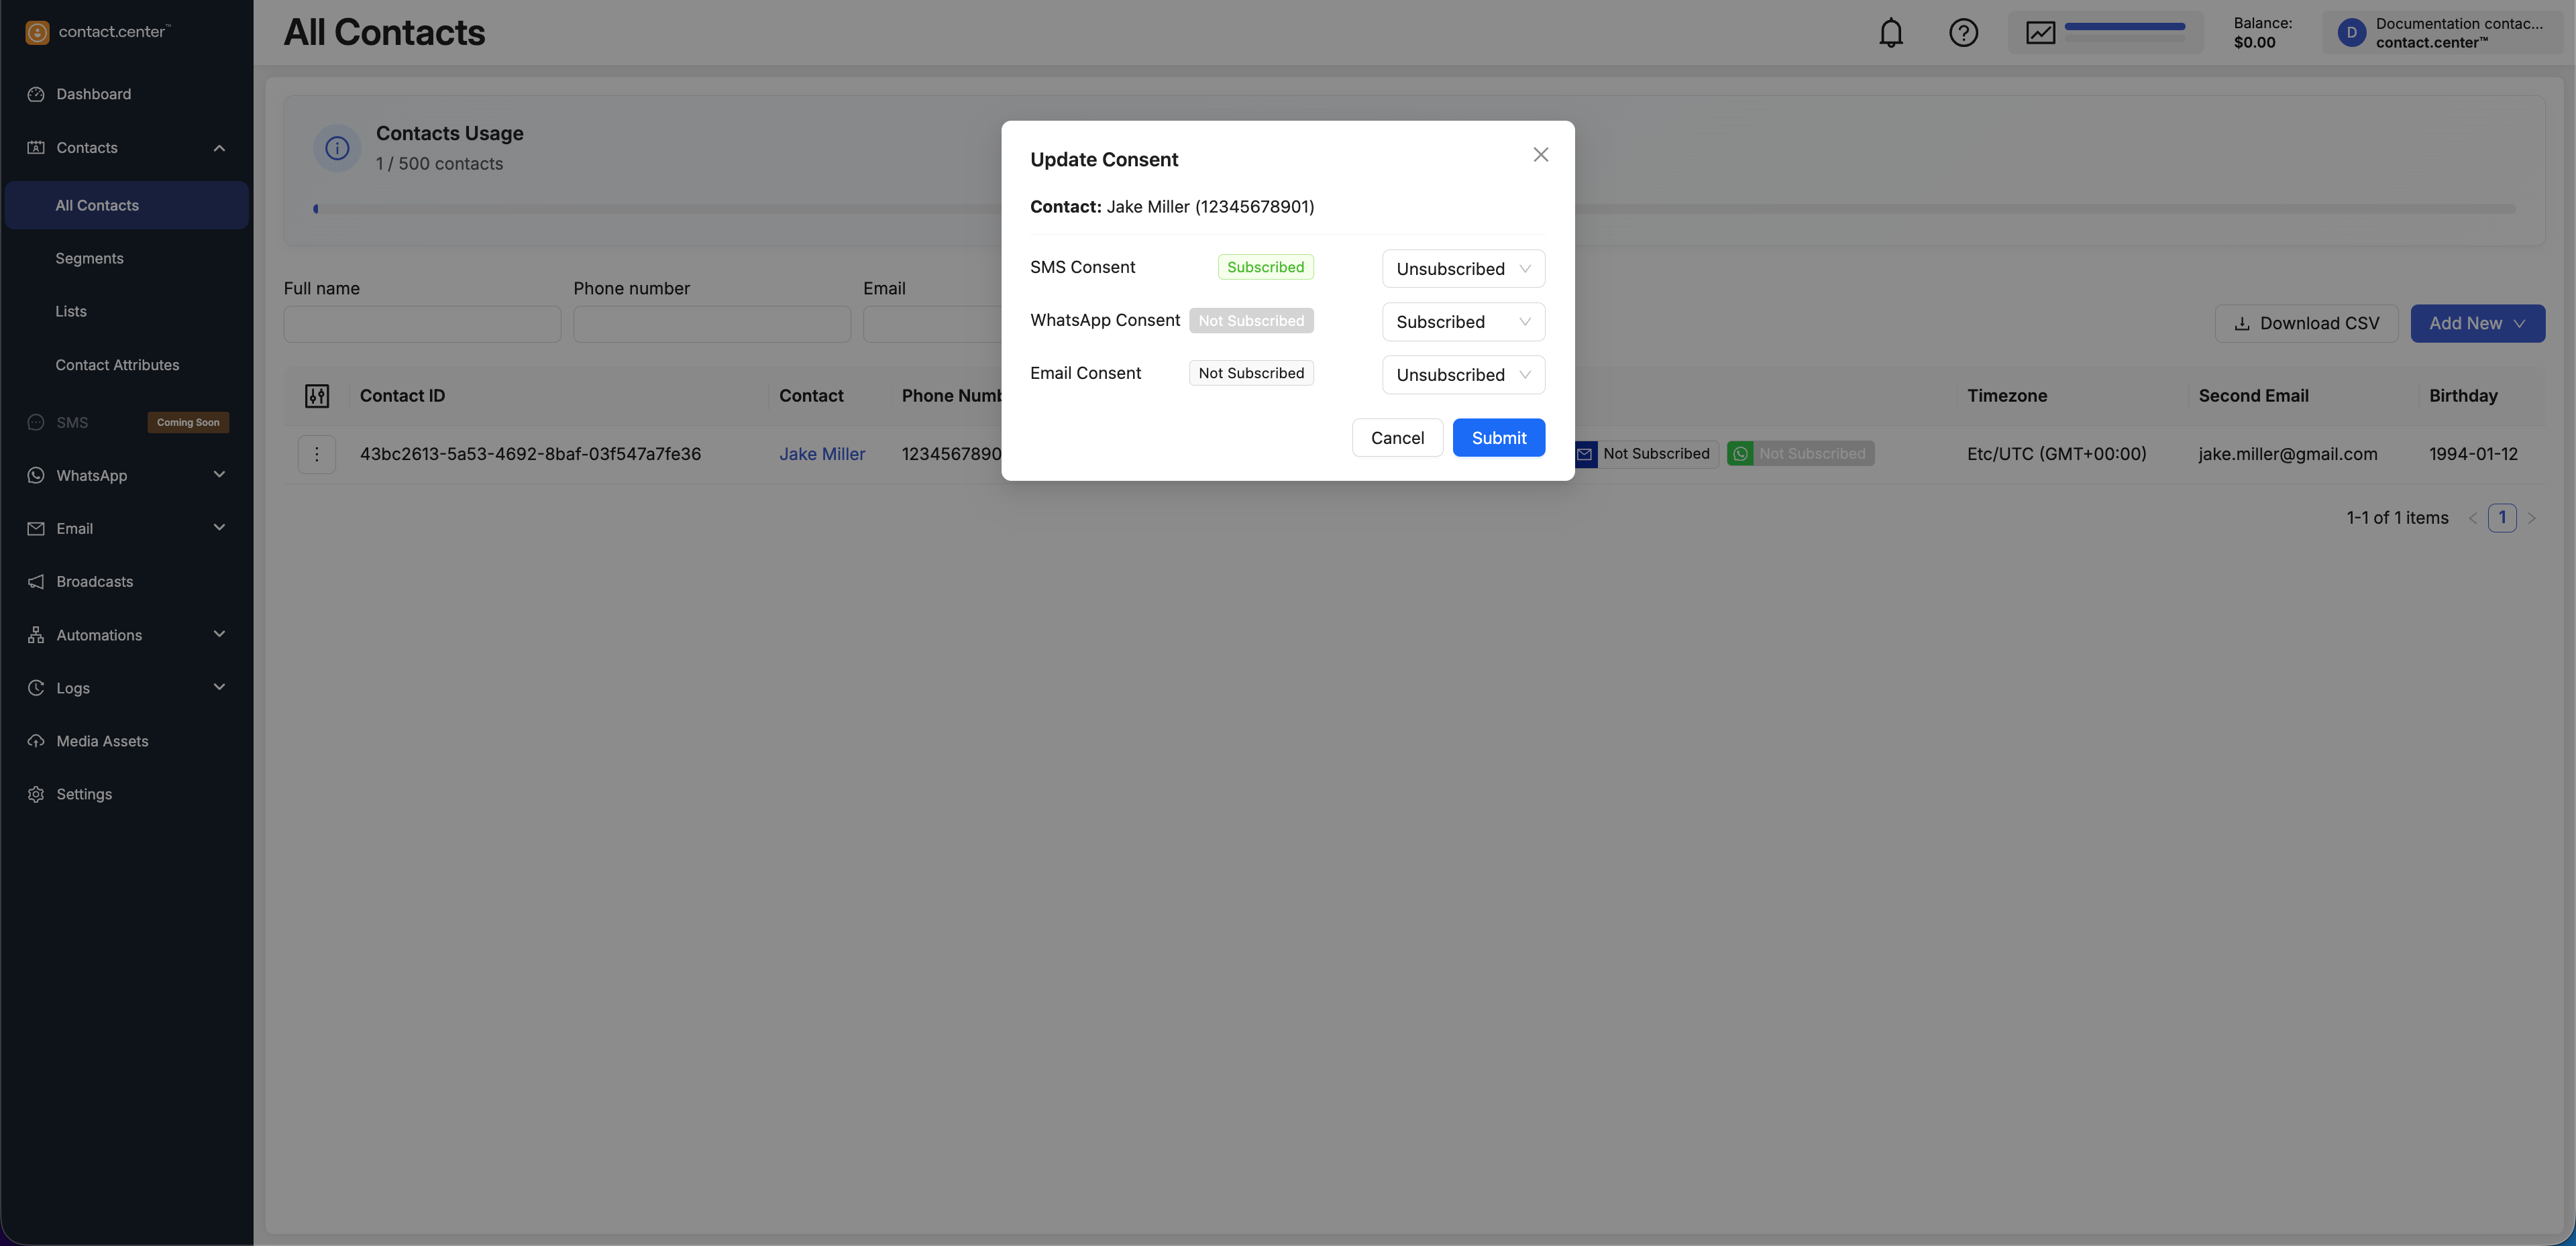
Fig. 26. Update Consent dialog.
Delete Contacts
Deleting a contact permanently removes it from your workspace.
Go to Contacts → All Contacts.
Locate the contact you want to delete.
Click Delete in the actions menu.
In the confirmation dialog, click Delete to confirm the removal.
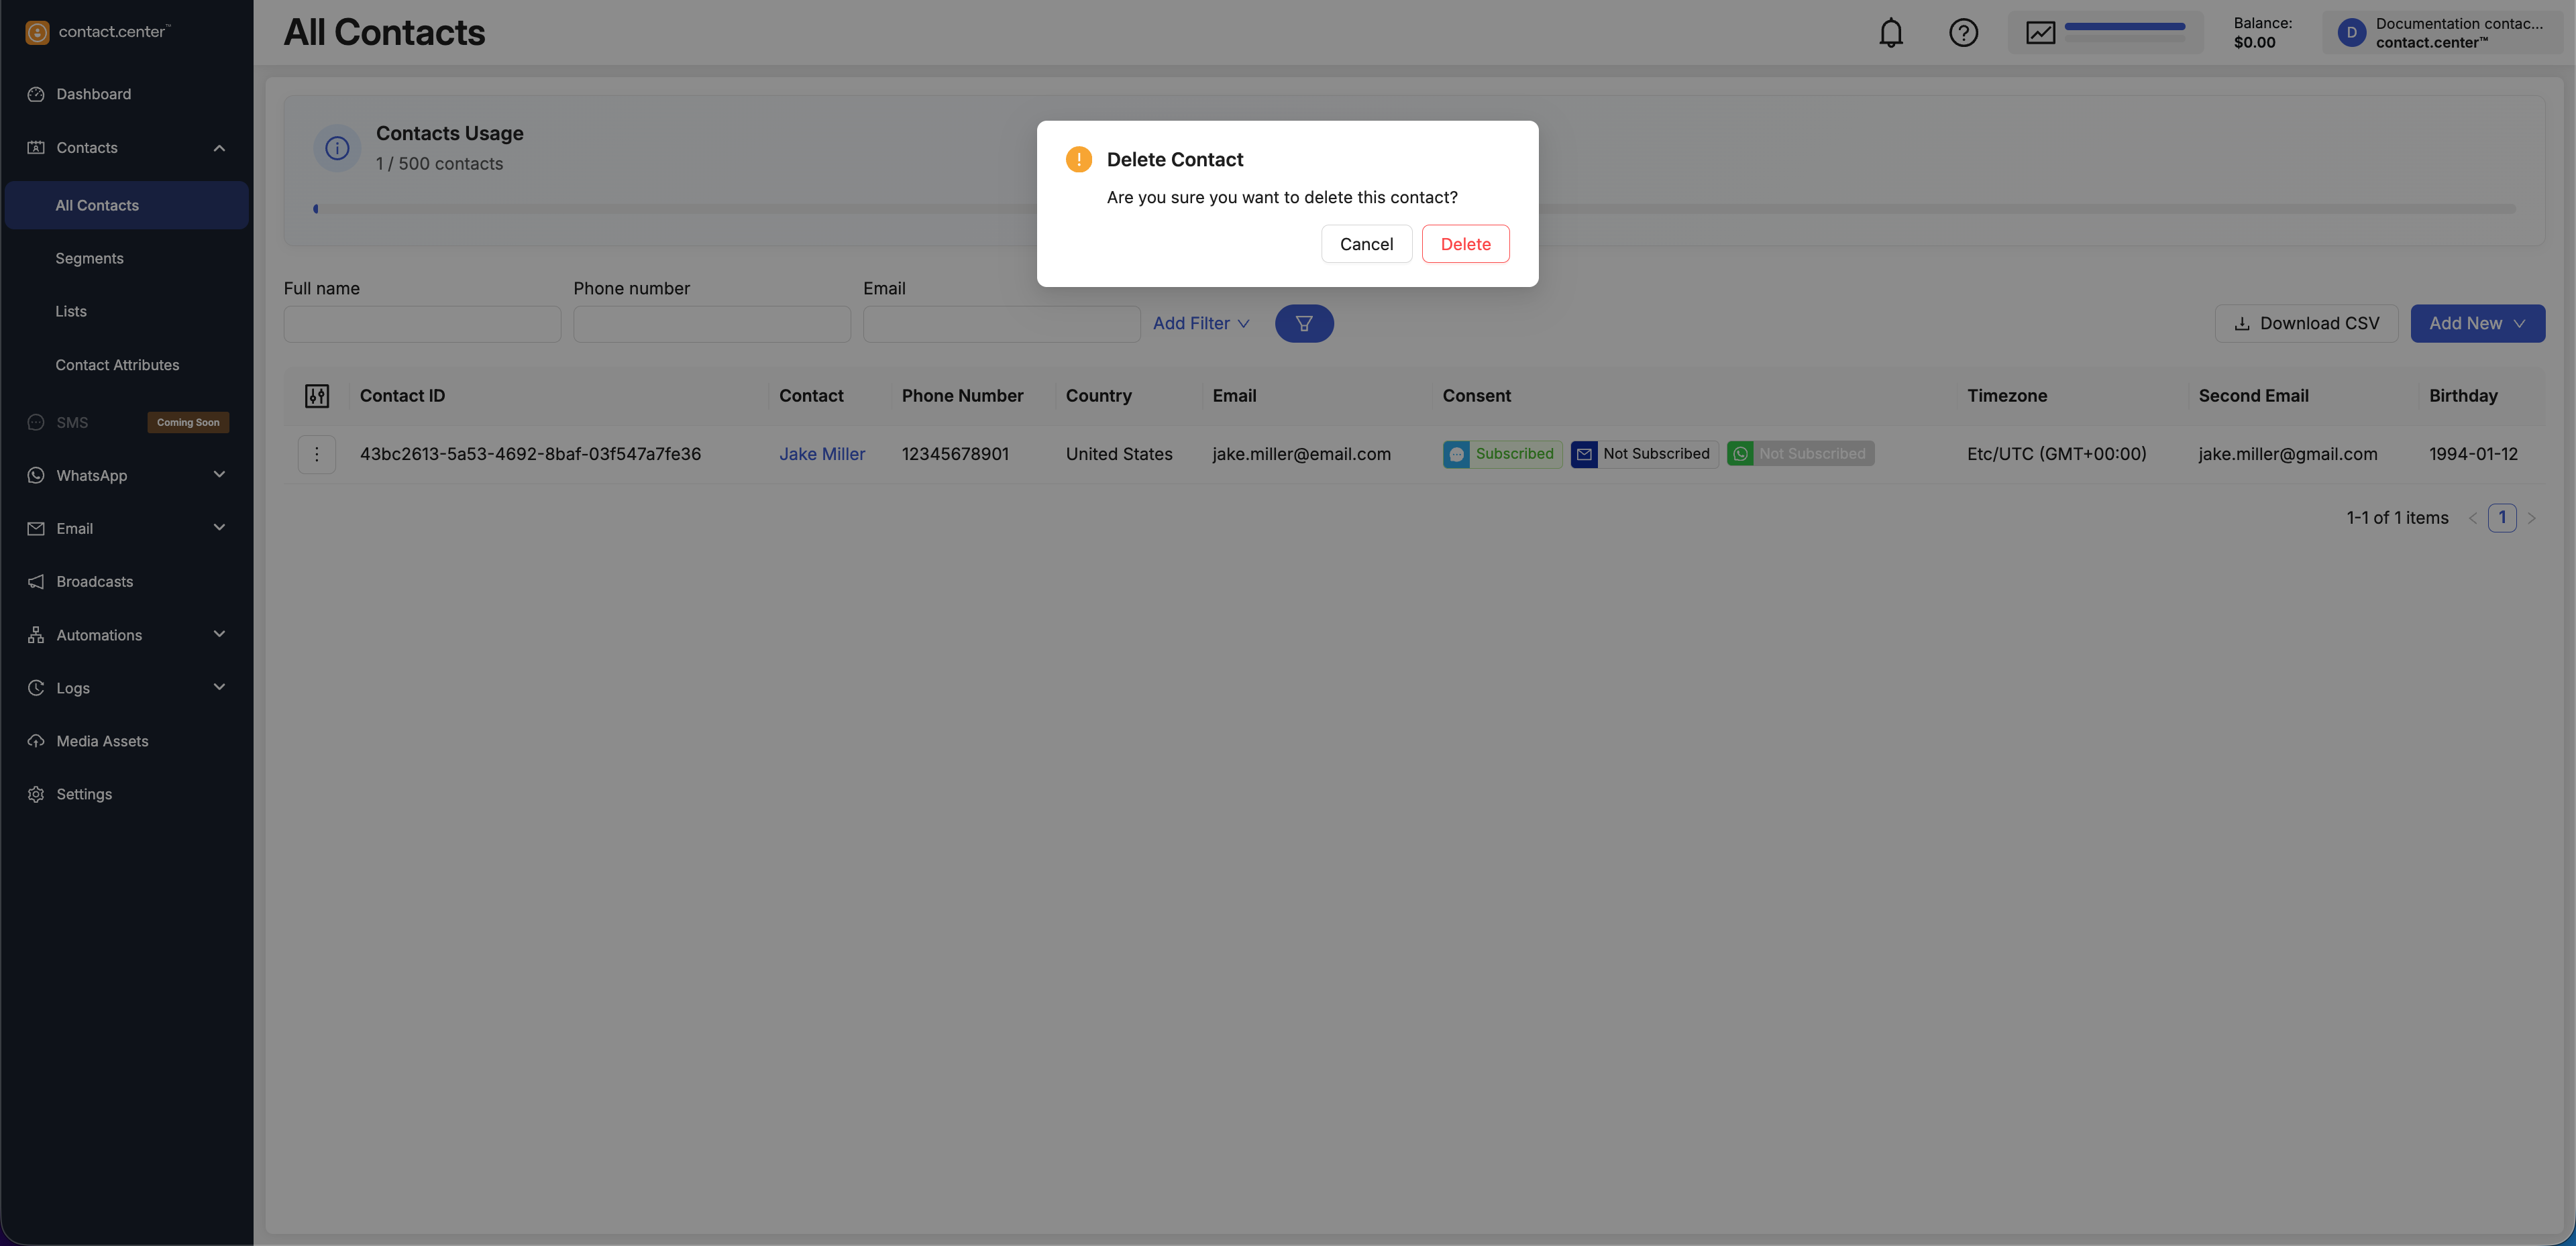
Fig. 28. Delete Contact confirmation dialog.