
 contact-center
Enable a Carrier Sender ID
Submit business and messaging details for destinations where the carrier assigns the Sender ID shown to recipients.
Before you begin
Review Carrier Sender IDs to confirm that this type matches your messaging use case.
Review A2P SMS compliance requirements before preparing the campaign description, consent flow, and sample messages.
Check that the billing information associated with the account is correct. It is locked for editing after the first Sender ID application is submitted.
Step 1: Open the application
In contact.center™, go to SMS > Sender Settings.
Under Carrier Sender ID, click Enable.
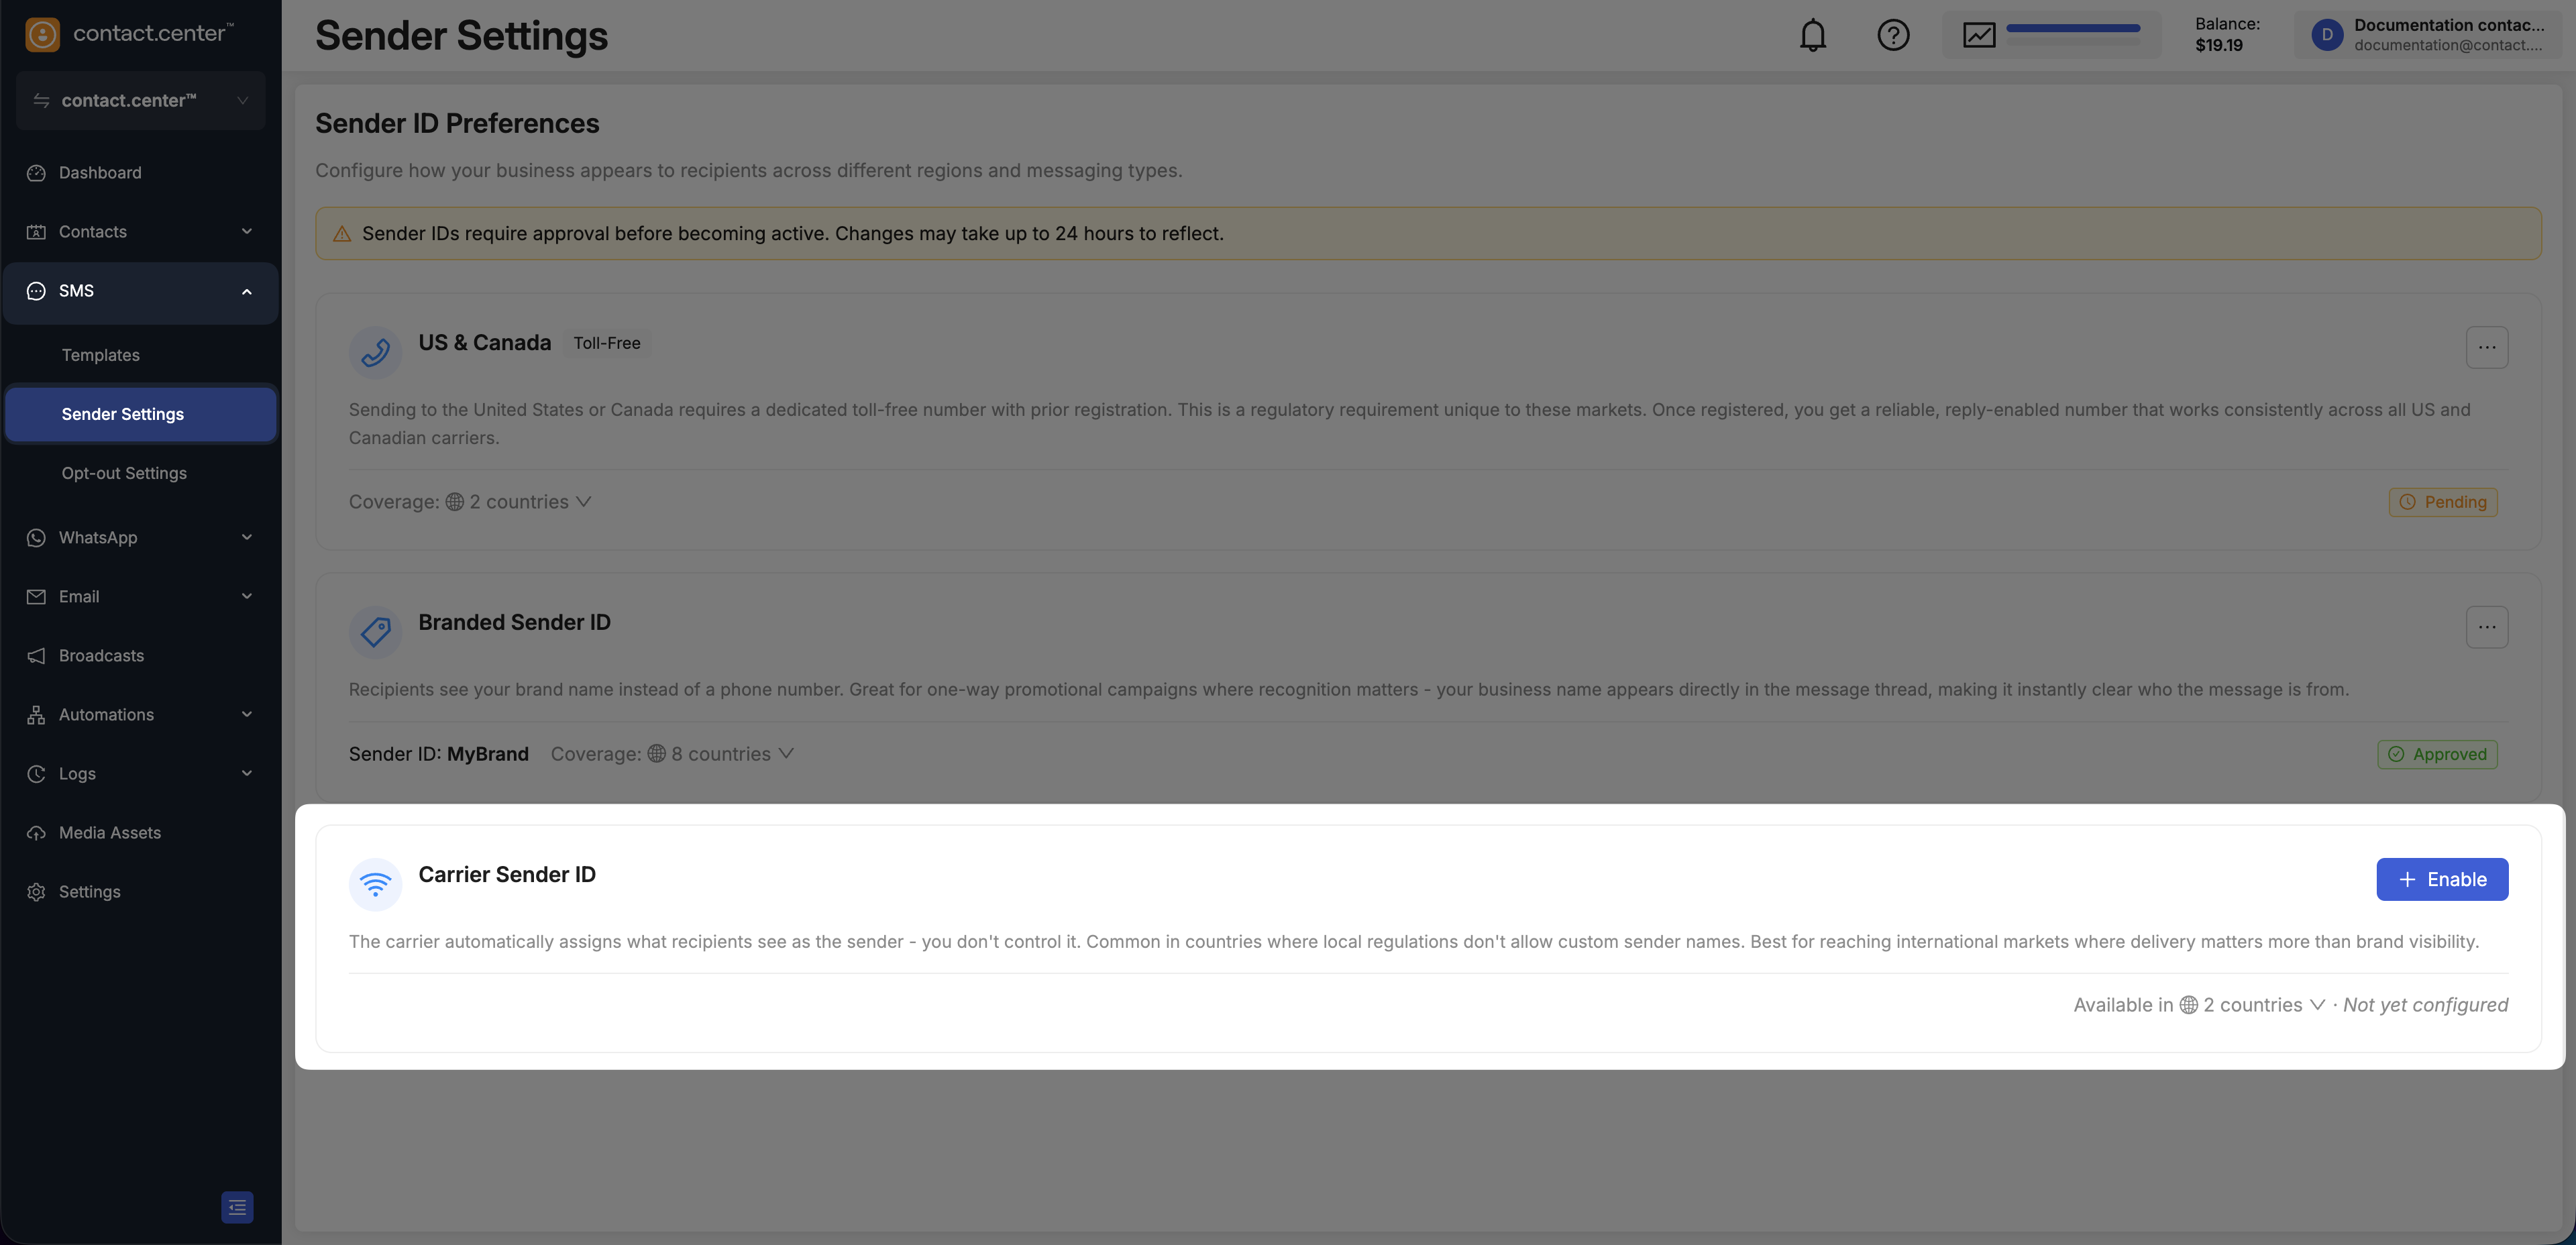
Fig. 1. Open the Carrier Sender ID application.
Step 2: Enter business information
Under About your business:
Enter the Legal Company Name and Website.
Click Next.
You do not select or reserve the Sender ID shown to recipients. It is assigned by the destination carrier.
For field descriptions, see Carrier Sender ID application.
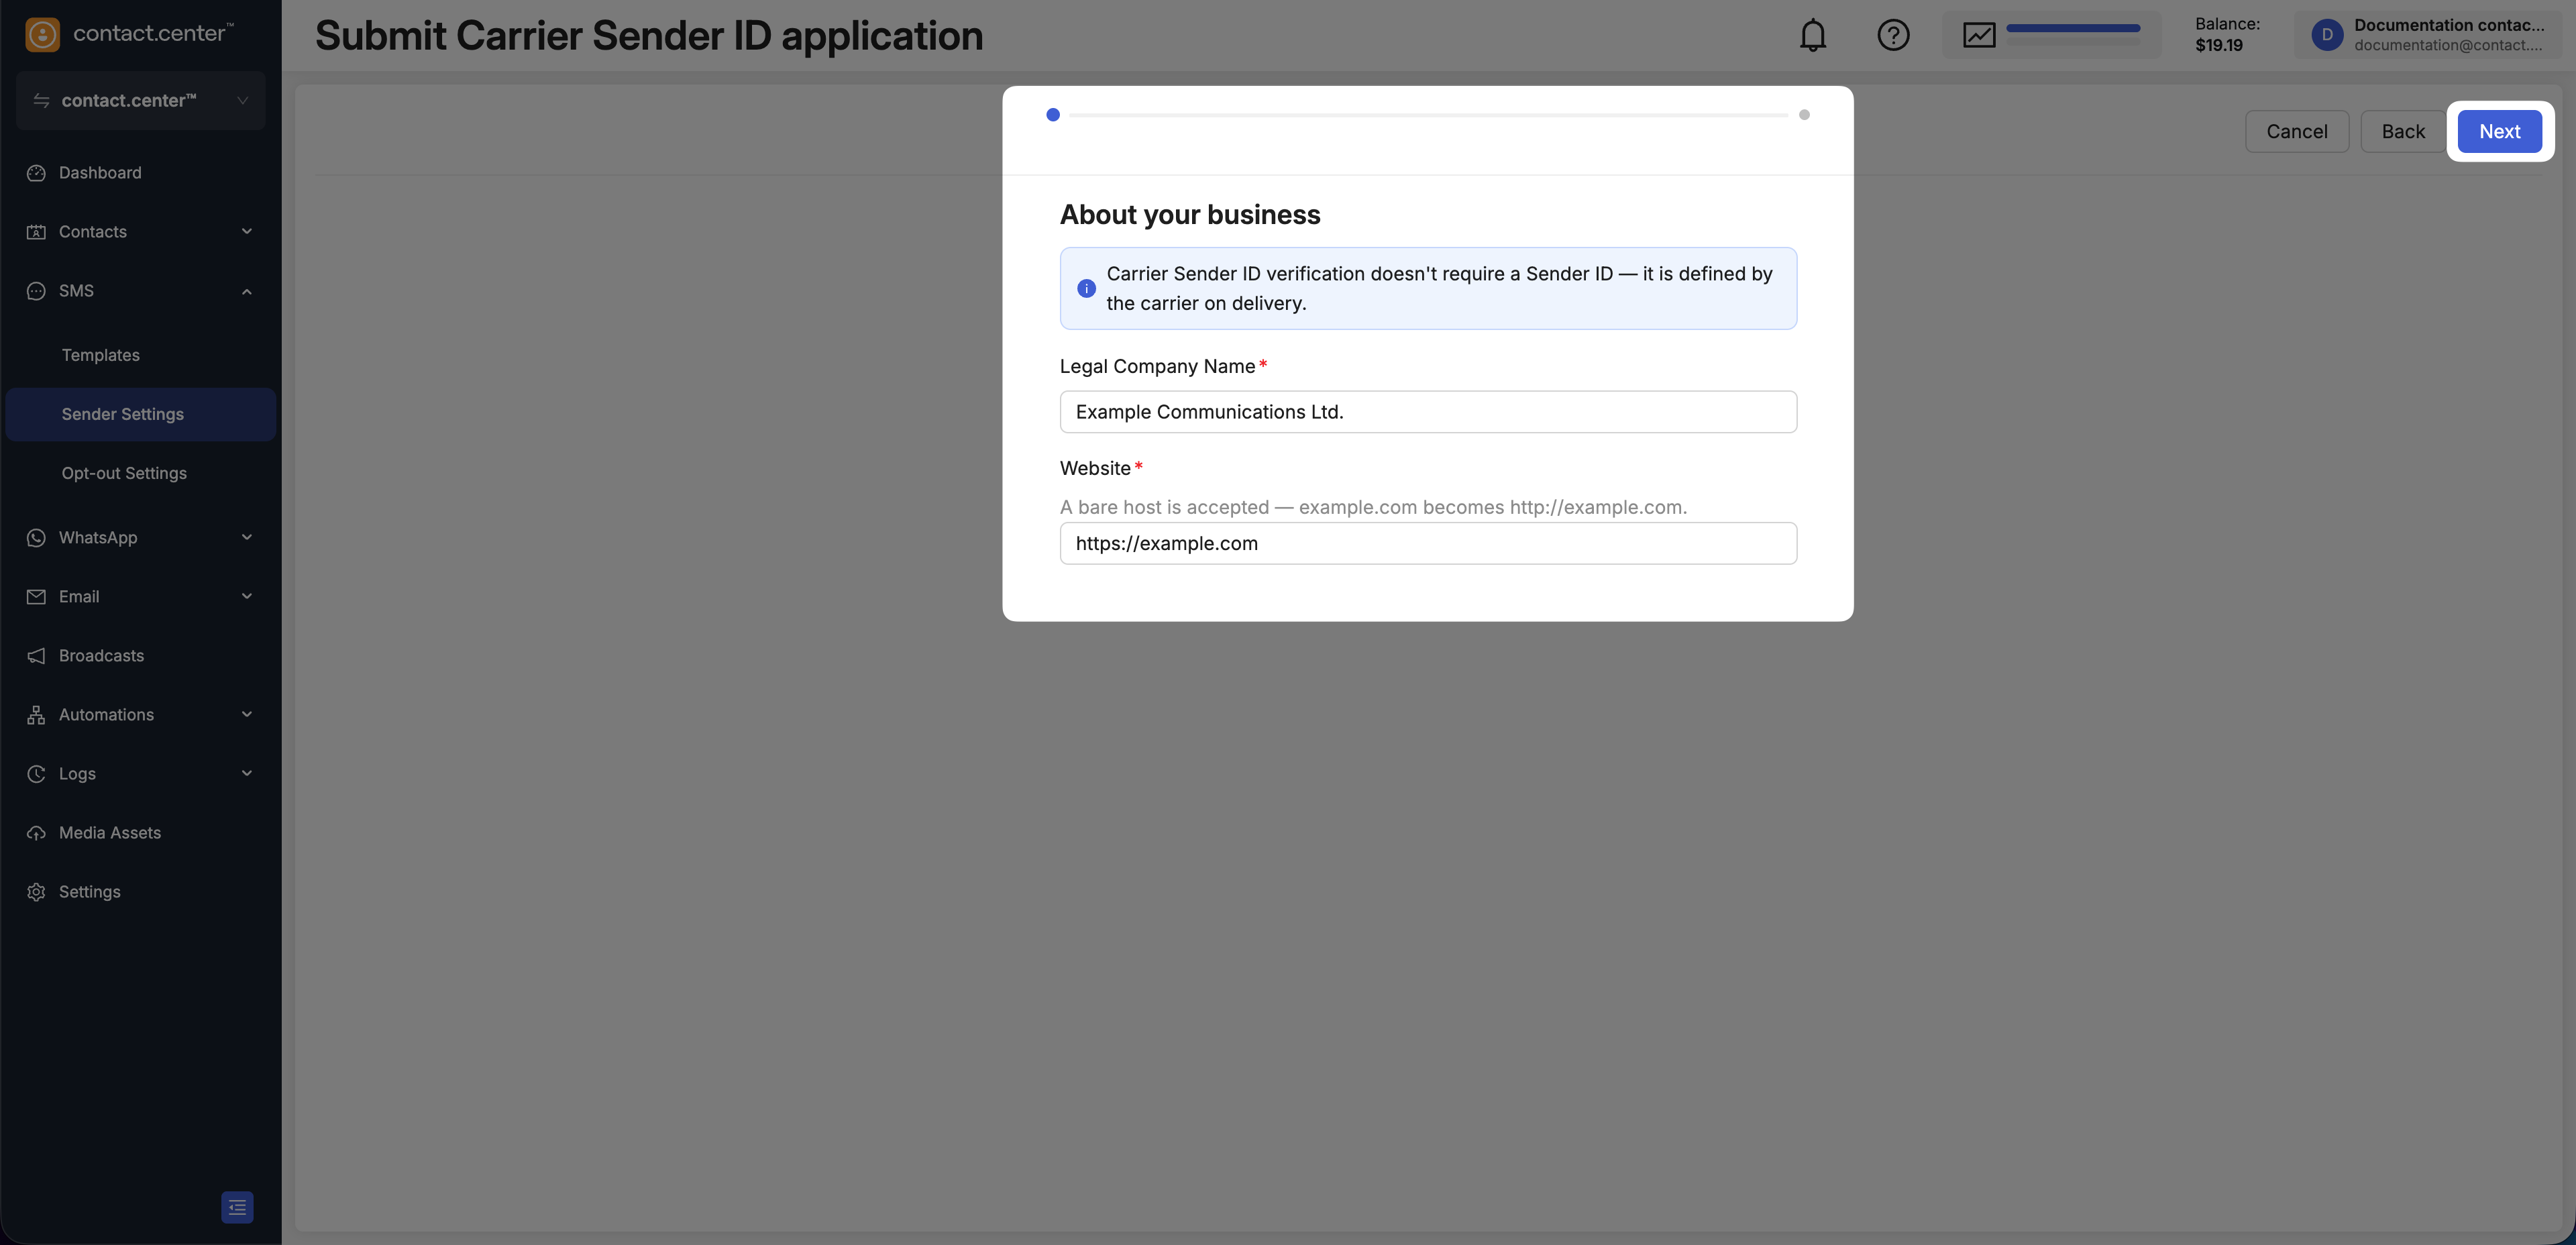
Fig. 2. Enter the business information.
Step 3: Enter campaign details
Select the Use case type.
Enter the Campaign description.
In How will consumers opt in?, explain how recipients agree to receive the messages.
Enter two representative messages in Sample content message #1 and Sample content message #2.
Review the information and click Submit.
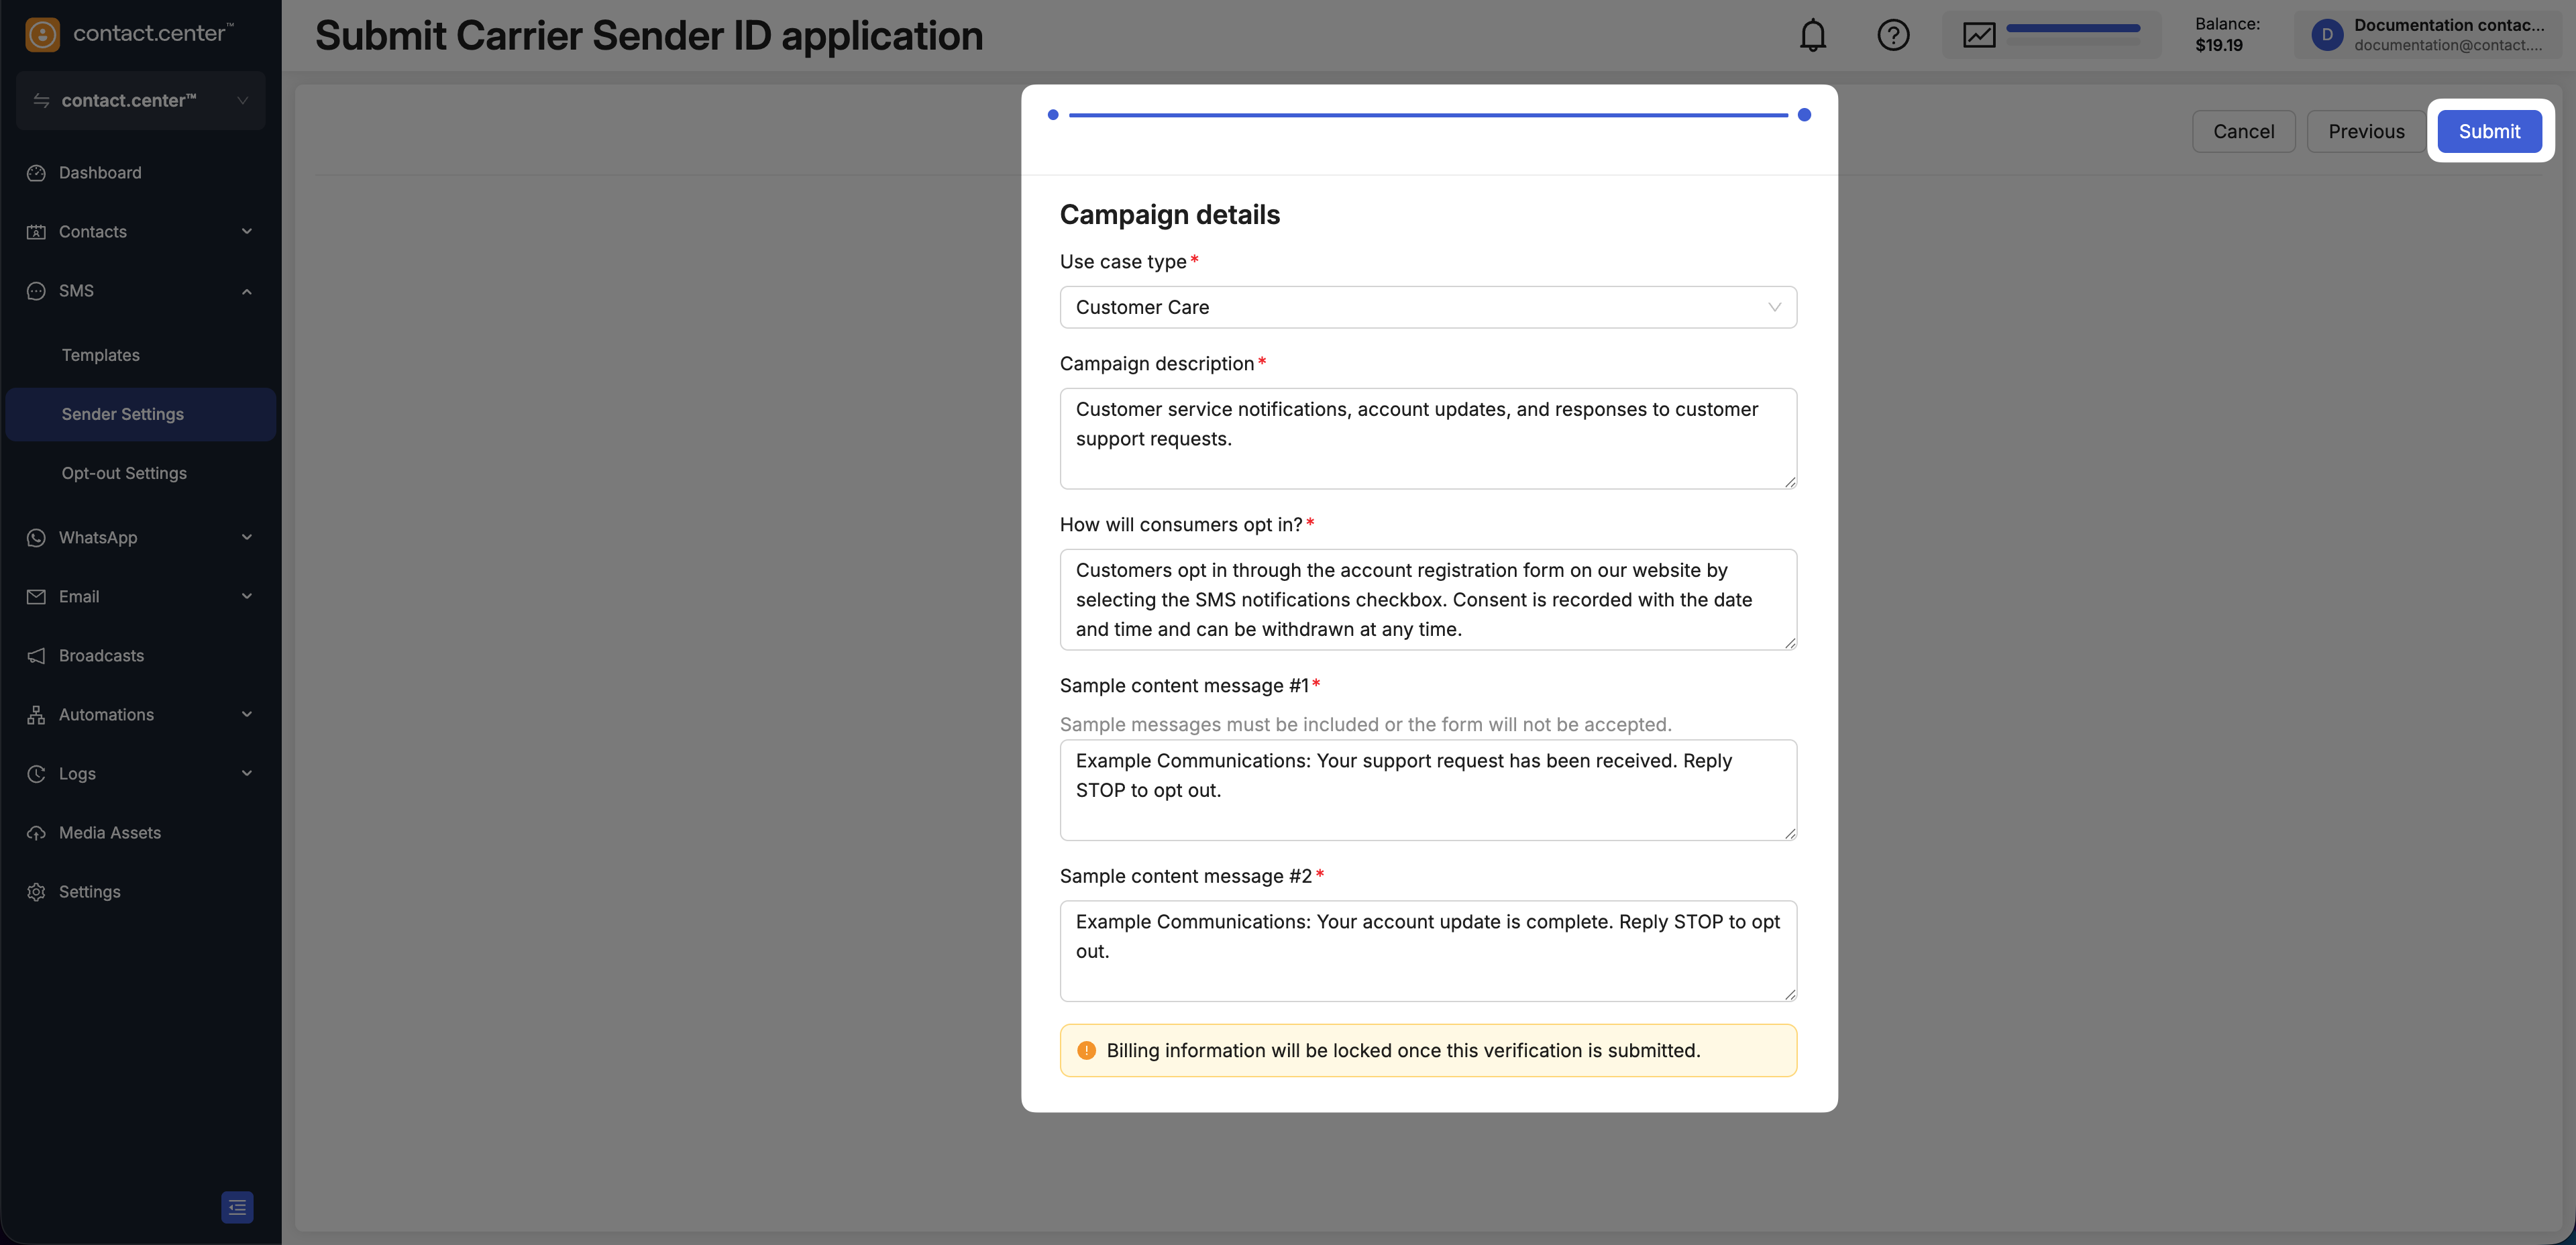
Fig. 3. Enter the campaign details and submit the application.
After submission, the status is shown under Carrier Sender ID on the Sender Settings page. Workspace owners and administrators receive an email when the application is submitted and when its status changes.
If changes are requested, see Resubmit a Sender ID application.