
 contact-center
Enable US & Canada Sender ID
Submit the business, messaging, and consent information required for a dedicated Toll-Free Sender ID. The number is assigned after approval.
Before you begin
Review US & Canada to confirm that this type matches your messaging use case.
Review A2P SMS compliance requirements before preparing the campaign description, consent flow, sample messages, and supporting files.
Check that the billing information associated with the account is correct. It is locked for editing after the first Sender ID application is submitted.
Step 1: Open the application
In contact.center™, go to SMS > Sender Settings.
Under US & Canada, click Enable.
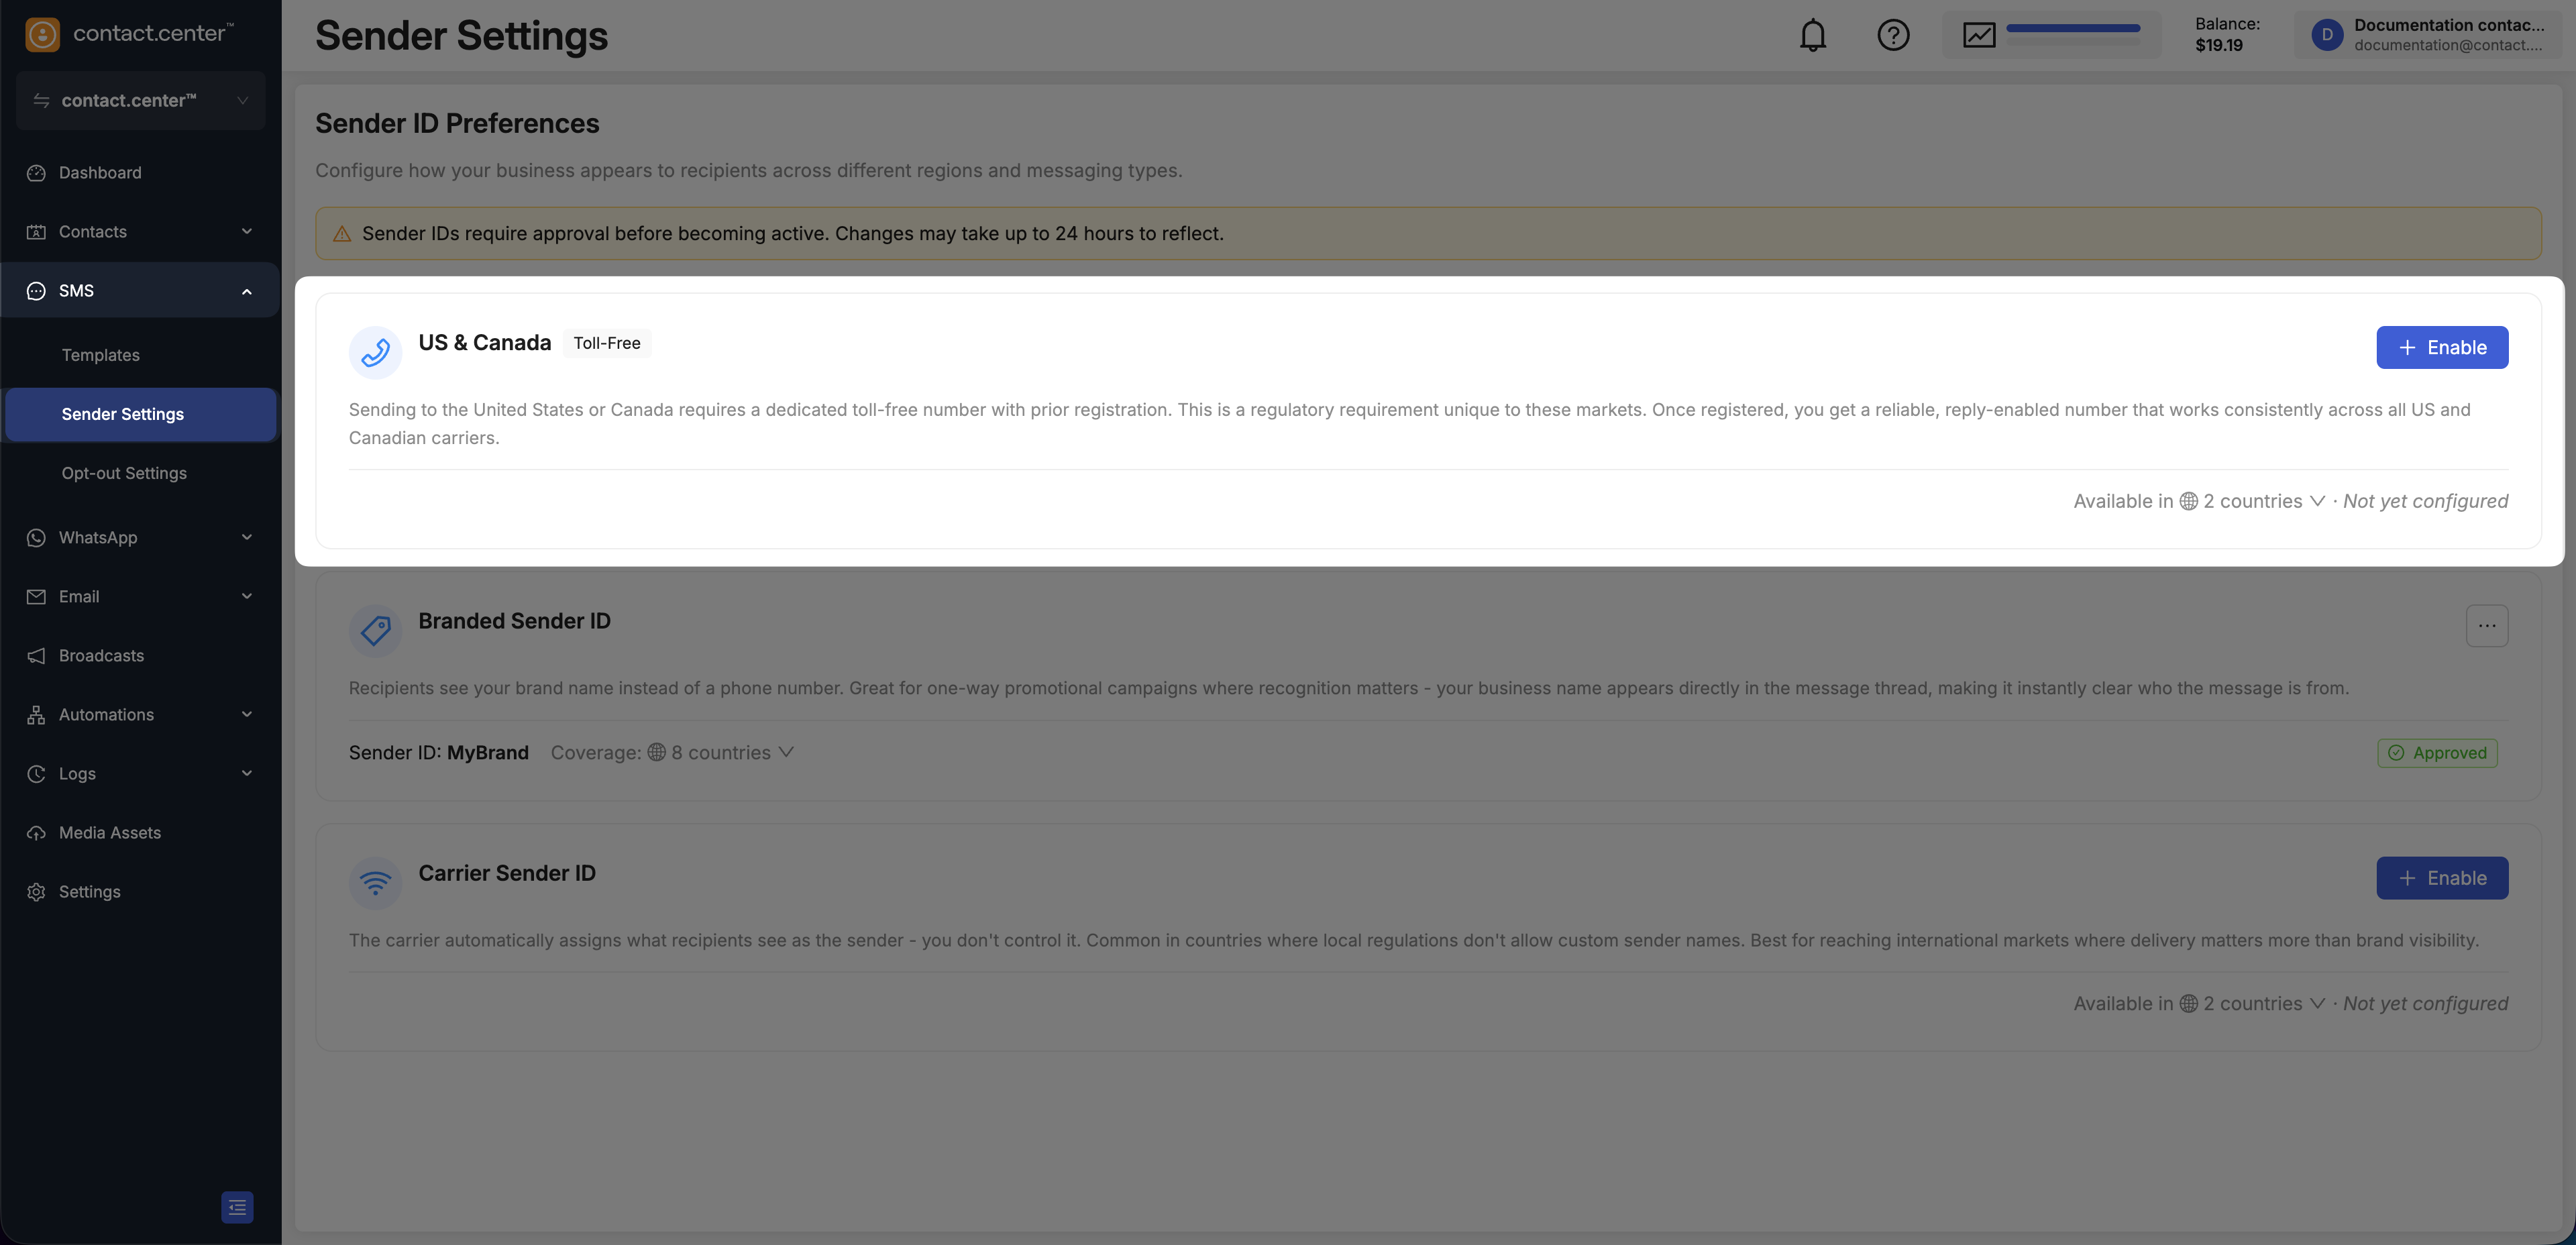
Fig. 1. Open the US & Canada application.
Step 2: Enter business information
Enter the Business Registration Number, Legal Company Name, Business entity type, Business registration type, and Website. Indicate whether the business is a Fortune 500 or 1000 company, then click Next.
For field descriptions, see US & Canada application.
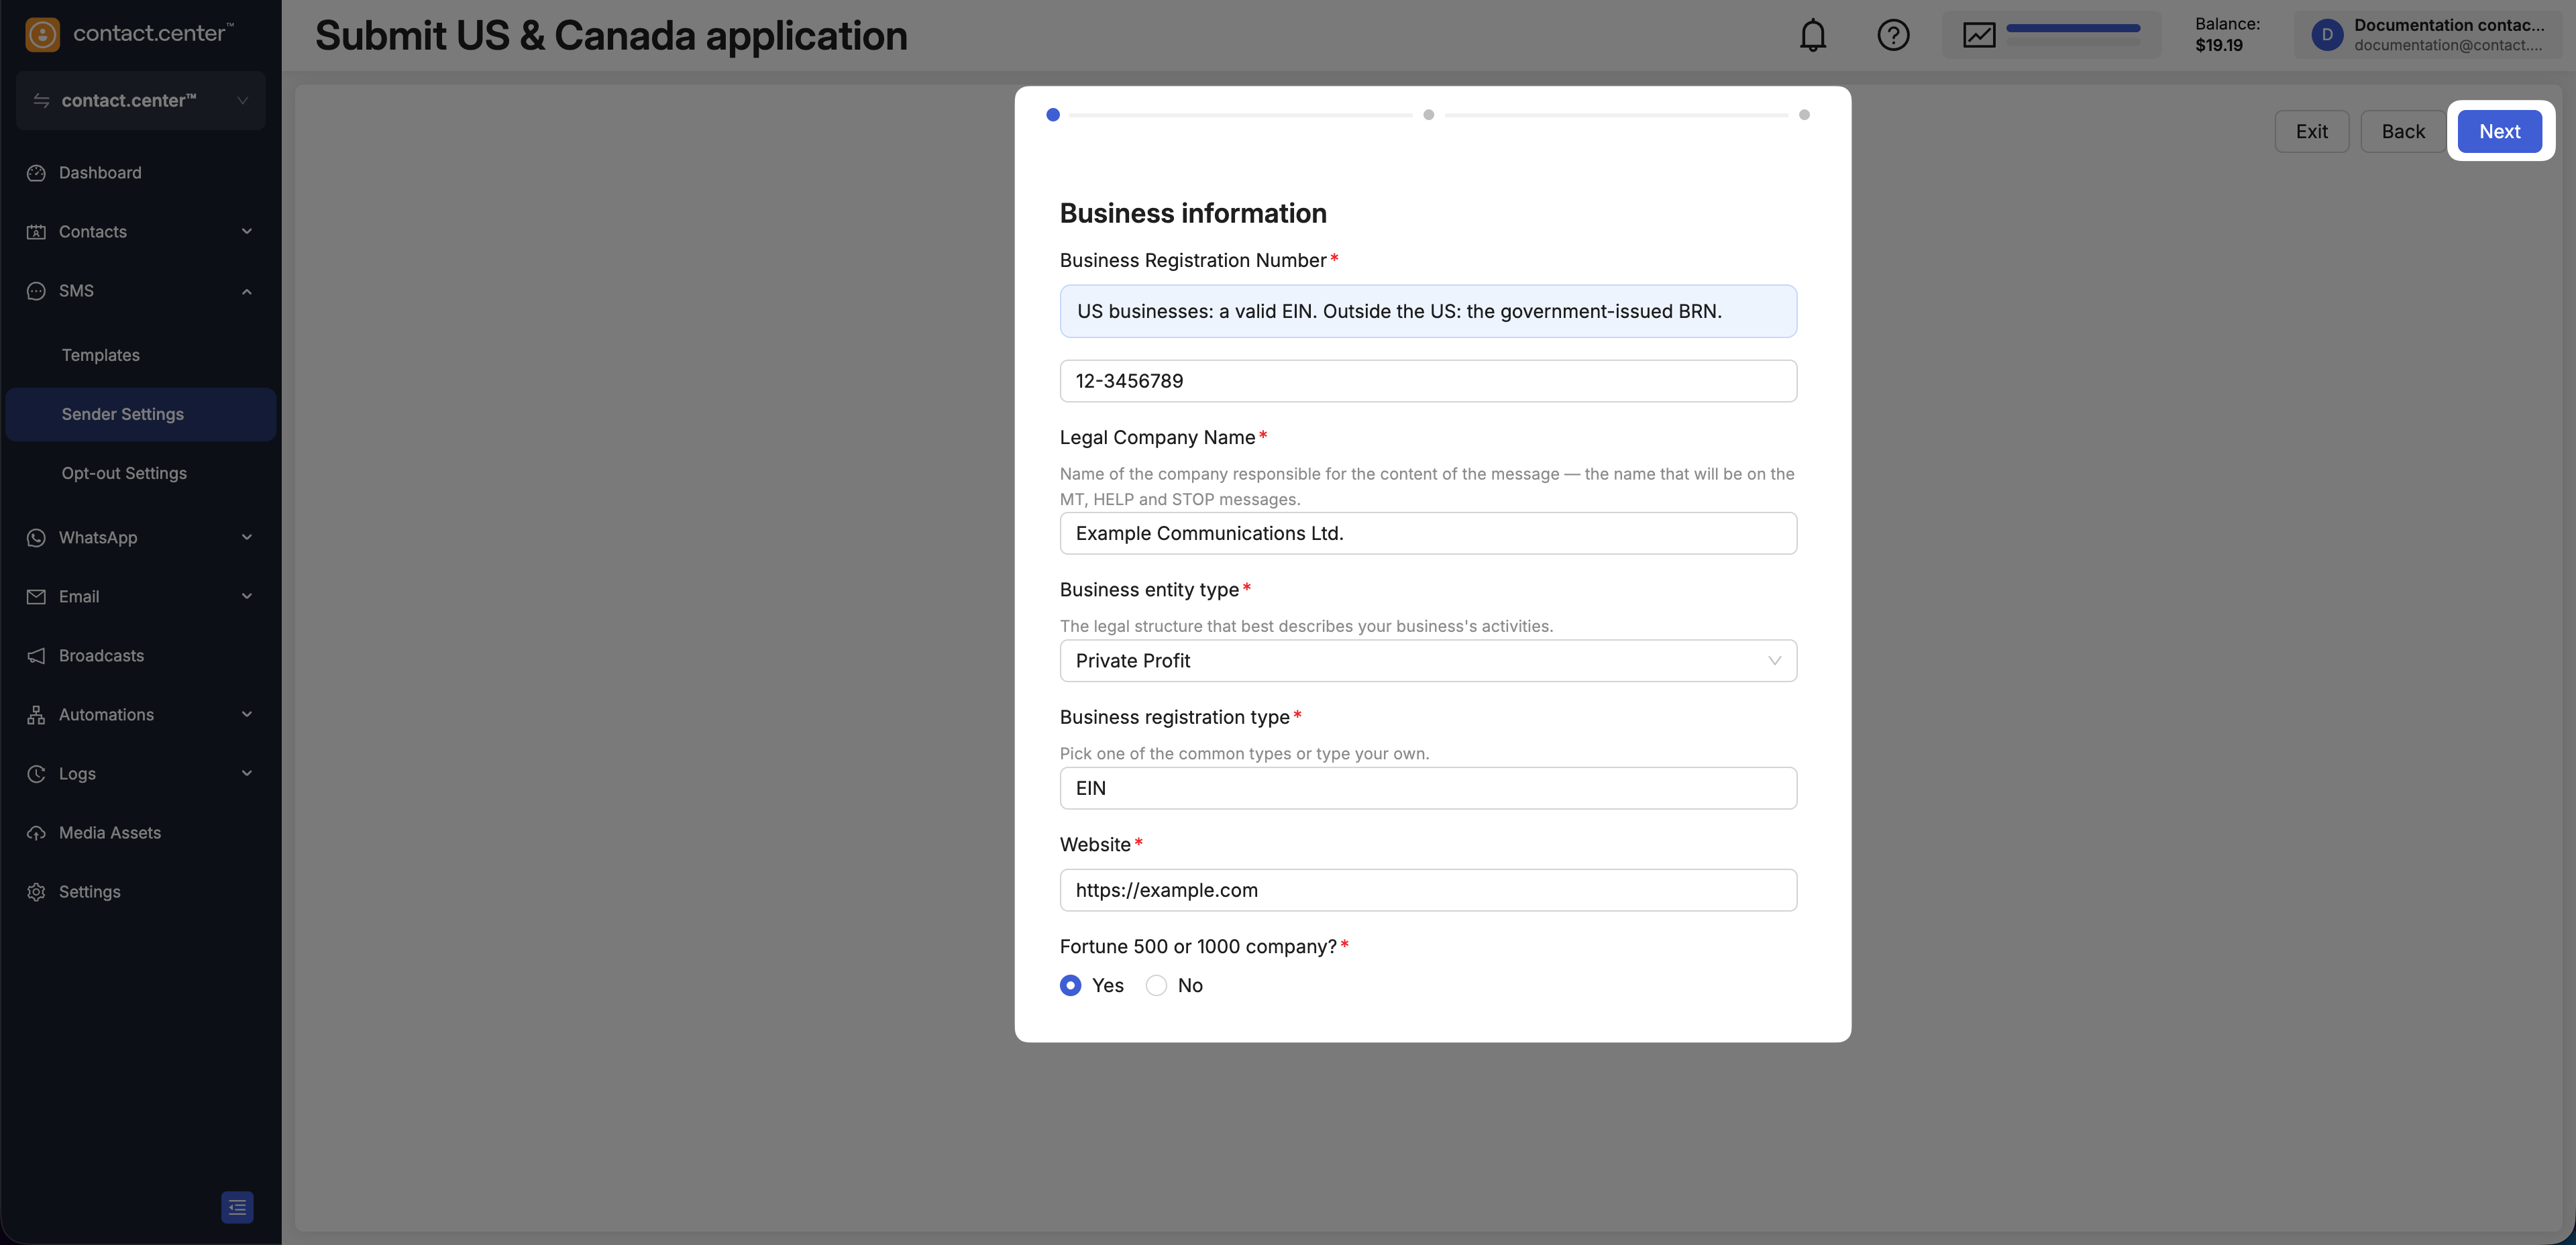
Fig. 2. Enter the business information.
Step 3: Enter campaign details
Select the Use case type and enter the Campaign description.
Under How will customers opt in (select one or more), select each opt-in method used by the business.
Enter the Detailed opt-in flow description and select the confirmation checkbox.
If Through my app or Physical form is selected, upload at least one screenshot of the opt-in workflow.
Enter two representative sample messages.
List any URLs or phone numbers that may appear in the messages.
Under Where the numbers are published, describe where customers can find the Toll-Free number. Supporting screenshots are optional.
Note
Each upload field accepts up to five PNG or JPEG files. Each file can be up to 20 MB.
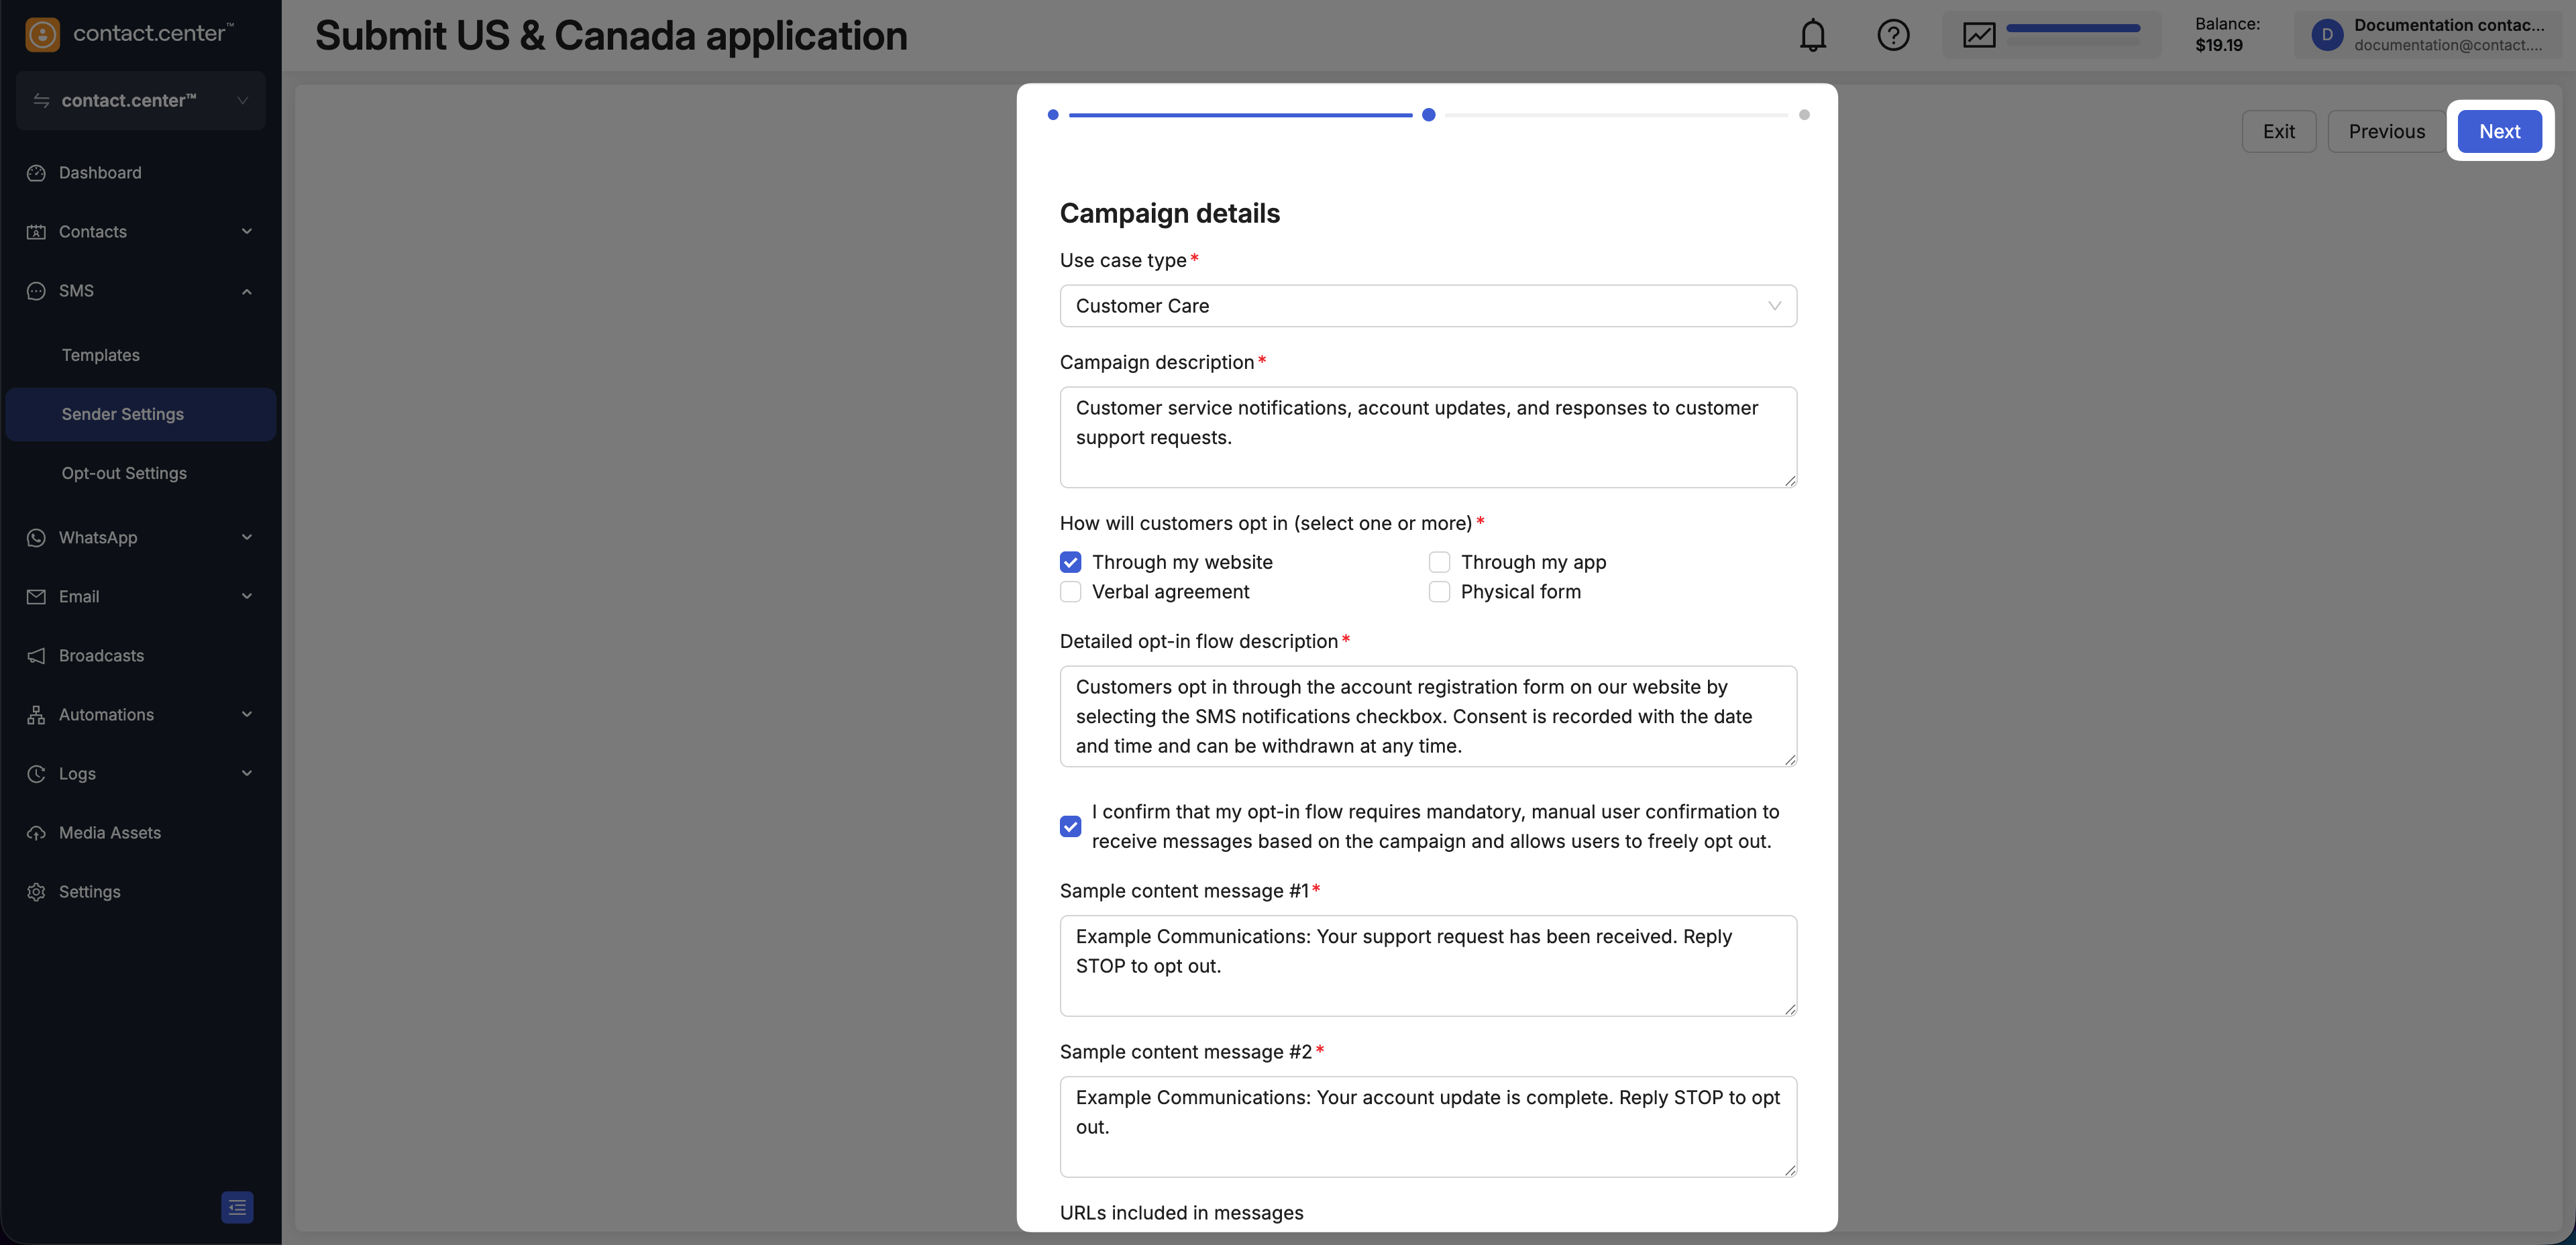
Fig. 3. Enter the campaign details.
Step 4: Enter additional details and submit
Select the Message volume type and enter the Estimated quantity.
Under Promotes commercial product?, select the applicable value.
Under Was this traffic previously on another messaging service?, select the applicable value. If required, provide the previous content and sending numbers.
Enter the Link to privacy policy and Link to Terms and conditions.
Click Submit.
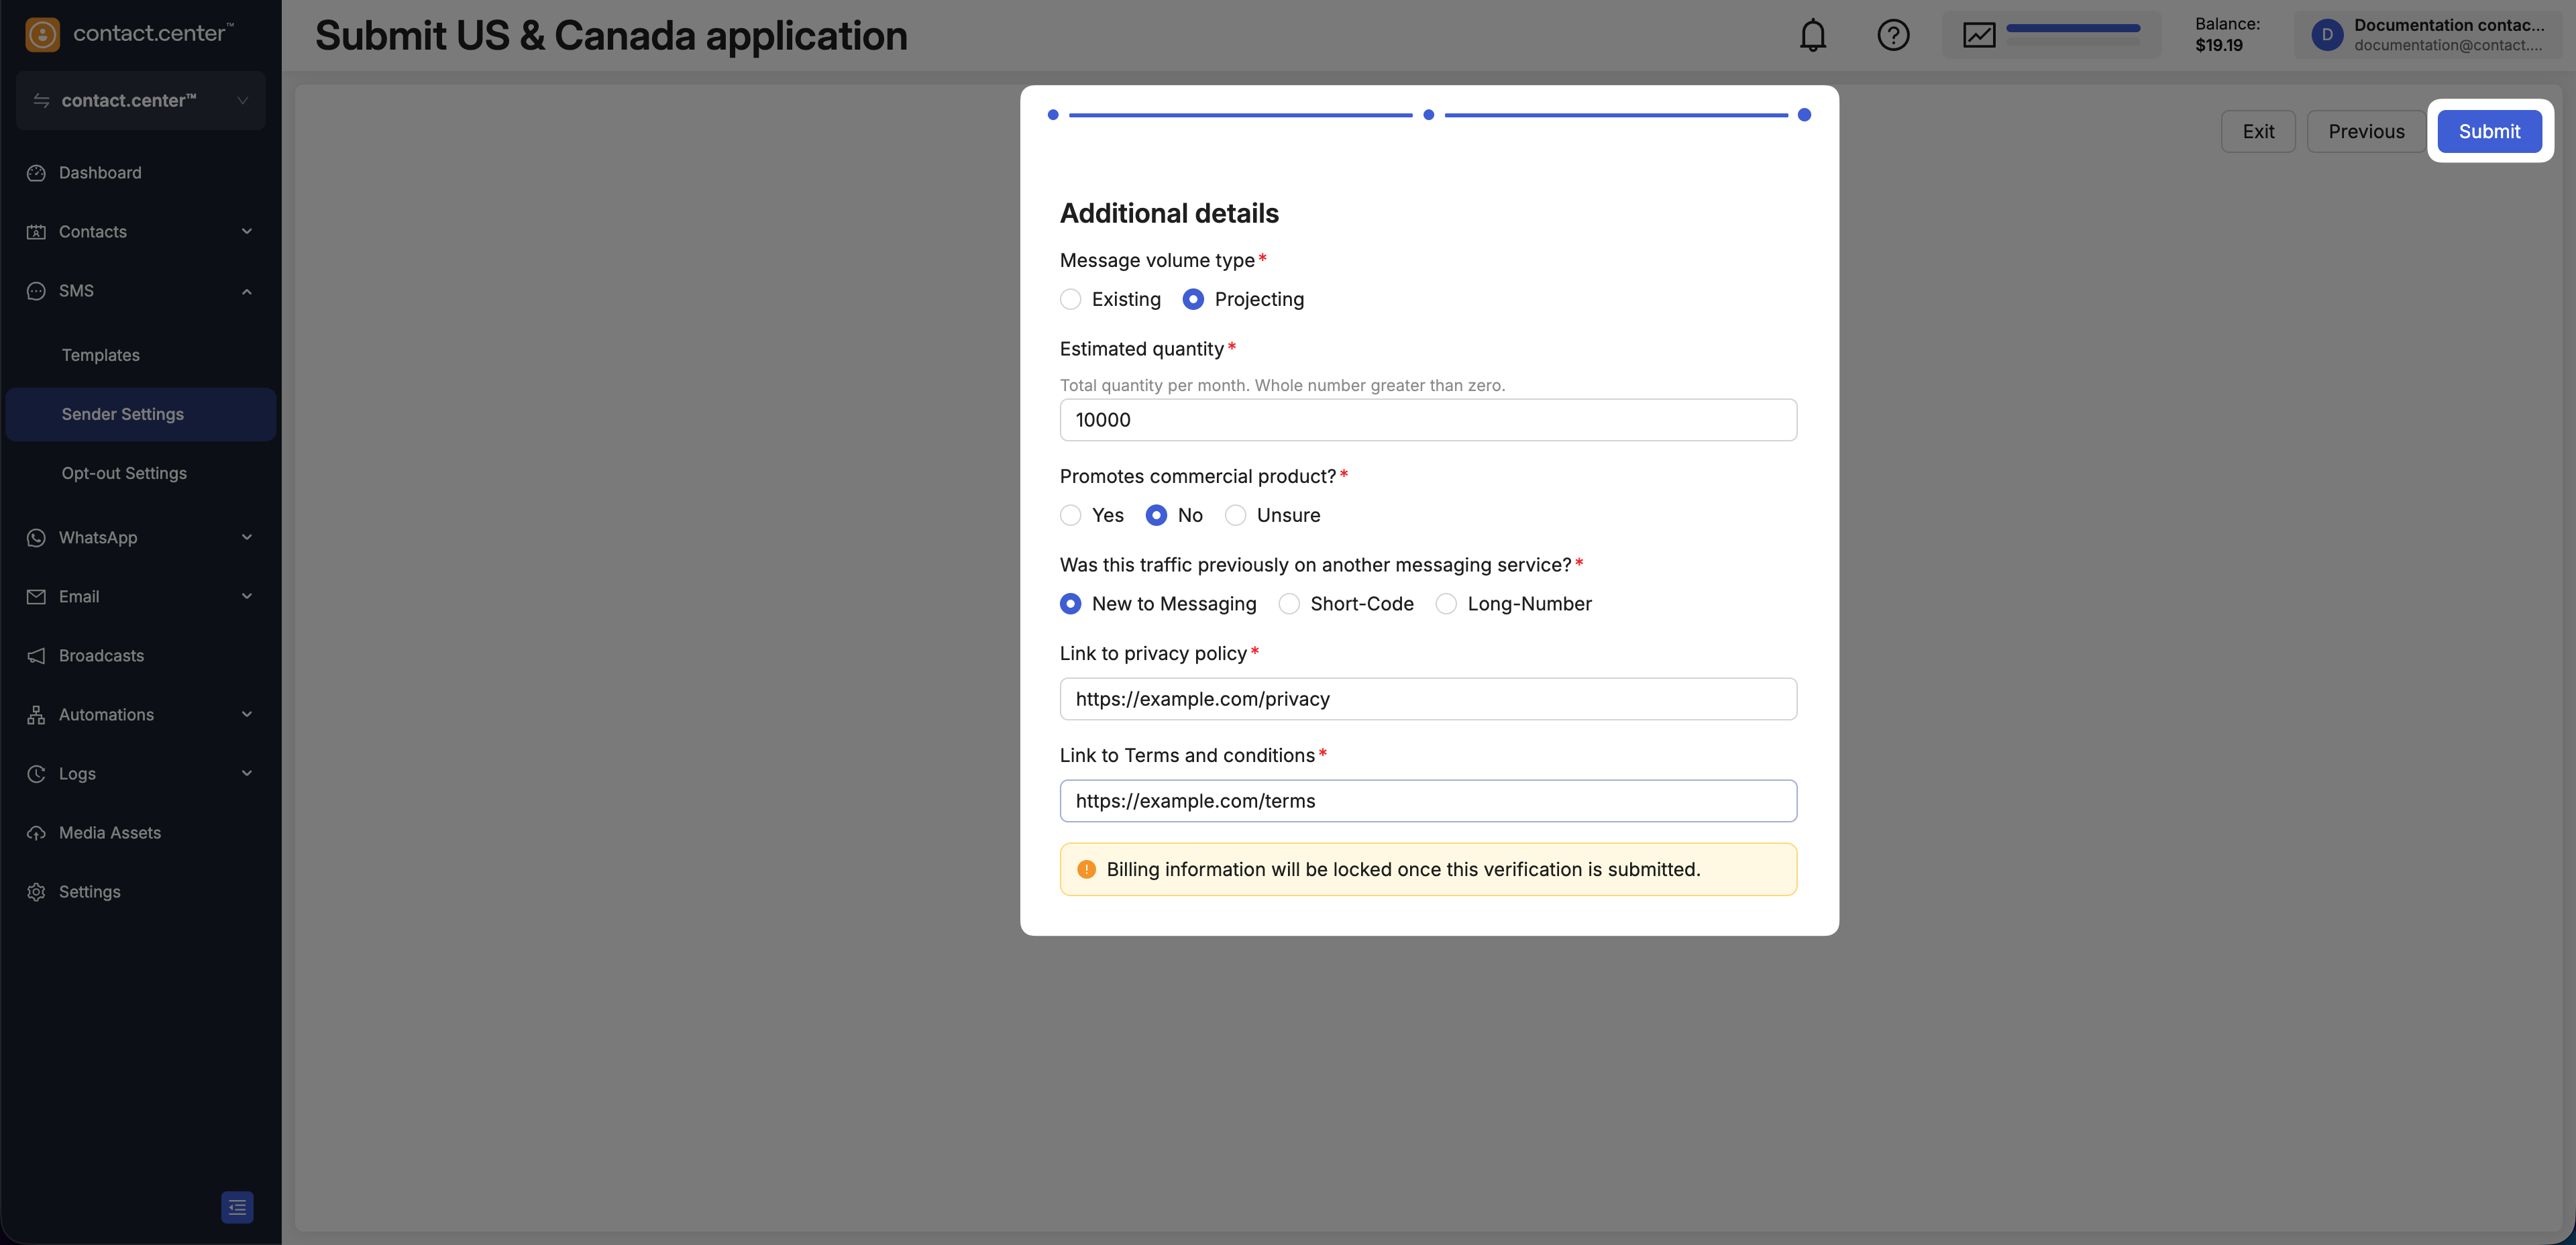
Fig. 4. Enter the additional details and submit the application.
After submission, the status is shown under US & Canada on the Sender Settings page. Workspace owners and administrators receive an email when the application is submitted and when its status changes.
If changes are requested, see Resubmit a Sender ID application.