
 contact-center
Resubmit a Sender ID application
Correct and resubmit an application when its status indicates that changes are required.
Before you begin
Review the requested changes and prepare any updated business information, sample messages, consent details, or supporting files.
Step 1: Open the application
In contact.center™, go to SMS > Sender Settings.
Find the Sender ID with the Action Required status.
Click Resubmit.
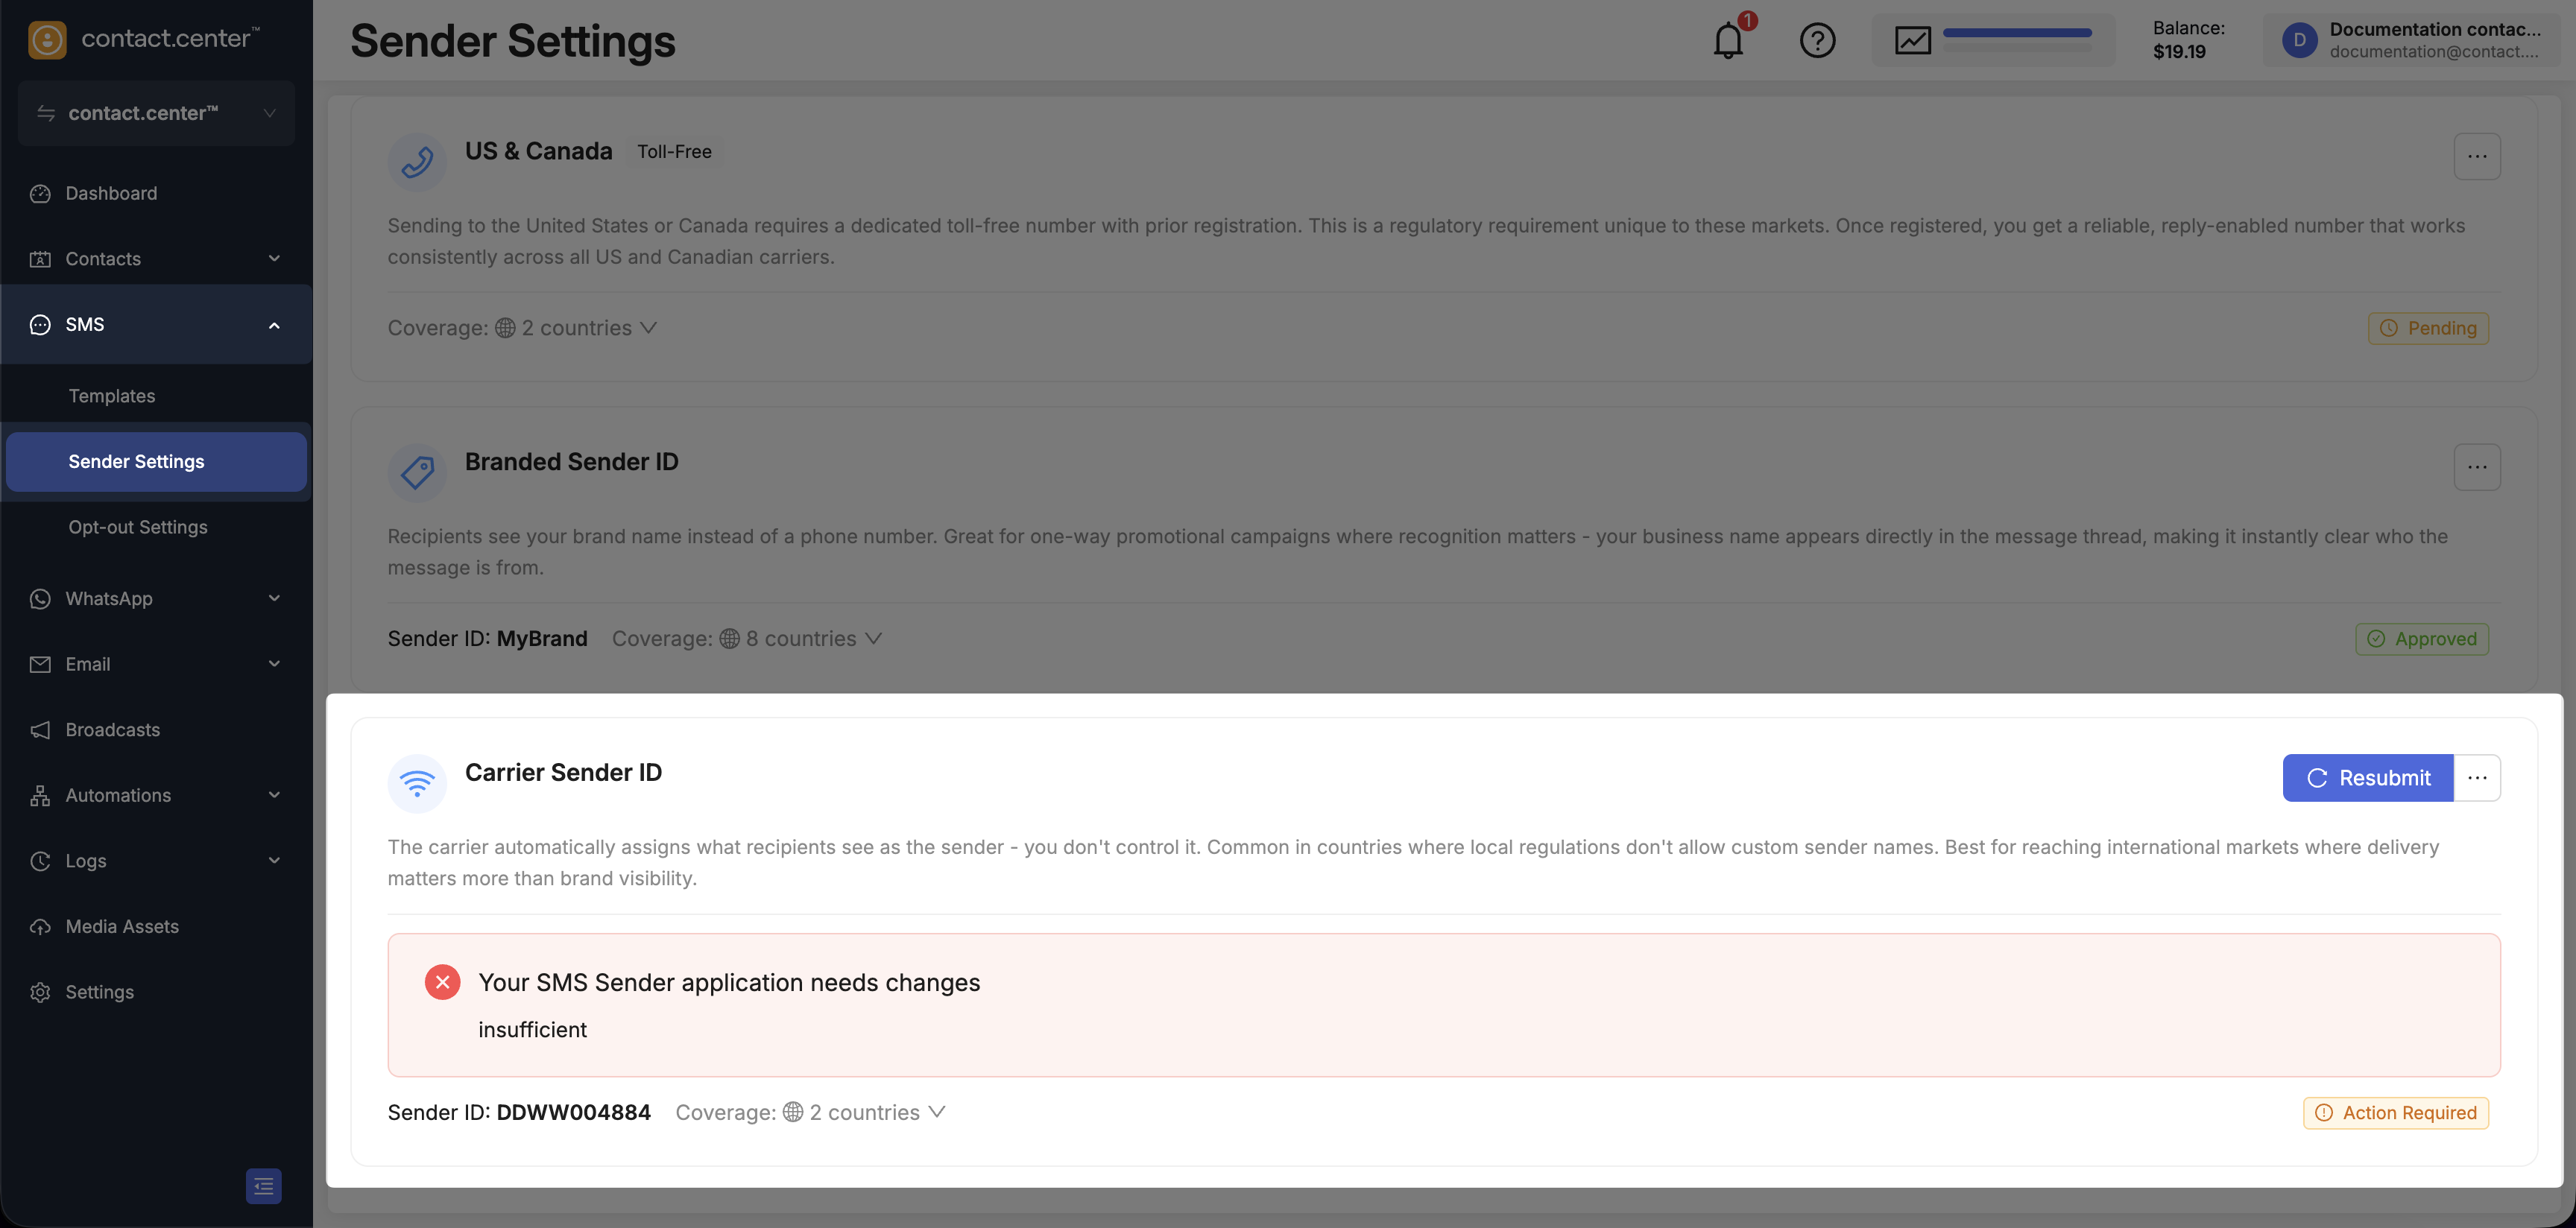
Fig. 1. Open the application for resubmission.
Step 2: Make the required changes
Review the reason that changes are required.
Complete every required field in the application.
Correct the information identified during review.
Upload any required supporting files.
Applications created before the current form was introduced may open with empty fields. Complete all required fields before resubmitting.
For field descriptions, see Sender Settings reference. For message and consent requirements, see A2P SMS compliance requirements.
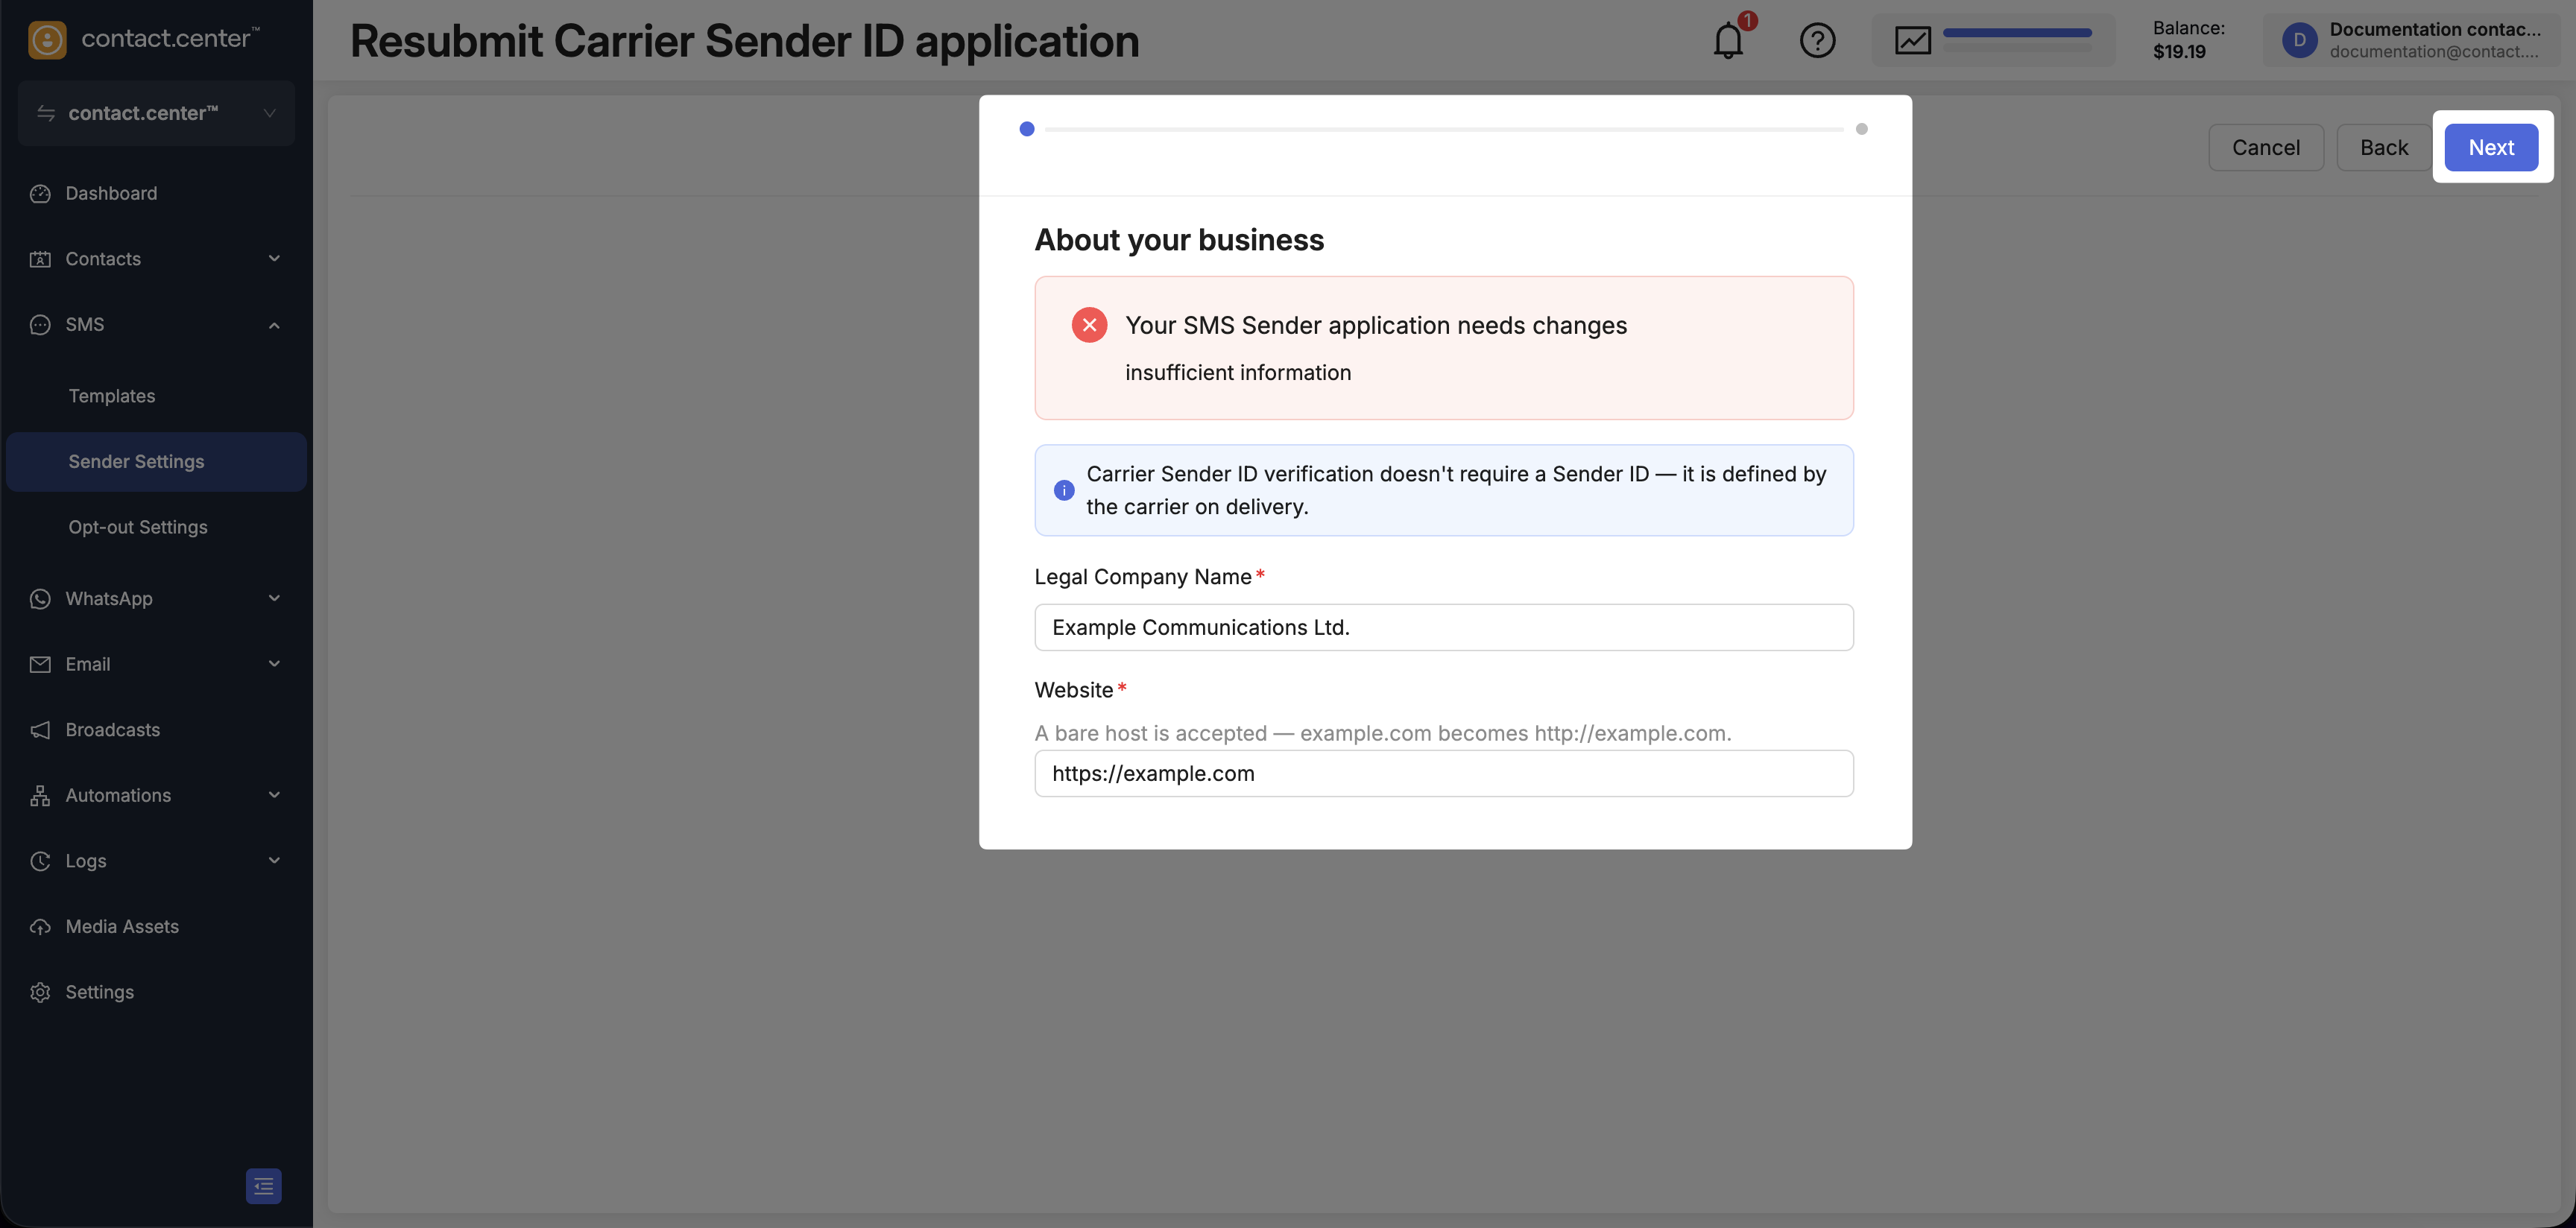
Fig. 2. Correct the application.
Step 3: Resubmit the application
Review the corrected information and click Submit.
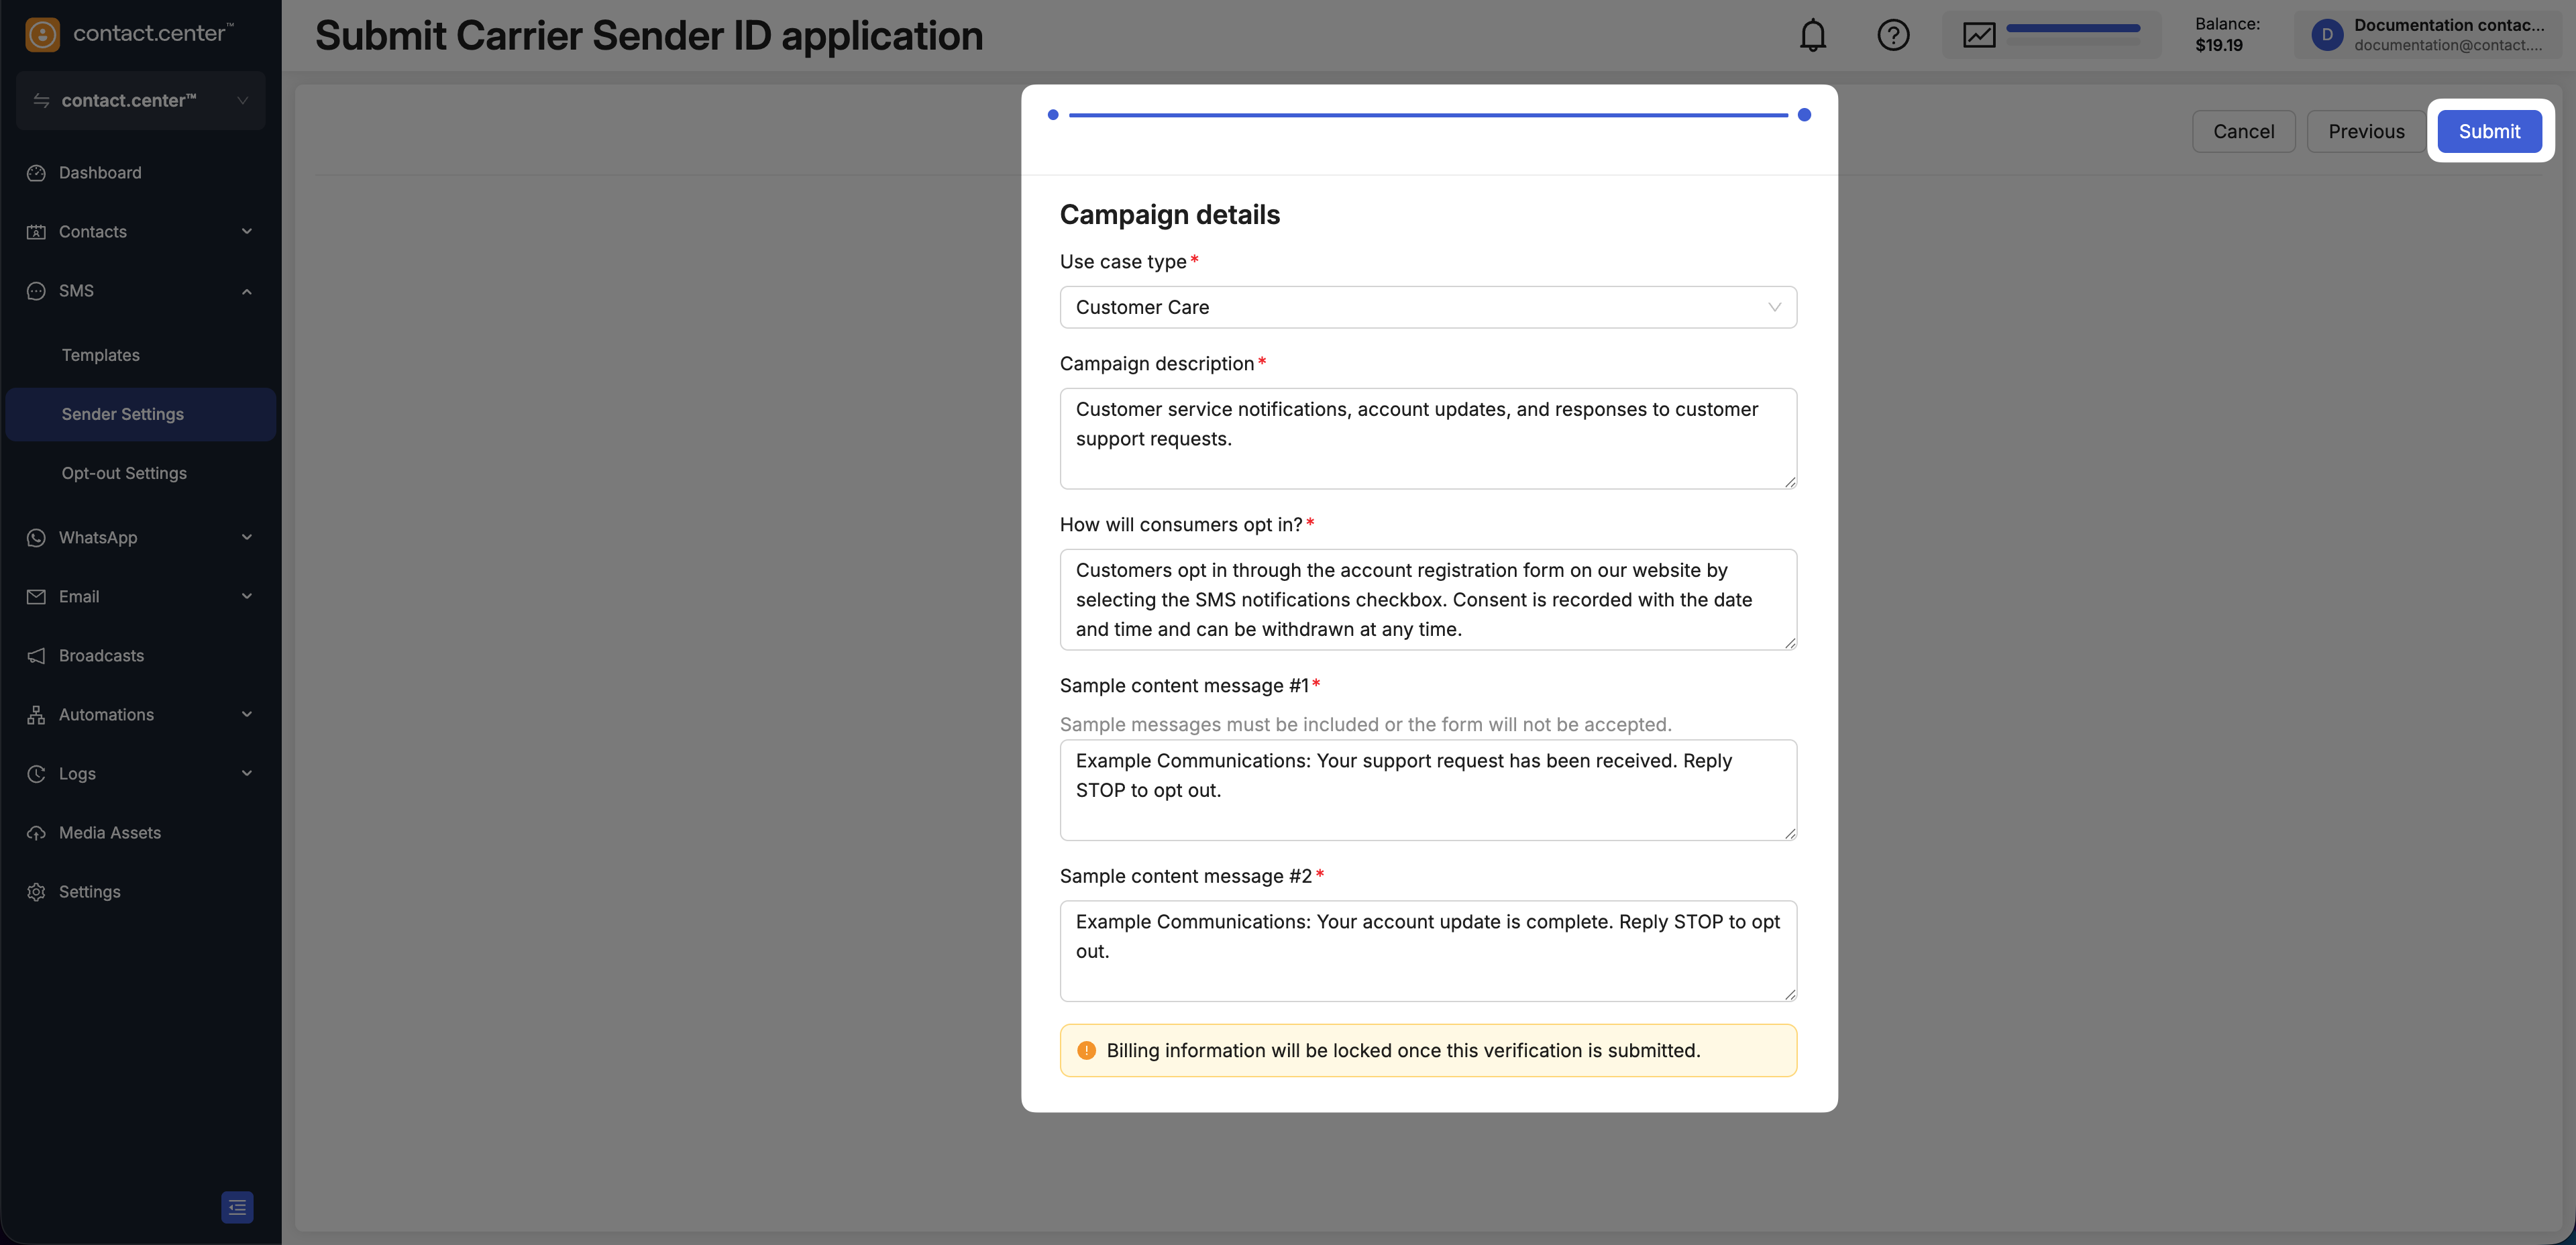
Fig. 3. Resubmit the application.
After submission, the application returns to review. Workspace owners and administrators receive an email when its status changes.