
 contact-center
WooCommerce Integration
Connect your WooCommerce store to contact.center™ to use your store’s customers and products in campaigns and automations. The connection is made with the Contact Center for WooCommerce plugin, which you install in your WordPress admin.
Data flows one way, from WooCommerce to contact.center™. Changes you make in contact.center™ are not written back to your store.
What gets synced
After you connect your store, the initial synchronization starts on its own. Webhooks then keep contact.center™ up to date with changes in your store.
Data |
How it is used in contact.center™ |
|---|---|
Customers |
Imported as contacts with their email, phone number, and consent state. |
Guest checkouts |
A contact is created from the order’s billing email or phone number, so buyers without a store account are also available as contacts. Repeat guest orders with the same email or phone number use the same contact. |
Products |
Available as merge tags in campaigns and automations. |
Orders |
New and updated orders are synced and linked to the buyer’s contact. An order you move to the trash in WooCommerce keeps its synced copy in contact.center™. |
Storefront activity |
After you connect, the plugin adds a tracking script to your storefront. It collects product page views and cart changes in the shopper’s browser and matches them to contacts by email address. No extra setting is needed. |
Note
Your store sends customer data and storefront activity to contact.center™. Describe this data transfer in your store’s privacy policy.
Set up the integration
Before you begin
You need a contact.center™ account. The WooCommerce integration is available on the Free plan. Sign in to contact.center™ or create a contact.center™ account .
You need a WooCommerce store on WordPress 6.5 or later, running PHP 7.4 or later.
You need WooCommerce installed and active. The plugin does not activate without it.
You need access to the WordPress admin of your store, with permission to install plugins.
Step 1: Install the plugin
In contact.center™, go to Settings > Workspace > Integrations and open WooCommerce.
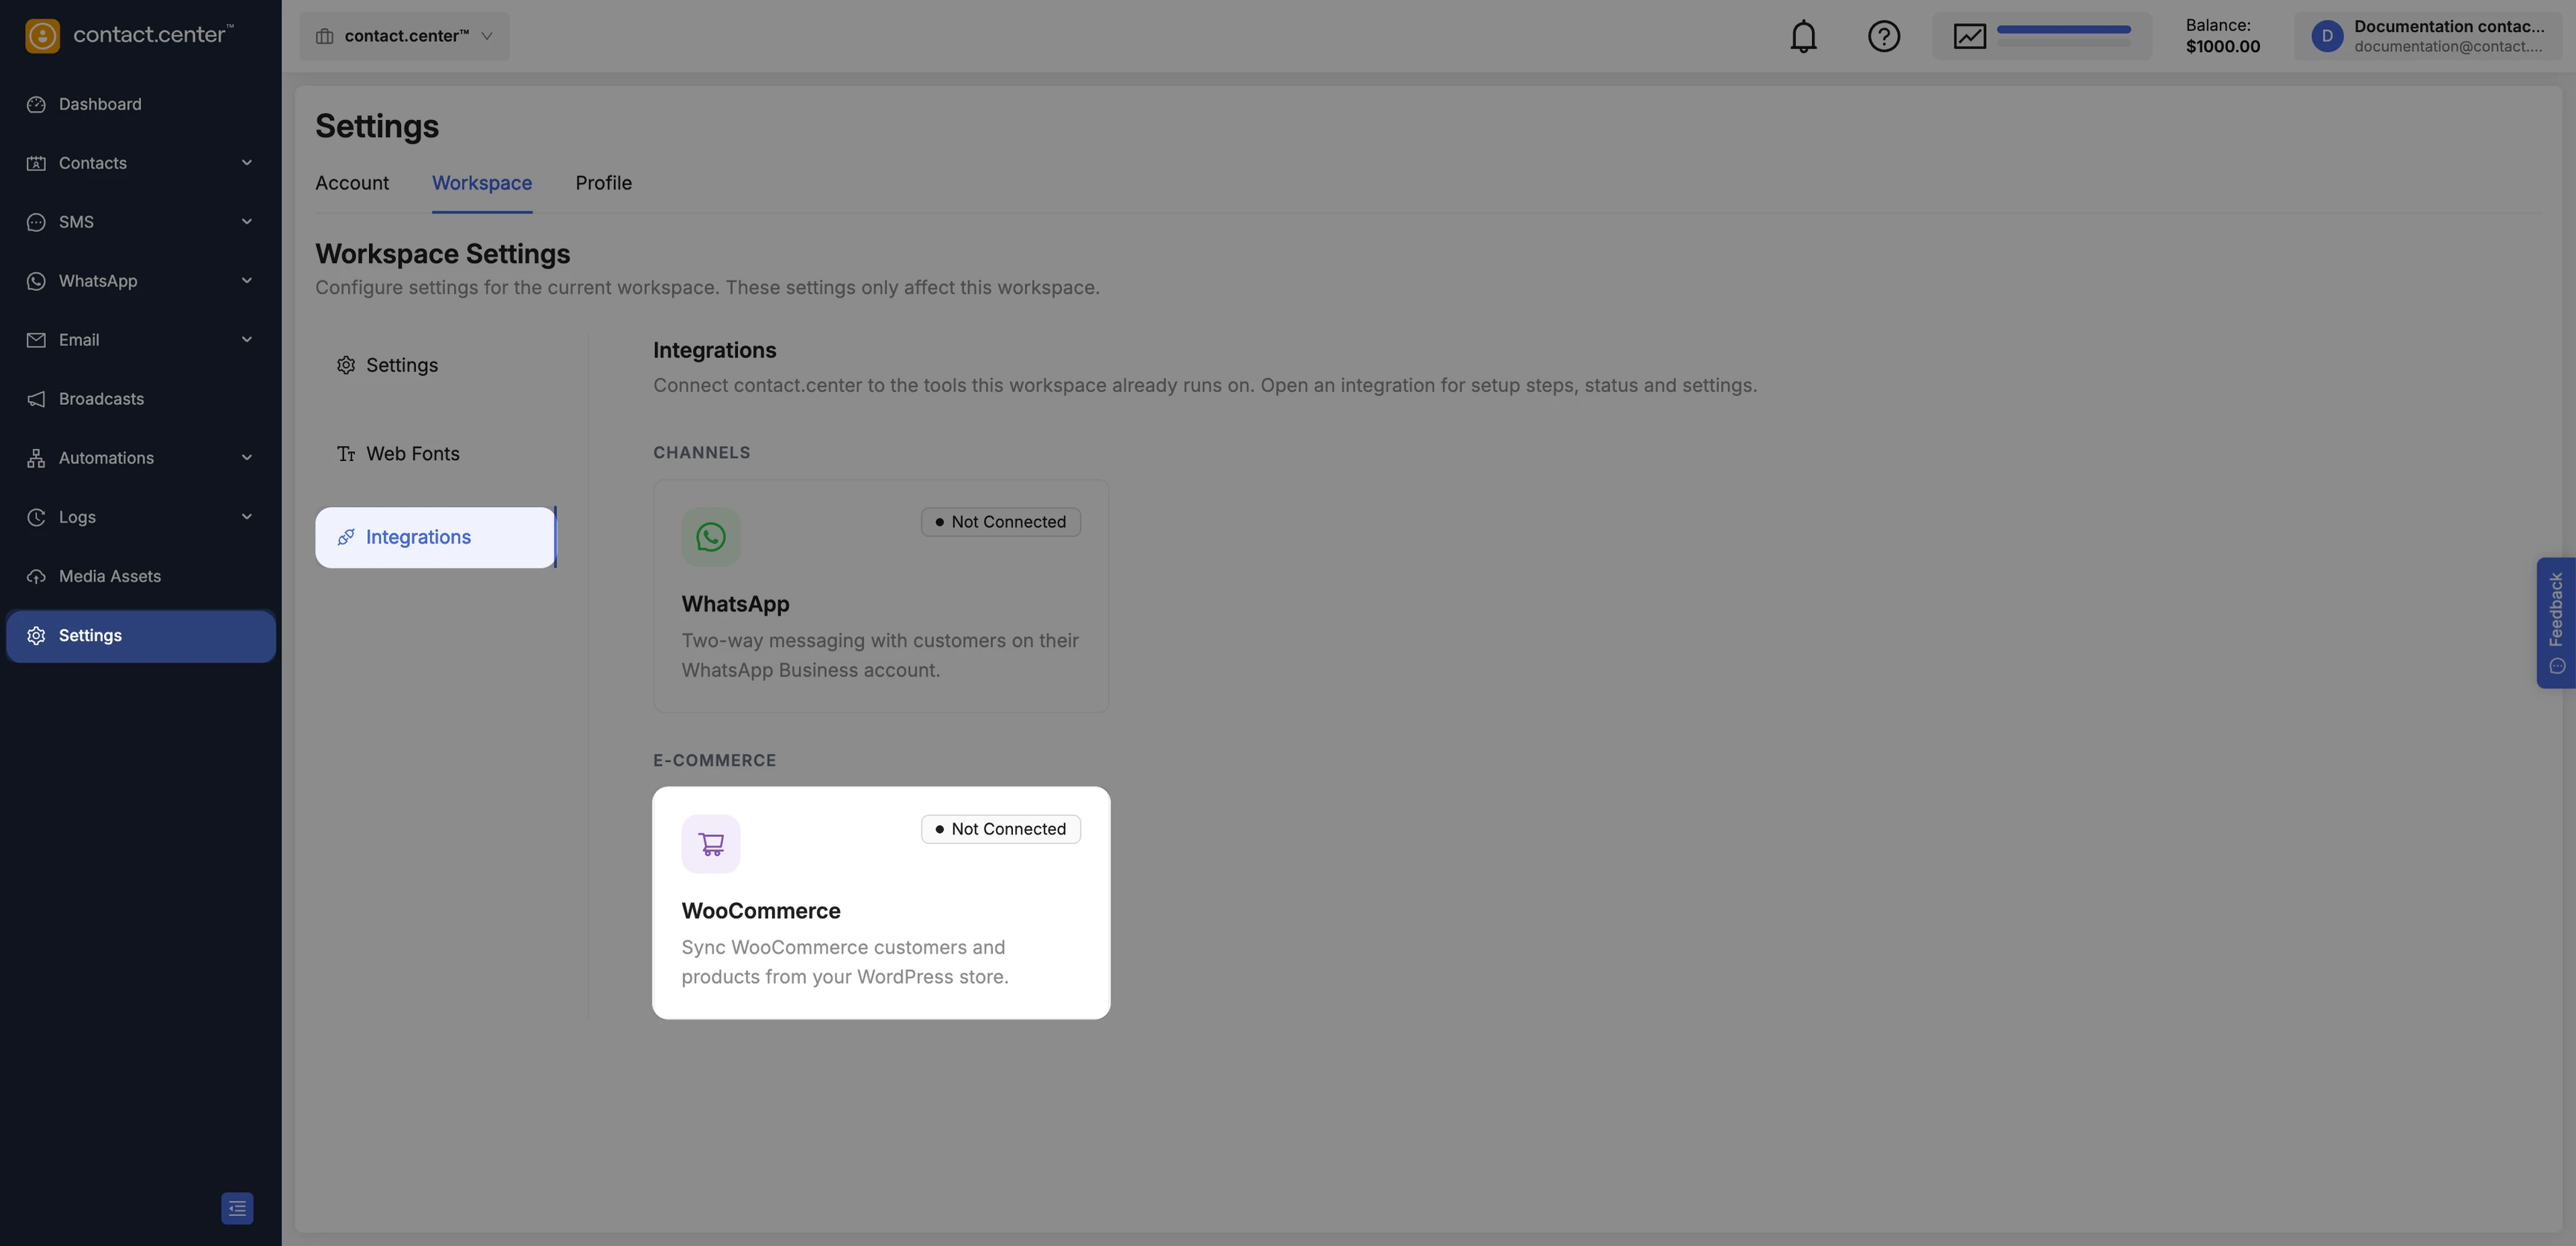
Fig. 1. WooCommerce in Settings > Workspace > Integrations.
Click Get the plugin. The plugin page opens in the WordPress plugin directory, where you can review the plugin details and requirements.
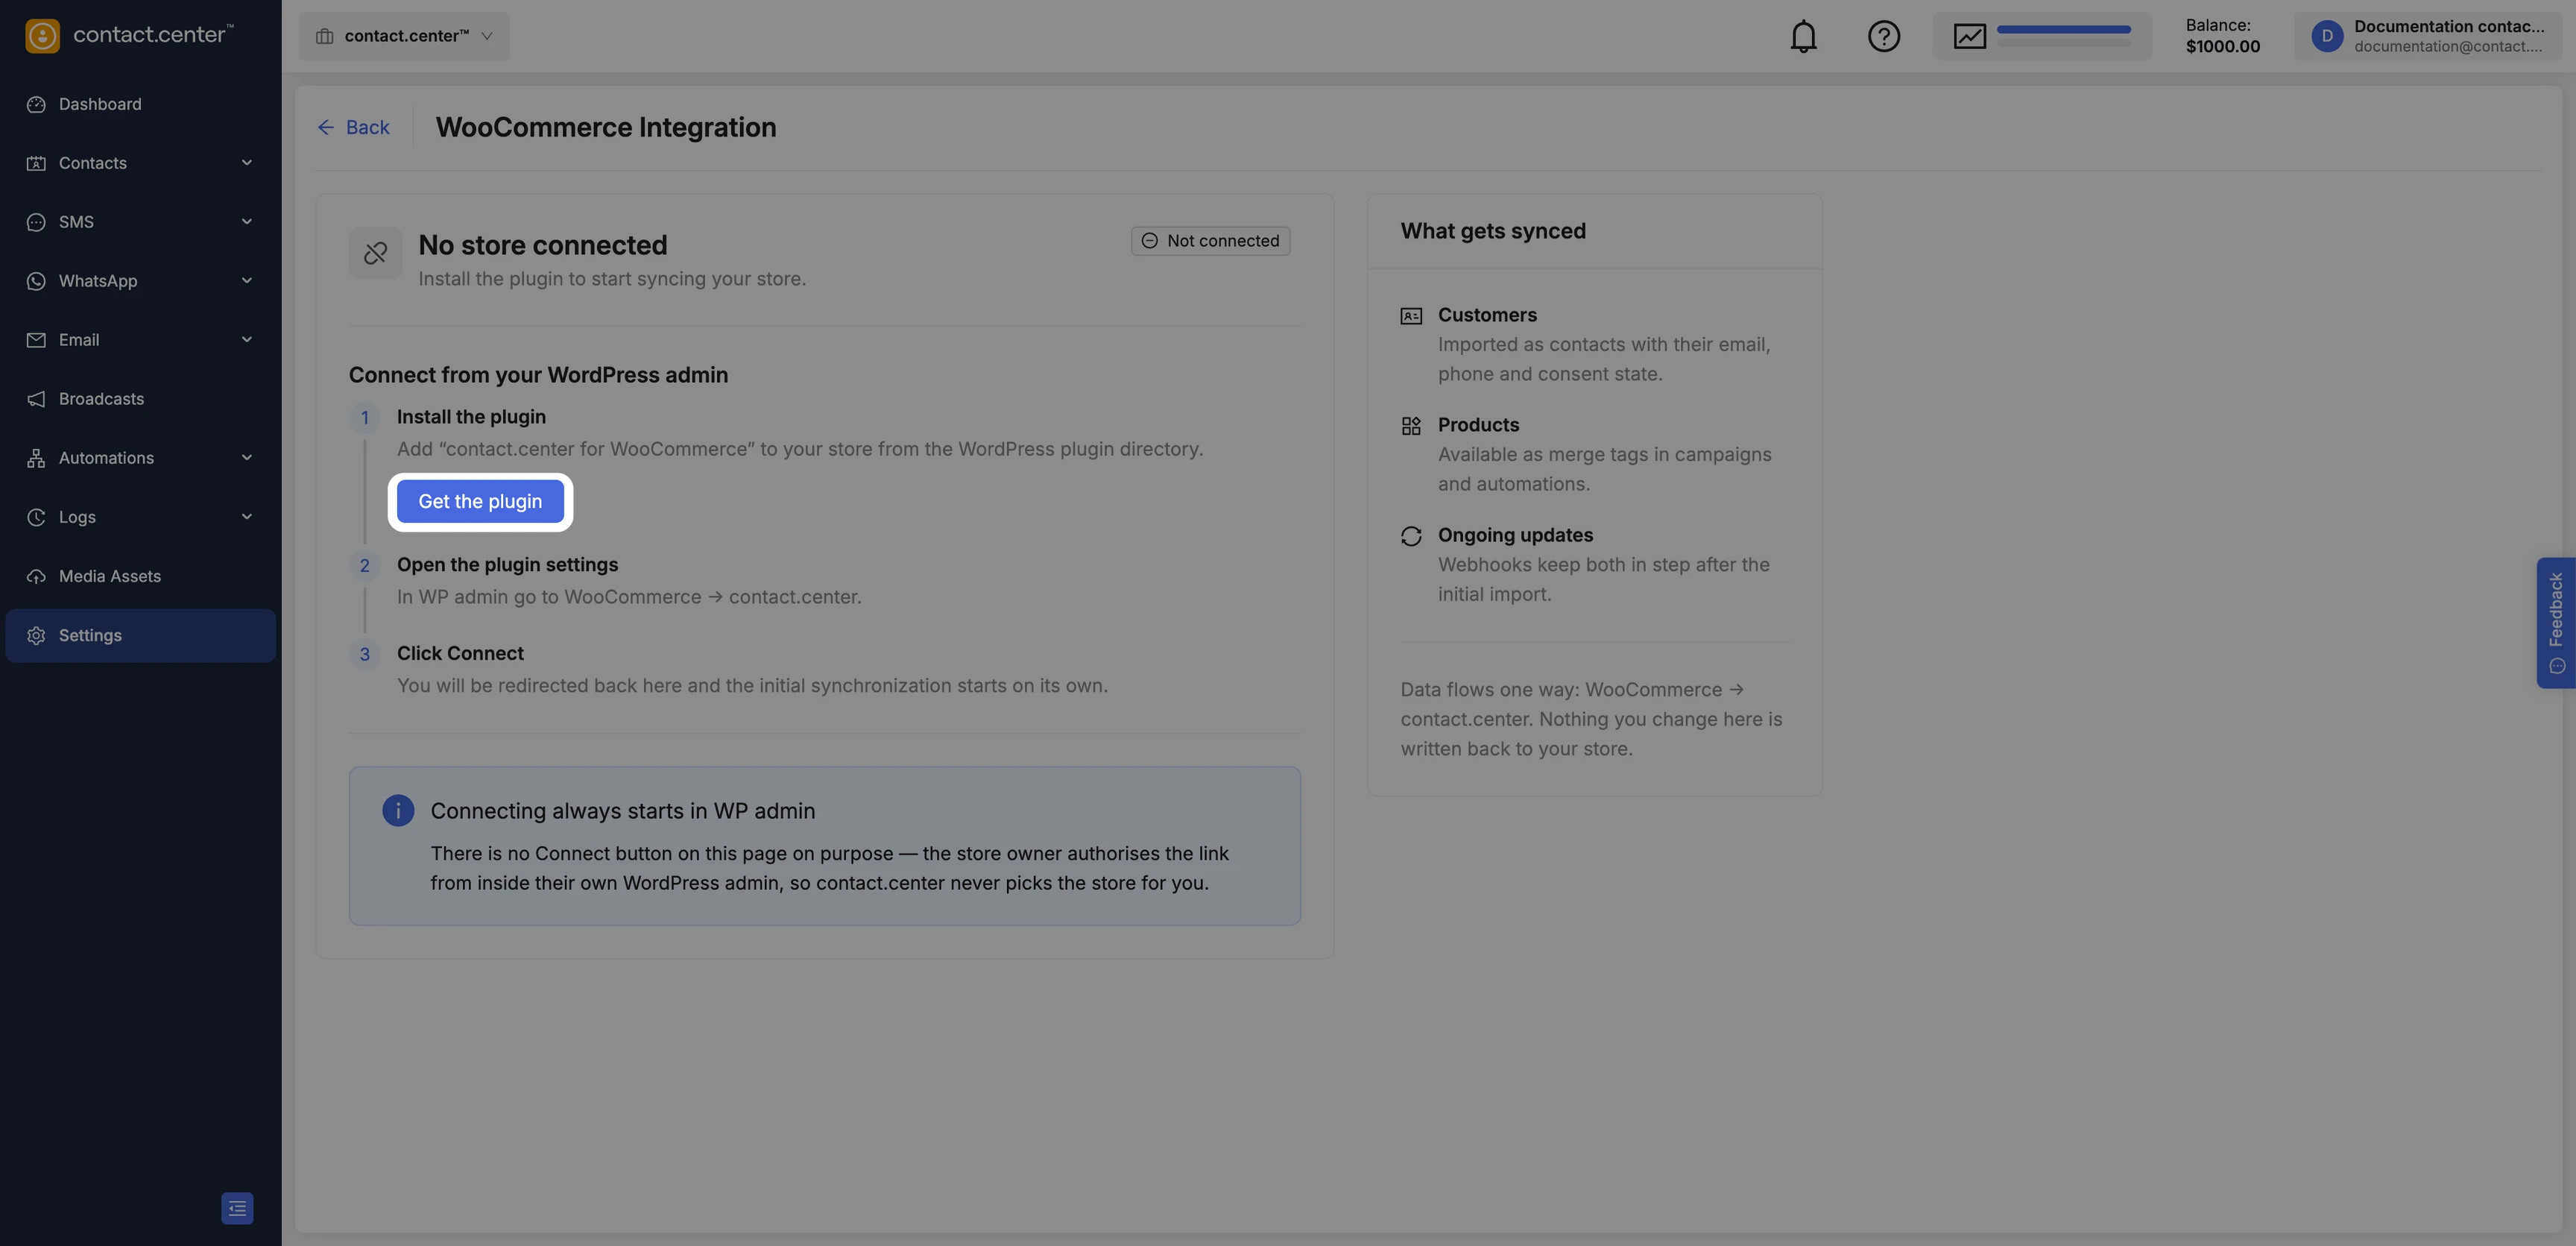
Fig. 2. The Get the plugin button on the WooCommerce Integration page.
In your WordPress admin, go to Plugins > Add Plugin.
In Search Plugins, enter
contact.center.On the Contact Center for WooCommerce card, click Install Now.
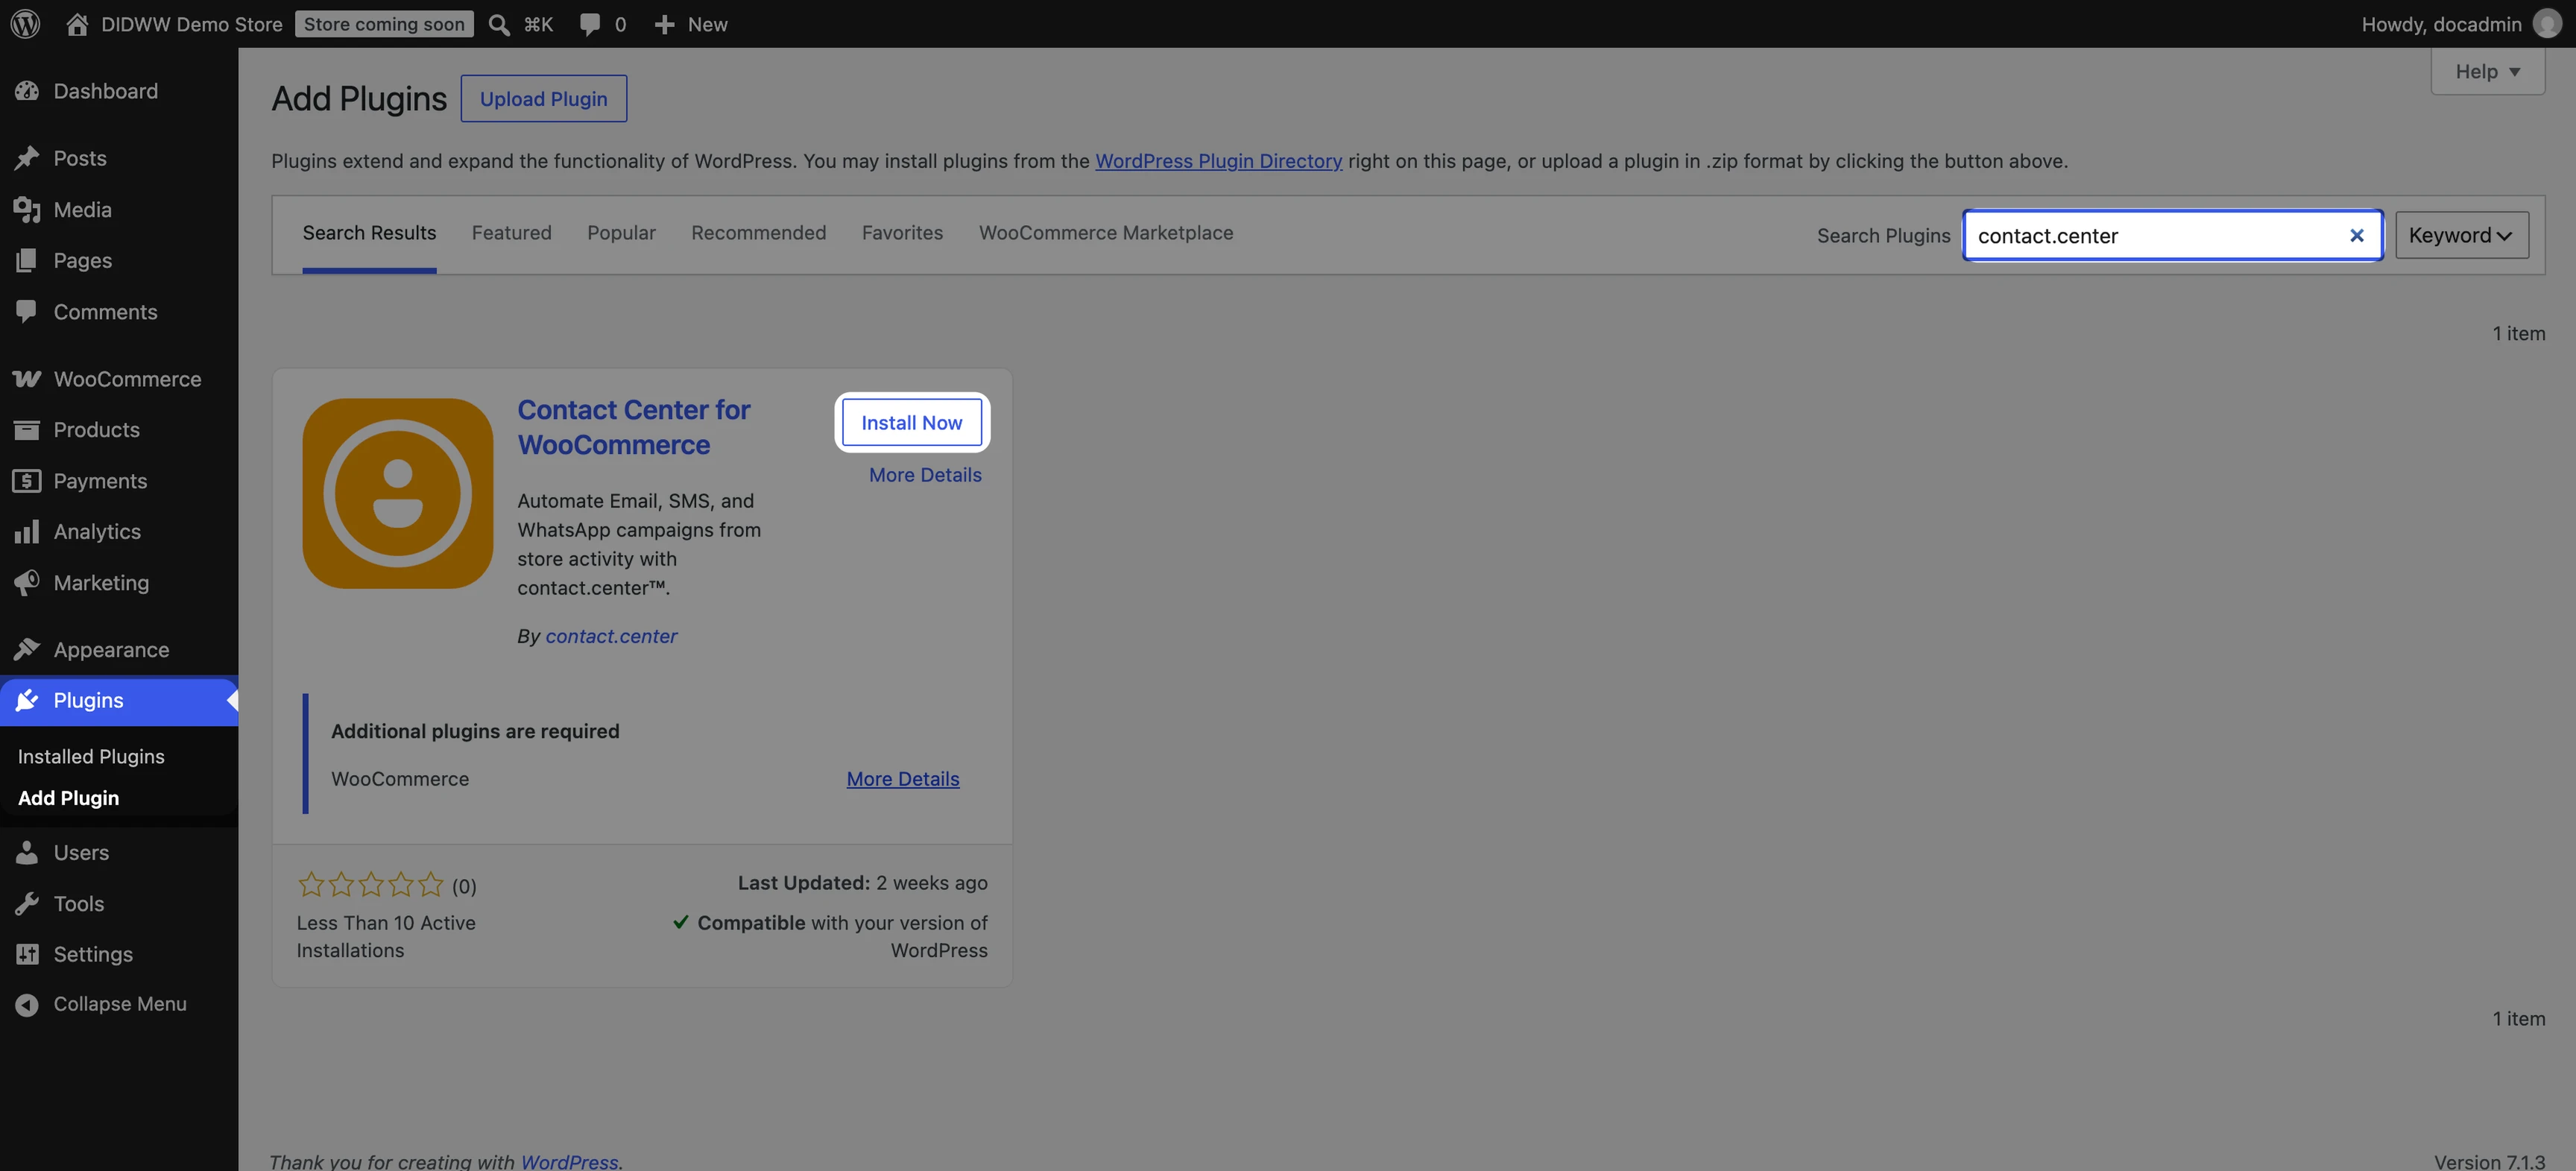
Fig. 3. Installing the plugin from Plugins > Add Plugin.
Click Activate.
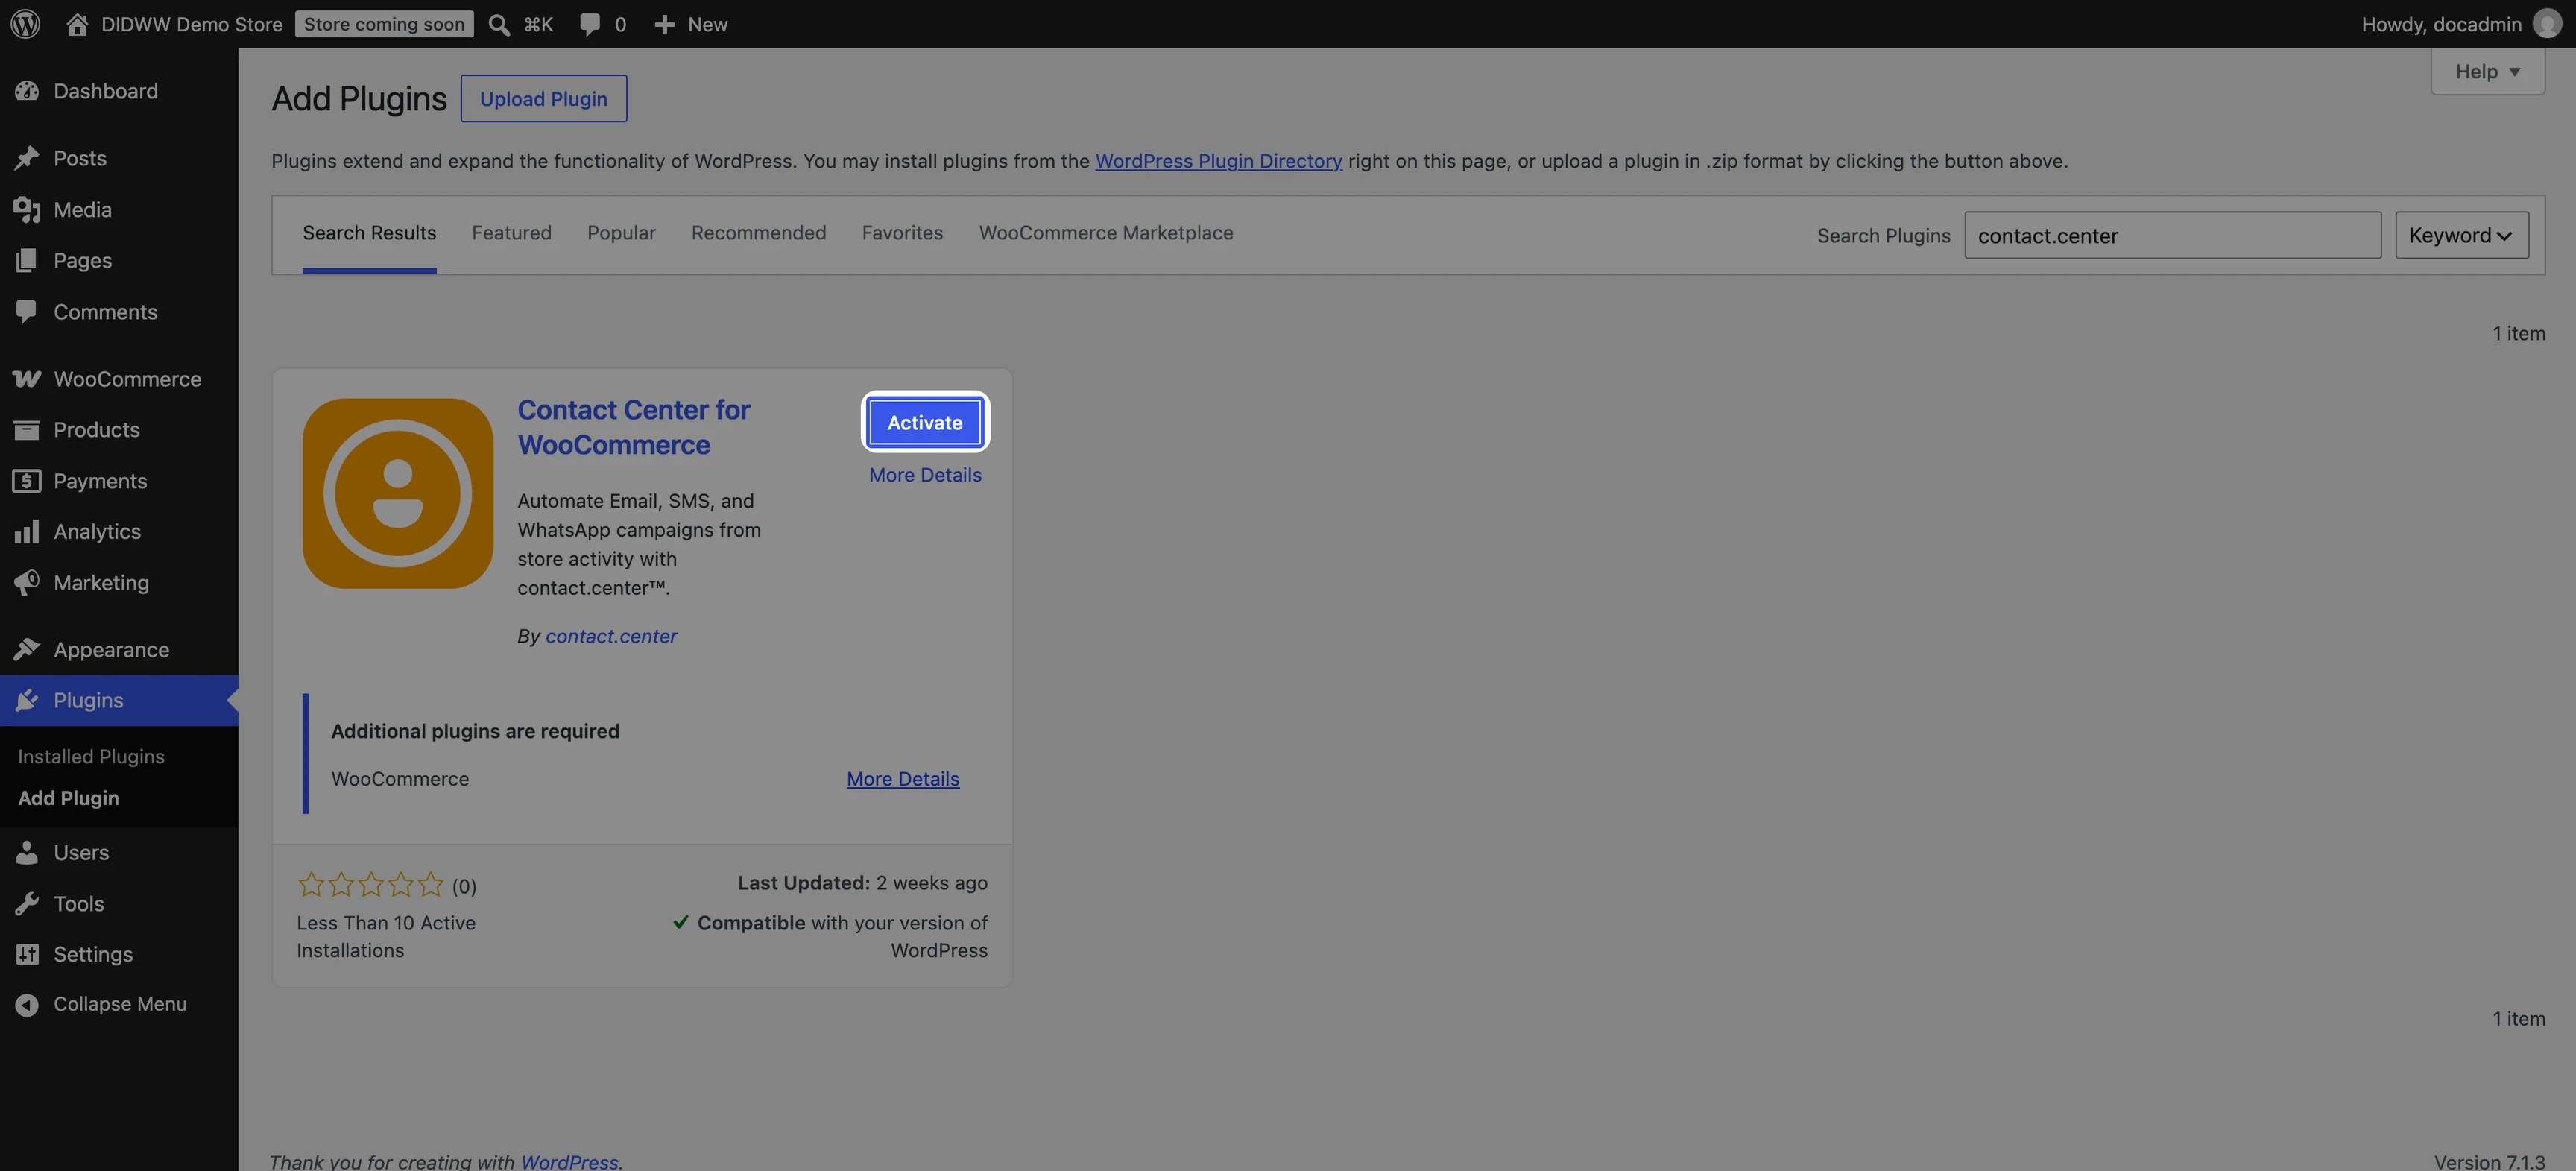
Fig. 4. Activating the plugin.
After activation, Contact Center for WooCommerce appears in the list of installed plugins, and a Connect your WooCommerce store to Contact Center notice appears at the top of the page.
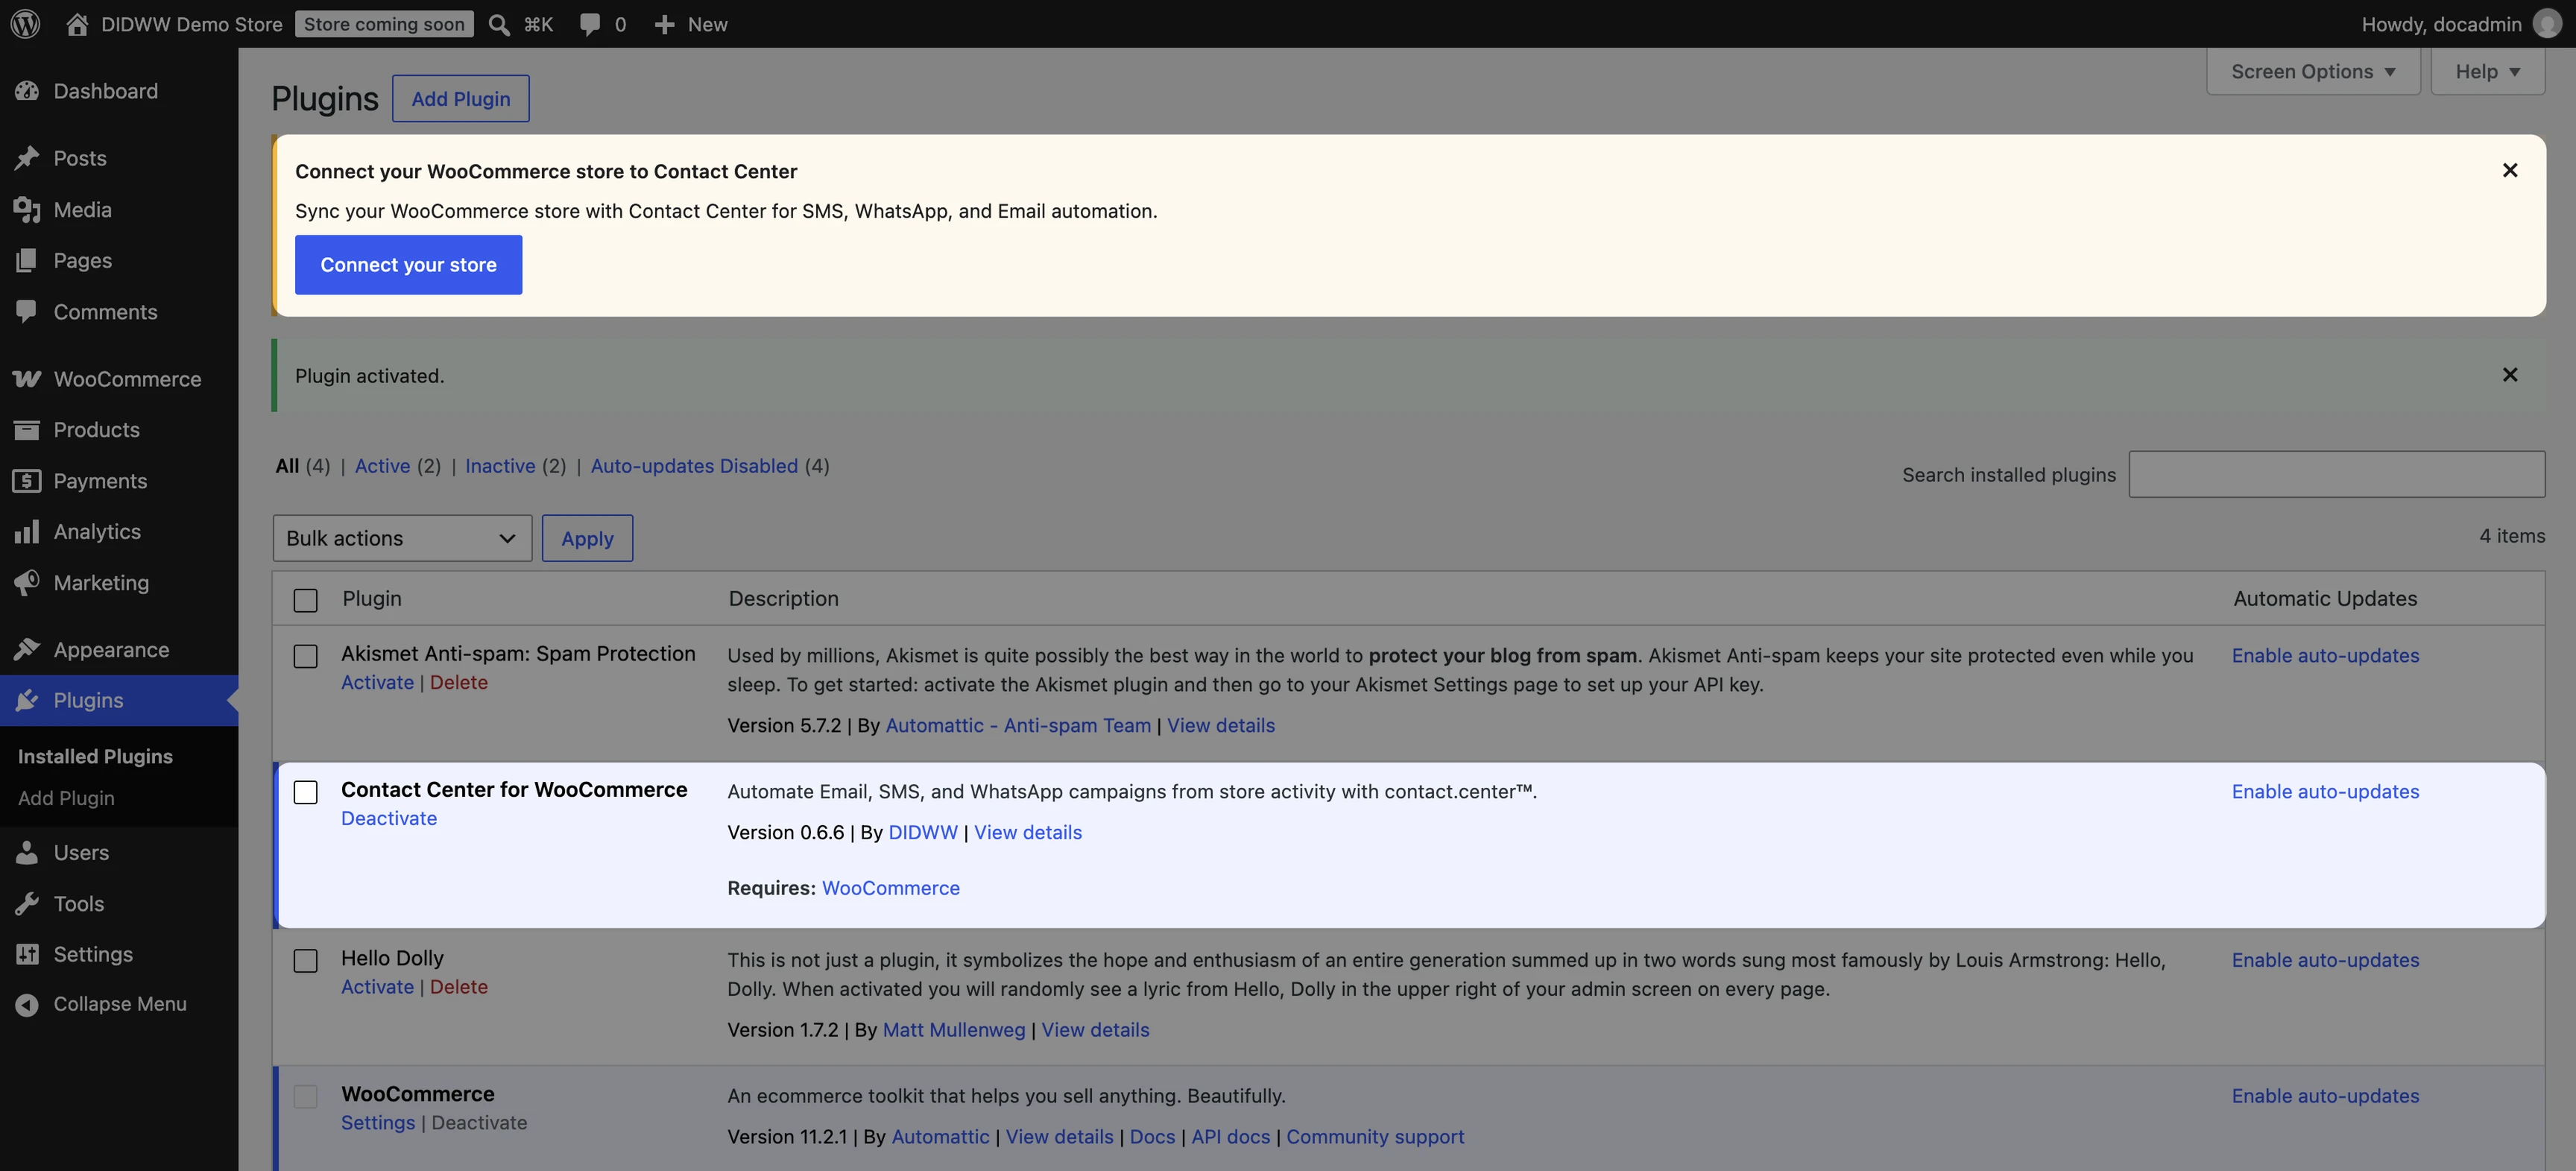
Fig. 5. The activated plugin and the Connect your store notice.
Note
If your store cannot install plugins from the WordPress plugin directory, click Download on the plugin page and upload the ZIP file in Plugins > Add Plugin > Upload Plugin.
Step 2: Connect your store
You always start the connection from your WordPress admin. The WooCommerce Integration page in contact.center™ has no Connect button.
The store connects to the contact.center™ workspace that is selected when you connect. A workspace can have only one connected store.
In the same browser, sign in to contact.center™ and switch to the workspace you want to connect the store to.
In your WordPress admin, go to WooCommerce > contact.center. You can also click Connect your store in the notice on the Plugins page.
Click Connect your account.
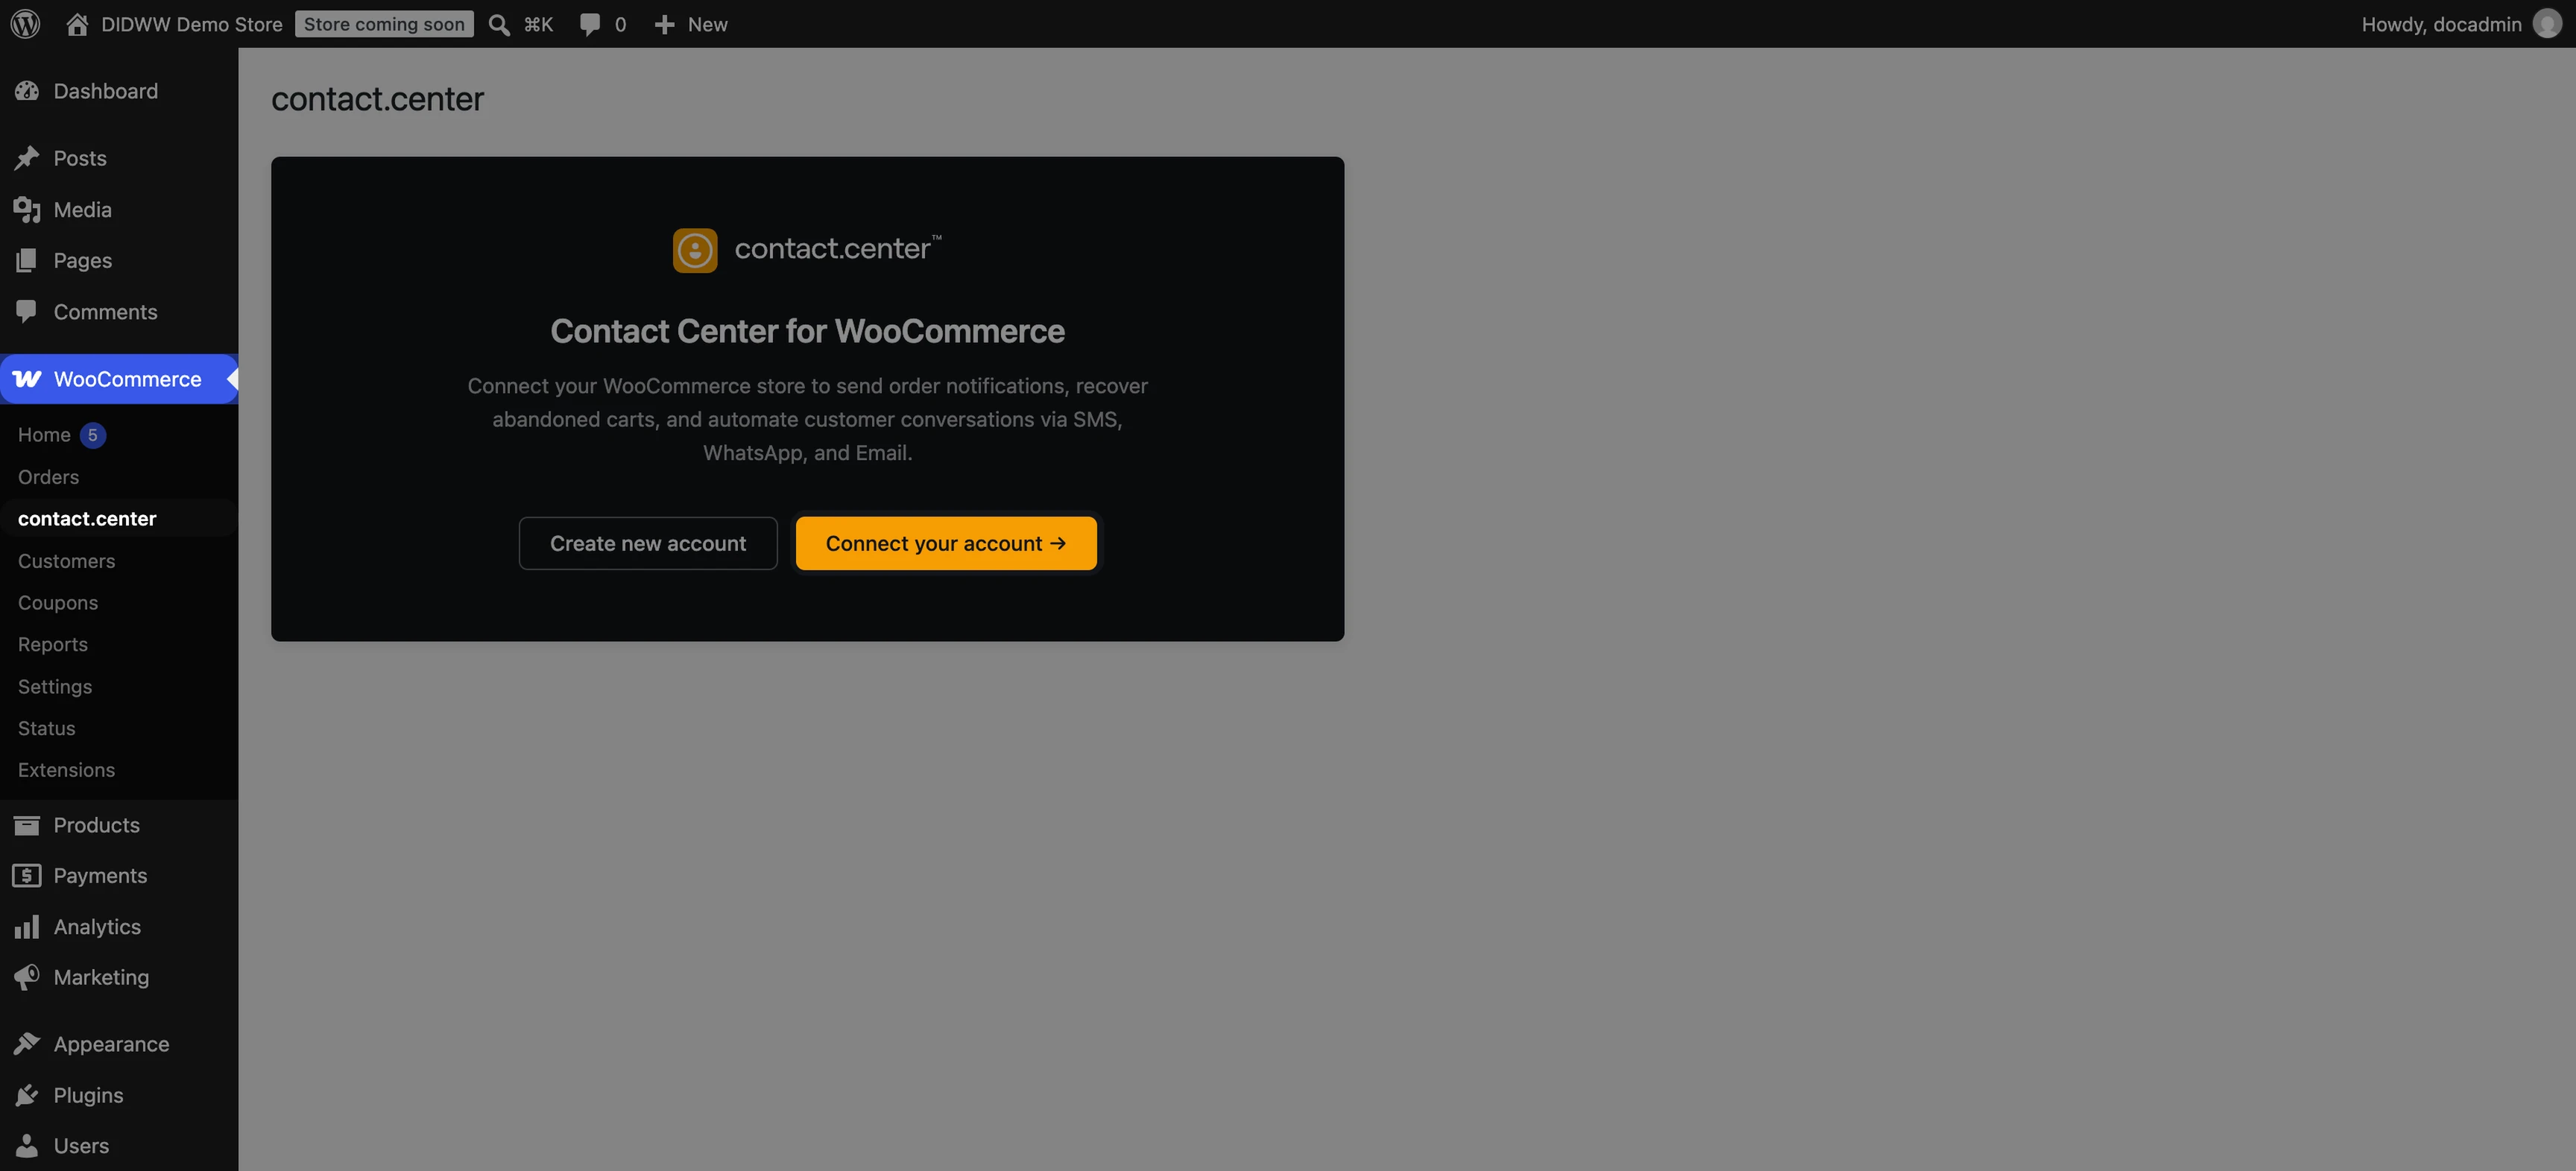
Fig. 6. The Connect your account button in WooCommerce > contact.center.
Tip
If you don’t have a contact.center™ account yet, click Create new account.
Review the access that contact.center™ requests, then click Approve.
contact.center™ gets read and write access to create webhooks and to view and manage coupons, customers, orders, sales reports, and products.
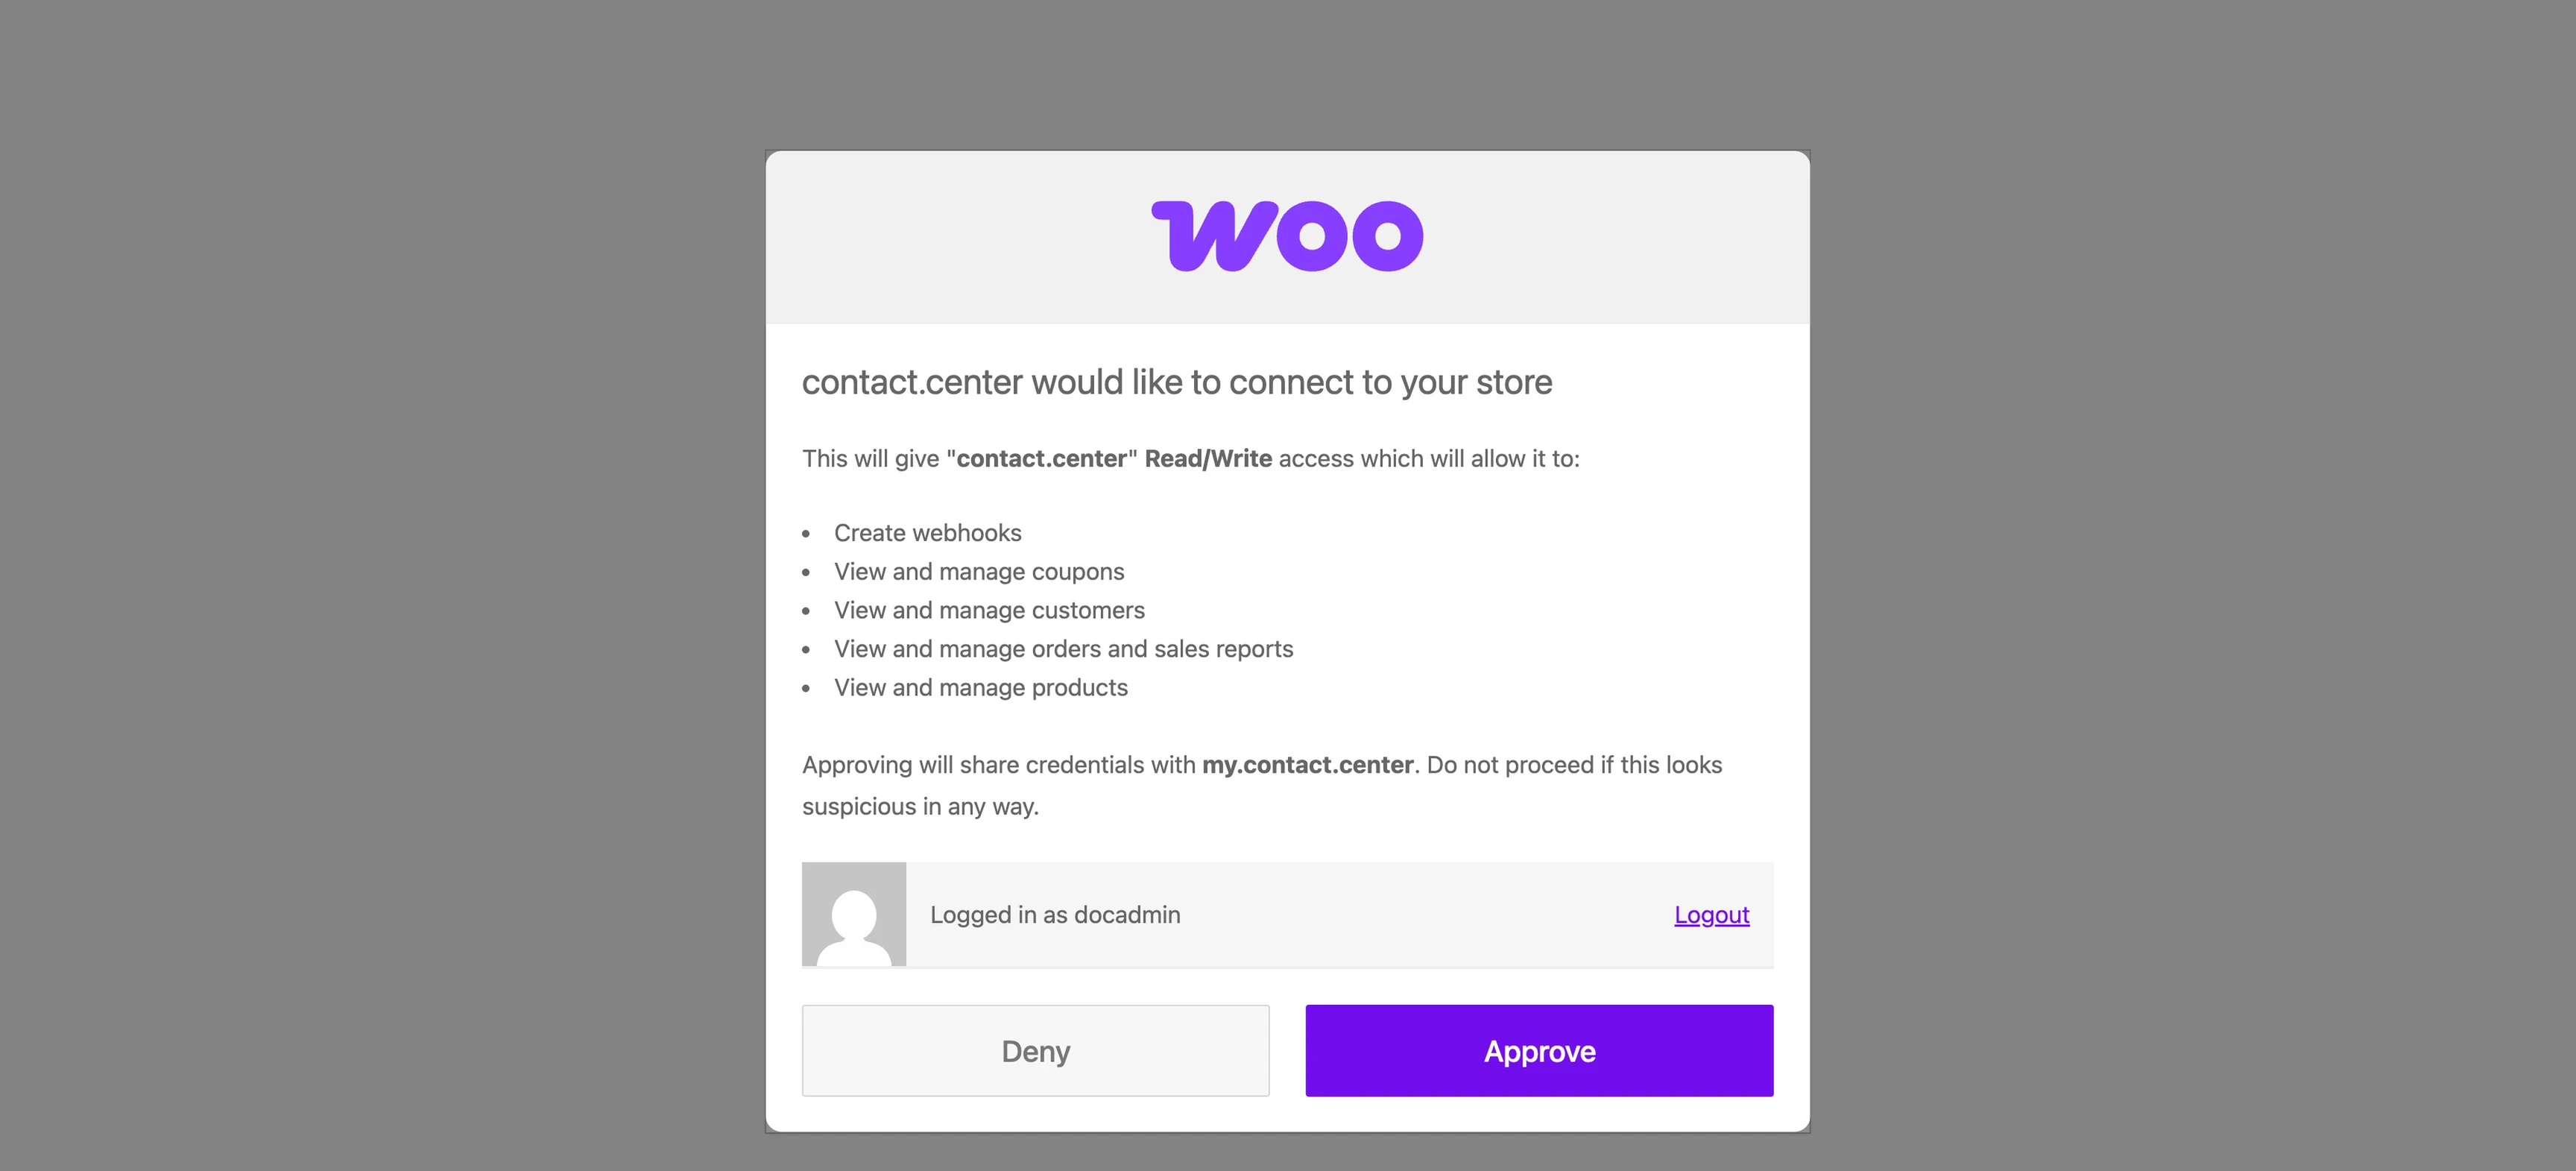
Fig. 7. Approving the connection in WooCommerce.
You return to WooCommerce > contact.center, which now shows Connected, the connected Workspace name, the Integration ID, and the Connected since date. The initial synchronization of your customers and products starts on its own.
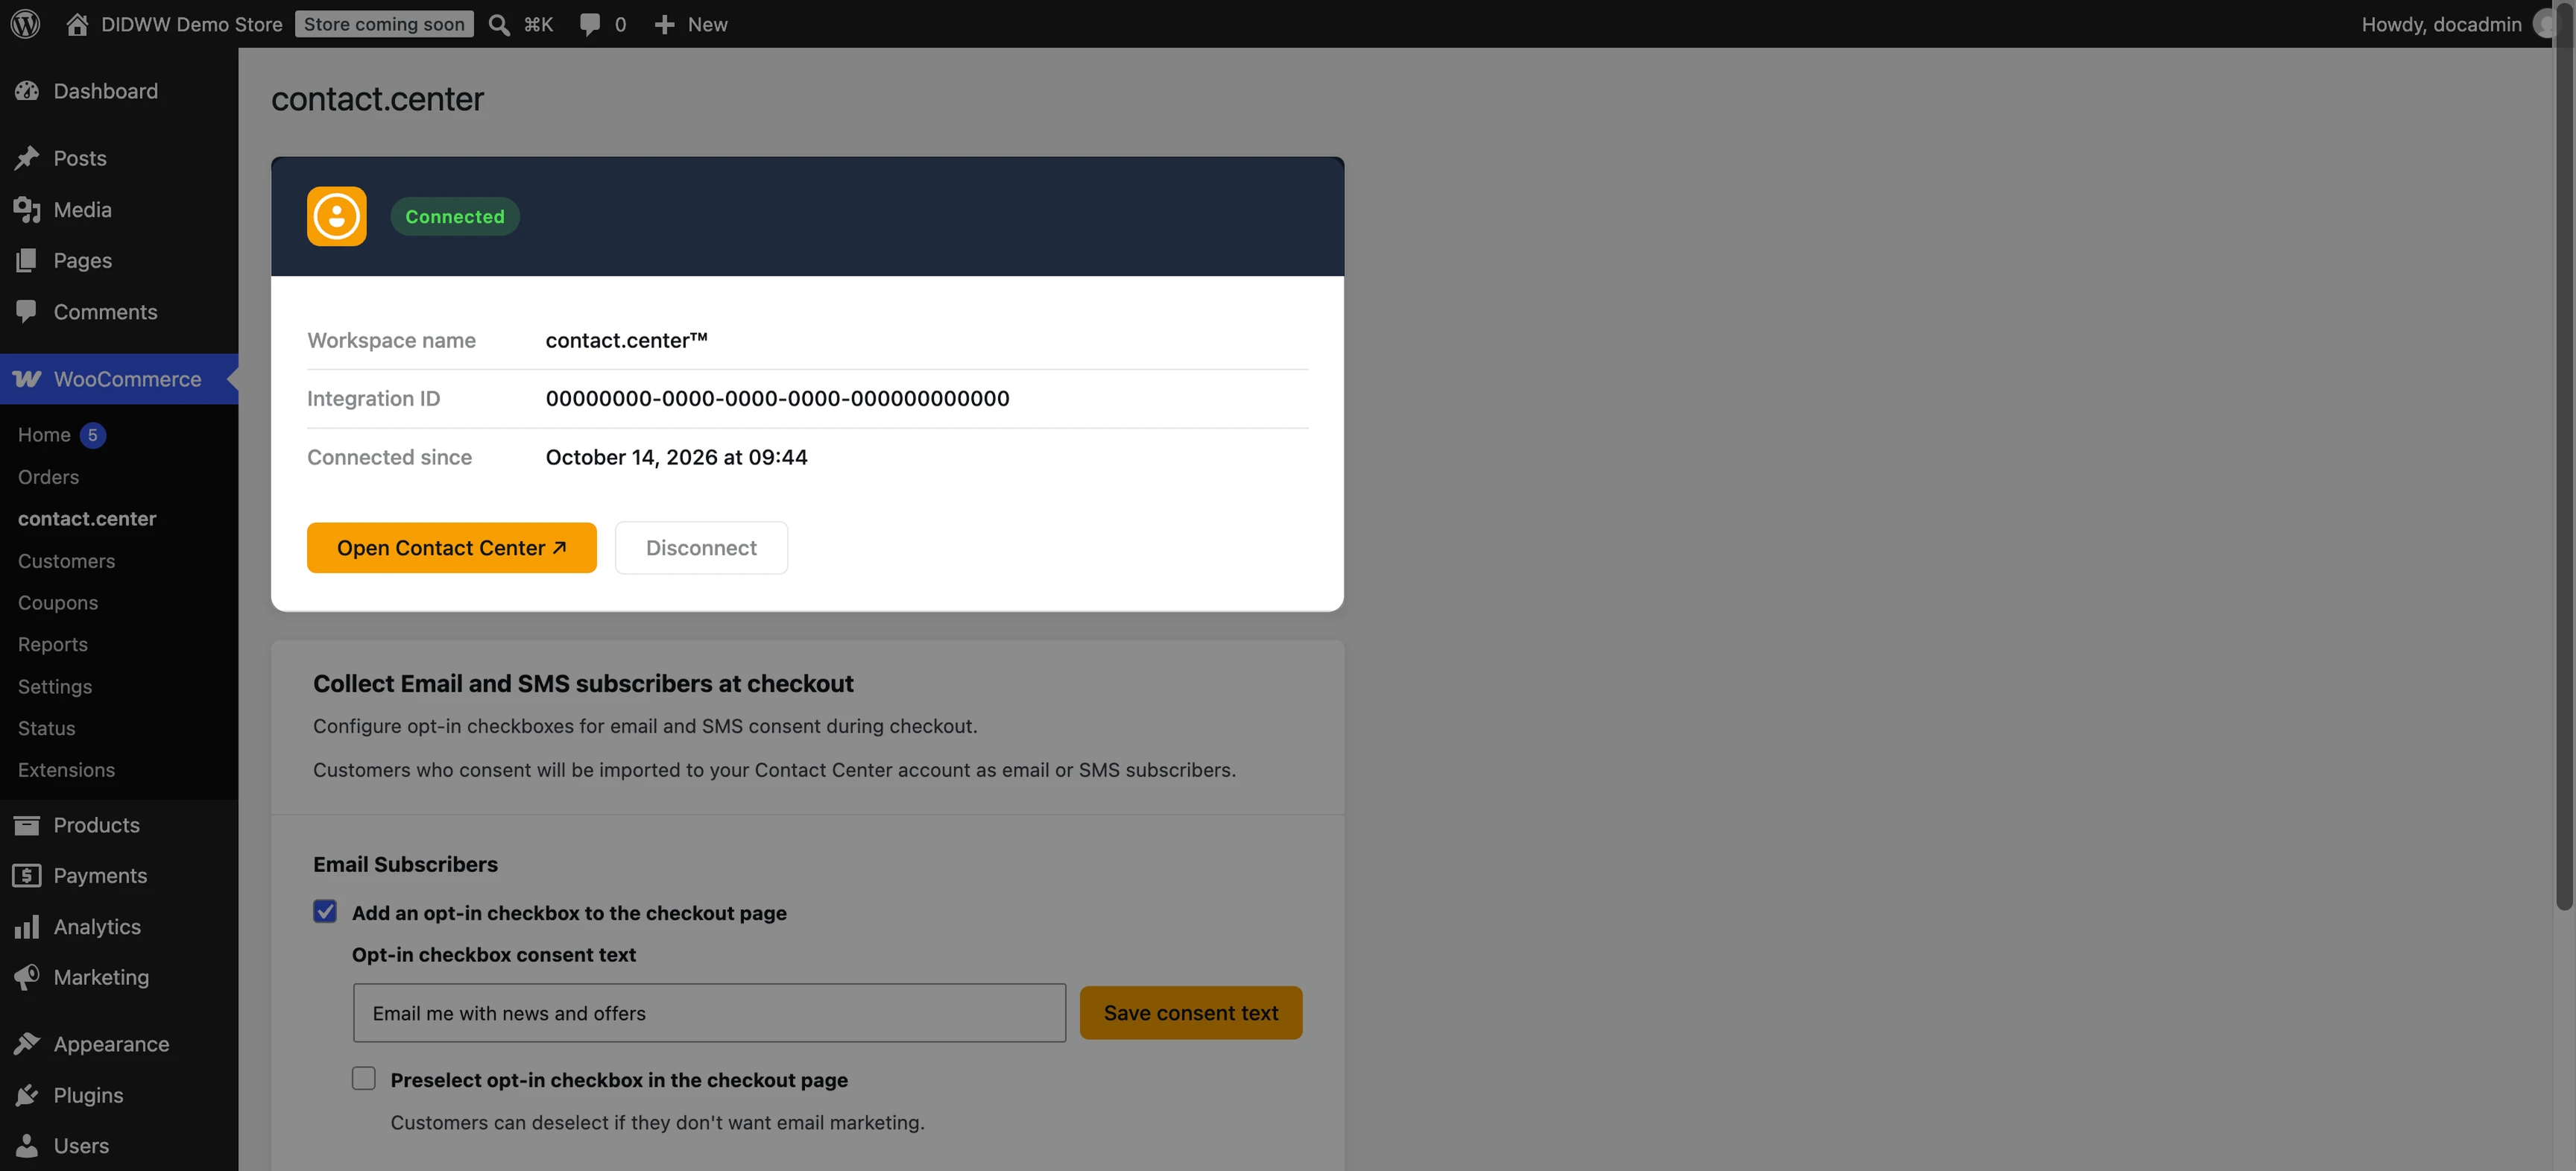
Fig. 8. A connected store in WooCommerce > contact.center.
Step 3: Set up checkout consent
The plugin can add marketing opt-in checkboxes to your checkout page. Customers who opt in are imported to contact.center™ as email or SMS subscribers.
In your WordPress admin, go to WooCommerce > contact.center.
In Collect Email and SMS subscribers at checkout, set the options for each channel:
Email Subscribers: select Add an opt-in checkbox to the checkout page, enter the Opt-in checkbox consent text, and click Save consent text. Select Preselect opt-in checkbox in the checkout page to tick the checkbox by default. Customers can still clear it.
Phone Subscribers: select Add an opt-in checkbox to the checkout page, enter the Opt-in checkbox consent text, and click Save consent text. The phone checkbox is never preselected.
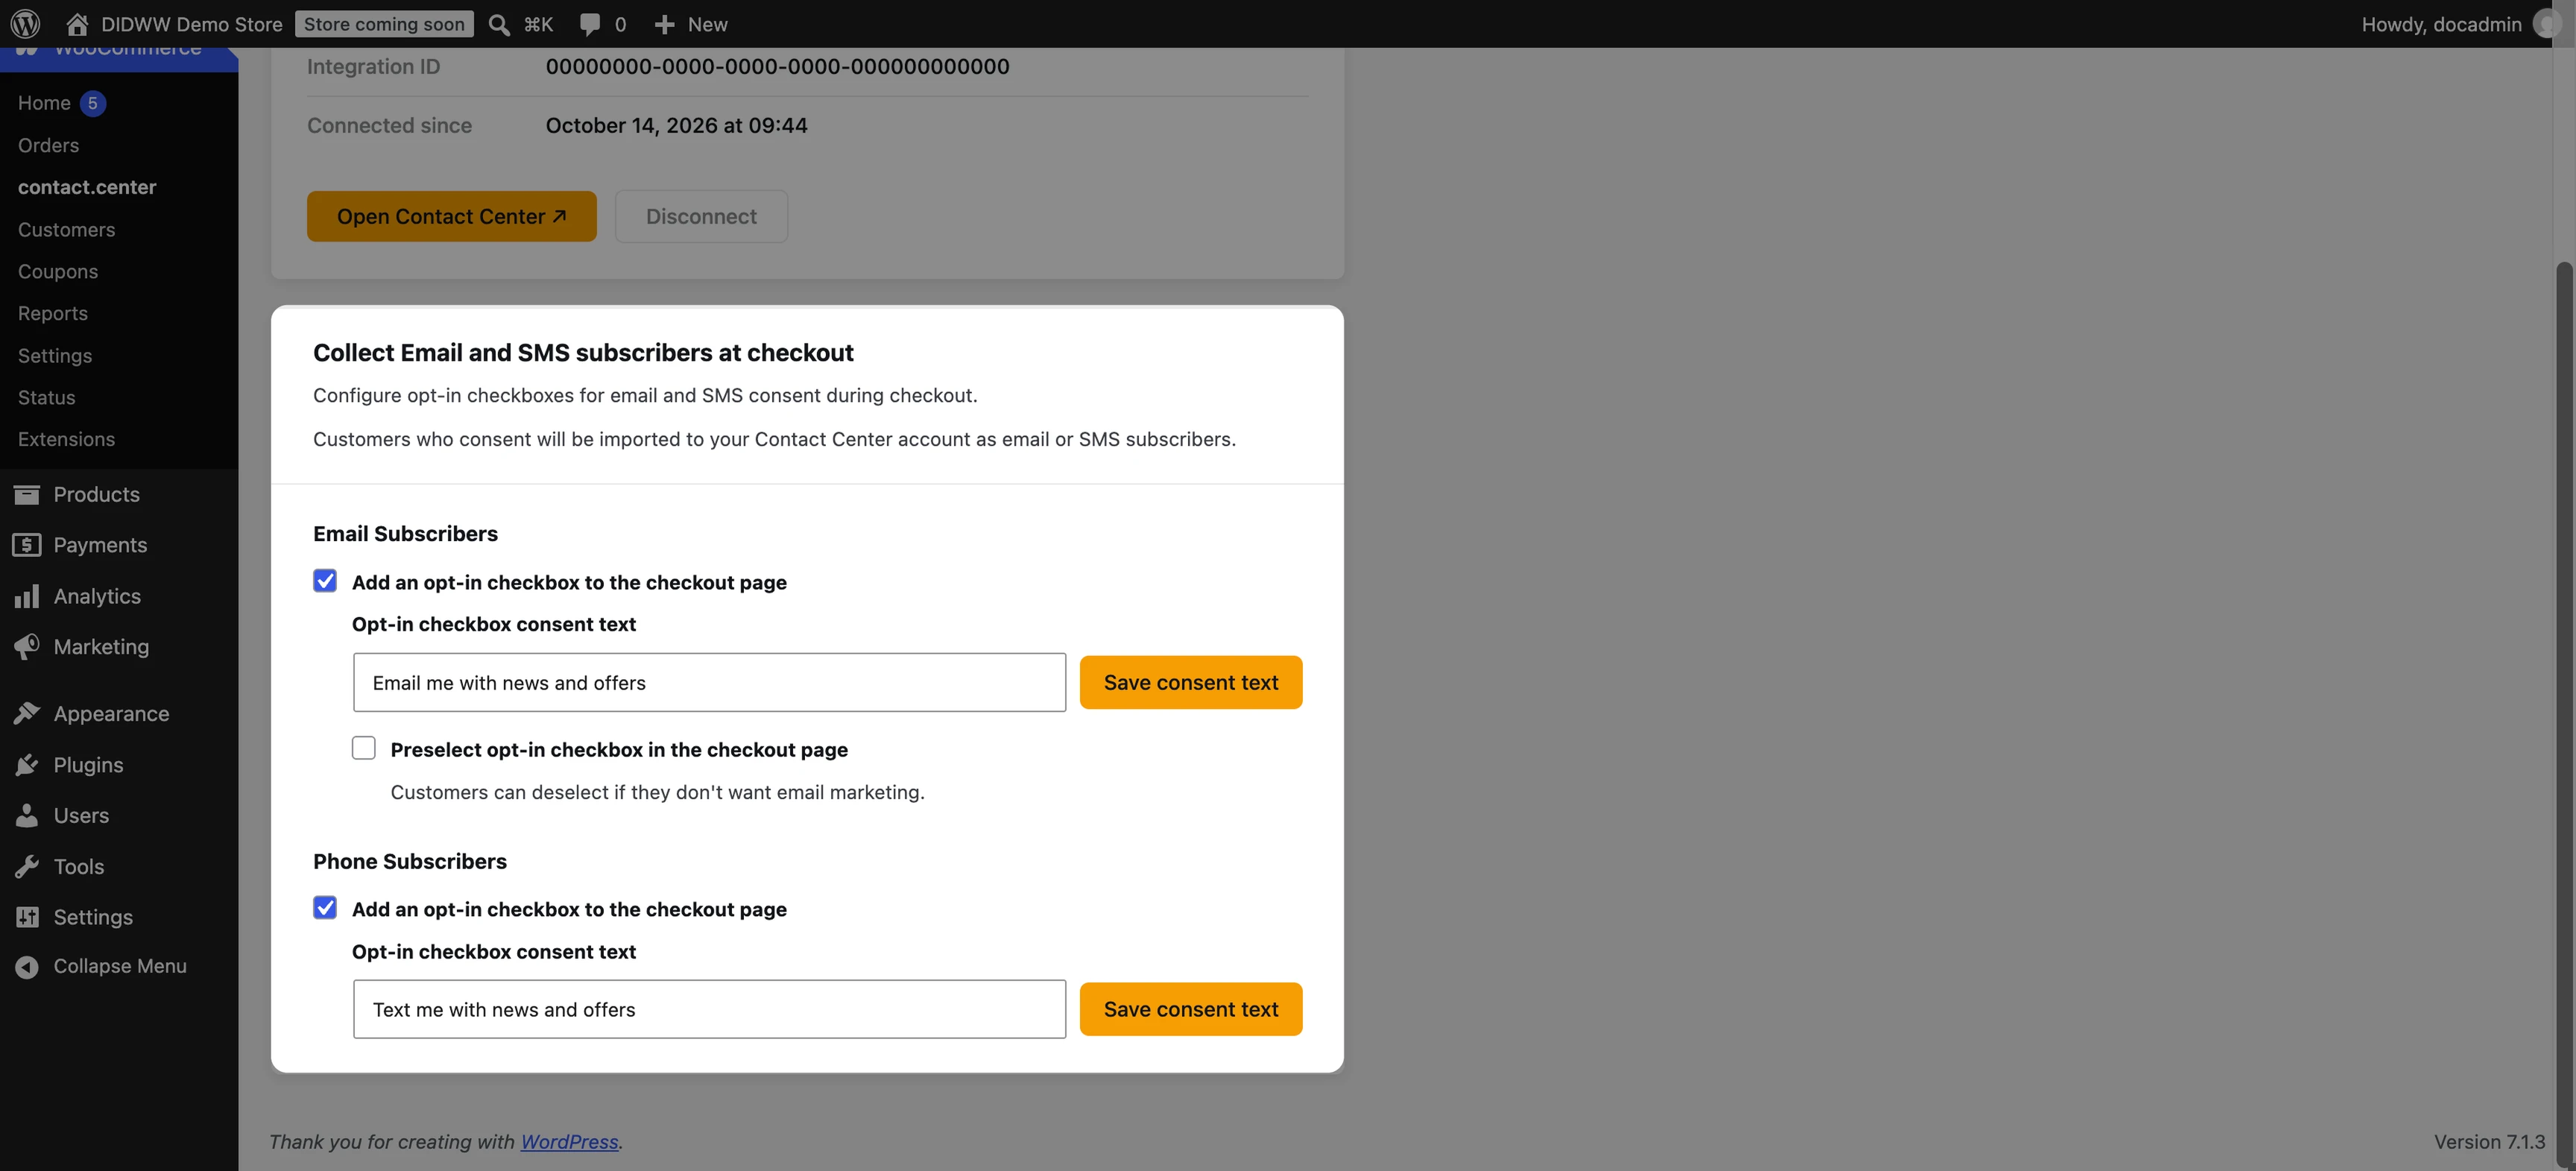
Fig. 9. Checkout consent settings.
Step 4: Check the sync
In contact.center™, go to Settings > Workspace > Integrations. The WooCommerce card shows Active when a store is connected. Open WooCommerce to see the connected store and its synchronization.
The Initial data synchronization table shows the one-time import of your existing customers and products. Records that arrive later through WooCommerce webhooks are not counted in this table.
Column |
Description |
|---|---|
Data |
The type of data imported: Customers or Products. |
Status |
The status of the import: Pending, In Progress, Completed, Cancelled, or Failed. The table refreshes on its own while an import is Pending or In Progress. |
Synced |
The number of records imported out of the total. |
Failed |
The number of records that could not be imported. |
Finished |
The date and time the import finished. |
To run the import again, click Resync now. Resync now is available when the store is active and no import is in progress. It imports customers and products again. Orders are not part of the initial import.
If an import shows Failed, or the Failed column shows records that were not imported, click Resync now. If the problem continues, contact support@contact.center .
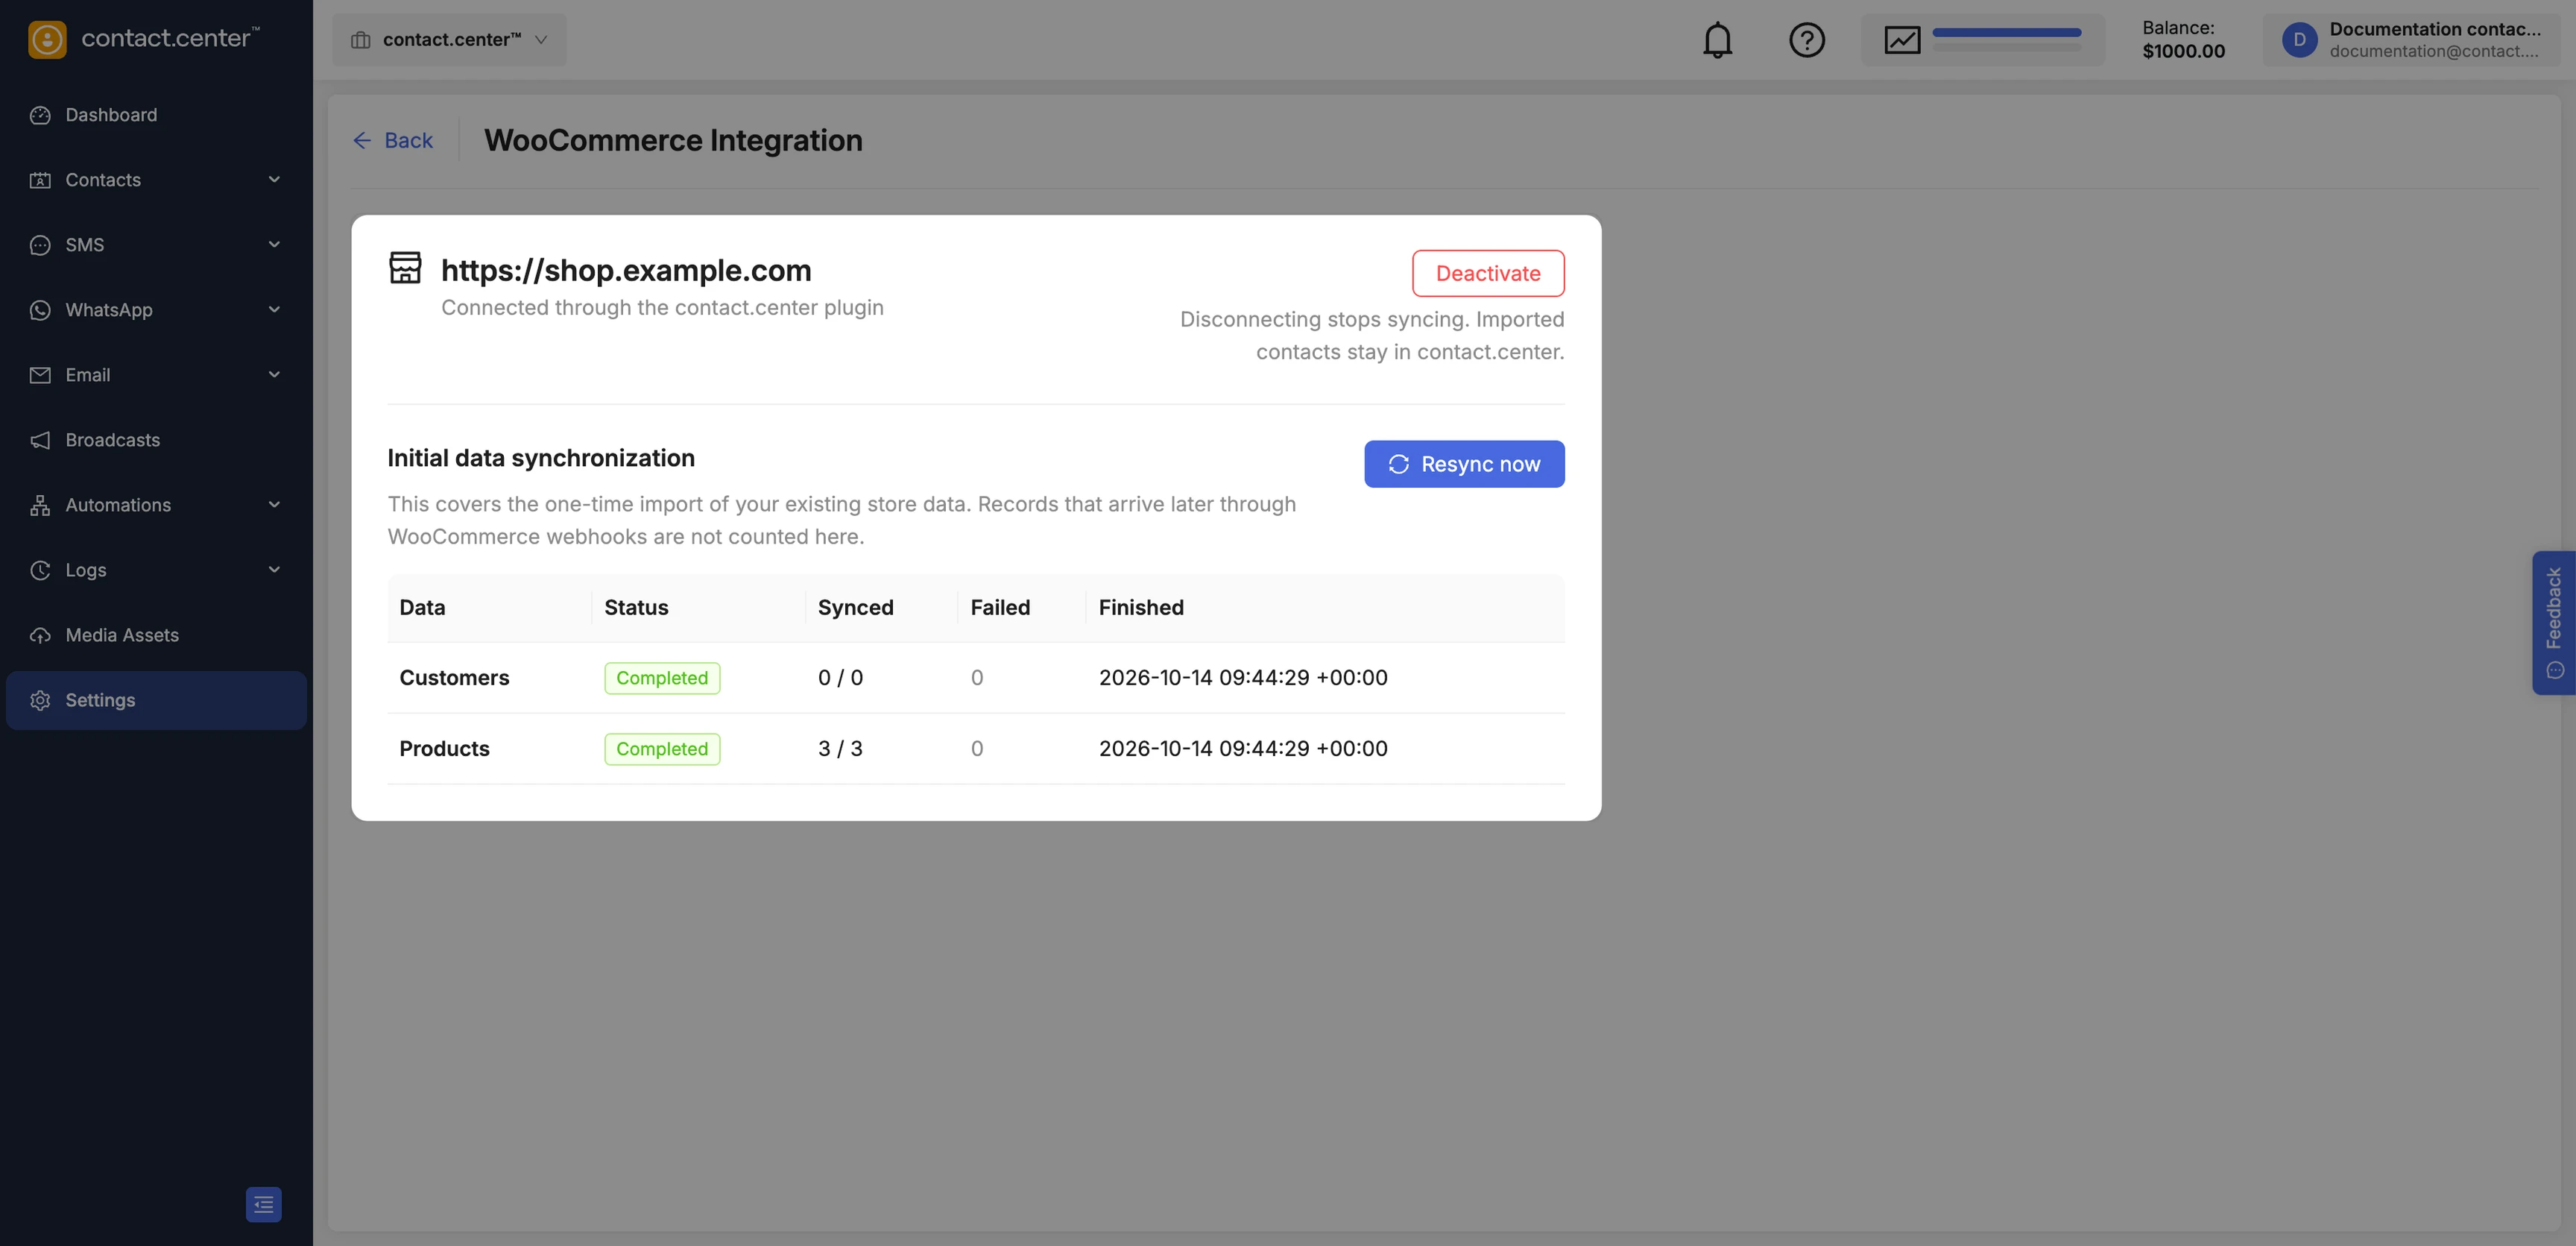
Fig. 10. A connected store and its initial data synchronization.
Disconnect your store
To disconnect your store:
In contact.center™, go to Settings > Workspace > Integrations and open WooCommerce.
Click Deactivate.
In the confirmation dialog, click Deactivate.
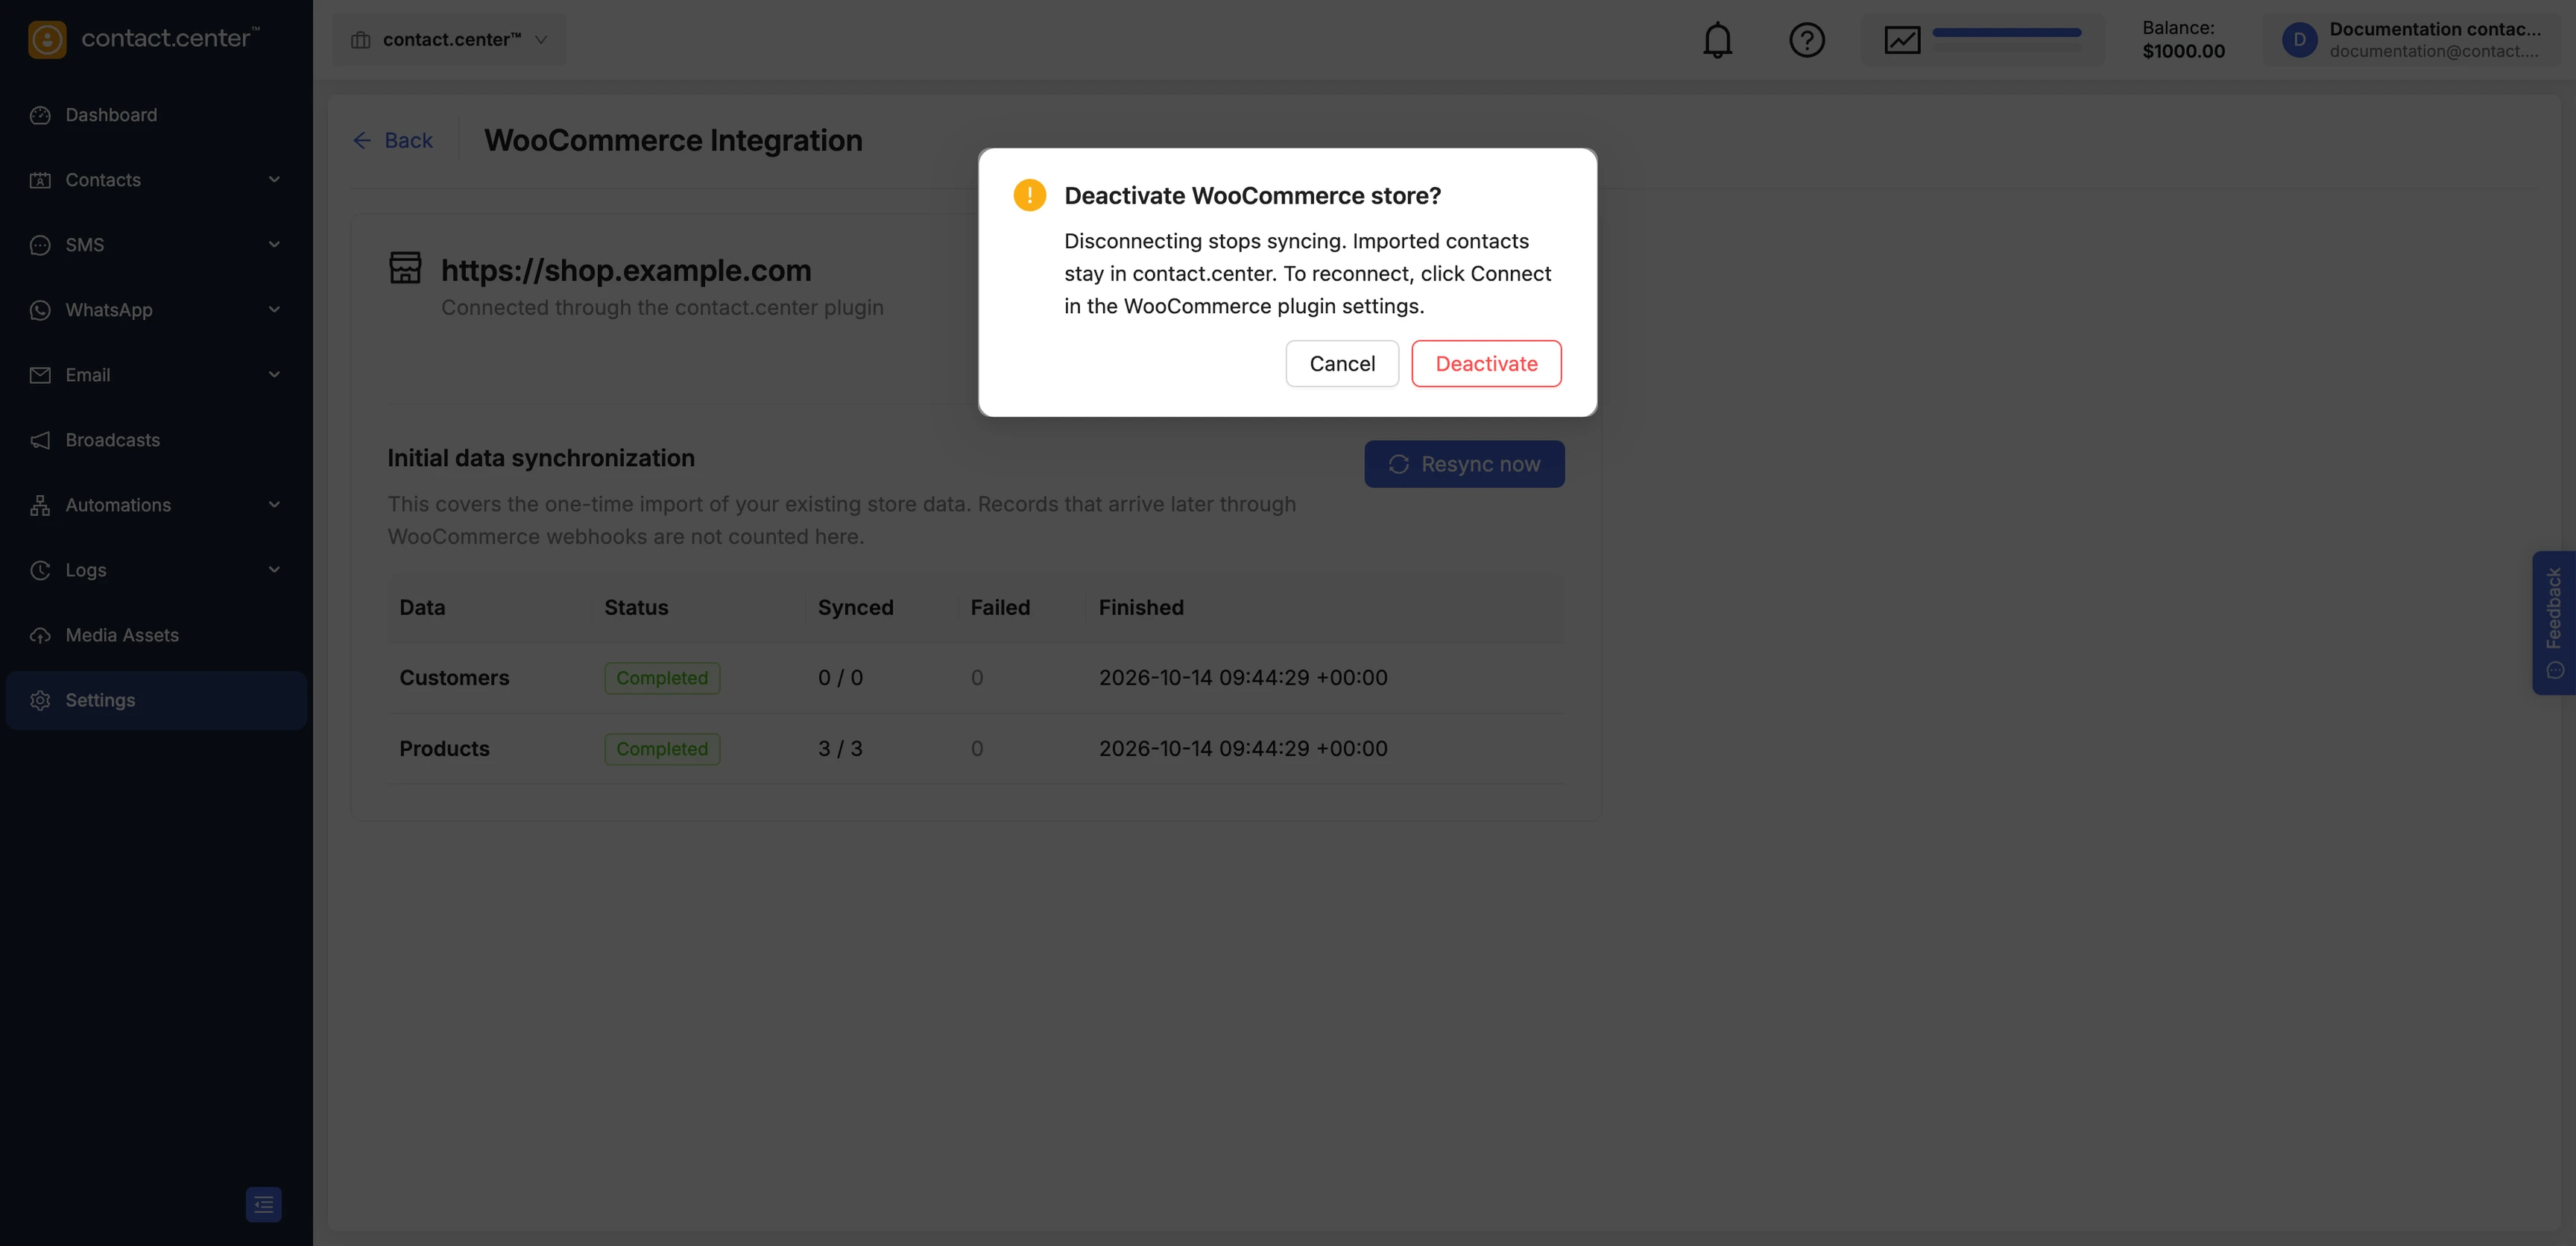
Fig. 11. Deactivating the store in contact.center™.
When you deactivate the store:
Syncing stops, and the plugin in your WordPress admin is disconnected.
The WooCommerce card in Settings > Workspace > Integrations shows Not Connected.
Contacts that were already imported stay in contact.center™, together with their consent state.
Synced products and orders are removed from contact.center™.
Flows that use a WooCommerce trigger stay Active, but they no longer receive store events. Pause or update these flows.
The WooCommerce REST API key that was created when you approved the connection stays in your store. To revoke it, go to WooCommerce > Settings > Advanced > REST API in your WordPress admin.
You can also click Disconnect in WooCommerce > contact.center in your WordPress admin. This removes the connection from your store and cancels deliveries that are still queued. Your checkout consent settings are kept.
To connect the store again, click Connect your account in WooCommerce > contact.center in your WordPress admin.
Note
If you uninstall the plugin, it also removes its checkout consent settings. The consent answers already saved with your WooCommerce orders are kept.